

Fancy a taste of France without leaving your kitchen? These 15 exquisite French cake recipes are here to make any day feel special. From the rich layers of an opera cake to the light and airy genoise, each one has its own delightful charm. Perfect for adding a touch of elegance to your dessert repertoire. Ready to explore these sweet treats?
Classic Madeleines
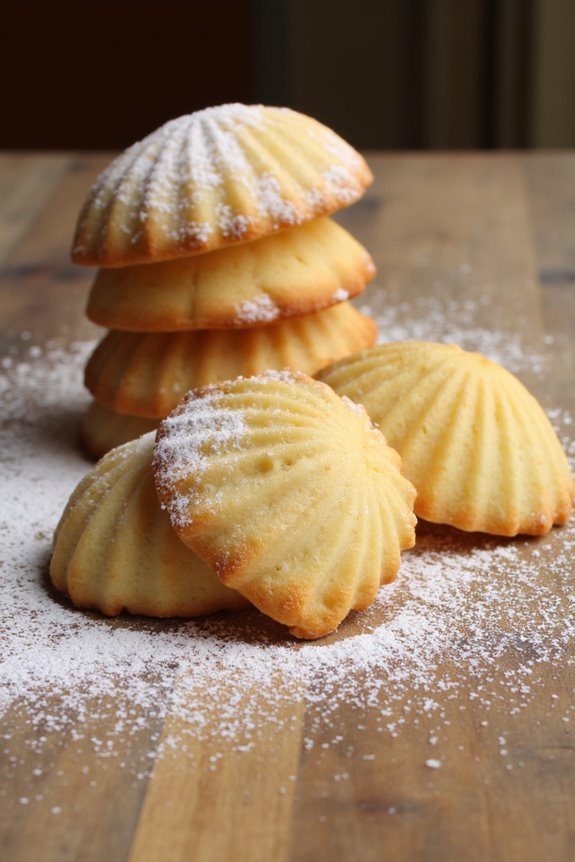
Classic Madeleines are a quintessential French treat, known for their distinctive shell shape and delightful buttery flavor. These small sponge cakes have a light and airy texture, making them perfect for an afternoon tea or a sophisticated dessert. The secret to their delicate crumb lies in the careful folding of the batter and the use of quality ingredients. Traditionally, madeleines are flavored with lemon zest or vanilla, though variations can include other citrus or spices.
To achieve the classic madeleine shape, a special scalloped mold is used. The batter is chilled before baking to guarantee the characteristic hump on the back of each cake. Despite their seemingly intricate appearance, madeleines are simple to make and require minimal ingredients. The following recipe will yield enough madeleines to serve 4-6 people, perfect for a small gathering or family dessert.
Ingredients:
- 1 cup all-purpose flour
- ½ teaspoon baking powder
- 1 pinch salt
- 2 large eggs
- ½ cup granulated sugar
- 1 teaspoon vanilla extract
- 1 tablespoon lemon zest
- ½ cup unsalted butter, melted and cooled
- Powdered sugar for dusting (optional)
Instructions:
- Preheat and Prepare: Start by preheating your oven to 375°F (190°C). Lightly grease a madeleine pan with butter and dust with flour, making sure all grooves are covered. Tap out any excess flour.
- Mix Dry Ingredients: In a small bowl, whisk together the flour, baking powder, and salt until well combined. Set aside.
- Beat Eggs and Sugar: In a larger mixing bowl, beat the eggs and granulated sugar together using an electric mixer on high speed for about 5 minutes, or until the mixture becomes thick, pale, and forms ribbons when the beaters are lifted.
- Add Vanilla and Lemon Zest: Gently fold in the vanilla extract and lemon zest into the egg mixture using a spatula.
- Incorporate Dry Ingredients: Gradually sift the flour mixture over the egg mixture and gently fold it in using a spatula. Be careful not to deflate the air you’ve incorporated into the eggs.
- Add Butter: Slowly pour the melted and cooled butter down the side of the bowl and continue folding until the butter is fully incorporated and the batter is smooth.
- Chill Batter: Cover the bowl with plastic wrap and refrigerate for at least 1 hour. This step is essential for developing the signature hump.
- Fill Molds: Once chilled, spoon the batter into the prepared madeleine molds, filling each about three-quarters full.
- Bake: Place the madeleine pan in the preheated oven and bake for 10-12 minutes, or until the edges are golden brown and the centers have risen.
- Cool and Serve: Remove the madeleines from the oven and let them cool in the pan for a few minutes before transferring them to a wire rack. Dust with powdered sugar just before serving, if desired.
Extra Tips:
To achieve the best results, make sure all your ingredients are at room temperature before starting. The chilling step is non-negotiable for the signature madeleine hump, so plan accordingly. If you have the time, chilling the batter overnight can enhance the flavors and texture.
For a more pronounced lemon flavor, you can add a tablespoon of lemon juice along with the zest. If you don’t have a madeleine pan, mini muffin pans can be used as a substitute, though they’ll lack the traditional shape.
Decadent Opera Cake
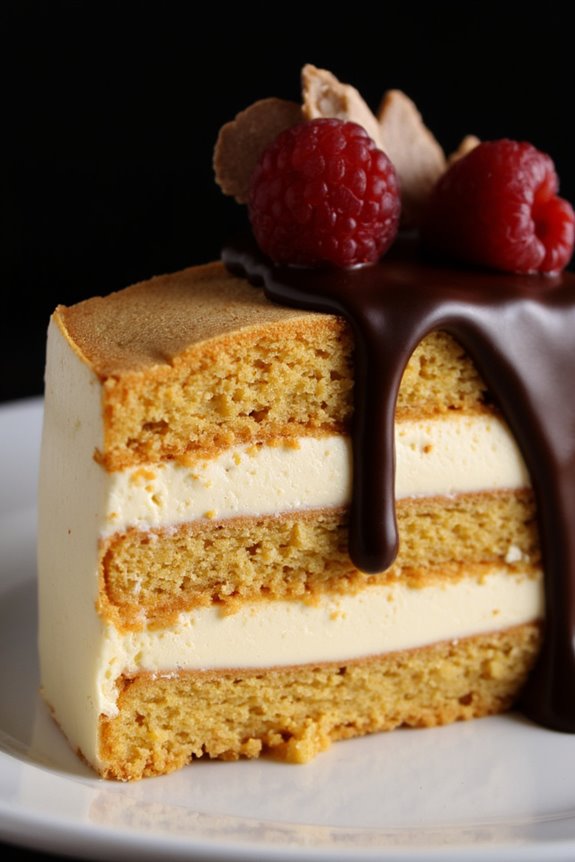
Opera Cake is a classic French dessert that combines layers of delicate almond sponge cake, known as joconde, with rich coffee buttercream and silky chocolate ganache. Its name is believed to be inspired by the Paris Opera House, reflecting the cake’s elegant and sophisticated nature.
With its harmonious blend of flavors and textures, Opera Cake is a gourmet treat that showcases the art of French pastry making. This decadent dessert is perfect for special occasions or as a luxurious indulgence.
Creating an Opera Cake requires precision and attention to detail, but the effort is truly rewarding. The cake’s distinctive layers are carefully assembled to create a stunning visual effect, while the flavors meld together to create a symphony of taste.
The key components of the cake include the almond sponge, coffee syrup to moisten the layers, coffee-flavored buttercream, and a glossy chocolate glaze. Making an Opera Cake from scratch may seem intimidating, but following this step-by-step guide will help you achieve a beautiful and delicious result.
Ingredients (serves 4-6):
- 4 large eggs
- ½ cup granulated sugar (for sponge)
- 1 cup almond flour
- ¼ cup all-purpose flour
- 2 tablespoons unsalted butter, melted
- ½ cup strong brewed coffee
- ¼ cup granulated sugar (for coffee syrup)
- 1 cup unsalted butter, softened (for buttercream)
- 1 cup powdered sugar
- 2 teaspoons instant coffee granules
- ½ teaspoon vanilla extract
- 1 cup heavy cream
- 1 cup dark chocolate, chopped
- 2 tablespoons corn syrup
Instructions:
1. Prepare the Joconde (Almond Sponge Cake): Preheat your oven to 400°F (200°C). Line a baking sheet with parchment paper. In a mixing bowl, whisk together the eggs and ½ cup granulated sugar until light and fluffy.
Gently fold in the almond flour and all-purpose flour until well combined. Add the melted butter and mix until smooth. Spread the batter evenly onto the prepared baking sheet and bake for 6-8 minutes, or until golden brown. Let it cool completely.
2. Make the Coffee Syrup: In a small saucepan, combine the brewed coffee and ¼ cup granulated sugar. Bring to a boil, stirring until the sugar dissolves. Remove from heat and let it cool.
3. Prepare the Coffee Buttercream: In a mixing bowl, beat the softened butter until creamy. Gradually add the powdered sugar, instant coffee granules, and vanilla extract, and continue to beat until light and fluffy.
4. Prepare the Chocolate Ganache: In a saucepan, heat the heavy cream until it just begins to simmer. Remove from heat and pour over the chopped dark chocolate in a separate bowl. Let it sit for a minute, then stir until smooth.
Add the corn syrup for shine and mix well.
5. Assemble the Cake: Cut the cooled sponge cake into three equal layers. Place one layer on a serving platter and brush generously with the coffee syrup. Spread a layer of coffee buttercream on top.
Place the second layer, brush with syrup, and spread another layer of buttercream. Add the third layer, brush with syrup, and pour the chocolate ganache over the top, allowing it to drip down the sides.
6. Chill and Serve: Refrigerate the assembled cake for at least 2 hours to set. Before serving, trim the edges to reveal clean layers, if desired.
Extra Tips:
When making Opera Cake, confirm that each layer is evenly coated with coffee syrup to keep the cake moist and flavorful. Use a serrated knife for clean cuts when slicing the cake.
If the ganache becomes too thick, gently warm it to achieve a pourable consistency. Patience is key; allow each component to cool properly before assembling to prevent melting and blending of the layers.
With practice, creating this elegant dessert will become a delightful and fulfilling culinary experience.
Light and Fluffy Genoise
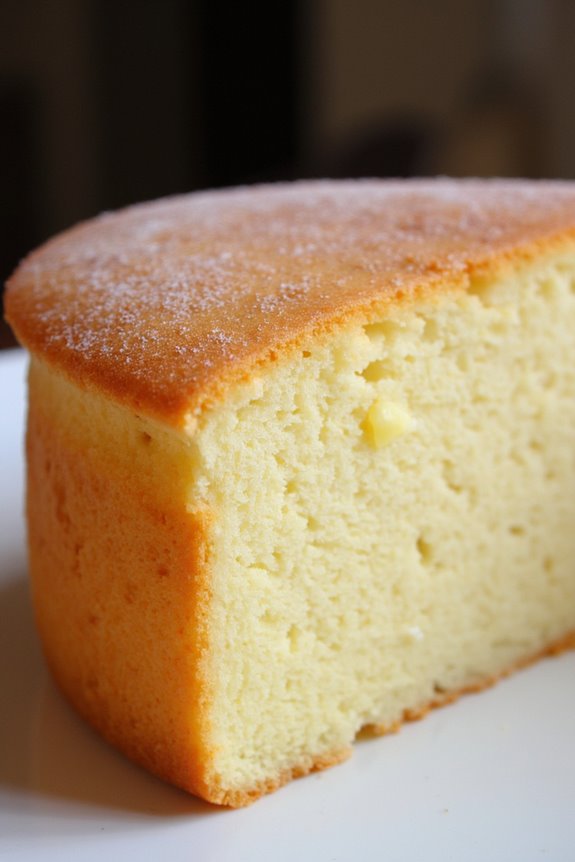
Genoise is a classic French sponge cake known for its light and airy texture, making it the perfect base for numerous elegant desserts. This cake relies on whipped eggs for its rise, rather than baking powder or soda, which results in a delicate crumb and a subtly sweet flavor. It can be savored on its own, layered with cream and fruit, or used as a foundation for more elaborate cakes.
The key to a successful genoise is mastering the technique of gently incorporating the flour into the airy egg mixture without deflating it. This recipe will guide you through creating a light and fluffy genoise suitable for serving 4-6 people. The process requires some precision and patience, but the end result is a versatile cake that can be dressed up for any occasion. Whether you’re making a simple dessert or an elaborate confection, this genoise recipe is a must-have in your repertoire.
Ingredients (serving size: 4-6 people):
- 4 large eggs
- 120 grams (1/2 cup) granulated sugar
- 120 grams (1 cup) all-purpose flour
- 30 grams (2 tablespoons) unsalted butter, melted and cooled
- 1 teaspoon vanilla extract
- A pinch of salt
Cooking Instructions:
- Preheat the Oven: Begin by preheating your oven to 350°F (175°C). Prepare a 9-inch round cake pan by greasing it lightly with butter and lining the bottom with parchment paper to prevent sticking.
- Whip the Eggs and Sugar: In a large mixing bowl, combine the eggs, sugar, and salt. Using an electric mixer, beat the mixture on high speed until it becomes thick, pale, and triples in volume. This should take about 8-10 minutes. The mixture should form a ribbon when the beaters are lifted.
- Incorporate the Flour: Sift the flour over the egg mixture in three additions. Use a large spatula to gently fold the flour into the batter after each addition. Be careful not to deflate the eggs; use an over-and-under motion and stop mixing as soon as the flour is incorporated.
- Add the Butter and Vanilla: Take a small portion of the batter and mix it with the melted butter and vanilla extract. This helps to incorporate the butter without deflating the entire batch. Gently fold this mixture back into the main batter until just combined.
- Bake the Cake: Pour the batter into the prepared cake pan, smoothing the top with a spatula. Bake in the preheated oven for 25-30 minutes, or until the cake is golden brown and springs back when lightly touched. A toothpick inserted into the center should come out clean.
- Cool the Cake: Allow the cake to cool in the pan for 5 minutes before running a knife around the edge to loosen it. Invert the cake onto a wire rack, remove the parchment paper, and let it cool completely.
Extra Tips:
To guarantee the best results, make sure all your ingredients are at room temperature before you begin. This will help the eggs whip to their fullest volume.
When folding in the flour, work quickly but gently to maintain the aeration in the batter. If you plan to layer the genoise, it’s best to do so after the cake has completely cooled. You can also brush the layers with a simple syrup flavored with your choice of liqueur or extract to add moistness and flavor.
Rich Chocolate Mousse Cake
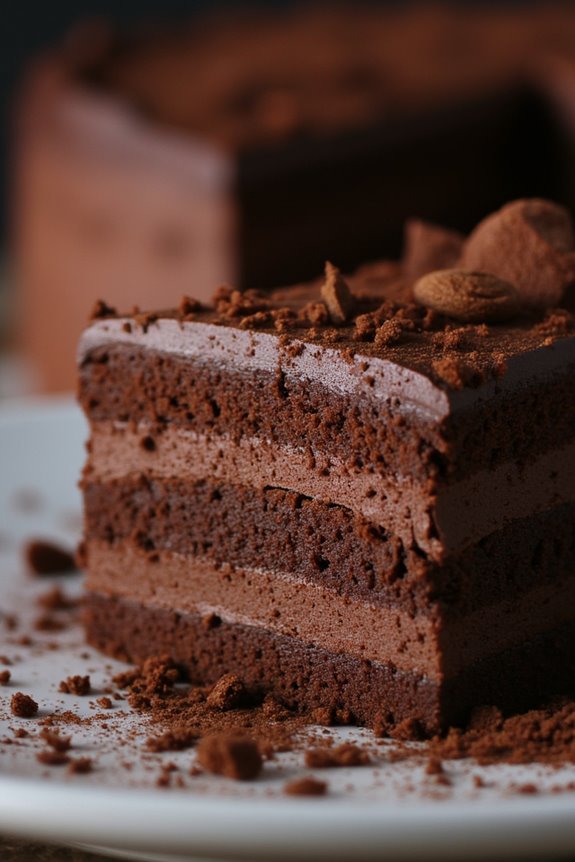
Rich Chocolate Mousse Cake is a decadent and luxurious dessert that perfectly captures the elegance of French patisserie. This cake combines layers of moist chocolate sponge with a silky, smooth chocolate mousse, creating a harmonious blend of textures and flavors. Ideal for special occasions or a delightful treat, this dessert is certain to impress your guests with its rich and indulgent taste.
The balance between the deep chocolate notes and the light, airy mousse makes it a favorite among chocolate lovers.
Creating a Rich Chocolate Mousse Cake requires patience and precision, but the results are truly rewarding. The key to this dessert lies in using high-quality chocolate and fresh ingredients to guarantee a rich and authentic flavor. With a bit of practice, you’ll master this recipe, delivering a restaurant-quality dessert that will have your guests raving.
Whether you’re an experienced baker or a novice, this recipe will guide you through the process of making a sumptuous Rich Chocolate Mousse Cake for 4-6 people.
Ingredients:
- 200g dark chocolate (70% cocoa)
- 200g unsalted butter
- 6 large eggs, separated
- 200g caster sugar
- 120g plain flour
- 50g cocoa powder
- 1 teaspoon baking powder
- 1 pinch of salt
- 300ml double cream
- 1 teaspoon vanilla extract
- Optional: chocolate shavings or cocoa powder for garnish
Cooking Instructions:
- Prepare the Chocolate Sponge: Preheat your oven to 180°C (350°F). Grease and line two 8-inch round cake tins with parchment paper. Melt the dark chocolate and butter in a heatproof bowl over simmering water, stirring occasionally until smooth. Remove from heat and let cool slightly.
- Mix the Batter: In a large bowl, beat the egg yolks and 100g of caster sugar until pale and creamy. Gradually add the melted chocolate mixture to the yolks, stirring continuously. Sift the flour, cocoa powder, baking powder, and salt into the mixture, folding gently to combine.
- Whip the Egg Whites: In a separate bowl, whisk the egg whites until soft peaks form. Gradually add the remaining 100g of caster sugar and continue whisking until stiff peaks form. Gently fold the egg whites into the chocolate batter in three additions, making sure the mixture remains light and airy.
- Bake the Cakes: Divide the batter evenly between the prepared cake tins. Bake for 20-25 minutes or until a skewer inserted into the center comes out clean. Allow the cakes to cool in the tins for 10 minutes, then transfer to a wire rack to cool completely.
- Make the Chocolate Mousse: Melt the remaining chocolate as before and set aside to cool slightly. Whip the double cream and vanilla extract in a bowl until soft peaks form. Carefully fold the cooled melted chocolate into the whipped cream until well combined.
- Assemble the Cake: Place one layer of the cooled chocolate sponge on a serving plate. Spread half of the chocolate mousse evenly over the sponge. Place the second sponge layer on top and spread the remaining mousse over the top and sides of the cake.
- Chill and Serve: Refrigerate the cake for at least 2 hours to set the mousse. Before serving, garnish with chocolate shavings or a dusting of cocoa powder, if desired.
Extra Tips:
To guarantee your Rich Chocolate Mousse Cake has the perfect texture, be gentle when folding the egg whites into the batter and the chocolate into the whipped cream. This will help maintain the lightness and airiness of the mousse and sponge.
Additionally, using a serrated knife to slice the cake will result in cleaner cuts and help preserve the mousse layers. For an even more intense chocolate flavor, consider adding a tablespoon of espresso powder to the chocolate mixture.
Elegant Fraisier Cake
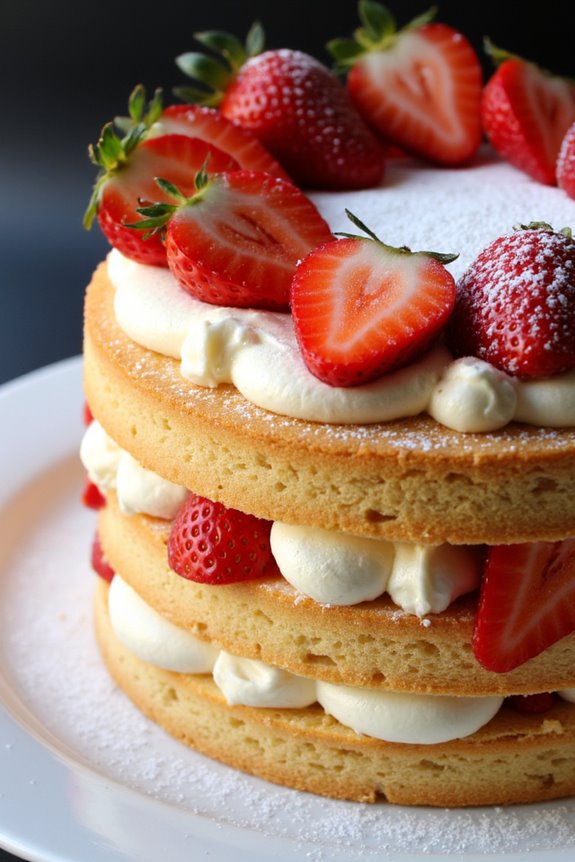
The Fraisier Cake is an exquisite French dessert that’s both light and indulgent, perfect for special occasions or a treat-yourself moment. This classic cake combines layers of delicate sponge cake, a rich and creamy mousseline, and fresh strawberries, creating a dessert that’s as beautiful to look at as it’s delicious to eat.
The cake is traditionally finished with a thin layer of almond paste or marzipan, giving it an elegant and polished appearance.
Preparing a Fraisier Cake requires some attention to detail, but the results are well worth the effort. This recipe will guide you through creating each component, from the sponge cake to the mousseline cream, and assembling them into a stunning centerpiece.
With a bit of patience and precision, you’ll be able to present a Fraisier Cake that rivals those found in the finest patisseries. This recipe serves 4-6 people.
Ingredients:
- 4 large eggs
- 120g granulated sugar
- 120g all-purpose flour
- 30g unsalted butter, melted
- 500ml whole milk
- 1 vanilla bean, split and scraped
- 4 egg yolks
- 100g granulated sugar (for mousseline cream)
- 40g cornstarch
- 200g unsalted butter, softened
- 500g fresh strawberries, hulled
- 200g marzipan or almond paste
- 1 tablespoon powdered sugar (for dusting)
Instructions:
1. Prepare the Sponge Cake: Preheat your oven to 180°C (350°F). Grease and line a 9-inch round cake pan with parchment paper. In a large bowl, whisk together the 4 eggs and 120g granulated sugar until the mixture is pale and tripled in volume.
Sift in the flour and gently fold it into the egg mixture with a spatula. Add the melted butter and fold until just combined. Pour the batter into the prepared pan and bake for 20-25 minutes, or until a toothpick inserted into the center comes out clean. Let it cool completely.
2. Make the Mousseline Cream: In a saucepan, heat the milk and vanilla bean over medium heat until just about to boil. In a separate bowl, whisk together the egg yolks, 100g sugar, and cornstarch until smooth.
Slowly pour the hot milk into the egg mixture, whisking constantly. Return the mixture to the saucepan and cook over medium heat, stirring continuously until it thickens. Remove from heat, discard the vanilla bean, and let it cool slightly. Beat in the softened butter until smooth and creamy. Cover and refrigerate until needed.
3. Assemble the Cake: Slice the cooled sponge cake into two even layers. Place one layer on your serving plate. Spread a thin layer of mousseline cream over the cake. Halve the strawberries and arrange them around the edge of the cake with the cut side facing outwards.
Fill the center with more strawberries, then spread a generous layer of mousseline cream over the top. Place the second sponge layer on top and press gently.
4. Finish and Decorate: Roll out the marzipan into a thin circle large enough to cover the top of the cake. Carefully place it over the cake and trim the edges. Dust with powdered sugar for a final touch.
Chill the cake for at least 2 hours before serving to allow the flavors to meld and the cake to set.
Extra Tips:
When making the sponge cake, be gentle when folding in the flour to retain as much air as possible for a light texture. For the mousseline cream, make certain that both the pastry cream and butter are at room temperature before combining to achieve a smooth and creamy consistency.
If you have time, prepare the cake a day in advance to let the flavors develop further. Serve the cake slightly chilled for the best taste and texture.
Zesty Lemon Tart

Zesty Lemon Tart is a classic French dessert that perfectly balances the tangy flavor of fresh lemons with a sweet, buttery crust. This invigorating dessert is ideal for any occasion, from casual gatherings to elegant dinner parties. The tart combines a crisp, flaky pastry with a rich, creamy lemon filling, creating a delightful treat that tantalizes the taste buds.
It’s a simple yet sophisticated dessert that showcases the bright and vibrant flavors of citrus.
Creating a Zesty Lemon Tart is a rewarding experience that involves a few key steps to guarantee the best flavor and texture. The process begins with preparing a homemade tart shell, followed by making a luscious lemon curd filling. The tart is then baked to perfection, allowing the filling to set and the crust to become golden and crisp.
When served, the tart can be garnished with a dusting of powdered sugar or a dollop of whipped cream for added indulgence.
Ingredients (Serves 4-6):
- 1 ½ cups all-purpose flour
- ½ cup unsalted butter, chilled and cubed
- ¼ cup granulated sugar
- 1 large egg
- ¼ teaspoon salt
- 1 egg yolk
- ¾ cup granulated sugar
- ½ cup freshly squeezed lemon juice (about 3-4 lemons)
- 1 tablespoon lemon zest
- ½ cup heavy cream
- Powdered sugar, for dusting (optional)
Cooking Instructions:
1. Prepare the Tart Shell: In a large bowl, combine the flour, cubed butter, sugar, and salt. Using your fingers or a pastry cutter, mix until the mixture resembles coarse sand. Add the egg and mix until the dough starts to come together.
Form the dough into a ball, flatten into a disk, wrap in plastic wrap, and refrigerate for at least 30 minutes.
2. Preheat the Oven: Preheat your oven to 350°F (175°C). Roll out the chilled dough on a floured surface to fit a 9-inch tart pan. Carefully transfer the dough into the pan, pressing it into the edges. Trim any excess dough and prick the bottom with a fork to prevent bubbling.
3. Blind Bake the Shell: Line the tart shell with parchment paper and fill with pie weights or dried beans. Bake for 15 minutes, remove the weights and parchment, then bake for another 10 minutes until lightly golden. Set aside to cool.
4. Make the Lemon Filling: In a medium saucepan, whisk together the egg yolk, granulated sugar, lemon juice, and lemon zest over medium heat. Cook, stirring constantly, until the mixture thickens and coats the back of a spoon, about 5-7 minutes.
Remove from heat and let cool slightly.
5. Combine Filling and Cream: Once the lemon mixture has cooled, whisk in the heavy cream until smooth and well combined. Pour the filling into the baked tart shell and smooth the top with a spatula.
6. Bake the Tart: Return the filled tart to the oven and bake for 20-25 minutes, or until the filling is set but still slightly wobbly in the center. Remove from oven and let cool to room temperature, then refrigerate for at least 1 hour before serving.
7. Garnish and Serve: Before serving, dust the tart with powdered sugar, if desired. Slice into wedges and serve chilled.
Extra Tips:
For the best results, use fresh lemons for both the juice and zest to guarantee a bright and zesty flavor. When making the pastry, keep your butter cold to achieve a flakier crust.
If the dough becomes too soft while rolling, place it back in the refrigerator for a few minutes to firm up. Additionally, when cooking the lemon filling, be patient and stir constantly to prevent curdling.
Finally, allowing the tart to chill thoroughly before serving will enhance the flavors and guarantee a perfect slice every time.
Traditional Tarte Tatin
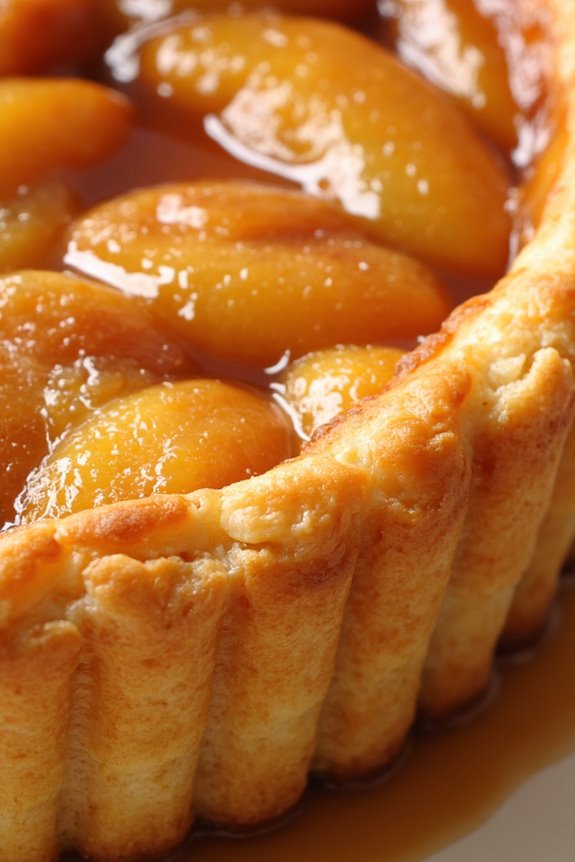
Tarte Tatin is a classic French dessert known for its rich caramelized apple topping and buttery pastry base. This upside-down tart is a delightful blend of textures and flavors, making it a favorite among dessert lovers. Originating from the Loire Valley, it was created by the Tatin sisters in the 1880s and has since become a staple in French patisseries.
The magic of Tarte Tatin lies in its simplicity, where humble ingredients come together to create an extraordinary dish. This dessert is perfect for showcasing the natural sweetness of apples, balanced with a hint of caramel.
It’s typically made with a shortcrust pastry, but puff pastry can also be used for a lighter, flakier texture. The key to a successful Tarte Tatin is confirming the apples are cooked to a deep, golden brown in the caramel before being covered with the pastry and baked to perfection.
Let’s plunge into the ingredients and method needed to create this delectable treat for 4-6 people.
Ingredients:
- 6-8 firm apples (such as Granny Smith or Golden Delicious)
- 1 cup granulated sugar
- 1/2 cup unsalted butter
- 1 sheet of puff pastry (or shortcrust pastry)
- 1 tablespoon lemon juice
- 1 teaspoon vanilla extract
- Pinch of salt
Instructions:
- Preheat the Oven: Start by preheating your oven to 375°F (190°C) to confirm it’s ready for the tart once the apples are caramelized.
- Prepare the Apples: Peel, core, and quarter the apples. As you prepare them, toss the apple slices in a bowl with lemon juice to prevent browning.
- Make the Caramel: In a heavy, oven-safe skillet (preferably cast iron), melt the butter over medium heat. Add the sugar and stir constantly until it dissolves and forms a smooth, golden caramel. This should take about 5-7 minutes. Be careful not to burn the caramel.
- Add the Apples: Arrange the apple quarters tightly in the skillet, rounded side down. Let them cook in the caramel for about 10 minutes, occasionally turning them to coat evenly with caramel, until they start to soften and take on a golden color.
- Flavor the Apples: Stir in the vanilla extract and a pinch of salt into the apple mixture for added depth of flavor.
- Cover with Pastry: Roll out the puff pastry slightly larger than the skillet. Place the pastry over the apples, tucking the edges down around the fruit.
- Bake the Tart: Transfer the skillet to the oven and bake for 25-30 minutes, or until the pastry is golden brown and crisp.
- Cool and Invert: Allow the tart to cool for about 10 minutes before carefully inverting it onto a serving plate, so the caramelized apples are on top.
Extra Tips:
For best results, use apples that hold their shape when cooked, such as Granny Smith or Golden Delicious.
Make sure your skillet is oven-safe, as this dish shifts from stovetop to oven. If you’re concerned about the tart sticking, you can line the skillet with parchment paper before adding the apples.
When inverting the tart, do so over a sink or a baking sheet to catch any excess caramel that may drip. Enjoy your Tarte Tatin warm, perhaps with a scoop of vanilla ice cream or a dollop of crème fraîche for a truly indulgent experience.
Delicate Charlotte Russe
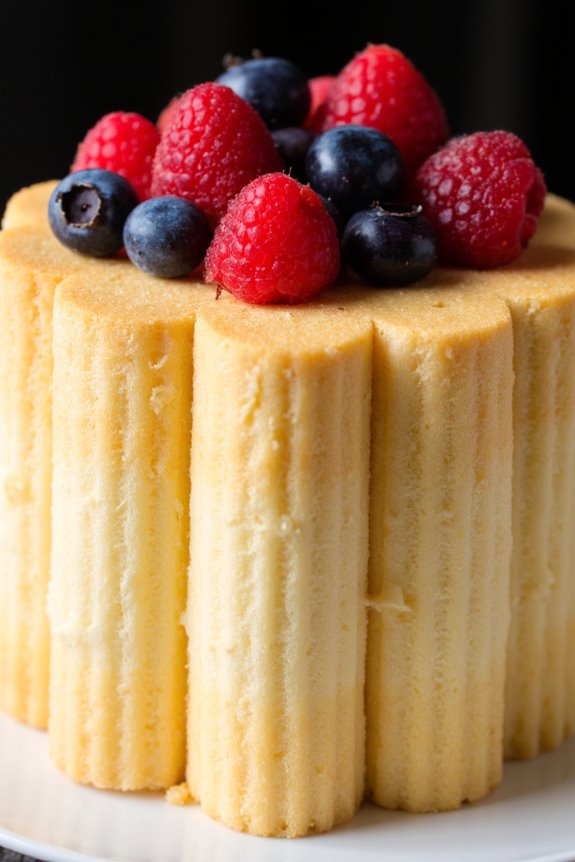
Charlotte Russe is a classic French dessert that exudes elegance and charm, perfect for a sophisticated finish to any meal. Traditionally, this dessert features a delicate combination of ladyfingers or sponge cake that form a mold, encasing a rich and creamy Bavarian cream filling. Its light yet indulgent nature makes it a delightful treat for special occasions or when you wish to impress your guests with a touch of French culinary finesse.
The contrast between the tender cake and the smooth, airy cream creates a harmonious balance that’s certain to please any dessert lover.
While the origins of Charlotte Russe are debated, with some attributing it to French chef Marie-Antoine Carême, it has become a beloved dessert in many countries. The name “Charlotte” is said to be in honor of Queen Charlotte, the wife of King George III of England.
This dessert is versatile and can be customized with a variety of flavors, such as vanilla, chocolate, or fruit-infused creams, making it a delightful and adaptable treat for any palate. Below is a recipe for a classic vanilla Charlotte Russe, serving 4-6 people.
Ingredients:
- 24-30 ladyfingers or 1 sponge cake, sliced into strips
- 1 cup milk
- 1 tablespoon unflavored gelatin
- 4 egg yolks
- 1/2 cup granulated sugar
- 1 teaspoon vanilla extract
- 1 1/2 cups heavy cream
- Fresh berries or fruit (optional, for garnish)
Cooking Instructions:
- Prepare the Mold: Start by lining a round cake mold or a springform pan with the ladyfingers or sponge cake slices. Place the ladyfingers vertically along the sides of the mold, making sure they’re snugly positioned and cover the bottom with more slices or cake pieces.
- Bloom the Gelatin: In a small bowl, sprinkle the gelatin over 1/4 cup of cold milk. Let it sit for about 5 minutes until the gelatin absorbs the liquid and becomes spongy.
- Make the Custard Base: In a medium saucepan, whisk together the egg yolks and sugar until pale and slightly thickened. Gradually add the remaining milk and whisk to combine. Cook over medium heat, stirring constantly, until the mixture thickens enough to coat the back of a spoon. Don’t let it boil.
- Incorporate the Gelatin: Remove the saucepan from heat and stir in the bloomed gelatin until completely dissolved. Add the vanilla extract and mix well. Let the mixture cool to room temperature, stirring occasionally.
- Whip the Cream: In a large bowl, whip the heavy cream until soft peaks form. Gently fold the cooled custard mixture into the whipped cream, making sure it’s thoroughly combined.
- Assemble the Charlotte Russe: Pour the cream mixture into the prepared mold over the ladyfingers. Smooth the top with a spatula. Cover and refrigerate for at least 4 hours, or until the filling is fully set.
- Serve: Once set, carefully remove the Charlotte Russe from the mold. Garnish with fresh berries or fruit if desired. Slice and serve chilled.
Extra Tips:
When making Charlotte Russe, verify the custard mixture isn’t too hot when folding into the whipped cream, as it may cause the cream to deflate and lose its airy texture.
Additionally, for a burst of flavor, consider adding a splash of liqueur or fruit puree to the custard before cooling. If you prefer a more stable structure, using a springform pan guarantees easy removal and presentation of the dessert.
Buttery Galette Des Rois
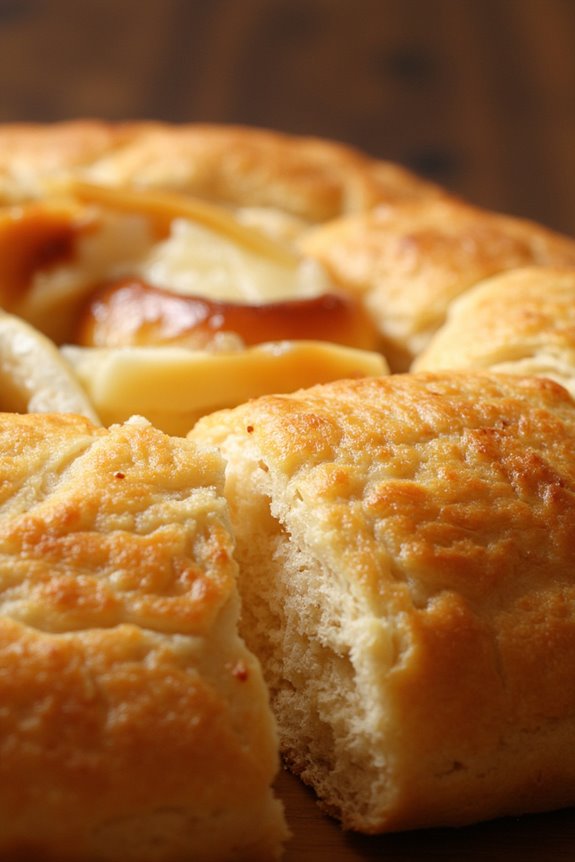
The Buttery Galette Des Rois is a traditional French cake that’s often served during the Epiphany, a Christian holiday celebrated on January 6th. This exquisite dessert is known for its flaky layers and creamy almond filling, making it a delightful treat for any occasion.
The name “Galette Des Rois” translates to “King’s Cake,” and it’s customary to hide a small figurine or bean inside the cake. The person who finds this hidden treasure is crowned “king” or “queen” for the day, adding a fun and festive element to the dessert.
This recipe for Buttery Galette Des Rois will serve 4-6 people and is perfect for those who enjoy a rich and buttery pastry with a sweet, nutty filling. The galette consists of two layers of puff pastry encasing a luscious almond cream called frangipane. Whether you’re celebrating Epiphany or simply looking to enjoy a delicious French pastry, this recipe will guide you through creating a beautiful and delicious Galette Des Rois.
Ingredients:
- 2 sheets of puff pastry
- 100g unsalted butter, softened
- 100g granulated sugar
- 100g almond flour
- 2 large eggs
- 1 teaspoon almond extract
- 1 egg yolk (for egg wash)
- 1 fève (small figurine) or dried bean (optional)
Instructions:
- Prepare the Frangipane Filling: In a medium bowl, cream together the softened butter and granulated sugar until light and fluffy. Add the almond flour and mix until well combined. Beat in the eggs one at a time, guaranteeing each egg is fully incorporated before adding the next. Stir in the almond extract until the mixture is smooth and creamy. Set aside.
- Roll Out the Puff Pastry: Preheat your oven to 400°F (200°C). Roll out the sheets of puff pastry on a lightly floured surface. Using a round cake pan or a large plate, cut two circles of equal size from the puff pastry sheets. Place one circle on a parchment-lined baking sheet.
- Assemble the Galette: Spread the frangipane filling evenly over the pastry circle on the baking sheet, leaving a 1-inch border around the edges. If using a fève or bean, press it gently into the filling. Brush the border with a little water to help seal the edges.
- Seal the Galette: Place the second pastry circle on top of the filling, aligning the edges. Press the edges together firmly to seal, then use the tines of a fork to crimp the edges for a decorative touch. Use a sharp knife to score a pattern on the top of the galette, being careful not to cut through the pastry.
- Apply Egg Wash and Bake: Beat the egg yolk with a tablespoon of water to create an egg wash. Brush the top of the galette with the egg wash, which will give it a beautiful golden color when baked. Bake in the preheated oven for 25-30 minutes, or until the pastry is puffed and golden brown.
- Cool and Serve: Allow the galette to cool on a wire rack for at least 15 minutes before serving. This will help the filling set and make it easier to slice.
Extra Tips:
When making the Buttery Galette Des Rois, ascertain that the puff pastry is kept cold until you’re ready to use it. This will help the pastry to puff up beautifully during baking.
If you have time, chilling the assembled galette in the refrigerator for about 15 minutes before baking can help the pastry hold its shape and prevent the filling from leaking out.
Remember to be cautious when hiding the fève or bean — warn your guests to look out for it to avoid any dental surprises!
Luxurious Saint-Honoré
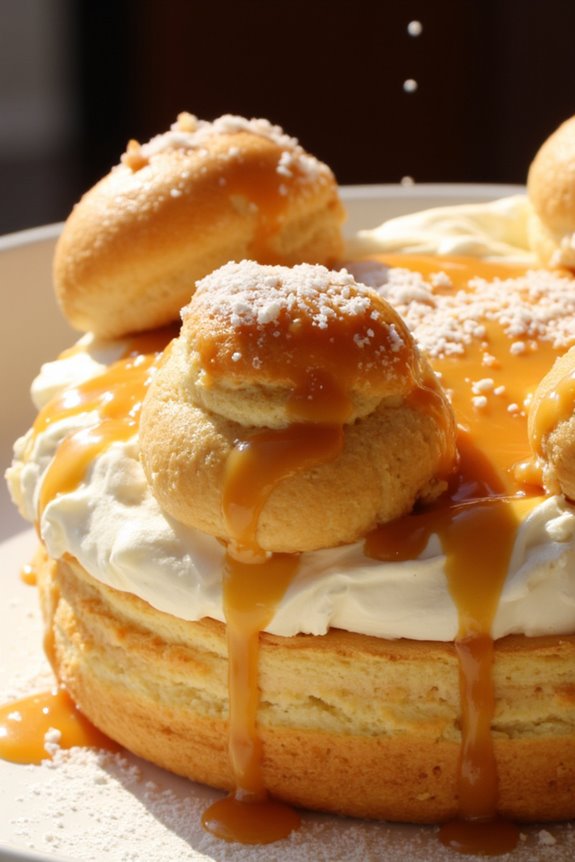
Luxurious Saint-Honoré is a classic French dessert that’s both visually stunning and delightfully indulgent. Named after the patron saint of bakers and pastry chefs, this dessert is a masterpiece of textures and flavors.
It features a base of puff pastry layered with choux pastry, filled with rich pastry cream, and topped with caramel-coated choux buns. Whipped cream is extravagantly piped between the choux buns, adding a light and airy contrast to the rich pastry cream and caramel.
This dessert is perfect for special occasions or when you want to impress your guests with a show-stopping piece. Although it involves multiple components, each step is straightforward, and the result is well worth the effort.
The combination of crisp pastry, creamy filling, and crunchy caramel creates a harmonious balance that’s synonymous with French patisserie at its finest.
Ingredients (Serves 4-6):
- 1 sheet of puff pastry
- 1/2 cup water
- 1/2 cup milk
- 1/2 cup unsalted butter
- 1 cup all-purpose flour
- 4 large eggs
- 1 tablespoon sugar
- Pinch of salt
- 2 cups heavy cream
- 1/2 cup granulated sugar
- 1 teaspoon vanilla extract
- 1/4 cup cornstarch
- 2 cups whole milk
- 1/4 cup caramel sauce (store-bought or homemade)
Cooking Instructions:
1. Prepare the Puff Pastry Base:
Preheat the oven to 400°F (200°C). Roll out the puff pastry sheet on a lightly floured surface to fit a round 10-inch tart pan. Prick the base with a fork to prevent it from rising too much. Bake for 15-20 minutes until golden and crisp. Allow it to cool completely.
2. Make the Choux Pastry:
In a saucepan, combine water, milk, butter, sugar, and salt. Bring to a boil. Remove from heat and quickly stir in the flour until a smooth dough forms. Return to heat and cook for 1-2 minutes, stirring constantly. Transfer the dough to a mixing bowl and beat in the eggs one at a time until smooth and glossy.
3. Pipe and Bake Choux Buns:
Transfer the choux pastry dough to a piping bag fitted with a plain nozzle. Pipe small mounds onto a baking sheet lined with parchment paper. Bake in the preheated oven at 400°F (200°C) for 20-25 minutes until puffed and golden. Cool on a wire rack.
4. Prepare the Pastry Cream:
In a saucepan, heat the milk and vanilla extract until just simmering. In a separate bowl, whisk together sugar and cornstarch. Gradually add the hot milk to the sugar mixture, whisking constantly. Return to the saucepan and cook over medium heat until thickened. Remove from heat and cool.
5. Assemble the Saint-Honoré:
Fill the cooled choux buns with pastry cream using a piping bag. Place the puff pastry base on a serving platter. Arrange the filled choux buns around the edge. Pipe the remaining pastry cream in the center. Drizzle the caramel sauce over the choux buns.
6. Garnish with Whipped Cream:
Whip the heavy cream until stiff peaks form. Pipe the whipped cream between the choux buns and in the center for a decorative finish.
Extra Tips:
For best results, ascertain that the puff pastry is fully cooled before assembling the dessert to prevent sogginess. If making the caramel sauce from scratch, be cautious as it can easily burn.
You can prepare the choux buns and pastry cream a day in advance, storing them separately and assembling the Saint-Honoré just before serving. This classic French dessert is as much about presentation as it’s about flavor, so take your time to arrange the choux buns and pipe the cream elegantly.
Velvety Paris-Brest
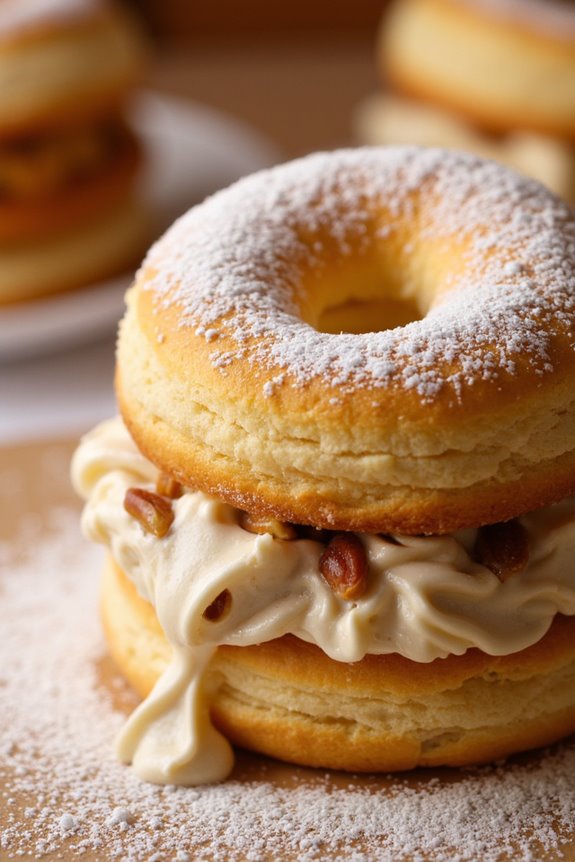
Velvety Paris-Brest is a classic French dessert, known for its delicate choux pastry filled with rich praline cream. Originally created to commemorate the Paris-Brest-Paris bicycle race, this dessert is shaped like a wheel, symbolizing the race’s circular route. The combination of light, airy pastry with the smooth, nutty cream makes it an irresistible treat perfect for any special occasion.
While it may seem complex, with careful attention to detail, you can recreate this luxurious dessert at home.
To make a Velvety Paris-Brest, you start by preparing the choux pastry, which involves cooking dough on the stovetop before baking it into a light, hollow ring. Once baked, the pastry is sliced open and filled with a luscious praline cream, made from hazelnuts and almonds that have been caramelized and then blended into a smooth paste. The result is a beautiful, golden pastry with a creamy, nutty filling that melts in your mouth.
This recipe serves 4-6 people, making it an excellent choice for an intimate dinner party or family gathering.
Ingredients for Velvety Paris-Brest (serves 4-6):
*Choux Pastry:*
- 1 cup water
- 1/2 cup unsalted butter
- 1/4 teaspoon salt
- 1 tablespoon sugar
- 1 cup all-purpose flour
- 4 large eggs
Praline Cream:
- 1 cup hazelnuts
- 1 cup almonds
- 1 cup sugar
- 1/3 cup water
- 1 1/2 cups heavy cream
- 1/4 cup powdered sugar
- 1 teaspoon vanilla extract
Cooking Instructions:
- Prepare the Praline Paste:
- Preheat your oven to 350°F (175°C). Spread the hazelnuts and almonds on a baking sheet and toast them in the oven for about 10 minutes, or until they’re golden and fragrant.
- In a saucepan, combine 1 cup of sugar with 1/3 cup of water over medium heat. Stir until the sugar dissolves, then stop stirring and let it cook until it turns a deep amber color.
- Remove from heat and quickly pour the caramel over the toasted nuts on the baking sheet. Let it cool completely.
- Once cooled, break the caramelized nuts into pieces and blend them in a food processor until smooth to form a praline paste.
- Make the Choux Pastry:
- Preheat oven to 400°F (200°C). In a medium saucepan, combine water, butter, salt, and sugar over medium heat. Bring to a boil.
- Add the flour all at once, stirring vigorously with a wooden spoon until the mixture forms a ball and pulls away from the sides of the pan.
- Remove from heat and let it cool slightly. Add eggs one at a time, beating well after each addition until the dough is smooth and glossy.
- Transfer the dough to a piping bag fitted with a large round tip. Pipe a circle of dough onto a parchment-lined baking sheet, about 8 inches in diameter, and then pipe another circle inside the first one.
- Bake in preheated oven for 20-25 minutes until puffed and golden brown. Let cool completely on a wire rack.
- Prepare the Praline Cream:
- In a mixing bowl, whip the heavy cream until soft peaks form. Add powdered sugar and vanilla extract, and continue to whip until stiff peaks form.
- Gently fold in the prepared praline paste into the whipped cream until well combined.
- Assemble the Paris-Brest:
- Slice the baked choux ring horizontally using a serrated knife.
- Pipe or spoon the praline cream generously onto the bottom half of the ring.
- Place the top half of the choux pastry back on and dust with powdered sugar for a finishing touch.
Extra Tips:
When making the choux pastry, verify that the dough is cool enough before adding the eggs, or they may cook prematurely.
If you find the pastry is browning too quickly in the oven, reduce the temperature slightly to verify even cooking throughout.
For an extra touch of elegance, you can decorate the top of the Paris-Brest with additional caramelized nuts or chocolate shavings.
Nutty Dacquoise
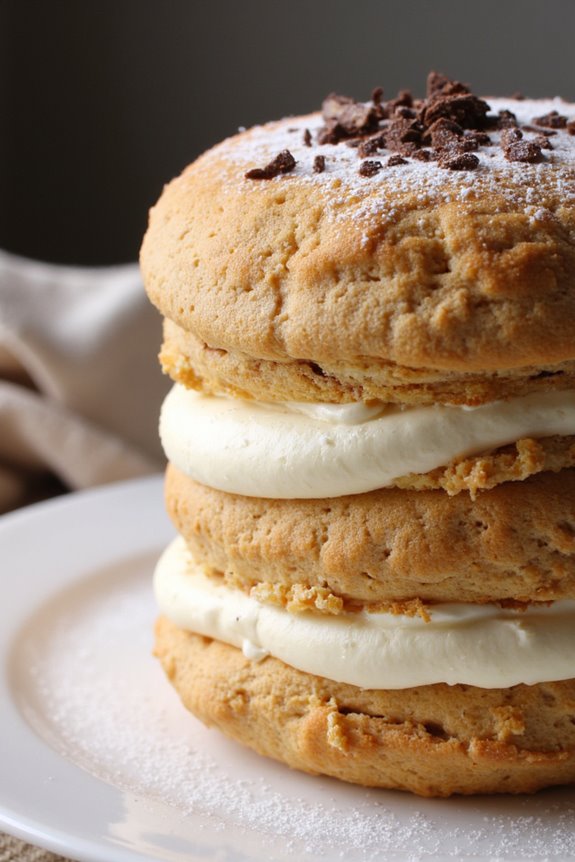
The Nutty Dacquoise is a classic French dessert that embodies the sophistication and elegance of French patisserie. This delightful treat is composed of layers of nut-based meringue alternated with rich buttercream, creating a harmonious blend of textures and flavors. The dacquoise layers are typically made from almond or hazelnut flour, which provides a subtle nuttiness, perfectly complemented by the creamy and buttery filling.
This dessert is perfect for special occasions or just to indulge in a bit of French culinary excellence at home. This recipe serves 4-6 people and involves a few steps that require precision, but the results are truly rewarding. The key to a successful Nutty Dacquoise is to guarantee the meringue layers are perfectly crisp and the buttercream is smooth and luscious.
Once you master these components, you’ll be able to impress your guests with a dessert that looks as stunning as it tastes. Follow the instructions closely and prepare to delight in the exquisite flavors of this French classic.
Ingredients:
- 1 cup almond flour
- 1 cup powdered sugar
- 4 large egg whites
- 1/2 cup granulated sugar
- 1 teaspoon vanilla extract
- 1 cup unsalted butter, softened
- 1 1/2 cups confectioners’ sugar
- 2 tablespoons milk
- 1/4 teaspoon salt
- 1 tablespoon hazelnut liqueur or almond extract (optional)
Cooking Instructions:
- Prepare the Meringue Layers:
- Preheat the oven to 300°F (150°C) and line two baking sheets with parchment paper. Draw two circles (8 inches each) on the parchment to guide the shape of your dacquoise layers.
- In a medium bowl, sift together the almond flour and powdered sugar. Set aside.
- In a large mixing bowl, beat the egg whites until soft peaks form. Gradually add granulated sugar, continuing to beat until stiff peaks are achieved.
- Gently fold the almond mixture into the beaten egg whites until fully incorporated, taking care not to deflate the mixture.
- Spread the meringue mixture onto the prepared circles on the baking sheets, smoothing out the tops.
- Bake in the preheated oven for 25-30 minutes or until the meringue is dry and lightly golden. Allow to cool completely on wire racks.
- Prepare the Buttercream:
- In a large bowl, beat the softened butter until creamy. Gradually add the confectioners’ sugar, milk, vanilla extract, and salt, beating until smooth and fluffy.
- Add the hazelnut liqueur or almond extract if using, and mix well until fully combined.
- Assemble the Dacquoise:
- Place one meringue layer on a serving plate. Spread a generous layer of buttercream over the top.
- Place the second meringue layer on top and cover with the remaining buttercream, smoothing it out evenly.
- Optionally, decorate the top with chopped nuts or chocolate shavings for added flair.
Extra Tips:
To achieve the perfect Nutty Dacquoise, guarantee that your egg whites are at room temperature before beating, as this helps them whip up more easily to the desired stiffness.
Be gentle when folding the almond mixture into the meringue to maintain the airiness needed for a light texture. If you’re not serving the dacquoise immediately, it’s best stored in the refrigerator to keep the buttercream fresh.
However, bring it back to room temperature before serving to enjoy the full flavor and creamy consistency.
Irresistible Gateau Basque
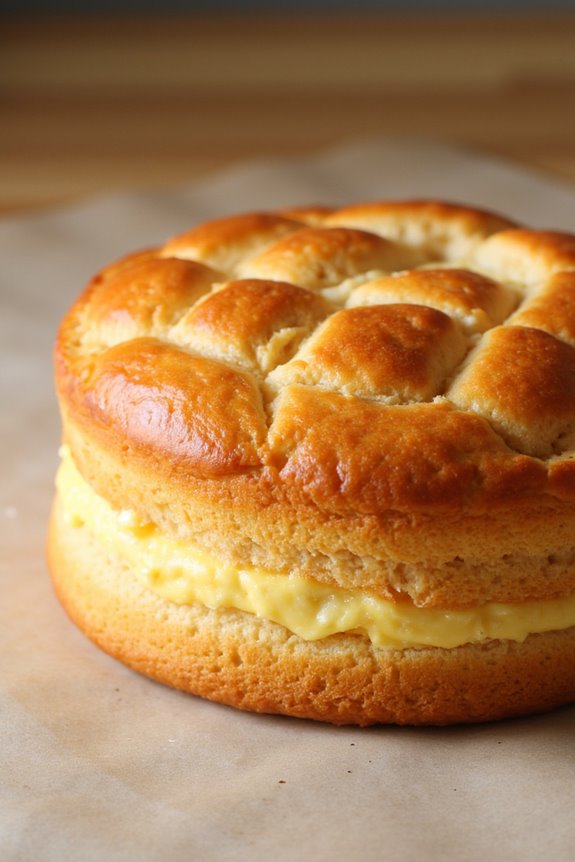
Irresistible Gateau Basque is a classic French dessert that hails from the Basque region in the southwest of France. This delightful cake is known for its rich and buttery pastry crust, enveloping a luscious filling of either almond-flavored pastry cream or black cherry jam.
Traditionally, the cake is enjoyed with a cup of coffee or tea and is a staple in many French households. Its unique texture and combination of flavors make it an irresistible treat that’s certain to impress at any gathering.
Gateau Basque is a versatile dessert that can be adapted to suit different tastes by varying the filling. Whether you choose a creamy custard or a fruity jam, this cake is certain to delight your taste buds. The pastry is made from a simple dough that’s easy to prepare yet yields a luxurious texture and flavor.
This recipe will guide you through the process of making a Gateau Basque filled with almond pastry cream, perfect for serving 4-6 people.
Ingredients:
- 1 3/4 cups all-purpose flour
- 1/2 teaspoon baking powder
- 1/4 teaspoon salt
- 3/4 cup unsalted butter, softened
- 3/4 cup granulated sugar
- 2 large eggs
- 1 teaspoon vanilla extract
- 1/2 teaspoon almond extract
- 1 1/2 cups whole milk
- 1/4 cup cornstarch
- 1/2 cup almond flour
- 1/4 cup powdered sugar
- 1 tablespoon rum (optional)
- 1 egg yolk (for brushing)
Instructions:
1. Prepare the Dough: In a medium bowl, sift together the flour, baking powder, and salt. In a separate large bowl, cream the butter and granulated sugar together until light and fluffy.
Beat in the eggs one at a time, then add the vanilla and almond extracts. Gradually add the dry ingredients to the wet ingredients, mixing until a dough forms.
Divide the dough into two discs, wrap in plastic wrap, and refrigerate for at least 1 hour.
2. Make the Pastry Cream: In a saucepan, combine the milk and 1/4 cup of sugar, and bring to a simmer over medium heat.
In a separate bowl, whisk together the cornstarch, almond flour, remaining sugar, and a pinch of salt. Gradually add the dry mixture to the hot milk, whisking constantly to prevent lumps.
Cook until the mixture thickens, then remove from heat. Stir in the rum (if using). Allow it to cool completely.
3. Assemble the Cake: Preheat your oven to 350°F (175°C). Roll out one disc of dough on a floured surface to fit the bottom and sides of a 9-inch round tart pan.
Press the dough into the pan, trimming any excess. Pour the cooled pastry cream into the crust. Roll out the second disc of dough and place it over the filling, sealing the edges.
Trim any excess dough.
4. Bake the Cake: Brush the top of the cake with the egg yolk to give it a glossy finish. Use a fork to create a crosshatch pattern on the surface.
Bake for 35-40 minutes or until the top is golden brown. Allow the cake to cool in the pan before transferring it to a wire rack.
5. Serve: Once cooled, slice the Gateau Basque into wedges and serve. It can be enjoyed at room temperature or slightly warmed.
Extra Tips:
When making the pastry cream, be certain of constant whisking to prevent clumping and to achieve a smooth texture.
If you prefer a fruity filling, black cherry jam is an excellent traditional alternative to the almond pastry cream. Allow the cake to cool completely before slicing to ensure clean cuts and to prevent the filling from spilling out.
Storing the cake in an airtight container will keep it fresh for a few days, making it a great make-ahead option for entertaining.
Creamy Mille-Feuille
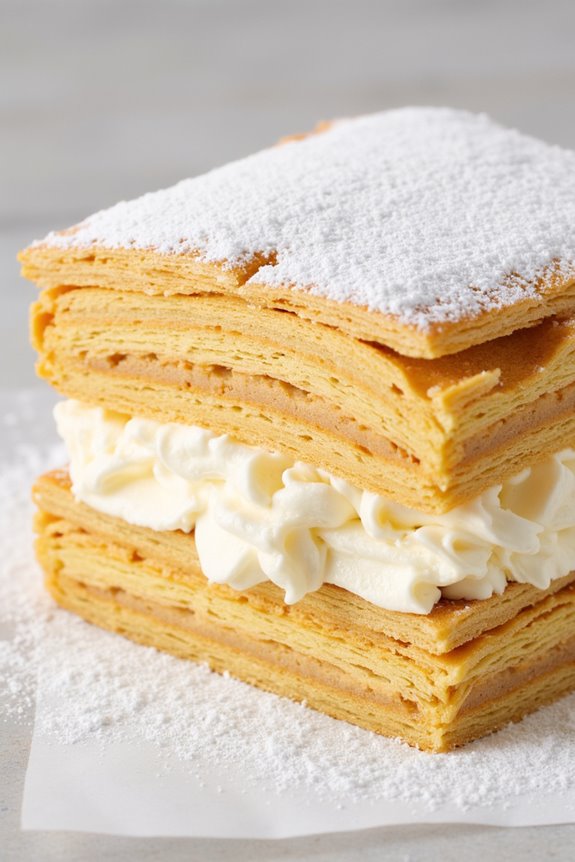
The Creamy Mille-Feuille, also known as “Napoleon,” is a classic French dessert that combines layers of flaky puff pastry with rich, velvety pastry cream. The name “Mille-Feuille” translates to “a thousand leaves,” referring to the delicate, crispy layers of pastry that encase the creamy filling.
This elegant dessert is perfect for special occasions, offering a delightful balance of textures and flavors that will impress any guest.
To achieve the perfect Creamy Mille-Feuille, each component must be carefully prepared. The puff pastry should be light and crispy, while the pastry cream should be smooth, creamy, and infused with a hint of vanilla.
Once assembled, the dessert is dusted with powdered sugar or drizzled with a simple glaze for a touch of sweetness. Whether you’re a seasoned baker or a novice in the kitchen, following this recipe will help you create a stunning and delicious dessert for 4-6 people.
Ingredients:
- 1 package of puff pastry (2 sheets)
- 2 cups whole milk
- 1/2 cup granulated sugar
- 1/4 cup cornstarch
- 4 large egg yolks
- 1 teaspoon vanilla extract
- 1 tablespoon unsalted butter
- Powdered sugar for dusting
Cooking Instructions:
- Prepare the Puff Pastry:
- Preheat your oven to 400°F (200°C).
- Roll out the puff pastry on a lightly floured surface to smooth any creases. Cut each sheet into three equal rectangles.
- Place the rectangles on a baking sheet lined with parchment paper. Prick all over with a fork to prevent puffing.
- Bake in the preheated oven for 12-15 minutes, or until golden brown and crisp. Allow to cool completely on a wire rack.
- Make the Pastry Cream:
- In a medium saucepan, bring the milk to a gentle simmer over medium heat.
- In a separate bowl, whisk together the sugar, cornstarch, and egg yolks until smooth.
- Gradually add the hot milk to the egg mixture, whisking constantly to prevent the eggs from cooking.
- Return the mixture to the saucepan and cook over medium heat, whisking continuously, until it thickens and comes to a boil.
- Remove from heat, stir in the vanilla extract and butter, and transfer to a bowl. Cover with plastic wrap, pressing it directly onto the surface to prevent a skin from forming. Chill in the refrigerator until set.
- Assemble the Mille-Feuille:
- Once the puff pastry and pastry cream have cooled, it’s time to assemble the dessert.
- Place one layer of puff pastry on a serving platter. Spread half of the pastry cream evenly over the top.
- Add a second layer of puff pastry, followed by the remaining pastry cream.
- Top with the final layer of puff pastry.
- Dust the top with powdered sugar just before serving.
Extra Tips:
To guarantee your Mille-Feuille stays crisp, assemble it just before serving. If you prepare it in advance, store the components separately and assemble at the last minute to maintain the texture.
Additionally, you can add a layer of fruit, such as sliced strawberries or raspberries, between the pastry cream layers for a rejuvenating twist.
When cutting the Mille-Feuille, use a sharp serrated knife to avoid crushing the delicate pastry layers. Enjoy your Creamy Mille-Feuille with a cup of coffee or tea for a truly indulgent experience.
Moist Financier Cake
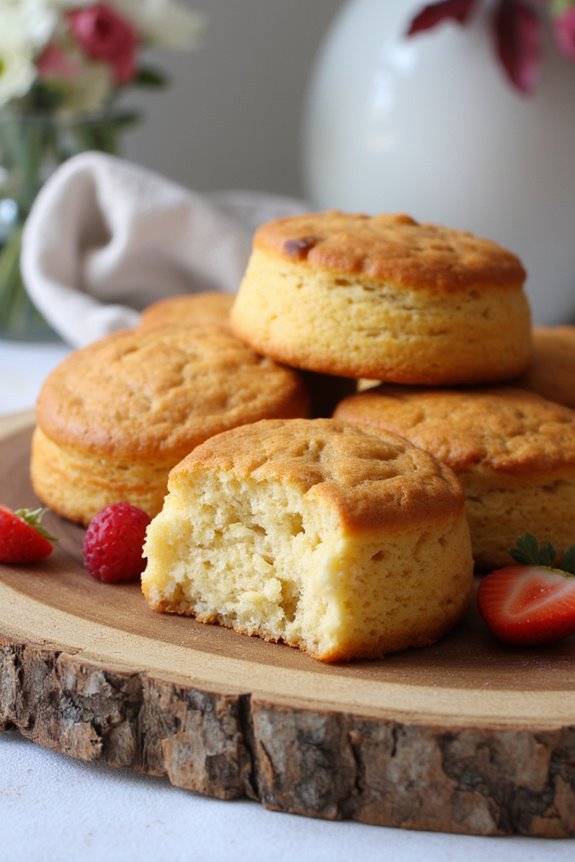
Moist Financier Cake is a delightful French dessert that showcases a rich, buttery flavor with a moist and tender crumb. Traditionally made with almond flour, these small cakes are often baked in rectangular molds, resembling bars of gold. This dessert is perfect for an afternoon tea or as an elegant finish to a dinner party. The name “financier” is said to have originated because these cakes were popular in the financial district of Paris, where bakers created them to appeal to the wealthy bankers.
The key to a perfect Moist Financier Cake lies in the beurre noisette, or brown butter, which infuses the cake with a nutty aroma and adds depth to its flavor. The almond flour provides a delicate texture, while the egg whites give the cake its signature lightness.
These cakes are simple to make and can be flavored with various ingredients such as berries, pistachios, or chocolate to suit your taste. This recipe serves 4-6 people and guarantees your financiers are moist and delicious every time.
Ingredients:
- 100g unsalted butter
- 100g almond flour
- 100g powdered sugar
- 40g all-purpose flour
- 4 large egg whites
- 1 tsp vanilla extract
- Pinch of salt
- Optional: fresh berries or sliced almonds for topping
Cooking Instructions:
- Prepare the Brown Butter: In a small saucepan, melt the unsalted butter over medium heat. Continue cooking, swirling the pan occasionally, until the butter turns golden brown and releases a nutty aroma. This will take about 5-7 minutes. Remove the saucepan from the heat and let the brown butter cool slightly.
- Mix the Dry Ingredients: In a large mixing bowl, sift together the almond flour, powdered sugar, all-purpose flour, and a pinch of salt. This guarantees that the dry ingredients are well combined and free of lumps.
- Whisk the Egg Whites: In a separate bowl, whisk the egg whites until frothy but not stiff. This step helps incorporate air into the batter, contributing to the cake’s light texture.
- Combine Ingredients: Gradually add the dry ingredients to the frothy egg whites, folding gently with a spatula to avoid deflating the mixture. Once combined, add the vanilla extract and the cooled brown butter, mixing until you achieve a smooth batter.
- Prepare the Molds: Preheat your oven to 180°C (350°F). Grease the financier molds or a muffin tin lightly with butter or non-stick spray to prevent sticking.
- Fill and Bake: Spoon the batter into the prepared molds, filling each about 2/3 full. If desired, top with fresh berries or sliced almonds. Bake in the preheated oven for 12-15 minutes, or until the edges are golden brown and a toothpick inserted into the center comes out clean.
- Cool and Serve: Allow the financiers to cool in the molds for a few minutes before transferring them to a wire rack to cool completely. Serve warm or at room temperature, ideally with a cup of tea or coffee.
Extra Tips:
For the best flavor, use high-quality unsalted butter and fresh almond flour. Beurre noisette is essential to the financier’s flavor profile, so take care not to burn the butter; it should be a rich, amber color.
If you don’t have financier molds, a muffin tin will work just fine. Feel free to experiment by adding different toppings like chocolate chips or citrus zest to create your own variation of this classic French dessert.