

Desserts have a special way of adding a touch of romance to any evening. Picture the joy of sharing a classic chocolate mousse or enjoying the delicate layers of a raspberry mille-feuille with someone special this Valentine’s Day. French desserts bring more than just flavor; they create sweet moments that last. Want to see how these treats can make your celebration unforgettable? Let’s explore these delightful recipes together.
Classic Chocolate Mousse

Indulge in the rich, velvety texture of a Classic Chocolate Mousse, a quintessential French dessert that’s perfect for a romantic Valentine’s Day celebration. This timeless treat combines the deep, luxurious flavors of dark chocolate with the light, airy texture of whipped cream, creating a harmonious blend that melts in your mouth.
Whether you’re preparing a special dinner for two or treating a small gathering of loved ones, this dessert promises to enchant with its sophisticated simplicity and irresistible charm.
Preparing a Classic Chocolate Mousse might seem intimidating, but with a carefully followed recipe, it becomes an enjoyable culinary adventure. The key to mastering this dessert lies in balancing the richness of the chocolate with the lightness of the cream, guaranteeing a perfect texture that’s both creamy and fluffy.
Follow the steps below to create a serving size for 4-6 people, and serve it in elegant dishes to add a touch of French elegance to your dinner table.
Ingredients (serving size: 4-6 people):
- 200 grams of high-quality dark chocolate (at least 70% cocoa)
- 4 large eggs, separated
- 50 grams of granulated sugar
- 300 ml of heavy cream
- 1 teaspoon of vanilla extract
- A pinch of salt
Cooking Instructions:
- Melt the Chocolate: Break the dark chocolate into small pieces and place it in a heatproof bowl. Set the bowl over a pot of simmering water, making sure the bottom of the bowl doesn’t touch the water. Stir occasionally until the chocolate is completely melted and smooth. Remove from heat and let it cool slightly.
- Prepare the Egg Yolks: In a separate bowl, whisk the egg yolks with half of the sugar (25 grams) until the mixture is pale and creamy. Slowly add the melted chocolate to the egg yolks, stirring continuously until fully combined. Add the vanilla extract and mix well.
- Whip the Cream: In a chilled mixing bowl, whip the heavy cream until soft peaks form. Be careful not to over-whip, as you want the cream to be light and airy.
- Beat the Egg Whites: In another clean bowl, whisk the egg whites with a pinch of salt until they begin to froth. Gradually add the remaining sugar and continue to whisk until stiff peaks form.
- Combine Ingredients: Gently fold the whipped cream into the chocolate mixture using a spatula, being careful not to deflate the mixture. Once combined, carefully fold in the beaten egg whites until no white streaks remain.
- Chill and Serve: Divide the mousse into individual serving glasses or bowls. Cover and refrigerate for at least 4 hours, or until set. Before serving, you may garnish with chocolate shavings, fresh berries, or a dollop of whipped cream for an extra touch of elegance.
Extra Tips:
For the best results, always use high-quality chocolate, as it’s the star ingredient of this dessert. Confirm that all your mixing bowls and utensils are clean and dry, especially for whipping the egg whites, as any trace of grease can prevent them from reaching the desired stiffness.
To enhance the chocolate flavor, you can add a tablespoon of liqueur such as Grand Marnier or a pinch of espresso powder to the chocolate mixture. Finally, remember that patience is key; allowing the mousse to chill adequately will guarantee it achieves the perfect texture and flavor.
Tarte Tatin
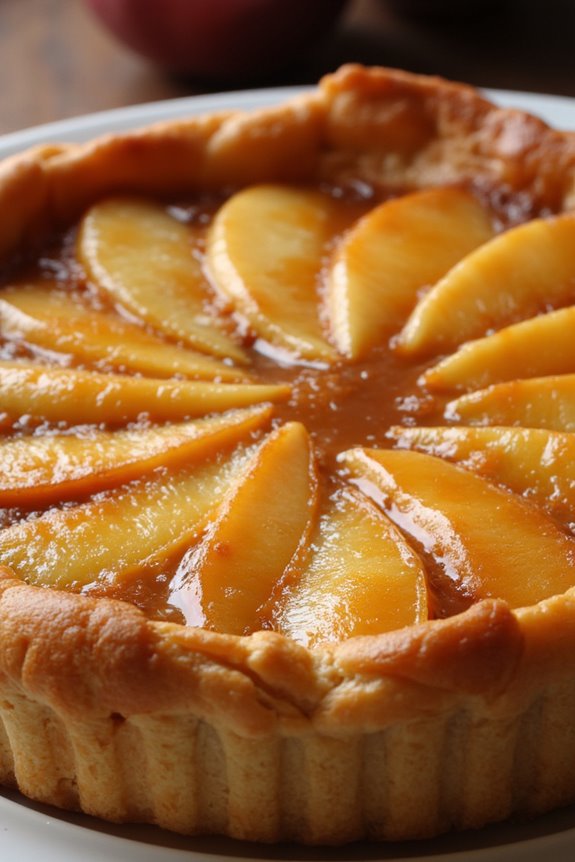
Tarte Tatin is a classic French dessert that transforms simple ingredients into an elegant and indulgent treat. Originating from the Loire Valley, this upside-down caramelized apple tart is a perfect way to celebrate Valentine’s Day with a touch of romance. The key to this dessert lies in its delightful balance of sweet caramel and tart apples, all encased in a buttery, flaky crust.
When served warm with a dollop of crème fraîche or vanilla ice cream, Tarte Tatin is the epitome of French culinary finesse. This dessert isn’t only delicious but also allows for a little drama in the kitchen, as the tart is traditionally flipped out of the pan right before serving. The process may seem intimidating, but with a bit of patience and attention to detail, even novice bakers can achieve this impressive dessert.
The following recipe is designed for 4-6 servings, perfect for a small gathering or a romantic dinner for two with leftovers for the next day.
Ingredients for 4-6 Servings:
- 4 to 5 medium-sized apples (preferably Granny Smith or Golden Delicious)
- 1 cup granulated sugar
- 1/2 cup unsalted butter
- 1 sheet of puff pastry, thawed
- 1 tablespoon lemon juice
- 1 teaspoon vanilla extract
- A pinch of salt
Cooking Instructions:
- Prepare the Apples:
- Peel, core, and quarter the apples. Toss them with lemon juice to prevent browning and set aside.
- Make the Caramel:
- In a heavy, oven-proof skillet or cast-iron pan, melt the butter over medium heat. Add the sugar and stir until it begins to dissolve. Allow the mixture to cook without stirring until it turns a rich, golden brown color, forming a caramel. This should take about 8–10 minutes.
- Add Apples to Caramel:
- Carefully arrange the apple quarters in the caramel, rounded side down. Pack them tightly, as they’ll shrink during cooking. Sprinkle with a pinch of salt and the vanilla extract. Let the apples cook in the caramel for about 10–15 minutes on medium-low heat until they start to soften.
- Prepare the Puff Pastry:
- Roll out the thawed puff pastry on a lightly floured surface until it’s slightly larger than the skillet. Prick it all over with a fork to prevent it from puffing too much in the oven.
- Assemble the Tarte Tatin:
- Carefully place the puff pastry over the apples, tucking the edges down into the skillet around the apples. Be cautious of the hot caramel.
- Bake the Tarte:
- Preheat the oven to 375°F (190°C). Transfer the skillet to the oven and bake for 25–30 minutes, or until the puff pastry is golden brown and cooked through.
- Flip and Serve:
- Once baked, let the tarte cool for a few minutes. Place a large plate over the skillet and, using oven mitts, carefully invert the tarte onto the plate. Serve warm with crème fraîche or vanilla ice cream for an extra touch of indulgence.
Extra Tips:
When making Tarte Tatin, timing and patience are essential. Be sure to keep an eye on the caramel as it can quickly go from perfect to burnt. Use a heavy, oven-proof skillet to guarantee even heat distribution, and handle the skillet with care, as the caramel will be extremely hot.
If you’re worried about the flip, practice with a cold plate to get the motion right before attempting with the hot skillet. Finally, if you prefer a more savory twist, a sprinkle of sea salt on top before serving can enhance the flavors beautifully.
Crème Brûlée
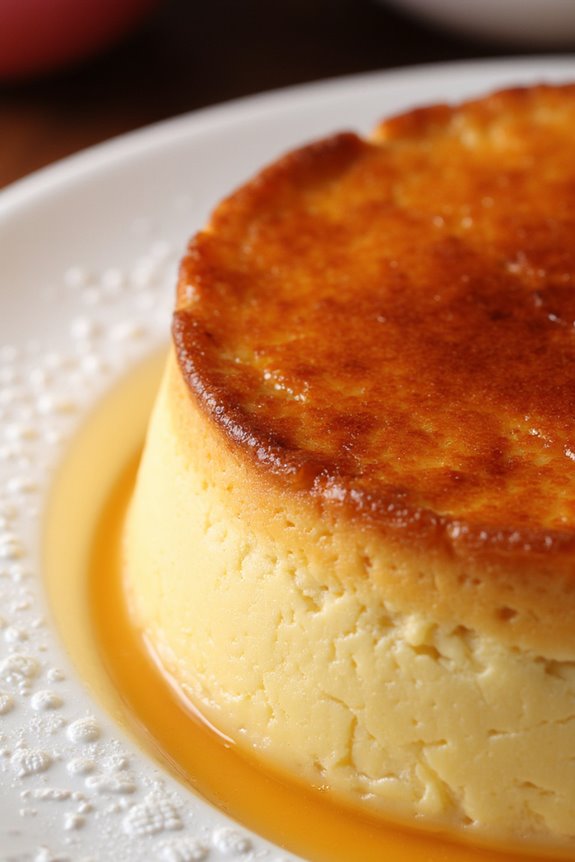
Crème Brûlée is a classic French dessert that’s perfect for a romantic Valentine’s Day celebration. This dish is known for its creamy custard base and a contrasting layer of hard caramel on top. When you crack through the caramelized sugar, you’ll discover a smooth, rich custard that’s both decadent and elegant. The simplicity of the ingredients combined with the sophisticated appearance makes Crème Brûlée an ideal dessert for impressing your loved one.
The origins of Crème Brûlée can be traced back to France in the 17th century, and it has since become a staple in fine dining restaurants worldwide. Despite its luxurious appearance, Crème Brûlée is relatively simple to make at home. With a few high-quality ingredients and some careful attention, you can create this delightful dessert in your own kitchen. Follow this recipe to prepare Crème Brûlée for 4-6 people, guaranteeing a memorable and romantic evening.
Ingredients:
- 2 cups heavy cream
- 1 vanilla bean (or 1 teaspoon vanilla extract)
- 5 large egg yolks
- 1/2 cup granulated sugar, plus more for topping
- A pinch of salt
Instructions:
- Preheat the Oven: Start by preheating your oven to 325°F (160°C). Arrange 4 to 6 ramekins in a baking dish that’s deep enough to hold water halfway up the sides of the ramekins.
- Prepare the Cream: In a medium saucepan, pour the heavy cream. Split the vanilla bean lengthwise and scrape the seeds into the cream, then add the pod. If using vanilla extract, add it after the cream is heated. Heat the cream over medium heat until it just begins to simmer. Remove from heat and let it sit for 15 minutes, allowing the vanilla to infuse.
- Mix the Egg Yolks and Sugar: In a separate bowl, whisk together the egg yolks, granulated sugar, and a pinch of salt until the mixture is pale and slightly thickened.
- Combine and Strain: Slowly pour the warm cream into the egg mixture, whisking continuously to prevent the eggs from cooking. Strain the mixture through a fine-mesh sieve into a pouring jug to remove the vanilla pod and any cooked egg bits.
- Fill the Ramekins: Pour the custard mixture evenly into the ramekins. Fill the baking dish with hot water until it reaches halfway up the sides of the ramekins. This water bath helps cook the custard evenly.
- Bake the Custard: Carefully transfer the baking dish to the preheated oven. Bake for 30-40 minutes, or until the custard is set but still has a slight wobble in the center. The time may vary depending on the size of your ramekins.
- Chill the Custard: Remove the ramekins from the water bath and let them cool to room temperature. Cover with plastic wrap and refrigerate for at least 2 hours, or until thoroughly chilled.
- Caramelize the Sugar: Before serving, evenly sprinkle about 1-2 teaspoons of granulated sugar on top of each custard. Using a kitchen torch, gently melt the sugar until it forms a crispy, golden-brown layer. Allow it to cool for a minute, creating a crackling crust.
Extra Tips:
When making Crème Brûlée, it’s important to heat the cream gently to avoid scalding. If you don’t have a kitchen torch, you can caramelize the sugar under a broiler, but be sure to watch closely to prevent burning.
Allow the sugar crust to cool slightly before serving, as this will guarantee it hardens properly. For an extra touch, you can infuse the cream with other flavors like coffee, citrus, or spices, but remember to adjust the amount of sugar to balance the flavors.
Raspberry Mille-Feuille
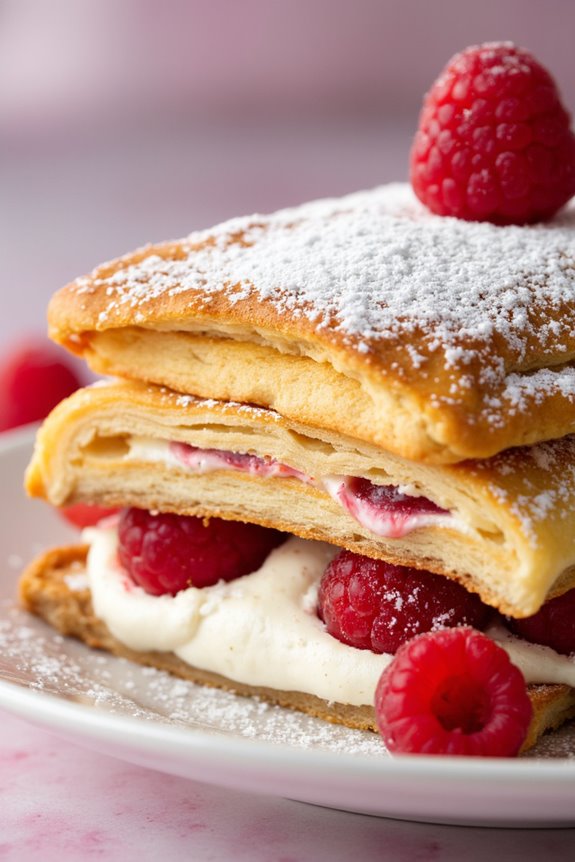
Raspberry Mille-Feuille is a classic French dessert that elegantly layers puff pastry with luscious cream and fresh raspberries. This decadent treat, also known as a “Napoleon,” showcases the perfect balance of crispy, flaky pastry and smooth, velvety cream, all complemented by the sweet-tart burst of ripe raspberries.
It’s an impressive dessert that’s ideal for celebrating Valentine’s Day, making it a romantic delight that will surely astonish your loved one.
This recipe serves 4-6 people and involves preparing the puff pastry, filling it with a luxurious vanilla pastry cream, and assembling the layers with fresh raspberries. The Mille-Feuille can be made ahead of time and assembled just before serving, making it a convenient option for a special occasion.
The resulting dessert isn’t only visually stunning but also a delicious combination of flavors and textures that will captivate your taste buds.
Ingredients:
- 1 package (about 17 oz) of puff pastry, thawed
- 1 1/2 cups fresh raspberries
- 2 cups whole milk
- 1 vanilla bean, split and seeds scraped
- 6 large egg yolks
- 1/2 cup granulated sugar
- 1/4 cup all-purpose flour
- 2 tablespoons cornstarch
- Powdered sugar for dusting
- Optional: mint leaves for garnish
Cooking Instructions:
- Prepare the Pastry Cream:
- In a medium saucepan, heat the milk and vanilla bean seeds over medium heat until just boiling. Remove from heat and let it infuse for about 10 minutes.
- In a separate bowl, whisk together egg yolks and granulated sugar until thick and pale. Add the flour and cornstarch, and mix until smooth.
- Gradually pour the infused milk into the yolk mixture, whisking constantly to prevent curdling. Return the mixture to the saucepan.
- Cook over medium heat, stirring constantly, until the mixture thickens and boils. Allow it to boil for 1-2 minutes, then remove from heat.
- Transfer the pastry cream to a bowl, cover with plastic wrap (pressing it directly onto the surface to prevent a skin from forming), and refrigerate until completely cool.
- Bake the Puff Pastry:
- Preheat the oven to 400°F (200°C). Roll out the puff pastry to a thickness of about 1/8 inch on a lightly floured surface.
- Cut the pastry into rectangles, approximately 3 inches by 6 inches. Place them on a parchment-lined baking sheet and prick all over with a fork to prevent puffing.
- Cover with another sheet of parchment and place a second baking sheet on top to keep the pastry flat while baking.
- Bake for 15-20 minutes, or until golden brown and crisp. Remove from the oven and let cool completely.
- Assemble the Mille-Feuille:
- Once the pastry and cream are ready, begin assembly. Place one pastry layer on a serving plate.
- Pipe or spread a layer of pastry cream over the pastry, then top with fresh raspberries.
- Repeat the layers, finishing with a third layer of pastry on top. Optionally, dust with powdered sugar.
- Refrigerate for about 30 minutes to allow the dessert to set before serving.
Extra Tips:
When preparing the pastry cream, make certain it’s completely cooled before assembling the dessert to maintain the crispness of the pastry.
If you prefer a smoother pastry cream, strain it through a fine-mesh sieve before chilling. For a more decorative touch, consider brushing the top layer of puff pastry with a simple glaze or melted chocolate before dusting with powdered sugar.
Additionally, you can add a splash of raspberry liqueur to the pastry cream for an extra depth of flavor. Remember to assemble the dessert just before serving to enjoy the perfect texture contrast between the crunchy pastry and creamy filling.
Chocolate Fondant
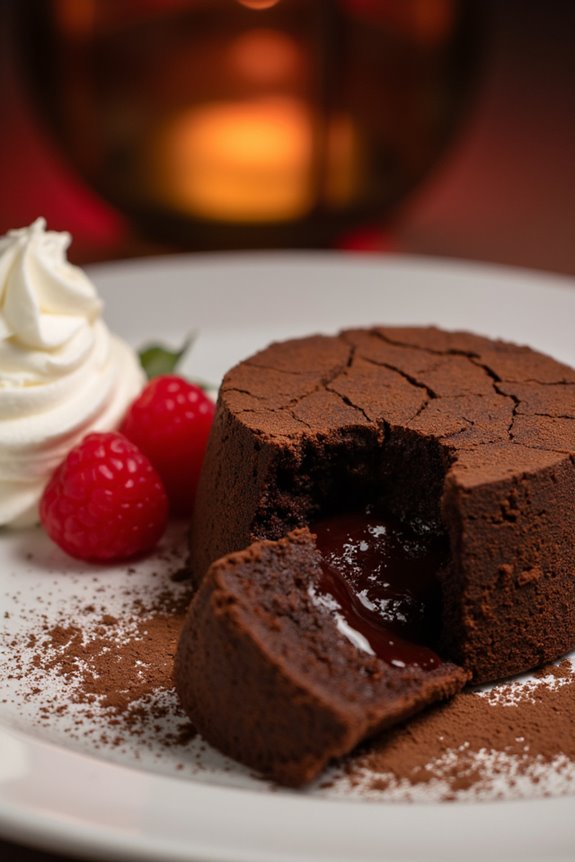
Indulge in the rich and decadent world of French desserts with a classic Chocolate Fondant, perfect for a romantic Valentine’s Day celebration. This dessert, also known as “Moelleux au Chocolat,” is characterized by its rich, molten center that oozes out as you cut into it. The outer layer is perfectly baked, offering a delightful contrast to the gooey chocolate interior. Ideal for chocolate lovers, the Chocolate Fondant is a luxurious treat that will surely impress your significant other or guests.
This dessert isn’t only a feast for the taste buds but also quite simple to prepare. With just a few high-quality ingredients and some careful attention to timing, you can create this irresistible dessert at home. Serve it with a scoop of vanilla ice cream or a dollop of whipped cream, and garnish with fresh berries for a touch of elegance. The following recipe is designed to serve 4-6 people, making it perfect for an intimate gathering or a special occasion.
Ingredients (Serves 4-6):
- 200g dark chocolate (70% cocoa)
- 200g unsalted butter, plus extra for greasing
- 200g caster sugar
- 4 large eggs
- 4 large egg yolks
- 200g plain flour
- A pinch of salt
- Cocoa powder, for dusting
Cooking Instructions:
- Preheat the Oven: Start by preheating your oven to 200°C (400°F). This guarantees that the oven is at the right temperature when you’re ready to bake the fondants.
- Prepare the Molds: Take six ramekins or small baking molds and generously butter them to prevent sticking. Dust them with cocoa powder, tapping out any excess. This step is essential for easy removal of the fondants once baked.
- Melt the Chocolate and Butter: In a heatproof bowl, combine the dark chocolate and butter. Place the bowl over a pan of simmering water, making sure the bowl doesn’t touch the water. Stir occasionally until the chocolate and butter are completely melted and smooth. Remove from heat and let it cool slightly.
- Mix the Eggs and Sugar: In a separate large bowl, whisk together the caster sugar, eggs, and egg yolks until the mixture is pale and slightly thickened. This process incorporates air, contributing to the fondant’s structure.
- Combine Mixtures: Gradually fold the melted chocolate mixture into the egg mixture, being careful not to knock out the air. Sieve the flour and salt into the mixture and gently fold until just combined.
- Fill the Molds: Divide the mixture evenly among the prepared ramekins, filling each about three-quarters full. This guarantees they’ve space to rise.
- Bake the Fondants: Place the ramekins on a baking tray and bake in the preheated oven for 10-12 minutes. The fondants should be firm on the outside but still soft and wobbly in the center.
- Serve Immediately: Once baked, let them rest for a minute before carefully turning them out onto individual plates. Serve immediately to enjoy the molten center, accompanied by ice cream or whipped cream and garnished with fresh berries, if desired.
Extra Tips:
To guarantee the perfect molten center, it’s essential not to overbake the fondants. Keep a close eye on them during the last few minutes of baking.
You can prepare the fondant mixture a day in advance and keep it in the fridge until you’re ready to bake. Just make sure to bring it to room temperature before baking.
Additionally, using high-quality chocolate will greatly enhance the flavor and texture of your dessert, providing a richer and more luxurious experience.
Profiteroles With Chocolate Sauce
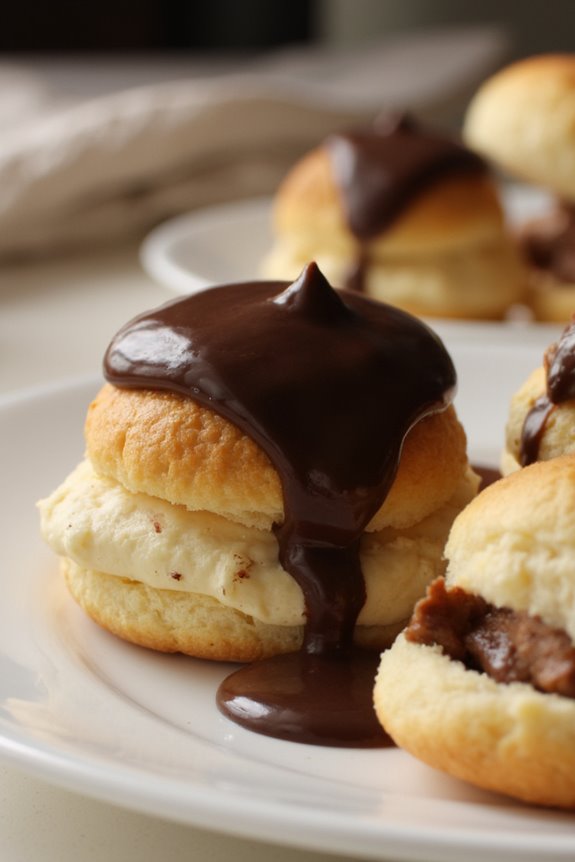
Profiteroles with Chocolate Sauce are a classic French dessert that’s sure to impress your loved ones on Valentine’s Day. These light and airy choux pastry puffs are filled with a rich, creamy filling and drenched in a luscious chocolate sauce. The combination of textures and flavors is truly divine, making it a perfect ending to a romantic meal.
Making profiteroles may seem intimidating, but with a little patience and attention to detail, you can create this elegant dessert at home. The key is to guarantee that the choux pastry is light and crisp, and the filling is smooth and flavorful. Paired with a decadent chocolate sauce, these profiteroles will surely be the highlight of your Valentine’s celebration.
Ingredients for 4-6 servings:
- 1/2 cup (1 stick) unsalted butter
- 1 cup water
- 1 cup all-purpose flour
- 4 large eggs
- 1/4 teaspoon salt
- 1 cup heavy cream
- 2 tablespoons powdered sugar
- 1 teaspoon vanilla extract
- 1 cup semisweet chocolate chips
- 1/2 cup heavy cream (for the chocolate sauce)
Cooking Instructions:
- Prepare the Choux Pastry: Preheat your oven to 425°F (220°C). In a medium saucepan, combine the water, butter, and salt. Heat over medium-high heat until the butter melts and the mixture comes to a rolling boil. Remove from heat, add the flour all at once, and stir vigorously with a wooden spoon until the mixture forms a ball and pulls away from the sides of the pan.
- Incorporate the Eggs: Allow the dough to cool slightly, then add the eggs one at a time, beating well after each addition until the dough is smooth and glossy. This can be done by hand or with an electric mixer.
- Shape the Profiteroles: Transfer the dough to a piping bag fitted with a large round tip. Pipe small mounds (about 1 1/2 inches wide) onto a baking sheet lined with parchment paper, spacing them about 2 inches apart.
- Bake the Profiteroles: Bake in the preheated oven for 20-25 minutes, or until puffed and golden brown. Don’t open the oven door during baking, as this could cause the profiteroles to deflate. Once baked, remove from the oven and let cool completely on a wire rack.
- Prepare the Filling: In a mixing bowl, whip the heavy cream with the powdered sugar and vanilla extract until soft peaks form. Transfer the whipped cream to a clean piping bag with a small tip.
- Fill the Profiteroles: Once cooled, use a sharp knife to make a small hole in the bottom of each profiterole. Pipe the whipped cream into the center until filled.
- Make the Chocolate Sauce: In a small saucepan, heat the 1/2 cup of heavy cream over medium heat until just simmering. Remove from heat and add the chocolate chips, stirring until smooth and fully melted.
- Serve: Arrange the filled profiteroles on a serving plate and drizzle generously with the warm chocolate sauce. Serve immediately for the best texture and flavor.
Extra Tips:
To guarantee your profiteroles are perfectly puffed and crisp, make sure not to open the oven door while they’re baking.
If you prefer a different filling, you can substitute the whipped cream with pastry cream or ice cream for a more indulgent treat.
Additionally, the chocolate sauce can be made ahead of time and gently reheated before serving.
Store any leftover profiteroles in an airtight container in the refrigerator for up to two days, but note that they’re best enjoyed fresh.
Lemon Madeleines
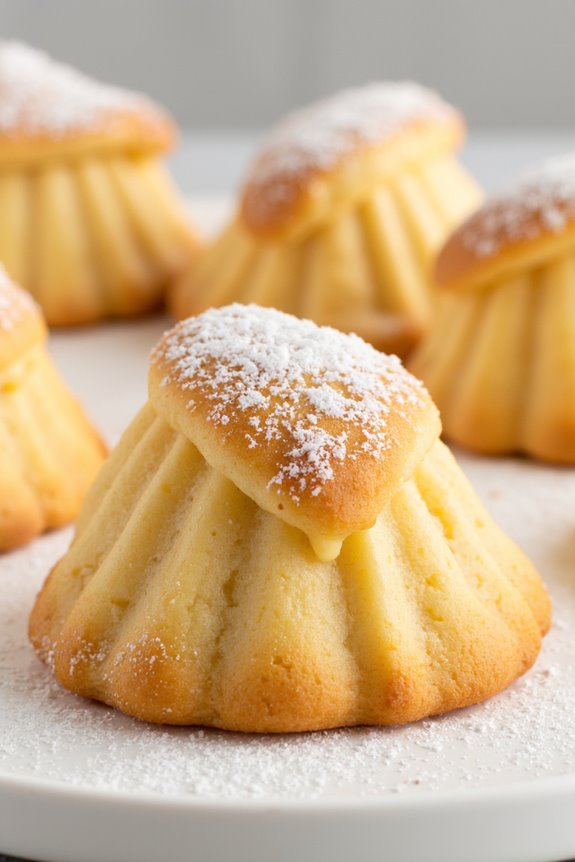
Lemon Madeleines are delicate shell-shaped French cakes, known for their light, buttery texture and a hint of citrus from the lemon zest. These petite treats are perfect for a romantic Valentine’s Day dessert, offering a burst of fresh flavor that complements a variety of other sweet delights.
They’re best served fresh out of the oven with a dusting of powdered sugar or a light glaze, making them an elegant addition to any dessert table.
Crafting these delightful madeleines requires a bit of attention to detail, particularly when it comes to achieving that classic hump on the back of each cake. The key lies in chilling the batter before baking, allowing the exterior to set quickly in the oven while the interior remains soft and tender.
With a few simple ingredients and a little patience, you can create these charming French pastries to impress your loved ones.
Ingredients for Lemon Madeleines (serves 4-6):
- 2 large eggs
- 2/3 cup granulated sugar
- 1 teaspoon pure vanilla extract
- 1 tablespoon lemon zest
- 1 cup all-purpose flour
- 1 teaspoon baking powder
- 1/4 teaspoon salt
- 1/2 cup unsalted butter, melted and cooled
- Powdered sugar, for dusting (optional)
Cooking Instructions:
- Prepare the Batter: In a medium bowl, whisk together the eggs and granulated sugar until the mixture is pale and thick, about 5 minutes. Add the vanilla extract and lemon zest, mixing until combined.
- Combine Dry Ingredients: In a separate bowl, sift together the flour, baking powder, and salt. Gently fold these dry ingredients into the egg mixture, being careful not to overmix.
- Add Butter: Gradually incorporate the melted butter into the batter, folding gently until fully combined. Cover the bowl with plastic wrap and refrigerate for at least 1 hour, or until the batter is chilled.
- Preheat and Prepare Molds: Preheat your oven to 375°F (190°C). Lightly grease a madeleine pan with butter or non-stick spray, making sure all crevices are coated.
- Fill the Molds: Spoon the chilled batter into each madeleine mold, filling them about 3/4 full. This allows room for the batter to expand and rise.
- Bake: Place the madeleine pan in the oven and bake for about 10-12 minutes, or until the edges are golden brown and the signature hump has formed on the back.
- Cool and Serve: Remove the pan from the oven and let the madeleines cool for a few minutes before gently removing them from the molds. Dust with powdered sugar if desired and serve warm.
Extra Tips:
To achieve the best results, verify that the batter is adequately chilled before baking; this helps create the iconic madeleine hump.
If you don’t have a madeleine pan, you can use mini muffin tins, though the shape will be different. For added flavor, consider drizzling the cooled madeleines with a simple lemon glaze made from powdered sugar and lemon juice.
Strawberry Clafoutis
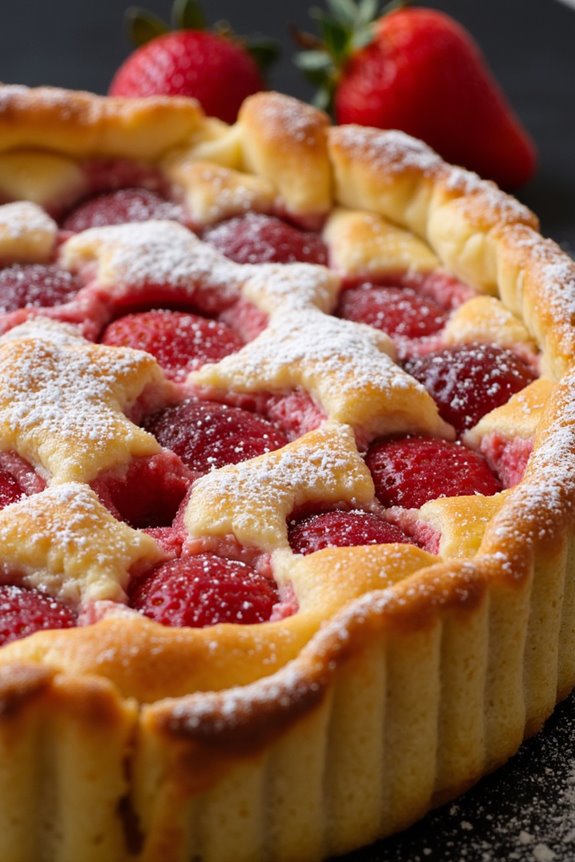
The dish is easy to prepare, making it a great choice for a homemade romantic dinner. The batter is similar to that of a pancake or crepe, and when baked with fresh strawberries, it creates a fluffy, aromatic experience that’s both comforting and indulgent.
Served warm, a Strawberry Clafoutis can be the perfect end to a romantic meal, offering both a visual and taste delight.
Ingredients for 4-6 servings:
- 1 cup fresh strawberries, hulled and halved
- 3 large eggs
- 1 cup whole milk
- 1/2 cup all-purpose flour
- 1/2 cup granulated sugar
- 1 teaspoon vanilla extract
- 1/4 teaspoon salt
- 2 tablespoons unsalted butter, melted
- Powdered sugar for dusting (optional)
Cooking Instructions:
- Preheat the Oven: Begin by preheating your oven to 350°F (175°C). This guarantees that your clafoutis bakes evenly and achieves the right texture.
- Prepare the Baking Dish: Butter a 9-inch pie dish or a similar baking dish to prevent the clafoutis from sticking. Arrange the halved strawberries at the bottom of the dish, distributing them evenly.
- Make the Batter: In a mixing bowl, whisk together the eggs and granulated sugar until the mixture is pale and frothy. Add the milk, vanilla extract, and melted butter, and whisk again until well combined.
- Incorporate the Dry Ingredients: Gradually add the flour and salt to the wet ingredients, whisking continuously to prevent lumps. The batter should be smooth and slightly runny.
- Assemble the Clafoutis: Pour the batter over the strawberries in the prepared dish, ensuring the fruit is evenly covered with the batter.
- Bake the Clafoutis: Place the dish in the preheated oven and bake for 35-40 minutes, or until the clafoutis is puffed, golden brown, and set in the center. A toothpick inserted should come out clean.
- Cool and Serve: Allow the clafoutis to cool slightly before dusting with powdered sugar. Serve warm, either on its own or with a scoop of vanilla ice cream or a dollop of whipped cream.
Extra Tips:
For the best results, use ripe, juicy strawberries to bring out the full flavor of the dessert. If strawberries are out of season, consider using frozen strawberries; just be sure to thaw and drain them well before use.
Additionally, for a different flavor profile, you can add a touch of almond extract to the batter or sprinkle sliced almonds over the top before baking.
Remember that clafoutis is best enjoyed fresh out of the oven, so plan to serve it shortly after baking for the ultimate romantic dessert experience.
Macarons

Macarons are a quintessentially French dessert that have become a symbol of elegance and romance. These delicate, colorful meringue-based cookies are often filled with a variety of creamy fillings, making them perfect for a romantic Valentine’s Day treat. Light and crisp on the outside with a chewy center, macarons are a delightful combination of texture and flavor.
While they may seem intimidating to make, with careful attention to detail and patience, you can create these beautiful confections in your own kitchen. This recipe will guide you through making classic French macarons with a luscious chocolate ganache filling, perfect for sharing with a loved one. With a serving size of 4-6 people, these macarons are sure to impress at your Valentine’s celebration.
The key to successful macarons lies in precision and timing, so be certain to follow the instructions closely for the best results.
Ingredients:
*For the Macaron Shells:*
- 90g almond flour
- 90g powdered sugar
- 70g egg whites (about 2 large eggs)
- 70g granulated sugar
- 1/4 tsp cream of tartar
- 1/2 tsp vanilla extract
- A few drops of red food coloring (optional)
For the Chocolate Ganache Filling:
- 100g dark chocolate, finely chopped
- 100ml heavy cream
- 20g unsalted butter
Instructions:
- Prepare the Dry Ingredients:
- Sift together the almond flour and powdered sugar into a large mixing bowl. This guarantees a smooth and lump-free batter, which is essential for the perfect macaron texture.
- Make the Meringue:
- In a clean, dry bowl, beat the egg whites on medium speed until foamy. Add the cream of tartar, then gradually incorporate the granulated sugar. Increase the speed to high and beat until stiff peaks form. Add the vanilla extract and food coloring, if using, and mix until just combined.
- Combine Ingredients:
- Gently fold the sifted dry ingredients into the meringue using a spatula. Be careful not to deflate the meringue. The batter should flow like lava, and when you lift the spatula, it should form a thick ribbon that slowly blends back into the batter.
- Pipe the Macaron Shells:
- Transfer the batter to a piping bag fitted with a round tip. Pipe small, even circles onto a baking sheet lined with parchment paper. Tap the baking sheet on the counter a few times to release any air bubbles.
- Rest the Macarons:
- Allow the piped macarons to rest at room temperature for 30-60 minutes, or until they form a skin. This is essential for developing the classic macaron “feet.”
- Bake:
- Preheat the oven to 300°F (150°C). Bake the macarons for 15-18 minutes, rotating the pan halfway through. The shells should be firm and not sticky when touched.
- Prepare the Ganache Filling:
- Heat the heavy cream in a small saucepan until it simmers. Pour over the chopped dark chocolate and let sit for a minute. Stir until the chocolate is melted and smooth. Add the butter and stir until combined. Allow the ganache to cool and thicken slightly.
- Assemble the Macarons:
- Pair the macaron shells by size. Pipe a small amount of ganache onto the flat side of one shell and gently press another shell on top to create a sandwich.
Extra Tips:
When making macarons, it’s important to measure your ingredients by weight for accuracy. The consistency of the batter is essential, so be gentle when folding the dry ingredients into the meringue.
If you’re new to macarons, consider practicing one or two batches to get a feel for the macaronage process. Additionally, humidity can affect macaron shells, so try to work in a dry environment and avoid making them on rainy days.
Don’t be discouraged if your first attempt isn’t perfect; macarons take practice, but the effort is well worth the reward!
Cherry Galette
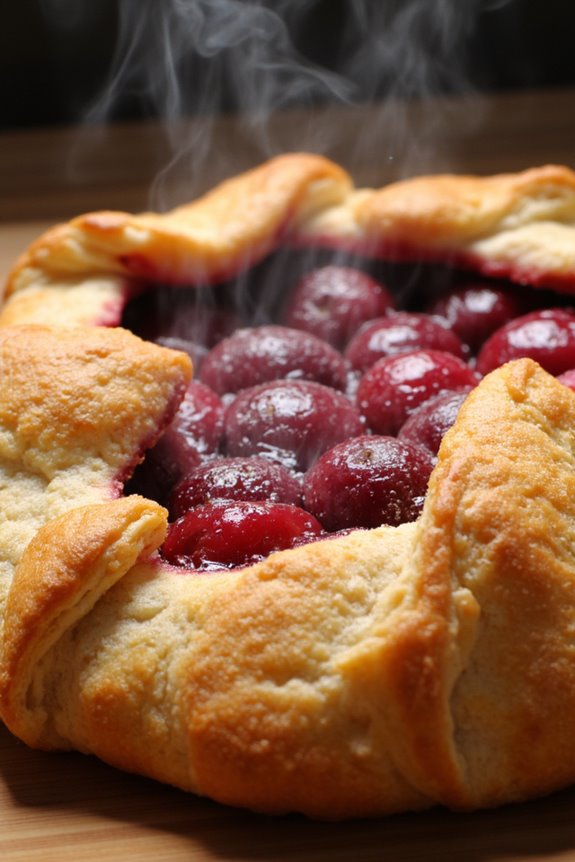
Indulge in the rustic charm of a Cherry Galette, a delightful French dessert that’s perfect for a romantic Valentine’s Day treat. This free-form tart features a buttery, flaky crust encasing a luscious filling of sweet cherries, offering a harmonious blend of flavors and textures. The beauty of a galette lies in its simplicity and rustic appeal; it’s less formal than a pie but equally satisfying.
With its vibrant colors and irresistible aroma, a Cherry Galette is sure to impress your loved one on this special occasion. This dessert requires only a few ingredients and minimal preparation time, making it an ideal choice for a romantic dinner at home. The tartness of the cherries combined with a hint of sweetness creates a perfectly balanced flavor profile.
When served warm, perhaps with a scoop of vanilla ice cream, the Cherry Galette becomes a truly heavenly dessert. Whether you’re an experienced baker or a beginner, this recipe is straightforward and rewarding, guaranteeing a delightful culinary experience.
Ingredients for 4-6 servings:
- 2 cups fresh or frozen cherries, pitted
- 1/3 cup granulated sugar
- 1 tablespoon cornstarch
- 1 teaspoon lemon juice
- 1 teaspoon vanilla extract
- 1/4 teaspoon almond extract
- 1 pre-made pie crust or homemade pastry dough
- 1 egg, beaten (for egg wash)
- 1 tablespoon coarse sugar (for sprinkling)
Cooking Instructions:
- Prepare the Cherries: In a medium-sized bowl, combine the pitted cherries, granulated sugar, cornstarch, lemon juice, vanilla extract, and almond extract. Stir gently until the cherries are evenly coated, and set aside for about 10 minutes to allow the flavors to meld.
- Roll Out the Dough: On a lightly floured surface, roll out the pie crust or pastry dough into a large circle, about 12 inches in diameter. Transfer the dough onto a parchment-lined baking sheet.
- Assemble the Galette: Spoon the cherry mixture onto the center of the dough, leaving a 2-inch border around the edges. Fold the edges of the dough over the cherries, pleating as needed to create a rustic edge. Be sure to leave the center of the galette open to expose the cherries.
- Apply Egg Wash: Using a pastry brush, apply the beaten egg onto the folded edges of the dough. This will give the crust a beautiful golden color when baked.
- Sprinkle with Sugar: Sprinkle coarse sugar over the egg-washed edges to add a touch of sweetness and an appealing crunch.
- Bake the Galette: Preheat your oven to 400°F (200°C). Place the galette in the oven and bake for 25-30 minutes, or until the crust is golden brown and the cherry filling is bubbling.
- Cool and Serve: Allow the galette to cool slightly on the baking sheet before slicing. Serve warm, optionally with a scoop of vanilla ice cream or a dollop of whipped cream for an extra indulgent treat.
Extra Tips:
For the best results, use fresh, ripe cherries when they’re in season, as they provide the most vibrant flavor. If using frozen cherries, make sure to thaw and drain them thoroughly to prevent excess liquid from making the crust soggy.
When rolling out the dough, try to keep it as even as possible to guarantee uniform baking. If you prefer a slightly thicker crust, you can double the pie crust recipe or use two store-bought crusts stacked together. Finally, feel free to experiment with additional spices like cinnamon or nutmeg to add a warm, aromatic depth to your Cherry Galette.
Gateau Opéra
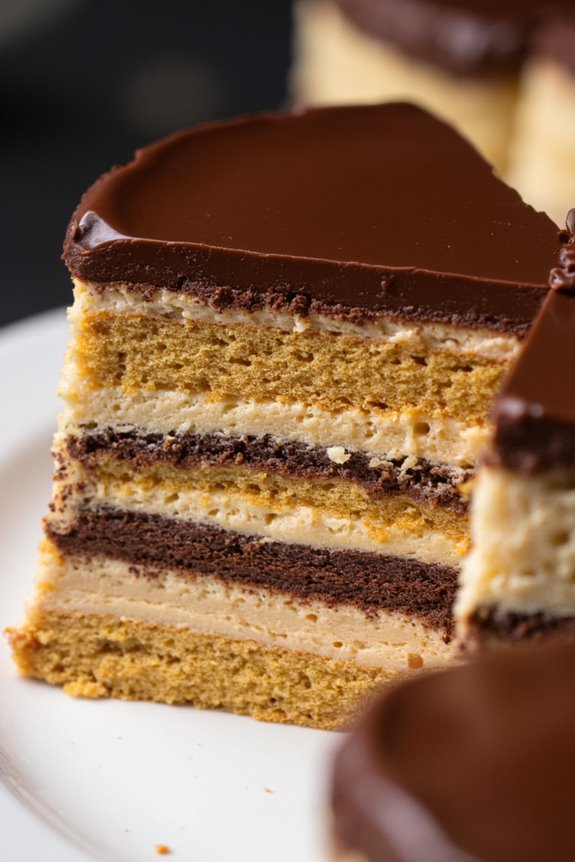
Gateau Opéra is an exquisite French dessert that layers almond sponge cake, coffee buttercream, and chocolate ganache to create a symphony of flavors and textures. This elegant cake is the perfect way to end a romantic Valentine’s Day meal, offering a luxurious combination of sweet and rich notes.
Traditionally, the Gateau Opéra is presented as a rectangular cake with a glossy chocolate glaze, a demonstration to both its sophisticated appearance and its decadent taste.
Creating a Gateau Opéra requires meticulous preparation and attention to detail, but the result is well worth the effort. The cake is composed of several layers: joconde sponge, coffee syrup, coffee buttercream, chocolate ganache, and a shiny chocolate glaze. Each component contributes to the overall harmony of flavors, with the coffee enhancing the chocolate and the almond sponge providing a delicate base.
This dessert is sure to impress your loved one and make your Valentine’s Day celebration truly memorable.
Ingredients (Serves 4-6):
- For the Joconde Sponge:
- 1 cup almond flour
- 1 cup confectioners’ sugar
- 3 large eggs
- 3 large egg whites
- 2 tablespoons granulated sugar
- 2 tablespoons all-purpose flour
- 2 tablespoons unsalted butter, melted
- For the Coffee Syrup:
- 1/2 cup water
- 1/3 cup granulated sugar
- 1 tablespoon instant coffee granules
- For the Coffee Buttercream:
- 1 cup unsalted butter, softened
- 1 1/2 cups confectioners’ sugar
- 1 tablespoon instant coffee granules dissolved in 1 tablespoon hot water
- 1 teaspoon vanilla extract
- For the Chocolate Ganache:
- 1 cup heavy cream
- 8 ounces semi-sweet chocolate, finely chopped
- For the Chocolate Glaze:
- 4 ounces semi-sweet chocolate, finely chopped
- 1/4 cup heavy cream
Instructions:
- Prepare the Joconde Sponge:
- Preheat your oven to 425°F (220°C). Line a baking sheet with parchment paper.
- In a large bowl, whisk together almond flour and confectioners’ sugar. Add the whole eggs one at a time and beat until the mixture is thick and pale.
- In a separate bowl, beat the egg whites to soft peaks. Gradually add granulated sugar and continue beating until stiff peaks form.
- Gently fold the egg whites into the almond mixture, then sift the all-purpose flour over it and fold in. Add melted butter and combine gently.
- Spread the batter evenly onto the prepared baking sheet and bake for 5-7 minutes, until golden brown. Allow to cool.
- Make the Coffee Syrup:
- In a small saucepan, combine water, granulated sugar, and instant coffee granules. Bring to a boil over medium heat, stirring until sugar dissolves. Remove from heat and let cool.
- Prepare the Coffee Buttercream:
- Beat softened butter until creamy. Gradually add confectioners’ sugar and continue beating until light and fluffy.
- Mix in the dissolved coffee and vanilla extract until fully incorporated.
- Make the Chocolate Ganache:
- Heat heavy cream in a saucepan until it just begins to simmer. Pour over the finely chopped chocolate in a bowl. Let sit for a minute, then stir until smooth. Allow to cool until slightly thickened.
- Assemble the Gateau Opéra:
- Cut the cooled joconde sponge into three equal rectangles. Place one sponge layer on a serving platter and brush generously with coffee syrup.
- Spread half of the coffee buttercream over the sponge. Place another sponge layer on top, brush with syrup, and spread with ganache.
- Add the final sponge layer, brush with syrup, and spread with the remaining buttercream. Chill to set.
- Apply the Chocolate Glaze:
- Heat heavy cream in a saucepan and pour over chopped chocolate. Stir until smooth. Let cool slightly, then pour over the chilled cake. Smooth the surface with a spatula and refrigerate until set.
Extra Tips:
When making Gateau Opéra, make certain each component is thoroughly cooled before assembling to maintain clean and distinct layers.
Additionally, using a long, sharp knife for cutting the sponge helps achieve even layers. For the best flavor, prepare this cake a day in advance to allow the flavors to meld together beautifully.
Finally, when spreading the chocolate glaze, work quickly and evenly to achieve a smooth, glossy finish.
Poire Belle Hélène
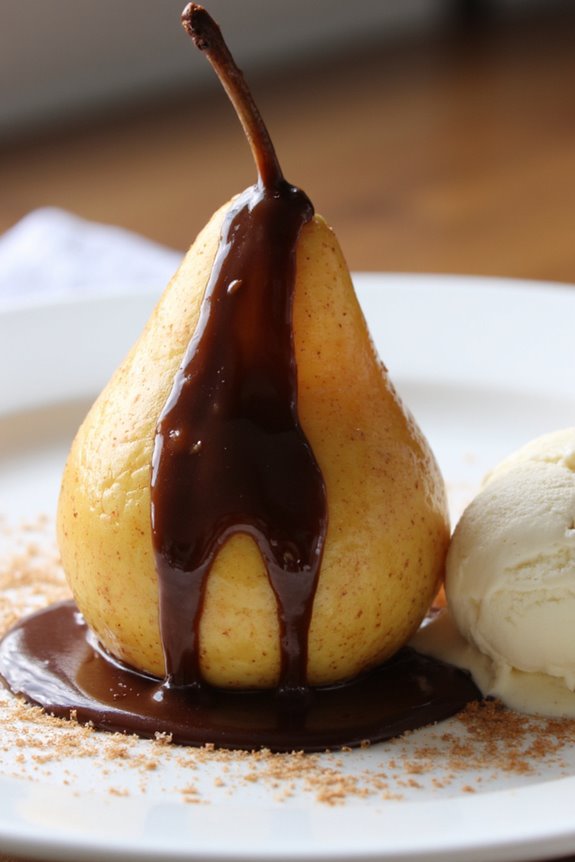
Poire Belle Hélène is a classic French dessert that beautifully combines the delicate flavors of poached pears with the richness of chocolate. Named after the operetta “La Belle Hélène” by Jacques Offenbach, this dessert is both elegant and simple, making it a perfect choice for a romantic Valentine’s dinner.
The dish is traditionally made by poaching pears in a sweet syrup, then serving them with a generous drizzle of chocolate sauce, alongside vanilla ice cream. The result is a harmonious blend of textures and flavors that create a delightful ending to any meal.
To prepare Poire Belle Hélène for 4-6 people, the pears are gently poached to perfection, guaranteeing they’re tender yet still hold their shape. The chocolate sauce, made with high-quality dark chocolate, is rich and smooth, perfectly complementing the sweetness of the pears. Served with a scoop of vanilla ice cream, this dessert is a timeless treat that can make any occasion feel special.
Whether you’re looking to impress a loved one or simply indulge in a classic French dessert, Poire Belle Hélène is sure to delight.
Ingredients for 4-6 servings:
- 4-6 ripe but firm pears, peeled and cored
- 750 ml water
- 300 g granulated sugar
- 1 vanilla bean, split and seeds scraped
- 200 g high-quality dark chocolate, chopped
- 100 ml heavy cream
- 1 tablespoon unsalted butter
- Vanilla ice cream, for serving
Cooking Instructions:
- Prepare the Poaching Liquid: In a large saucepan, combine the water, granulated sugar, and the vanilla bean with its seeds. Stir the mixture over medium heat until the sugar completely dissolves and the liquid begins to simmer.
- Poach the Pears: Carefully place the peeled and cored pears into the simmering poaching liquid. Confirm that the pears are fully submerged by adding a small plate on top if necessary. Let the pears poach gently for about 15-20 minutes or until they’re tender when pierced with a fork. Once done, remove the pears from the liquid and allow them to cool slightly.
- Prepare the Chocolate Sauce: In a medium saucepan, heat the heavy cream over medium heat until it just begins to simmer. Remove from heat and add the chopped dark chocolate. Allow it to sit for a minute, then stir until the chocolate is fully melted and smooth. Stir in the unsalted butter until the sauce is glossy.
- Assemble the Dessert: Place each poached pear on a serving plate. Drizzle generously with the warm chocolate sauce, letting it cascade down the sides. Serve immediately with a scoop of vanilla ice cream alongside.
Extra Tips:
When selecting pears, choose ones that are ripe but still firm to the touch to guarantee they hold their shape during poaching.
You can prepare the pears and chocolate sauce a few hours in advance, keeping them separate until ready to serve. Reheat the chocolate sauce gently over a low flame, stirring constantly to prevent it from burning.
For an added touch, consider garnishing with toasted almonds or a sprinkle of sea salt for a delightful contrast to the sweetness of the dessert.
Cannelés De Bordeaux
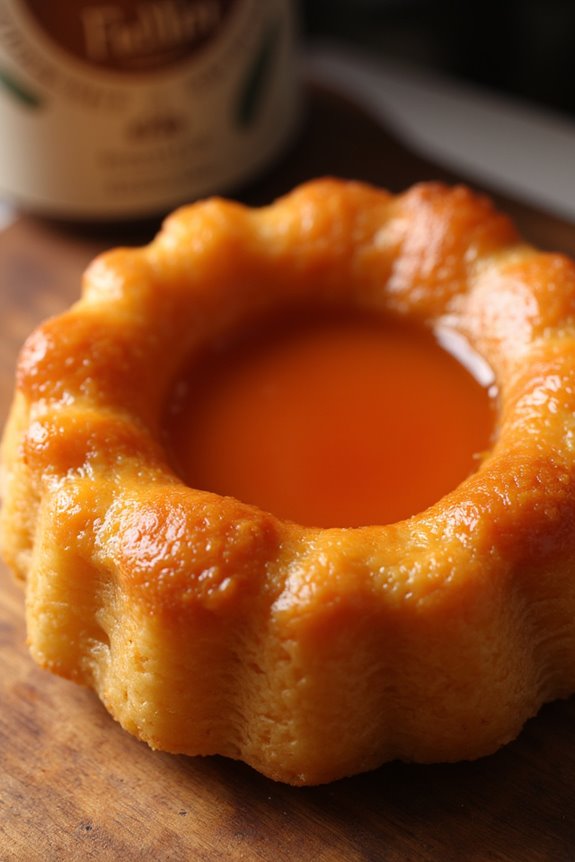
Cannelés De Bordeaux are a classic French pastry originating from the Bordeaux region, known for their crunchy caramelized crust and soft, custardy interior. These little cakes are traditionally flavored with vanilla and a hint of rum, making them a delightful treat to enjoy on a romantic Valentine’s Day.
The unique fluted shape of Cannelés is achieved by baking them in special copper molds, which contribute to the perfect texture contrast that these pastries are famous for.
The preparation of Cannelés requires some patience, as the batter needs to rest for at least 24 hours to achieve the characteristic flavor and texture. However, the wait is absolutely worth it when you bite into one of these golden-brown delights. Perfectly paired with a cup of coffee or a glass of dessert wine, Cannelés De Bordeaux are sure to impress your loved one with their elegant yet rustic charm.
Ingredients for 4-6 servings:
- 500 ml whole milk
- 50 g unsalted butter
- 1 vanilla bean, split and scraped
- 100 ml dark rum
- 100 g all-purpose flour
- 250 g granulated sugar
- 2 large eggs
- 2 large egg yolks
- A pinch of salt
Cooking Instructions:
- Infuse the Milk: In a medium saucepan, combine whole milk, unsalted butter, and the seeds of the vanilla bean along with the pod. Gently heat the mixture over medium heat until the butter is fully melted and the milk is infused with vanilla aroma. Remove from heat and allow it to cool slightly. Once cooled, add the dark rum and mix well.
- Prepare the Batter: In a large mixing bowl, whisk together all-purpose flour, granulated sugar, and a pinch of salt. In a separate bowl, lightly beat the eggs and egg yolks. Gradually add the eggs to the dry ingredients, stirring continuously to prevent lumps from forming. Slowly pour in the cooled milk mixture, stirring until a smooth batter is formed.
- Rest the Batter: Cover the bowl with plastic wrap and refrigerate the batter for at least 24 hours. This resting period is essential for developing the flavors and ensuring a smooth texture in the baked Cannelés.
- Preheat the Oven: Preheat your oven to 220°C (430°F). Meanwhile, generously butter the Cannelé molds, ensuring every crevice is coated to prevent sticking.
- Fill the Molds: Remove the batter from the refrigerator and give it a gentle stir. Pour the batter into the prepared molds, filling them about three-quarters full to allow for expansion during baking.
- Bake the Cannelés: Place the molds on a baking sheet and bake in the preheated oven for 15 minutes. Then, reduce the oven temperature to 180°C (350°F) and continue baking for an additional 45-50 minutes, or until the Cannelés are deep golden brown and have formed a crusty exterior.
- Cool and Serve: Carefully remove the Cannelés from the molds while still warm and place them on a wire rack to cool completely. Serve them fresh on their own or with a dusting of powdered sugar.
Extra Tips:
For ideal results, use traditional copper molds if available, as they conduct heat more evenly and help achieve the perfect crust. If you don’t have copper molds, silicone molds can be an alternative, but the texture might slightly differ.
Make sure to butter the molds generously to prevent sticking, and consider placing them on a preheated baking tray to enhance the crust development. Finally, the batter can be kept in the refrigerator for up to 48 hours, allowing you to plan your preparation in advance.
Chocolate Éclairs
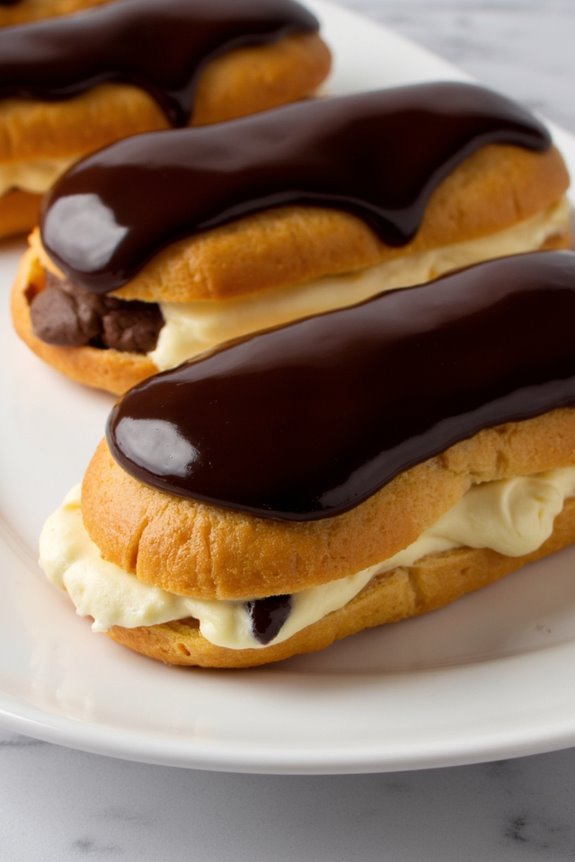
Indulge in the classic French pastry, Chocolate Éclairs, for a delightful romantic dessert this Valentine’s Day. These elegant pastries are made from light, airy choux pastry filled with rich, creamy pastry cream and topped with a glossy chocolate glaze. Perfect for impressing your special someone, these éclairs are a timeless symbol of French culinary artistry.
Whether you’re a seasoned baker or a novice in the kitchen, this recipe will guide you through each step to create a stunning dessert that looks as good as it tastes. The key to perfect éclairs lies in mastering the choux pastry, which puffs up beautifully in the oven to create a hollow center just waiting to be filled with luscious cream.
The combination of textures—from the crisp pastry shell to the smooth filling and luxurious chocolate topping—creates a dessert that’s both enchanting and delicious. With a few simple ingredients and a bit of patience, you’ll be able to whip up a batch of éclairs that will delight your loved ones and leave them craving more.
Ingredients (Serving Size: 4-6 people):
- For the Choux Pastry:
- 1/2 cup (120ml) water
- 1/2 cup (120ml) milk
- 1/2 cup (113g) unsalted butter
- 1 tablespoon granulated sugar
- 1/4 teaspoon salt
- 1 cup (125g) all-purpose flour
- 4 large eggs
- For the Pastry Cream:
- 2 cups (480ml) whole milk
- 1/2 cup (100g) granulated sugar
- 1 vanilla bean (or 1 teaspoon vanilla extract)
- 4 large egg yolks
- 1/4 cup (30g) cornstarch
- 2 tablespoons (28g) unsalted butter
- For the Chocolate Glaze:
- 4 ounces (115g) semi-sweet chocolate, chopped
- 1/2 cup (120ml) heavy cream
Cooking Instructions:
- Prepare the Choux Pastry:
- Preheat your oven to 400°F (200°C) and line a baking sheet with parchment paper.
- In a medium saucepan, combine water, milk, butter, sugar, and salt. Heat over medium heat until the mixture comes to a boil.
- Remove from heat and add flour all at once, stirring vigorously with a wooden spoon until the mixture forms a ball and pulls away from the sides of the pan.
- Return the pan to low heat and cook the dough for 1-2 minutes, stirring constantly to dry it out slightly.
- Transfer the dough to a mixing bowl and let it cool for a few minutes. Beat in eggs one at a time, making sure each is fully incorporated before adding the next. The dough should be smooth and glossy.
- Spoon the dough into a piping bag fitted with a large round tip and pipe 4-5 inch long strips onto the prepared baking sheet.
- Bake for 25-30 minutes until the éclairs are puffed and golden. Turn off the oven and let them cool inside with the door slightly ajar.
- Make the Pastry Cream:
- In a saucepan, heat milk and the vanilla bean (if using) over medium heat until simmering. Remove from heat and let it infuse.
- In a bowl, whisk together sugar, egg yolks, and cornstarch until smooth. Gradually whisk in the hot milk mixture.
- Return the mixture to the saucepan and cook over medium heat, whisking constantly until it thickens and boils. Boil for about 1 minute.
- Remove from heat, stir in butter, and vanilla extract (if using). Strain the pastry cream through a sieve if necessary for smoothness.
- Cover with plastic wrap directly on the surface and refrigerate until chilled.
- Prepare the Chocolate Glaze:
- Place chopped chocolate in a heatproof bowl.
- Heat cream in a saucepan until it simmers, then pour over the chocolate. Let it sit for a few minutes, then stir until smooth. Let the glaze cool slightly.
- Assemble the Éclairs:
- Once the éclairs are cool, use a small knife to make a small slit on the side of each éclair.
- Fill a piping bag fitted with a small tip with the chilled pastry cream. Pipe the cream into the éclairs through the slit.
- Dip the tops of the éclairs in the chocolate glaze or spread it with a spatula for a smooth finish. Allow the glaze to set before serving.
Extra Tips:
When preparing the choux pastry, make certain that the dough isn’t too hot when adding eggs; otherwise, the eggs might scramble. If the dough is too thick after adding all the eggs, you can add a little water to achieve the right consistency.
For the pastry cream, stirring constantly while cooking is essential to prevent lumps and guarantee a smooth texture. Finally, when glazing the éclairs, allow them to cool completely to prevent the glaze from running off. Enjoy these delightful Chocolate Éclairs with a chilled glass of Champagne for a truly romantic experience.