

When I think of Paris, I picture beautifully plated dishes, each bursting with the essence of French cuisine. Picture enjoying a classic ratatouille or a cheese and herb soufflé, right from your own kitchen. These vegetarian recipes bring a touch of Parisian elegance to your meals. They blend sophistication with warmth. Ready to explore these culinary delights that promise to elevate your dining experience?
Classic Ratatouille
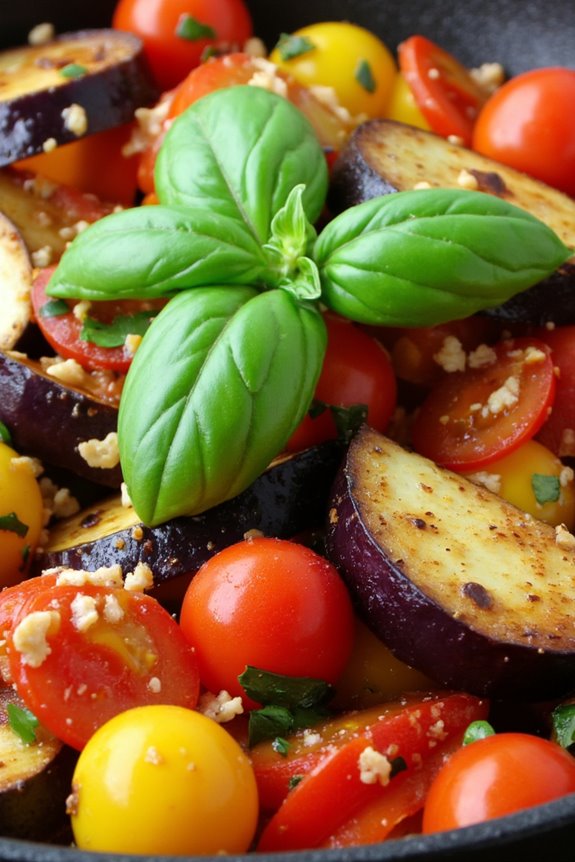
Ratatouille is a beloved classic from the Provence region of France, celebrated for its vibrant presentation and flavorful mix of fresh vegetables. It embodies the essence of French country cooking, utilizing simple ingredients that are brought to life with fragrant herbs and olive oil.
This vegetarian dish is as much a feast for the eyes as it’s for the palate, with its colorful array of zucchini, eggplant, bell peppers, and tomatoes. Perfect for a summer meal, this dish can be served as a main course or as a side dish, and it pairs wonderfully with crusty bread or over a bed of rice.
The key to a successful ratatouille is in the harmonious blend of its ingredients, each retaining its own texture and flavor while contributing to the dish’s overall richness. The vegetables are typically sautéed separately to guarantee they’re cooked to perfection, then combined to let their flavors meld together.
This recipe serves 4-6 people, making it ideal for a family dinner or a gathering with friends. For the best results, use the freshest vegetables you can find and take your time to let the flavors develop.
Ingredients:
- 2 medium eggplants
- 2 zucchini
- 1 red bell pepper
- 1 yellow bell pepper
- 1 large onion
- 4 ripe tomatoes
- 4 cloves of garlic
- 1/4 cup olive oil
- 1 teaspoon dried thyme
- 1 teaspoon dried oregano
- Salt and pepper to taste
- Fresh basil leaves for garnish
Cooking Instructions:
- Preparation: Start by washing all your vegetables thoroughly. Peel the eggplants and cut them into 1-inch cubes. Slice the zucchini into 1/4-inch rounds. Deseed and cut the bell peppers into thin strips. Dice the onion and mince the garlic cloves. Finally, chop the tomatoes into small cubes.
- Cook the Eggplants: Heat two tablespoons of olive oil in a large sauté pan over medium heat. Add the eggplant cubes and cook, stirring occasionally, until they’re golden brown and tender, about 8-10 minutes. Remove the eggplant from the pan and set aside.
- Sauté the Zucchini: In the same pan, add another tablespoon of olive oil and sauté the zucchini rounds until they’re lightly browned and tender, approximately 5-7 minutes. Remove and set aside with the eggplant.
- Cook the Peppers and Onion: Add the remaining olive oil to the pan and sauté the diced onion and bell pepper strips until the onion is translucent and the peppers are softened, about 8 minutes.
- Add Garlic and Tomatoes: Stir in the minced garlic and let it cook for about 1 minute until fragrant. Then, add the chopped tomatoes, thyme, oregano, salt, and pepper. Cook for another 10 minutes, stirring occasionally.
- Combine and Simmer: Return the eggplant and zucchini to the pan, gently mixing all the vegetables together. Lower the heat, cover the pan, and let the ratatouille simmer for about 20-30 minutes, allowing the vegetables to meld and the flavors to develop.
- Final Touch: Before serving, taste and adjust the seasoning if necessary. Garnish with fresh basil leaves for a touch of color and added freshness.
Extra Tips:
For an even more flavorful ratatouille, consider making it a day ahead. Allowing the dish to sit overnight in the refrigerator really enhances the flavors as they continue to blend and develop.
When reheating, gently warm it over low heat to avoid overcooking the vegetables. Additionally, feel free to experiment with different herbs, such as fresh thyme or rosemary, to suit your taste preferences.
Ratatouille is also quite versatile and can be served warm, at room temperature, or even cold as part of a summer picnic spread.
French Onion Soup Without the Beef

French Onion Soup is a classic French dish known for its rich flavors and comforting warmth. Traditionally made with beef stock, this vegetarian version retains all the savory depth and aromatic elegance, making it perfect for those who prefer plant-based meals. By using vegetable stock and a few clever ingredients, you can achieve a satisfying umami flavor that complements the sweet, caramelized onions.
This vegetarian French Onion Soup isn’t only delicious but also simple to make, requiring just a few ingredients and some patience as the onions slowly caramelize to perfection. Topped with toasted slices of baguette and melted cheese, this soup is a delightful starter or a light main course on a chilly day.
Ingredients for 4-6 Servings:
- 4 large yellow onions, thinly sliced
- 3 tablespoons unsalted butter
- 2 tablespoons olive oil
- 1 teaspoon salt
- 1 teaspoon sugar
- 2 cloves garlic, minced
- 1/2 cup dry white wine
- 6 cups vegetable stock
- 2 tablespoons all-purpose flour
- 1 teaspoon thyme leaves
- 1 bay leaf
- Salt and pepper to taste
- 1 baguette, sliced into 1-inch thick rounds
- 2 cups grated Gruyère cheese
Cooking Instructions:
- Caramelize the Onions: In a large pot or Dutch oven, melt the butter and olive oil over medium heat. Add the sliced onions and stir to coat them in the fat. Sprinkle with salt and sugar, which will help with the caramelization process. Cook, stirring occasionally, for about 25-30 minutes, until the onions are soft and a deep golden brown.
- Add Garlic and Wine: Add the minced garlic to the pot and cook for 1-2 minutes until fragrant. Pour in the white wine and scrape up any browned bits from the bottom of the pot. Allow the wine to reduce by half, intensifying its flavor.
- Thicken the Soup: Sprinkle the flour over the caramelized onions and stir well to coat. Cook for another 2 minutes to remove the raw flour taste. This will help thicken the soup slightly.
- Simmer the Soup: Gradually add the vegetable stock while stirring to make certain there are no lumps. Add the thyme and bay leaf, then bring the soup to a gentle simmer. Let it cook uncovered for 20-25 minutes, allowing the flavors to meld together. Season with salt and pepper to taste.
- Prepare the Baguette and Cheese: While the soup is simmering, preheat your oven’s broiler. Place the baguette slices on a baking sheet and toast them under the broiler for 1-2 minutes on each side until golden brown. Remove from the oven and top each slice with a generous amount of Gruyère cheese.
- Finish the Soup: Remove the bay leaf from the soup. Ladle the soup into oven-safe bowls, place the cheese-topped baguette slices on top, and broil for another 3-4 minutes, or until the cheese is bubbly and lightly browned.
Extra Tips:
For a deeper flavor, consider using a combination of onions like yellow, red, and shallots. This adds complexity to the soup’s flavor profile. If you prefer a vegan version, use vegan butter and cheese substitutes.
Adjust the seasoning as needed, and don’t rush the caramelization process as it’s key to developing the soup’s rich taste. Enjoy your warm, comforting bowl of vegetarian French Onion Soup with a side salad or simply on its own.
Vegetable Tart Provencal

The Vegetable Tart Provencal is a delightful and colorful dish that brings the essence of the French countryside to your table. This vibrant tart combines a flaky, buttery crust with a rich, savory filling of fresh vegetables and aromatic herbs, capturing the flavors of Provence. It makes for a perfect main course or a stunning appetizer, showcasing the simplicity and elegance of French vegetarian cuisine.
Whether you’re serving it at a dinner party or enjoying it as a light lunch, this tart is bound to impress with its harmonious blend of textures and flavors.
A key to achieving the perfect Vegetable Tart Provencal is to use fresh, high-quality ingredients. Seasonal vegetables such as zucchini, bell peppers, and tomatoes are carefully arranged atop a creamy base of ricotta cheese and herbes de Provence. The tart is then baked to golden perfection, resulting in a dish that’s as visually appealing as it’s delicious.
The combination of the crispy crust and the tender, flavorful vegetables creates a symphony of tastes that will transport you to the sunny fields of Southern France.
Ingredients (Serves 4-6):
- 1 pre-made puff pastry sheet
- 1 tablespoon olive oil
- 1 medium zucchini, sliced
- 1 red bell pepper, sliced
- 1 yellow bell pepper, sliced
- 2 medium tomatoes, sliced
- 1 cup ricotta cheese
- 1/4 cup grated Parmesan cheese
- 1 tablespoon herbes de Provence
- Salt and pepper to taste
- 1 egg, beaten (for egg wash)
- Fresh basil leaves for garnish
Cooking Instructions:
- Preheat the Oven: Start by preheating your oven to 400°F (200°C). This guarantees that the oven is hot enough to cook the tart evenly.
- Prepare the Puff Pastry: Roll out the pre-made puff pastry sheet on a lightly floured surface to fit your tart pan. Gently press it into the pan and trim any excess dough from the edges. Prick the base of the pastry with a fork to prevent it from puffing up during baking.
- Prepare the Ricotta Mixture: In a medium bowl, combine the ricotta cheese, Parmesan cheese, herbes de Provence, salt, and pepper. Mix well until smooth and creamy. Spread this mixture evenly over the base of the puff pastry.
- Arrange the Vegetables: Layer the sliced zucchini, red bell pepper, yellow bell pepper, and tomatoes over the ricotta mixture. Arrange them in an overlapping pattern for a visually appealing presentation.
- Brush with Oil and Egg Wash: Drizzle olive oil over the vegetables. Brush the exposed edges of the puff pastry with the beaten egg to give the tart a beautiful golden color when baked.
- Bake the Tart: Place the tart in the preheated oven and bake for 25-30 minutes, or until the pastry is golden brown and the vegetables are tender.
- Garnish and Serve: Once baked, remove the tart from the oven and let it cool slightly. Garnish with fresh basil leaves before slicing and serving.
Extra Tips:
For the best results, use fresh, organic vegetables whenever possible. They not only enhance the flavor but also retain their vibrant colors.
If you prefer a spicier taste, add a pinch of red pepper flakes to the ricotta mixture. Additionally, ascertain that the puff pastry is kept cold until it’s ready to be used, as this helps in achieving a crispier crust.
This tart can be served warm or at room temperature, making it a versatile dish for any occasion. Enjoy your Vegetable Tart Provencal with a glass of chilled white wine for a complete Provencal experience.
Cheese and Herb Soufflé

The Cheese and Herb Soufflé is a classic French vegetarian dish that showcases the delicate art of soufflé-making. Light, airy, and bursting with flavors, this dish combines the richness of cheese with the freshness of herbs to create a delightful culinary experience. Perfect as a main course or a sophisticated side dish, the soufflé is renowned for its impressive rise and its elegant presentation.
Attaining the perfect soufflé requires attention to detail, but with the right technique, it can be a stunning centerpiece for any meal. Soufflés are made by folding beaten egg whites into a flavorful base, in this case, a mixture of cheese and herbs. The base is typically a béchamel or Mornay sauce, which provides a creamy, rich foundation for the dish.
The key to a successful soufflé lies in properly whipping the egg whites to stiff peaks and folding them gently into the base to retain as much air as possible. When baked, the soufflé rises dramatically, creating a golden, puffed exterior with a soft, delicious interior. This Cheese and Herb Soufflé recipe serves 4-6 people, making it ideal for family gatherings or intimate dinner parties.
Ingredients (serves 4-6):
- 4 tablespoons unsalted butter
- 1/4 cup all-purpose flour
- 1 1/4 cups whole milk
- 1/4 teaspoon salt
- 1/4 teaspoon freshly ground black pepper
- A pinch of ground nutmeg
- 5 large eggs, separated
- 1 cup grated Gruyère cheese
- 1/2 cup grated Parmesan cheese
- 2 tablespoons chopped fresh chives
- 2 tablespoons chopped fresh parsley
- 2 tablespoons chopped fresh thyme
- Butter, for greasing the soufflé dish
- Grated Parmesan cheese, for dusting the soufflé dish
Cooking Instructions:
- Prepare the Oven and Dish: Preheat your oven to 375°F (190°C). Grease a 2-quart soufflé dish with butter and dust the inside with grated Parmesan cheese to create a non-stick surface for the soufflé to climb.
- Make the Béchamel Sauce: In a medium saucepan, melt the butter over medium heat. Add the flour and whisk constantly for about 2 minutes until it forms a smooth paste and starts to bubble. Gradually whisk in the milk, guaranteeing there are no lumps, and bring the mixture to a simmer. Cook until thickened, about 3-4 minutes, stirring frequently. Remove from heat and season with salt, pepper, and nutmeg.
- Prepare the Soufflé Base: Transfer the béchamel sauce to a large mixing bowl. Stir in the egg yolks one at a time, ensuring they’re fully incorporated. Add the Gruyère and Parmesan cheeses, along with the chopped chives, parsley, and thyme. Mix until well combined.
- Beat the Egg Whites: In a separate clean and dry bowl, beat the egg whites with an electric mixer until stiff peaks form. The egg whites should be glossy and hold their shape when the beaters are lifted.
- Fold the Whites into the Base: Gently fold one-third of the beaten egg whites into the cheese and herb mixture to lighten it. Carefully fold in the remaining egg whites, using a spatula and a gentle cutting and folding motion to avoid deflating the mixture.
- Fill the Soufflé Dish: Carefully spoon the mixture into the prepared soufflé dish, filling it close to the top. Run your thumb around the inside edge of the dish to help the soufflé rise evenly.
- Bake the Soufflé: Place the soufflé dish on a baking sheet and bake in the preheated oven for 25-30 minutes, or until the soufflé is puffed and golden brown on top. Avoid opening the oven door during baking to prevent the soufflé from collapsing.
Extra Tips:
To attain a perfect rise, guarantee that all your ingredients are at room temperature before starting. When beating the egg whites, make sure there are no traces of yolk in them, as this can prevent them from reaching stiff peaks.
Additionally, when folding the egg whites into the base, be gentle to keep as much air as possible in the mixture. Serve the soufflé immediately after it comes out of the oven for the best texture and presentation, as it will start to deflate after a few minutes. Enjoy this elegant dish with a simple green salad or steamed vegetables for a well-rounded meal.
Mushroom and Leek Quiche

Mushroom and Leek Quiche is a classic French vegetarian dish that combines the earthy flavors of mushrooms with the delicate sweetness of leeks, all encased in a buttery, flaky pastry crust. This quiche is perfect for brunch, lunch, or a light dinner and can be served either warm or at room temperature.
The creamy filling is made with eggs and cream, which provides a rich and satisfying texture, while the addition of Gruyère cheese adds a hint of nutty flavor that complements the vegetables beautifully.
This recipe serves 4-6 people and is perfect for a family meal or a gathering with friends. The quiche can be prepared ahead of time, making it a convenient option for hosting. While traditionally made with a homemade pastry crust, you can use a store-bought crust to save time without sacrificing flavor.
The combination of mushrooms and leeks is a proven favorite, and this quiche is sure to become a staple in your vegetarian recipe repertoire.
Ingredients:
- 1 ready-made 9-inch pie crust (or homemade if preferred)
- 2 tablespoons olive oil
- 1 cup leeks, cleaned and sliced
- 2 cups mushrooms, sliced
- 3 large eggs
- 1 cup heavy cream
- 1 cup Gruyère cheese, grated
- Salt and pepper to taste
- 1/4 teaspoon nutmeg (optional)
Instructions:
1. Prepare the Crust: Preheat your oven to 375°F (190°C). Roll out the pie crust and fit it into a 9-inch quiche or pie pan. Trim any excess dough from the edges and prick the bottom with a fork.
Blind bake the crust by lining it with parchment paper and filling it with pie weights or dried beans. Bake for 10 minutes, then remove the weights and parchment, and bake for an additional 5 minutes. Set aside to cool.
2. Cook the Vegetables: Heat the olive oil in a large skillet over medium heat. Add the sliced leeks and cook for about 5 minutes until they soften.
Add the mushrooms and continue to cook for another 5-7 minutes until they release moisture and begin to brown. Season with salt and pepper, then remove from heat and allow to cool slightly.
3. Prepare the Filling: In a large mixing bowl, whisk together the eggs and heavy cream until smooth. Stir in the grated Gruyère cheese and season with salt, pepper, and a pinch of nutmeg if using.
4. Assemble the Quiche: Spread the cooked leeks and mushrooms evenly across the bottom of the prepared crust. Pour the egg and cream mixture over the top, making sure that it covers the vegetables evenly.
5. Bake the Quiche: Place the quiche in the preheated oven and bake for 35-40 minutes, or until the filling is set and the top is lightly golden brown.
Remove from the oven and allow to cool for at least 10 minutes before slicing and serving.
Extra Tips: To guarantee the best texture, make sure the vegetables are well-cooked and free of excess moisture before adding them to the quiche. This will prevent a soggy bottom and guarantee a firm filling.
If you prefer a stronger flavor, try adding a sprinkle of fresh herbs like thyme or chives to the filling. Additionally, the quiche can be stored in the refrigerator for up to three days and can be reheated gently in the oven or enjoyed cold.
Elegant Lentil Salad With Dijon Vinaigrette
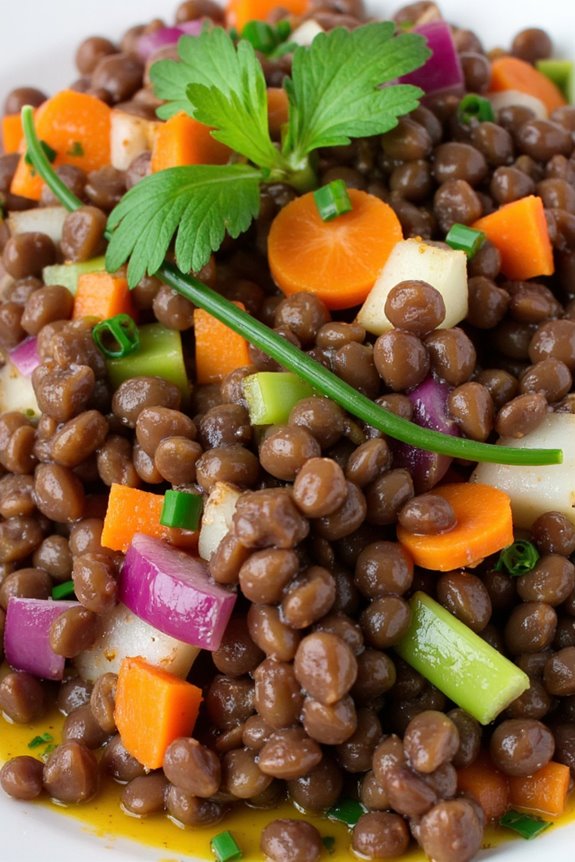
Elegant Lentil Salad With Dijon Vinaigrette is a delightful French-inspired vegetarian dish that combines the earthy flavors of lentils with a tangy and robust vinaigrette. This salad is perfect as a light main course or a sophisticated side dish, offering a balance of textures and tastes that will surely impress your guests. The Dijon vinaigrette adds a classic French touch, giving the salad a zesty kick that complements the hearty lentils beautifully.
This recipe isn’t only delicious but also easy to prepare, making it an excellent choice for both casual dinners and elegant gatherings. It features a combination of fresh vegetables and herbs, which provide a revitalizing contrast to the protein-rich lentils. The result is a nutritious and satisfying dish that can be enjoyed year-round. With a serving size suitable for 4-6 people, this salad is perfect for sharing with friends and family.
Ingredients:
- 1 1/2 cups green or brown lentils
- 4 cups water
- 1 bay leaf
- 1 small red onion, finely diced
- 1 carrot, peeled and finely diced
- 1 celery stalk, finely diced
- 1/4 cup fresh parsley, chopped
- 1/4 cup fresh chives, chopped
- 1/4 cup olive oil
- 3 tablespoons Dijon mustard
- 2 tablespoons red wine vinegar
- Salt and freshly ground black pepper, to taste
Cooking Instructions:
- Prepare the Lentils: Rinse the lentils under cold water to remove any debris. In a large pot, combine the lentils, water, and bay leaf. Bring to a boil over medium-high heat, then reduce the heat to low and simmer for about 20-25 minutes, or until the lentils are tender but not mushy. Drain and discard the bay leaf, then let the lentils cool.
- Chop the Vegetables: While the lentils are cooking, finely dice the red onion, carrot, and celery. Chop the parsley and chives and set them aside.
- Make the Vinaigrette: In a small bowl, whisk together the olive oil, Dijon mustard, and red wine vinegar until emulsified. Season with salt and freshly ground black pepper to taste.
- Combine Ingredients: In a large mixing bowl, combine the cooked lentils, diced vegetables, parsley, and chives. Pour the Dijon vinaigrette over the mixture and gently toss until everything is evenly coated.
- Chill and Serve: Cover the bowl with plastic wrap and refrigerate for at least 30 minutes to allow the flavors to meld. Serve the lentil salad chilled or at room temperature, garnished with additional chives or parsley if desired.
Extra Tips:
For the best flavor, use high-quality olive oil and fresh Dijon mustard. Adjust the seasoning according to your taste preferences, and feel free to add other vegetables like cherry tomatoes or bell peppers for extra color and flavor.
If you prefer a bit of crunch, consider topping the salad with some toasted nuts or seeds. This dish can be made a day in advance, allowing the flavors to develop even further, making it an ideal option for meal prep or entertaining.
Crispy Potato Galette

Crispy Potato Galette is a classic French dish that brings together the humble potato in a sophisticated and flavorful manner. This dish is perfect for a vegetarian meal, offering a delightful combination of crispy texture on the outside and tender, buttery layers on the inside. Ideal as a side or a main course, the galette pairs wonderfully with a fresh salad or a light soup.
The key to a successful Potato Galette is patience and precision, guaranteeing that each potato slice is perfectly thin and evenly layered to achieve that desired golden crispiness.
The beauty of a Potato Galette lies in its simplicity, yet it offers an elegant presentation that can elevate any meal. It’s a wonderful way to showcase the versatility of potatoes and a great addition to any French vegetarian recipe collection. The recipe requires minimal ingredients, allowing the natural flavors of the potato to shine through. By following this recipe, you’ll be able to create a deliciously crispy, savory galette that will impress your guests and satisfy your taste buds.
Ingredients (Serves 4-6):
- 2 pounds of Yukon Gold potatoes
- 4 tablespoons unsalted butter, melted
- 2 tablespoons olive oil
- 1 teaspoon salt
- 1/2 teaspoon freshly ground black pepper
- 2 tablespoons fresh thyme leaves
Cooking Instructions:
- Prepare the Ingredients: Start by preheating your oven to 400°F (200°C). Wash and peel the potatoes, then slice them thinly—ideally about 1/8 inch thick. A mandoline slicer can be very helpful for achieving uniform slices.
- Season the Potatoes: In a large bowl, gently toss the sliced potatoes with melted butter, olive oil, salt, pepper, and thyme leaves. Make certain that each slice is evenly coated with the mixture.
- Layer the Potatoes: In a 10-inch ovenproof non-stick skillet or a well-seasoned cast-iron pan, arrange the potato slices in a circular pattern, starting from the center and working your way outwards. Overlap the slices slightly to guarantee they hold together well. Continue layering until all the potatoes are used.
- Cook on the Stovetop: Place the skillet over medium heat and cook for about 10-15 minutes, pressing down occasionally with a spatula, until the bottom layer starts to turn golden brown.
- Bake the Galette: Transfer the skillet to the preheated oven and bake for 25-30 minutes, or until the potatoes are tender throughout and the top is crisp and golden.
- Finish and Serve: Once baked, carefully invert the galette onto a serving plate. Cut into wedges and serve immediately, either as a side dish or a main course.
Extra Tips:
For the best results, use a waxy potato variety like Yukon Gold, as they hold their shape better and create a more cohesive galette. If you don’t have fresh thyme, dried thyme or other herbs like rosemary can be substituted.
Be patient while cooking; the key to a perfect galette is allowing the potatoes to develop a deep, golden crust. If the edges start to brown too quickly in the oven, cover them lightly with aluminum foil to prevent burning. Finally, confirm your skillet is oven-safe to avoid any mishaps when shifting from stovetop to oven.
Carrot and Coriander Velouté

Carrot and Coriander Velouté is a delightful French vegetarian soup that combines the earthy sweetness of carrots with the aromatic freshness of coriander. This velvety recipe is perfect for those who appreciate the simplicity and elegance of French cuisine, offering a warm and comforting dish that can be enjoyed as a starter or a light meal.
The blend of flavors in this velouté provides a wholesome experience, ideal for cozy family dinners or when entertaining guests. This velouté isn’t only easy to prepare but also packed with nutrients, making it a healthy choice for everyone. The smooth texture of the soup is achieved by pureeing the cooked vegetables, resulting in a creamy consistency without the need for cream.
The addition of fresh coriander elevates the dish, adding a burst of color and a hint of citrusy flavor that complements the sweetness of the carrots beautifully. Suitable for serving 4-6 people, this recipe is sure to become a favorite in your culinary repertoire.
Ingredients (serving size: 4-6 people):
- 1 kg of carrots, peeled and sliced
- 1 large onion, chopped
- 2 cloves of garlic, minced
- 1.5 liters of vegetable stock
- 2 tablespoons of olive oil
- 1 bunch of fresh coriander, roughly chopped
- Salt and pepper to taste
- Optional: a pinch of ground cumin
Cooking Instructions:
- Prepare the Ingredients: Begin by peeling and slicing the carrots, chopping the onion, and mincing the garlic. This will guarantee all ingredients are ready for cooking.
- Sauté the Aromatics: In a large pot, heat the olive oil over medium heat. Add the chopped onion and minced garlic, cooking until the onion becomes translucent and fragrant. This should take about 5 minutes.
- Cook the Carrots: Add the sliced carrots to the pot, stirring occasionally. Cook for another 5 minutes until the carrots start to soften.
- Simmer in Stock: Pour in the vegetable stock, making sure that the carrots are fully submerged. Add salt, pepper, and optional ground cumin to taste. Bring the mixture to a boil, then reduce the heat to a simmer. Cover the pot and let it cook for about 20 minutes, or until the carrots are tender.
- Blend the Soup: Once the carrots are cooked through, remove the pot from heat. Using an immersion blender, puree the soup until it reaches a smooth consistency. Alternatively, you can transfer the soup in batches to a countertop blender.
- Add Fresh Coriander: Stir in the chopped coriander, reserving a small amount for garnish. Mix well to combine the flavors.
- Adjust Seasoning and Serve: Taste the soup and adjust seasoning if necessary. Serve hot, garnished with the reserved coriander.
Extra Tips:
For an extra depth of flavor, consider roasting the carrots in the oven with a drizzle of olive oil before adding them to the pot. This enhances their sweetness and adds a subtle caramelized note to the soup.
If you prefer a richer texture, you can stir in a dollop of crème fraîche just before serving. Remember to taste and adjust the seasoning as needed, as the balance of salt and pepper can greatly affect the final flavor of the velouté.
Cauliflower Gratin

Cauliflower Gratin is a classic French dish that combines the delicate flavors of cauliflower with a creamy, cheesy béchamel sauce. This dish is perfect for vegetarians and can serve as a hearty main course or a delightful side dish.
The gratin is baked until golden and bubbly, creating a comforting meal that’s rich in taste and texture, with the cauliflower providing a tender bite under a crisp, cheesy crust.
This recipe for Cauliflower Gratin serves 4-6 people and is a wonderful way to incorporate more vegetables into your diet while enjoying a taste of French cuisine. The blend of creamy sauce and melted cheese makes it a family favorite, ideal for both weeknight dinners and special occasions.
The dish is simple to prepare and can be easily customized with your choice of herbs and spices.
Ingredients:
- 1 large head of cauliflower, cut into florets
- 4 tablespoons unsalted butter
- 4 tablespoons all-purpose flour
- 2 cups whole milk
- 1 cup grated Gruyère cheese
- 1/2 cup grated Parmesan cheese
- 1/4 teaspoon nutmeg
- Salt and pepper to taste
- 1/2 cup breadcrumbs
- 2 tablespoons olive oil
- Fresh parsley, chopped (optional, for garnish)
Cooking Instructions:
1. Preheat and Prepare: Preheat your oven to 375°F (190°C). Bring a large pot of salted water to a boil. Add the cauliflower florets to the boiling water and cook for about 5 minutes until slightly tender but still firm. Drain and set aside.
2. Make the Béchamel Sauce: In a medium saucepan, melt the butter over medium heat. Add the flour and whisk continuously for about 1-2 minutes until the mixture is smooth and lightly golden. Gradually whisk in the milk, ensuring no lumps form.
Continue to cook, stirring constantly, until the sauce thickens and coats the back of a spoon, about 5-7 minutes.
3. Add Cheese and Seasoning: Remove the sauce from heat and stir in the Gruyère and half of the Parmesan cheese until melted and smooth. Season with nutmeg, salt, and pepper to taste.
4. Assemble the Gratin: In a greased baking dish, arrange the cauliflower florets. Pour the cheese sauce evenly over the cauliflower, ensuring all pieces are well-coated.
5. Add Toppings: In a small bowl, combine the breadcrumbs with the remaining Parmesan cheese and olive oil. Sprinkle this mixture over the cauliflower and cheese sauce.
6. Bake: Place the baking dish in the preheated oven and bake for 25-30 minutes, or until the top is golden brown and the cheese is bubbly.
7. Garnish and Serve: Remove from the oven and let the gratin cool for a few minutes. Garnish with fresh parsley before serving, if desired.
Extra Tips:
When preparing the béchamel sauce, make sure to whisk continuously to prevent lumps and achieve a smooth consistency.
If you prefer a crispier topping, broil the gratin for an additional 2-3 minutes after baking, but watch carefully to avoid burning.
Feel free to experiment with different types of cheese for varied flavors, such as adding a bit of sharp cheddar or a sprinkle of blue cheese for a more robust taste.
Additionally, you can incorporate herbs like thyme or rosemary into the sauce for an aromatic twist. Enjoy your Cauliflower Gratin as a standalone dish or alongside a fresh green salad.
Endive and Roquefort Salad

Indulge in the sophisticated flavors of French cuisine with an exquisite Endive and Roquefort Salad. This classic salad is a delightful combination of crisp endive leaves and creamy Roquefort cheese, offering a perfect balance of textures and flavors. The slight bitterness of the endive complements the rich and tangy Roquefort, making it a wonderful starter or side dish for any meal.
Finished with a simple dressing, this salad is both elegant and easy to prepare, capturing the essence of French culinary art. This recipe serves 4-6 people and is perfect for a light lunch or a refined dinner party starter. The key to a successful Endive and Roquefort Salad lies in selecting fresh and high-quality ingredients.
The crispness of the endive should be matched by the creaminess of the Roquefort, while a hint of sweetness from the dressing ties everything together beautifully. With minimal cooking required, this dish is ideal for those who want to impress with a touch of French sophistication without spending hours in the kitchen.
Ingredients:
- 4 heads of endive
- 150g Roquefort cheese
- 1/2 cup walnuts, toasted and roughly chopped
- 1 red apple, thinly sliced
- 2 tablespoons lemon juice
- 3 tablespoons extra virgin olive oil
- 1 tablespoon white wine vinegar
- 1 teaspoon Dijon mustard
- Salt and freshly ground black pepper to taste
Cooking Instructions:
- Prepare the Endive: Start by washing the endive under cold running water. Pat them dry with a clean kitchen towel. Cut off the base of each endive and separate the leaves. Arrange them neatly on a large serving platter.
- Prepare the Dressing: In a small bowl, combine the lemon juice, white wine vinegar, Dijon mustard, and olive oil. Whisk the ingredients together until they’re well emulsified. Season the dressing with salt and freshly ground black pepper according to your taste.
- Add the Cheese and Nuts: Crumble the Roquefort cheese over the arranged endive leaves. Sprinkle the toasted walnuts on top, ensuring even distribution for a balanced crunch in every bite.
- Incorporate the Apple: Thinly slice the red apple, ensuring they’re even for a uniform appearance. Lay the apple slices over the salad, adding a fresh, sweet contrast to the creamy and tangy elements.
- Dress the Salad: Just before serving, drizzle the prepared dressing over the salad. Gently toss the salad, ensuring all ingredients are well coated with the dressing. Be careful not to overmix to maintain the integrity and presentation of the salad.
- Final Touch: Serve immediately to retain the crispness of the endive and freshness of the apple slices.
Extra Tips:
For a truly authentic French touch, consider using walnut oil instead of olive oil in the dressing to enhance the nutty flavor. If Roquefort cheese isn’t available, Gorgonzola or another creamy blue cheese can be used as a substitute.
Make sure to toast the walnuts beforehand to enhance their flavor and add a delightful crunch to the salad. When slicing the apple, you can toss them in a little lemon juice to prevent browning if not serving immediately. This salad is best enjoyed fresh, so try to prepare and serve it just before the meal to maintain its vibrant and crisp texture.
Grilled Vegetable Niçoise
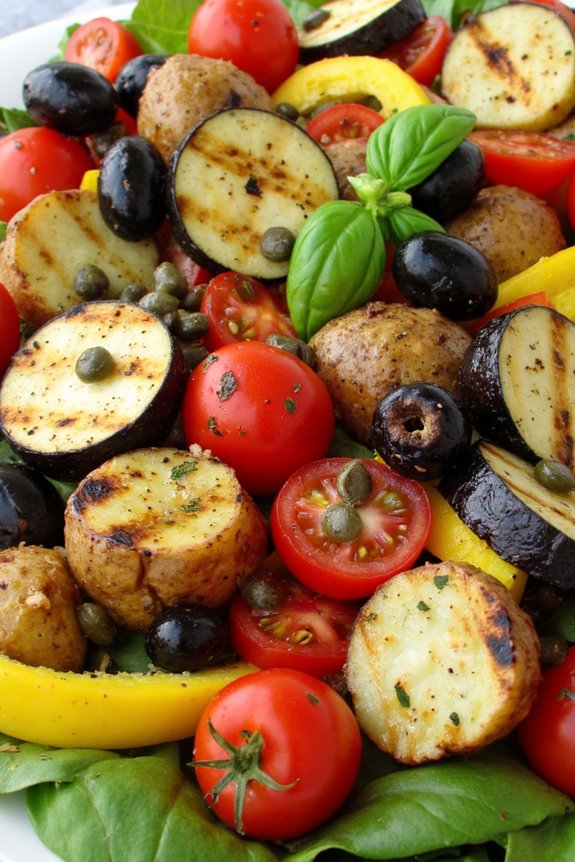
Grilled Vegetable Niçoise is a delightful twist on the classic French Niçoise salad, traditionally featuring tuna or anchovies. This vegetarian version captures the essence of Niçoise with a variety of fresh, grilled vegetables, making it a hearty yet healthy meal. The smoky flavor from the grilled vegetables adds depth to the dish, while the classic components such as olives, capers, and a tangy vinaigrette bring it all together.
Perfect for warm weather dining, this dish showcases the best of summer produce and Mediterranean flavors. This recipe serves 4-6 people and highlights the vibrant colors and flavors of grilled vegetables, nestled on a bed of crisp greens, and finished with a drizzle of homemade vinaigrette. Whether served as a main course or a satisfying side, Grilled Vegetable Niçoise is sure to guarantee its balance of textures and tastes. Gather your ingredients and prepare to enjoy a taste of Provence in your own kitchen.
Ingredients:
- 2 medium zucchinis, sliced lengthwise
- 1 red bell pepper, quartered
- 1 yellow bell pepper, quartered
- 1 small eggplant, sliced
- 1 red onion, sliced into rings
- 200g green beans, trimmed
- 4 medium potatoes, boiled and quartered
- 200g cherry tomatoes, halved
- 1/2 cup pitted black olives
- 1/4 cup capers
- 6 cups mixed salad greens
- 3 tablespoons olive oil
- Salt and pepper to taste
- 1 lemon, juiced
- 1 tablespoon Dijon mustard
- 1 tablespoon red wine vinegar
- 2 cloves garlic, minced
- Fresh basil leaves for garnish
Cooking Instructions:
- Prepare the Grill: Preheat your grill to medium-high heat. Ascertain the grates are clean and lightly oiled to prevent sticking.
- Grill the Vegetables: In a large bowl, toss the zucchinis, bell peppers, eggplant, red onion, and green beans with 2 tablespoons of olive oil, salt, and pepper. Grill the vegetables in batches, turning occasionally, until they’re tender and have nice grill marks, about 5-7 minutes per batch. Remove from the grill and set aside to cool slightly.
- Boil the Potatoes: While the vegetables are grilling, bring a pot of salted water to a boil. Add the potatoes and cook until tender, about 15 minutes. Drain and let them cool slightly before quartering.
- Prepare the Vinaigrette: In a small bowl, whisk together the remaining 1 tablespoon of olive oil, lemon juice, Dijon mustard, red wine vinegar, minced garlic, and a pinch of salt and pepper. Taste and adjust seasoning as needed.
- Assemble the Salad: On a large platter or individual plates, arrange the mixed salad greens. Top with the grilled vegetables, boiled potatoes, halved cherry tomatoes, black olives, and capers.
- Dress the Salad: Drizzle the prepared vinaigrette over the salad. Gently toss to combine all the ingredients, ensuring everything is evenly coated with the dressing.
- Garnish and Serve: Garnish with fresh basil leaves before serving. Enjoy the Grilled Vegetable Niçoise warm or at room temperature.
Extra Tips:
For best results, choose fresh, seasonal vegetables for this dish, as they’ll have the most flavor. If you don’t have access to a grill, you can also roast the vegetables in a 425°F (220°C) oven for about 20-25 minutes.
Additionally, feel free to customize the salad by adding other grilled vegetables like asparagus or mushrooms, or even some boiled eggs for extra protein. Make sure to taste the vinaigrette before dressing the salad, as the acidity can be adjusted to suit your preference by adding more lemon juice or vinegar. Enjoy the versatility and freshness of this truly delicious French-inspired salad!
Pears Poached in Red Wine

Pears Poached in Red Wine is a classic French dessert that combines the natural sweetness of ripe pears with the rich, complex flavors of red wine and spices. This elegant dish is perfect for special occasions or a sophisticated end to a dinner party. The vibrant color of the wine-soaked pears paired with their tender texture creates a visually stunning and delicious treat. Served either warm or chilled, this dessert is bound to impress your guests with its refined simplicity and delightful taste.
The process of poaching the pears in red wine not only infuses them with flavor but also reduces the wine into a luscious syrup that can be drizzled over the fruit. The choice of spices, such as cinnamon, vanilla, and cloves, enhances the aromatic qualities of the wine, creating a fragrant and inviting dessert. This recipe serves 4-6 people and can be prepared ahead of time, allowing you to focus on other aspects of your meal when entertaining.
Ingredients (Serves 4-6):
- 4-6 ripe but firm pears (such as Bosc or Anjou)
- 750ml bottle of red wine (Merlot or Cabernet Sauvignon)
- 200g sugar
- 1 cinnamon stick
- 4 whole cloves
- 1 vanilla pod, split and seeds scraped
- Zest of 1 orange
- Juice of 1 orange
- Optional: fresh mint leaves, for garnish
Cooking Instructions:
- Prepare the Pears: Begin by peeling the pears, leaving the stems intact for a more elegant presentation. If desired, core the pears from the bottom using a melon baller or a small spoon.
- Create the Poaching Liquid: In a large saucepan, combine the red wine, sugar, cinnamon stick, cloves, vanilla pod and seeds, orange zest, and orange juice. Stir the mixture over medium heat until the sugar dissolves completely.
- Poach the Pears: Gently place the peeled pears into the poaching liquid, guaranteeing they’re fully submerged. If necessary, add a little water to cover the pears. Bring the liquid to a gentle simmer, then reduce the heat to low.
- Simmer and Infuse: Allow the pears to poach for 20-30 minutes, turning occasionally to guarantee even coloring and flavor infusion. The pears should be tender when pierced with a knife but not mushy.
- Reduce the Syrup: Once the pears are poached, carefully remove them from the saucepan and set them aside. Increase the heat to medium-high and continue to simmer the poaching liquid until it reduces to a syrupy consistency, about 15-20 minutes.
- Serve: Arrange the poached pears on a serving platter or individual plates. Drizzle the reduced red wine syrup over the pears. Garnish with fresh mint leaves if desired. Serve warm or chilled.
Extra Tips:
For the best results, choose pears that are ripe but still firm to the touch, as they’ll hold their shape during poaching. The choice of red wine can greatly influence the flavor of the dish, so opt for a wine that you enjoy drinking.
If you prefer a non-alcoholic version, substitute the wine with a mixture of grape juice and a splash of balsamic vinegar. This dish can be made a day in advance, allowing the pears to soak up more flavor as they chill in the refrigerator. Just be sure to store them in the poaching liquid to prevent them from drying out.
Enjoy this elegant dessert as is, or serve it with a scoop of vanilla ice cream or a dollop of whipped cream for added indulgence.