

Embark on a delightful journey through the flavors of France with these authentic vegetarian main course recipes. From the rich, earthy notes of a Mushroom and Leek Quiche to the comforting embrace of a Potato Gratin Dauphinois, each dish offers a taste of tradition. These recipes are a celebration of French heritage, crafted with love and artistry. Ready to explore these timeless classics? Let’s get cooking together!
Ratatouille Provençale
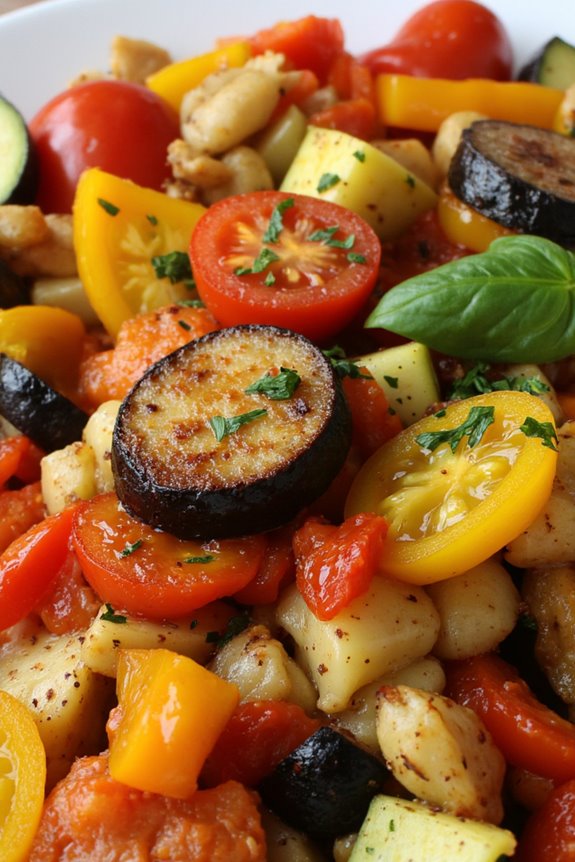
Ratatouille Provençale is a classic French vegetarian dish that marries a medley of fresh vegetables, herbs, and aromatic flavors into a hearty and satisfying meal. Originating from the Provence region, this dish embodies the essence of Mediterranean cuisine, capturing the vibrant colors and rich tastes of summer.
Ratatouille isn’t only a feast for the eyes but also a versatile dish that can be served as a main course, a side dish, or even as a delightful topping for crusty bread. Perfect for family dinners or gatherings, it’s both comforting and elegant, making it a staple in vegetarian menus.
This Ratatouille Provençale recipe serves 4-6 people and requires a careful selection of fresh produce to achieve its authentic taste. The key to a successful ratatouille is the slow cooking process that allows each vegetable to release its flavors while maintaining a tender texture.
The combination of eggplant, zucchini, bell peppers, tomatoes, and herbs creates a harmonious blend that’s deeply satisfying. Whether you’re a seasoned cook or a beginner in the kitchen, this recipe is straightforward and rewarding, showcasing the beauty of simple ingredients prepared with care.
Ingredients:
- 2 medium eggplants, diced
- 2 medium zucchinis, sliced
- 1 red bell pepper, diced
- 1 yellow bell pepper, diced
- 1 large onion, chopped
- 4 cloves garlic, minced
- 4 large tomatoes, chopped
- 1/4 cup olive oil
- 2 teaspoons salt
- 1 teaspoon black pepper
- 1 teaspoon dried thyme
- 1 teaspoon dried oregano
- 1/2 teaspoon dried basil
- 1/4 cup fresh basil leaves, chopped
- 2 tablespoons fresh parsley, chopped
Cooking Instructions:
- Prepare the Vegetables: Begin by washing and drying all the vegetables. Dice the eggplants and place them in a colander. Sprinkle with a teaspoon of salt and let them sit for 20 minutes to remove any bitterness. Rinse and pat dry with a clean towel.
- Sauté the Onions and Garlic: In a large heavy-bottomed pot or Dutch oven, heat the olive oil over medium heat. Add the chopped onion and sauté for about 5 minutes until they become translucent. Add the minced garlic and stir for an additional minute until fragrant.
- Cook the Vegetables: Add the diced eggplants, zucchinis, and bell peppers to the pot. Stir to combine and cook for about 10 minutes, stirring occasionally, until the vegetables start to soften.
- Add the Tomatoes and Herbs: Stir in the chopped tomatoes, salt, black pepper, thyme, oregano, and dried basil. Mix well, reduce the heat to low, and cover the pot. Let the ratatouille simmer for about 30-40 minutes, stirring occasionally, until all the vegetables are tender and the flavors meld together.
- Finish with Fresh Herbs: Once cooked, remove the pot from the heat and stir in the fresh basil and parsley. Taste and adjust seasoning if necessary.
- Serve: Serve the ratatouille warm as a main dish or a side. It can be enjoyed on its own or paired with crusty bread, rice, or pasta.
Extra Tips:
When making Ratatouille Provençale, the quality of your vegetables is essential; opt for the freshest produce available to enhance the dish’s natural flavors. If time allows, prepare the dish a day in advance and let it rest in the refrigerator overnight. This will allow the flavors to deepen, making the ratatouille even more delicious.
Additionally, feel free to experiment with the herbs used; fresh thyme or rosemary can add a different dimension to the dish. Remember, the key to a perfect ratatouille is patience and allowing enough time for each ingredient to cook thoroughly and develop its full flavor.
French Onion Tart

A French Onion Tart is a delightful and savory dish that embodies the comforting flavors of caramelized onions, all encased in a flaky pastry shell. This vegetarian main course is perfect for a cozy dinner with family or friends, offering a taste of traditional French cuisine with a modern twist. The rich, sweet onions are slow-cooked to perfection, enhancing their natural sweetness, and are then combined with creamy cheese and aromatic herbs, creating a harmonious blend of flavors and textures.
This dish isn’t only pleasing to the palate but also visually appealing, with its golden crust and lightly browned top. The French Onion Tart can be served as a main course for a dinner party or enjoyed as a hearty lunch. Its preparation is straightforward, yet it requires patience to allow the onions to caramelize fully, which is key to achieving the depth of flavor that makes this tart so special.
Whether you’re new to French cooking or a seasoned chef, this recipe is sure to impress.
Ingredients for 4-6 servings:
- 2 tablespoons olive oil
- 6 large onions, thinly sliced
- 1 teaspoon salt
- 1/2 teaspoon sugar
- 1/2 teaspoon black pepper
- 1 teaspoon fresh thyme leaves
- 1/2 cup heavy cream
- 4 eggs
- 1 cup grated Gruyère cheese
- 1 tablespoon Dijon mustard
- 1 pre-made puff pastry sheet
- Extra thyme and Gruyère for garnish (optional)
Cooking Instructions:
- Prepare the Onions: In a large skillet, heat the olive oil over medium heat. Add the sliced onions, salt, and sugar. Stir occasionally, allowing the onions to cook slowly and caramelize. This process should take about 30-40 minutes. The onions should be golden brown and sweet.
- Preheat the Oven: While the onions are caramelizing, preheat your oven to 375°F (190°C).
- Prepare the Filling: In a mixing bowl, whisk together the eggs, heavy cream, black pepper, and thyme leaves. Add the caramelized onions once they’ve cooled slightly. Stir in the grated Gruyère cheese and Dijon mustard, mixing until well combined.
- Assemble the Tart: Roll out the puff pastry on a lightly floured surface to fit your tart pan. Press the pastry into the pan, trimming any excess. Pour the onion and cheese mixture into the pastry shell, spreading it evenly.
- Bake the Tart: Place the tart in the preheated oven and bake for 25-30 minutes, or until the filling is set and the top is lightly browned and bubbly.
- Cool and Serve: Allow the tart to cool for a few minutes before slicing. Garnish with additional thyme leaves and Gruyère cheese if desired. Serve warm or at room temperature.
Extra Tips:
When cooking the onions, patience is key. Make sure not to rush the caramelization process, as this is where most of the flavor is developed. Stir the onions occasionally to prevent them from burning. If they stick to the pan, add a splash of water to deglaze.
For a more robust flavor, consider adding a splash of balsamic vinegar to the onions towards the end of the caramelization process. Additionally, make certain your pastry is well chilled before baking, as this will help achieve a crispier crust.
Enjoy your homemade French Onion Tart with a side salad or a glass of your favorite wine for a complete French dining experience.
Potato Gratin Dauphinois

Potato Gratin Dauphinois is a classic French dish that embodies the art of simple yet elegant cooking. This vegetarian main course is a rich and creamy delight, featuring thinly sliced potatoes layered with cream, garlic, and cheese, then baked to golden perfection. The dish is known for its velvety texture and comforting flavors, making it a perfect addition to any meal, whether it’s a family dinner or a special occasion.
The key to a successful Gratin Dauphinois lies in the quality of ingredients and the patience to permit the flavors to meld together beautifully as it cooks. Originating from the Dauphiné region of France, this dish is celebrated for its ability to turn humble potatoes into a luxurious centerpiece. The use of cream and cheese provides a richness that’s complemented by the subtle garlic aroma, creating a harmonious balance of flavors.
The top layer of cheese becomes golden and crispy, adding a delightful contrast to the soft and creamy layers beneath. Serve Potato Gratin Dauphinois as a standalone main course or pair it with a simple salad for a well-rounded vegetarian meal that’s sure to impress.
Ingredients (Serves 4-6):
- 2 lbs (about 1 kg) potatoes, preferably Yukon Gold or Russets
- 2 cups (500 ml) heavy cream
- 1 cup (100 g) grated Gruyère cheese
- 2 cloves garlic
- Salt and freshly ground black pepper, to taste
- 1/4 teaspoon nutmeg (optional)
- 1 tablespoon unsalted butter, for greasing the baking dish
Cooking Instructions:
- Preheat the Oven: Start by preheating your oven to 350°F (175°C). This will guarantee that the oven is at the right temperature when you’re ready to bake the gratin.
- Prepare the Baking Dish: Grease a 9×13-inch (or similar size) baking dish with the unsalted butter. This will prevent the gratin from sticking to the dish and make for easier cleaning.
- Prepare the Garlic: Peel the garlic cloves and cut them in half. Rub the cut sides of the garlic all over the inside of the buttered baking dish to impart a subtle garlic flavor.
- Slice the Potatoes: Peel the potatoes and slice them very thinly (about 1/8 inch thick) using a sharp knife or a mandoline for uniform slices. This permits even cooking and a smooth texture.
- Layer the Potatoes: Arrange a layer of sliced potatoes in the bottom of the prepared baking dish. Season with a pinch of salt, pepper, and a touch of nutmeg if using.
- Add Cream and Cheese: Pour a portion of the heavy cream over the potato layer, then sprinkle with some of the grated Gruyère cheese. Repeat the layering process with the remaining potatoes, cream, and cheese until all ingredients are used, finishing with a layer of cheese on top.
- Bake the Gratin: Cover the baking dish with aluminum foil and place it in the preheated oven. Bake for about 1 hour, then remove the foil and continue baking for an additional 30 minutes, or until the potatoes are tender and the top is golden brown and bubbly.
- Rest and Serve: Allow the Gratin Dauphinois to rest for 10 minutes before serving. This will help the layers set and make it easier to slice and serve.
Extra Tips:
For the best flavor, try to use a high-quality Gruyère cheese, as its nutty and slightly sweet taste is key to the dish’s traditional flavor. Yukon Gold potatoes are preferred for their creamy texture, but Russets will work well too if you prefer a fluffier consistency.
If you find the gratin is browning too quickly, you can cover it with foil for the remaining baking time. Additionally, feel free to experiment with adding a sprig of fresh thyme or a sprinkle of Parmesan cheese to the top for an extra burst of flavor. Enjoy the Gratin Dauphinois with a crisp green salad or a side of steamed vegetables for a balanced meal.
Mushroom and Leek Quiche

Mushroom and leek quiche is a delightful vegetarian dish that combines the earthy flavors of mushrooms with the subtle sweetness of leeks, encased in a buttery, flaky pastry. It’s perfect for a light lunch, dinner, or even a hearty breakfast. This dish isn’t only delicious but also versatile, allowing for various cheeses and herbs to be added according to personal taste. The creaminess of the filling pairs beautifully with a crisp green salad or roasted vegetables, making it an ideal choice for any meal.
Preparing a mushroom and leek quiche is both straightforward and rewarding. The process begins with a savory shortcrust pastry that serves as the foundation for the rich filling. The mushrooms are sautéed until golden brown, while the leeks are softened to release their delicate flavor. A mixture of eggs, cream, and cheese is then combined with the vegetables to create a luscious custard that sets perfectly in the oven. This quiche recipe serves 4-6 people, making it a great option for a family meal or to impress guests at a dinner party.
Ingredients:
- 1 1/4 cups all-purpose flour
- 1/2 cup cold unsalted butter, diced
- 1/4 teaspoon salt
- 1/4 cup cold water
- 1 tablespoon olive oil
- 2 cups sliced mushrooms
- 2 leeks, white and light green parts only, thinly sliced
- 3 large eggs
- 1 cup heavy cream
- 1 cup grated Gruyère cheese
- Salt and pepper to taste
- 1/4 teaspoon nutmeg
- 1 tablespoon chopped fresh thyme
Instructions:
- Prepare the Pastry: In a large mixing bowl, combine the flour and salt. Add the diced cold butter and use your fingertips to rub it into the flour until the mixture resembles breadcrumbs. Gradually add cold water, mixing until a dough forms. Wrap the dough in plastic wrap and refrigerate for at least 30 minutes.
- Preheat Oven: Preheat your oven to 375°F (190°C).
- Roll Out Pastry: On a lightly floured surface, roll out the chilled dough to fit a 9-inch tart pan. Carefully transfer the rolled dough to the pan, pressing it into the edges. Trim any excess dough. Prick the base with a fork and refrigerate for another 15 minutes.
- Blind Bake Pastry: Line the dough in the tart pan with parchment paper and fill with pie weights or dried beans. Bake for 15 minutes, then remove the weights and paper. Bake for an additional 5 minutes until the crust is lightly golden. Remove from the oven and set aside.
- Cook Vegetables: In a large skillet, heat olive oil over medium heat. Add the sliced mushrooms and cook until golden brown, about 5-7 minutes. Add the leeks and continue to cook until they’re soft, about 5 minutes more. Season with salt and pepper, then remove from heat.
- Prepare Filling: In a mixing bowl, whisk together the eggs, heavy cream, nutmeg, and a pinch of salt and pepper. Stir in the cooked mushrooms, leeks, and grated Gruyère cheese.
- Assemble Quiche: Pour the filling into the pre-baked pastry shell. Scatter fresh thyme over the top for added flavor.
- Bake Quiche: Bake in the preheated oven for 30-35 minutes, or until the filling is set and the top is golden brown. Let the quiche cool slightly before slicing and serving.
Extra Tips:
For a crispier base, verify your pastry is well chilled before rolling out, as this helps to prevent shrinking during baking. You can experiment with different types of mushrooms or cheeses for varied flavors. If Gruyère is unavailable, consider using Swiss or cheddar cheese.
Also, make sure to thoroughly clean the leeks, as they can harbor dirt between their layers. This quiche can be made a day ahead and reheated gently in the oven, making it a convenient option for entertaining.
Stuffed Bell Peppers With Herbes De Provence
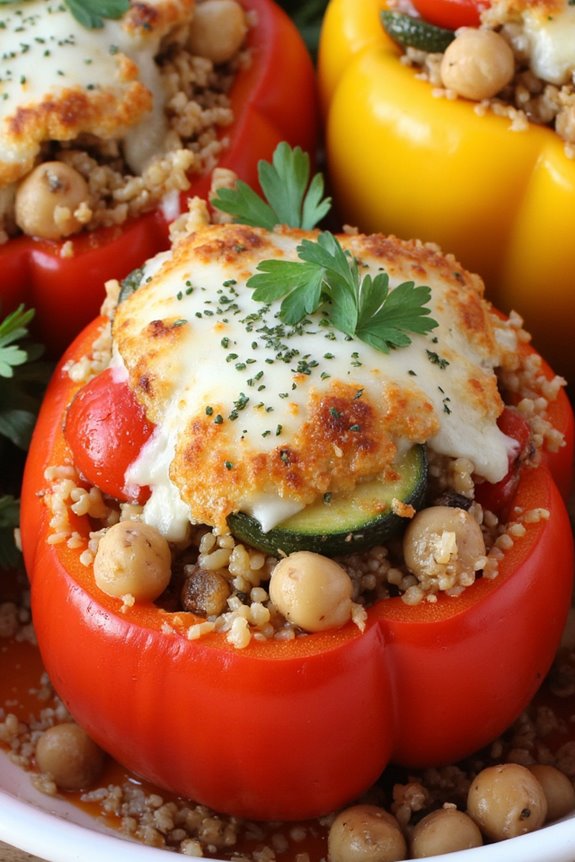
Stuffed Bell Peppers With Herbes De Provence is a delightful French vegetarian dish that brings together vibrant bell peppers and a filling of aromatic herbs and wholesome ingredients. This dish isn’t only visually appealing with its colorful presentation but also rich in flavors that are certain to tantalize your taste buds. Perfect as a main course, it’s an excellent option for a family dinner or a special occasion, offering a taste of Provence with every bite.
The key to this recipe is the use of Herbes De Provence, a quintessential blend of herbs such as thyme, rosemary, and lavender, which infuse the stuffing with a distinctive aromatic quality. The stuffing itself is a hearty mix that typically includes rice or quinoa, vegetables, and sometimes cheese, all baked to perfection inside the sweet, roasted bell peppers. This recipe serves 4-6 people and is a wonderful way to enjoy a nutritious and satisfying meal.
Ingredients (serves 4-6):
- 6 large bell peppers (any color)
- 1 cup of quinoa or rice
- 2 cups of vegetable broth
- 1 onion, finely chopped
- 2 cloves of garlic, minced
- 1 zucchini, diced
- 1 cup of cherry tomatoes, halved
- 1 can (15 oz) of chickpeas, drained and rinsed
- 1 teaspoon Herbes De Provence
- Salt and pepper to taste
- 1 cup of shredded cheese (optional)
- Olive oil for drizzling
- Fresh parsley for garnish
Instructions:
- Preheat the Oven: Begin by preheating your oven to 375°F (190°C). This will guarantee it’s at the right temperature by the time you’ve prepared the peppers.
- Prepare the Peppers: Slice the tops off the bell peppers and remove the seeds and membranes. Drizzle the inside of each pepper with a bit of olive oil and a pinch of salt. Place them upright in a baking dish.
- Cook the Grain: In a medium saucepan, bring the vegetable broth to a boil. Add the quinoa or rice, reduce the heat to low, cover, and let simmer until the grain is cooked and all the liquid is absorbed (about 15-20 minutes for quinoa, 20-25 minutes for rice).
- Sauté the Vegetables: In a large skillet over medium heat, add a tablespoon of olive oil. Sauté the onion and garlic until translucent. Add the zucchini and cook until slightly tender. Stir in the cherry tomatoes and chickpeas, cooking for another 5 minutes.
- Mix the Stuffing: In a large bowl, combine the cooked grain, sautéed vegetables, Herbes De Provence, salt, and pepper. If using cheese, stir half of it into the mixture.
- Stuff the Peppers: Generously fill each bell pepper with the quinoa or rice mixture. If desired, sprinkle the remaining cheese on top of each stuffed pepper.
- Bake: Cover the baking dish with foil and bake in the preheated oven for 30 minutes. Remove the foil and bake for an additional 10-15 minutes, or until the peppers are tender and the cheese is golden and bubbly.
- Garnish and Serve: Remove from the oven and let cool slightly. Garnish with fresh parsley before serving.
Extra Tips: When selecting bell peppers, opt for ones that can stand upright on their own for even cooking and presentation. For a spicier kick, add a pinch of red pepper flakes to the stuffing mix. If you’re making this dish ahead of time, prepare the stuffed peppers and refrigerate them until you’re ready to bake. This dish is highly versatile, so feel free to substitute or add vegetables of your choice, such as mushrooms or spinach, for added flavor and nutrition.
Vegetable Cassoulet
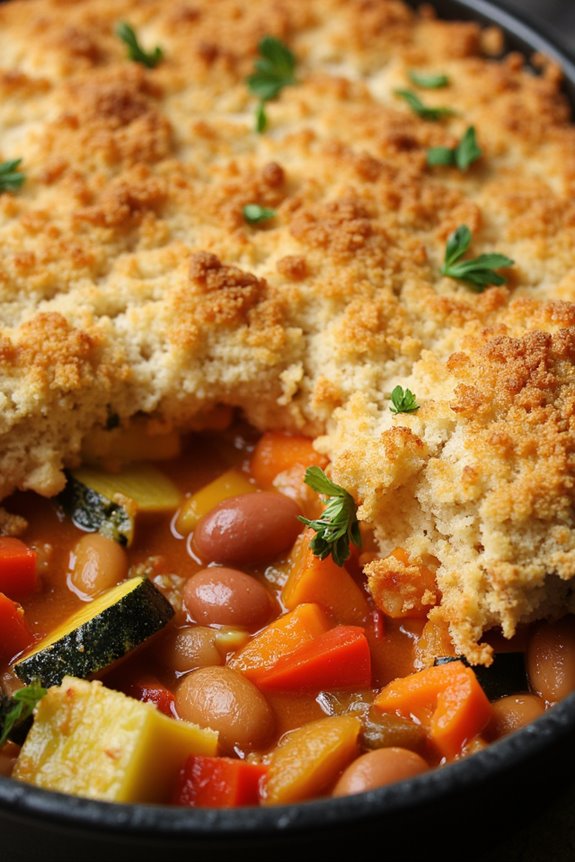
Cassoulet is a traditional French dish, typically rich in meats and slow-cooked flavors. However, this vegetarian version transforms the classic into a hearty, plant-based delight, perfect for any dinner table. A medley of vegetables, beans, and herbs come together to create a dish that’s both comforting and satisfying.
With layers of flavors from garlic, thyme, and a hint of wine, this vegetable cassoulet provides a taste of rustic France in every bite. This recipe serves 4-6 people, making it ideal for family gatherings or a cozy dinner with friends. The preparation involves a mix of seasonal vegetables and pantry staples, ensuring that you can whip up this dish with ease.
The slow-cooked nature of the cassoulet allows the flavors to meld beautifully, resulting in a dish that’s both nutritious and delicious. Perfect for those who love a hearty meal without the meat.
Ingredients:
- 2 tablespoons olive oil
- 1 large onion, chopped
- 3 cloves garlic, minced
- 2 carrots, sliced
- 2 celery stalks, chopped
- 1 red bell pepper, chopped
- 1 zucchini, sliced
- 1 cup mushrooms, sliced
- 1 can (14 oz) diced tomatoes
- 2 cups vegetable broth
- 1 can (15 oz) cannellini beans, drained and rinsed
- 1 can (15 oz) kidney beans, drained and rinsed
- 1 teaspoon dried thyme
- 1 teaspoon dried rosemary
- 1 bay leaf
- Salt and pepper to taste
- 1/2 cup dry white wine (optional)
- 1 cup breadcrumbs
- 2 tablespoons chopped fresh parsley
Instructions:
- Prepare the Vegetables: Begin by heating olive oil in a large Dutch oven or casserole dish over medium heat. Add the chopped onion and sauté for about 5 minutes until translucent. Stir in the minced garlic and cook for an additional minute until fragrant.
- Cook the Base: Add the carrots, celery, red bell pepper, zucchini, and mushrooms to the pot. Cook the vegetables for about 10 minutes, stirring occasionally, until they begin to soften.
- Add Liquids and Beans: Pour in the diced tomatoes with their juice, vegetable broth, and white wine (if using). Stir in the cannellini beans and kidney beans. Add the dried thyme, rosemary, bay leaf, and season with salt and pepper. Bring the mixture to a simmer.
- Simmer the Cassoulet: Reduce the heat to low, cover the pot, and let the cassoulet simmer gently for about 30 minutes. This allows the flavors to meld together and the vegetables to become tender.
- Prepare the Topping: While the cassoulet is simmering, preheat your oven to 350°F (175°C). In a small bowl, combine the breadcrumbs with chopped fresh parsley. Set aside.
- Bake the Cassoulet: After simmering, remove the bay leaf. Sprinkle the breadcrumb mixture evenly over the top of the cassoulet. Transfer the dish to the preheated oven and bake uncovered for 15-20 minutes, or until the breadcrumbs are golden brown and crispy.
- Serve: Remove from the oven and let the cassoulet cool slightly before serving. Garnish with additional parsley if desired.
Extra Tips:
For an extra depth of flavor, consider adding a tablespoon of tomato paste when sautéing the onions. This will give the cassoulet a richer taste.
If you prefer a spicier dish, a pinch of red pepper flakes can be added along with the herbs. The cassoulet can be made a day ahead, as the flavors only improve with time. Simply reheat gently before serving.
For a gluten-free version, substitute the breadcrumbs with gluten-free breadcrumbs or omit them entirely.
Lentil Salad With Dijon Vinaigrette
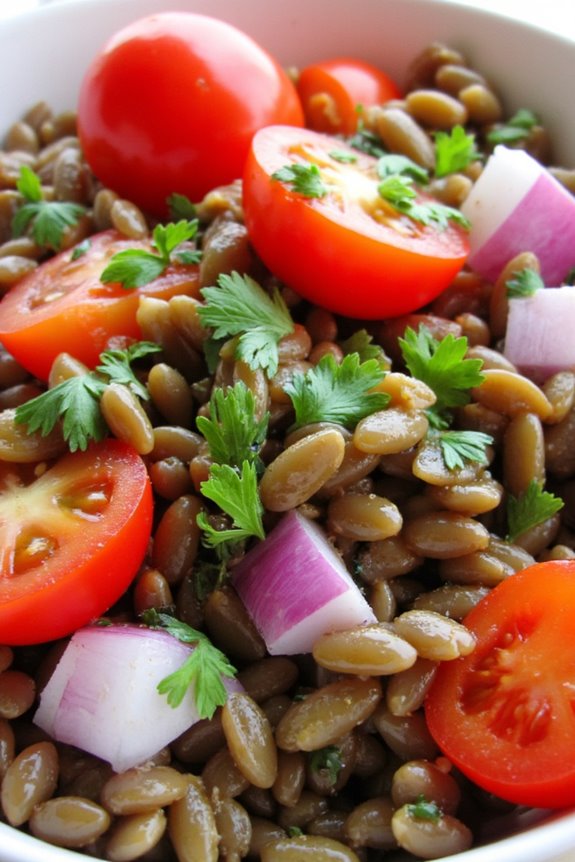
Lentil Salad with Dijon Vinaigrette is a delightful and invigorating dish that combines the earthy flavors of lentils with the tangy zest of a Dijon mustard vinaigrette. This French-inspired vegetarian main course isn’t only nutritious but also incredibly satisfying. The lentils provide a robust foundation that’s perfectly complemented by the crispness of fresh vegetables and the aromatic dressing.
Whether you’re looking for a light lunch or a substantial dinner, this lentil salad is sure to please both vegetarians and non-vegetarians alike.
The recipe brings together a harmony of textures and flavors, utilizing simple and wholesome ingredients. French green lentils, known for their firm texture and peppery taste, are the star of the dish. They’re accompanied by an array of colorful vegetables such as cherry tomatoes, red onions, and bell peppers, which add vibrancy and crunch.
The Dijon vinaigrette, with its subtle hint of garlic and lemon, ties everything together, making each bite a flavorful experience. This salad can be served warm or cold, making it versatile for any season.
Ingredients for 4-6 servings:
- 1 1/2 cups French green lentils
- 4 cups water
- 1 bay leaf
- 1 cup cherry tomatoes, halved
- 1/2 red onion, finely chopped
- 1 red bell pepper, diced
- 1/4 cup fresh parsley, chopped
- 1/4 cup fresh chives, chopped
- 1/4 cup olive oil
- 3 tablespoons Dijon mustard
- 2 tablespoons red wine vinegar
- 1 tablespoon lemon juice
- 1 garlic clove, minced
- Salt and black pepper to taste
Cooking Instructions:
- Cook the Lentils: Rinse the lentils under cold water. In a large pot, combine the lentils, water, and bay leaf. Bring to a boil over medium-high heat, then reduce the heat to low and let simmer for about 20-25 minutes, or until the lentils are tender but not mushy. Drain the lentils and discard the bay leaf. Set aside to cool slightly.
- Prepare the Vegetables: While the lentils are cooking, prepare the vegetables. Halve the cherry tomatoes, finely chop the red onion, and dice the red bell pepper. Chop the fresh parsley and chives, and set all aside.
- Make the Vinaigrette: In a small mixing bowl, whisk together the olive oil, Dijon mustard, red wine vinegar, lemon juice, minced garlic, salt, and black pepper until well combined. Taste and adjust the seasoning if necessary.
- Assemble the Salad: In a large salad bowl, combine the cooked lentils, cherry tomatoes, red onion, red bell pepper, parsley, and chives. Pour the Dijon vinaigrette over the mixture and gently toss until all the ingredients are evenly coated with the dressing.
- Serve: Serve the lentil salad warm or cold, depending on your preference. It can be enjoyed on its own or as a side to complement other dishes.
Extra Tips:
To enhance the flavor of this dish, consider adding a sprinkle of feta cheese or crumbled goat cheese for a creamy contrast. You can also incorporate other vegetables such as cucumber or carrots for added crunch.
If time allows, let the salad sit in the refrigerator for an hour before serving to allow the flavors to meld together. For a nutty twist, garnish with toasted walnuts or almonds. Adjust the seasoning to your taste preference, and remember that the vinaigrette can be stored in the refrigerator for future use.
Spinach and Gruyère Soufflé

Spinach and Gruyère Soufflé is a delightful French vegetarian dish that elevates the humble spinach to a sophisticated level. This classic soufflé is known for its light, airy texture combined with the rich flavors of Gruyère cheese. The dish is perfect for a dinner party or a special family meal, providing a combination of elegance and comfort.
The key to a successful soufflé lies in its preparation; with a few careful steps, you can achieve that impressive rise and fluffy texture that make this dish a standout. The combination of fresh spinach and flavorful Gruyère cheese creates a savory depth that’s both satisfying and nutritious.
Gruyère, a Swiss cheese known for its smooth melting properties and nutty taste, pairs beautifully with the earthy flavors of spinach. When these ingredients are combined with a traditional béchamel sauce and whipped egg whites, the result is a soufflé that’s both rich in flavor and airy in texture. This recipe serves 4-6 people, making it a great choice for a small gathering or a family dinner.
Ingredients for 4-6 servings:
- 300g fresh spinach leaves
- 60g unsalted butter, plus extra for greasing
- 40g all-purpose flour
- 250ml whole milk
- 1/4 teaspoon freshly grated nutmeg
- Salt and pepper to taste
- 5 large eggs, separated
- 150g Gruyère cheese, grated
- 1 tablespoon breadcrumbs
Cooking Instructions:
- Prepare the Soufflé Dish: Preheat the oven to 190°C (375°F). Grease a 1.5-liter soufflé dish with butter and sprinkle with breadcrumbs. This will help the soufflé rise evenly and prevent sticking.
- Cook the Spinach: In a large pan, sauté the spinach over medium heat until wilted. Transfer to a sieve and press out excess moisture. Chop finely and set aside.
- Make the Béchamel Sauce: In a medium saucepan, melt the butter over medium heat. Stir in the flour and cook for 1-2 minutes to form a roux. Gradually whisk in the milk, continuing to stir until the sauce thickens. Add nutmeg, salt, and pepper to taste.
- Incorporate the Cheese and Spinach: Remove the saucepan from heat and stir in the grated Gruyère cheese until melted and smooth. Mix in the chopped spinach until evenly distributed.
- Prepare the Egg Whites: In a clean, dry bowl, beat the egg whites to stiff peaks using an electric mixer. Confirm no yolk contaminates the whites, as this will affect their ability to stiffen.
- Combine Mixtures: Stir the egg yolks into the warm cheese and spinach mixture until well combined. Gently fold one-third of the beaten egg whites into the mixture to lighten it. Carefully fold in the remaining egg whites, taking care not to deflate them.
- Bake the Soufflé: Pour the soufflé mixture into the prepared dish, smoothing the top with a spatula. Run your thumb around the edge inside the rim to help the soufflé rise evenly. Bake for 25-30 minutes until well-risen and golden brown on top. Avoid opening the oven door during baking.
Extra Tips:
To ascertain your soufflé rises perfectly, make sure to use room temperature ingredients where possible, especially the eggs. Also, be gentle when folding the egg whites into the base mixture to retain as much air as possible.
Using a metal spoon or spatula instead of a wooden spoon can help achieve this. Finally, serve the soufflé immediately after it comes out of the oven, as it will start to deflate rather quickly. With these tips in mind, you’ll be able to present a stunning and delicious Spinach and Gruyère Soufflé that will impress your guests.
Provençal Vegetable Tian
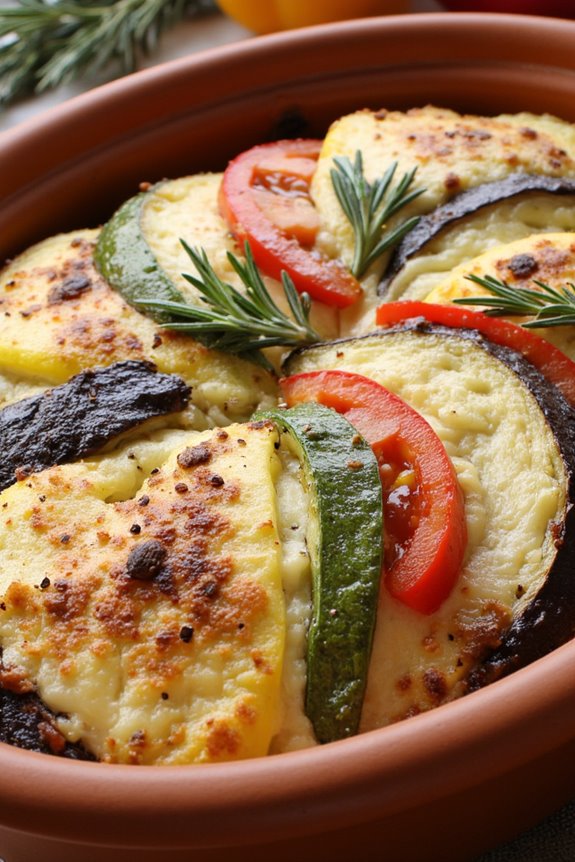
Provençal Vegetable Tian is a classic French dish that beautifully showcases the vibrant flavors of fresh vegetables, herbs, and olive oil. This rustic, oven-baked gratin is a demonstration of the simplicity and elegance of Provençal cuisine. The dish is named after the earthenware baking dish traditionally used in Provence, which allows the vegetables to cook evenly while developing a deliciously crisp and golden top layer.
This recipe layers thinly sliced tomatoes, zucchini, eggplant, and bell peppers, flavored with garlic, fresh thyme, and rosemary. When baked, the vegetables meld together, releasing their juices and infusing each layer with a harmonious blend of flavors. It’s a perfect main course for vegetarians, offering a hearty and satisfying meal that can be served hot or at room temperature. This Provençal Vegetable Tian serves 4-6 people.
Ingredients:
- 2 medium zucchinis
- 2 medium eggplants
- 4 large tomatoes
- 2 red bell peppers
- 1 large onion
- 4 cloves garlic
- 1/4 cup olive oil
- 1 teaspoon fresh thyme
- 1 teaspoon fresh rosemary
- Salt and pepper to taste
- 1/4 cup grated Parmesan cheese (optional)
Cooking Instructions:
- Prepare the Vegetables: Preheat your oven to 375°F (190°C). Begin by washing and drying all the vegetables. Thinly slice the zucchinis, eggplants, tomatoes, and bell peppers into 1/4-inch thick slices. Peel and slice the onion into thin rings.
- Layer the Vegetables: Lightly grease a large baking dish with olive oil. Arrange the vegetables in the dish in a single layer, alternating the slices of zucchini, eggplant, tomato, bell pepper, and onion in overlapping rows. This will create a visually appealing pattern.
- Add Seasoning: Mince the garlic cloves and sprinkle them evenly over the layered vegetables. Drizzle the olive oil over the top, making sure all the vegetables are lightly coated. Season generously with salt, pepper, fresh thyme, and rosemary.
- Bake the Tian: Cover the baking dish with aluminum foil and place it in the preheated oven. Bake for 30 minutes, allowing the vegetables to soften and release their juices. Remove the foil and continue baking for an additional 20-25 minutes, or until the vegetables are tender and the top is slightly browned.
- Add Cheese (Optional): If using Parmesan cheese, sprinkle it over the top of the vegetables during the last 5 minutes of baking. This will create a golden crust that adds a savory depth to the dish.
- Serve: Remove the tian from the oven and let it cool for a few minutes before serving. This dish can be enjoyed hot or at room temperature, making it versatile for any meal setting.
Extra Tips:
When preparing the Provençal Vegetable Tian, make sure that the vegetables are sliced evenly to promote uniform cooking. If you prefer a more robust flavor, consider adding a splash of balsamic vinegar before baking or incorporate other herbs like basil or oregano.
For a vegan option, simply omit the Parmesan cheese. This dish can also be prepared a day in advance and reheated, as the flavors deepen and improve overnight.
Creamy Mushroom Risotto
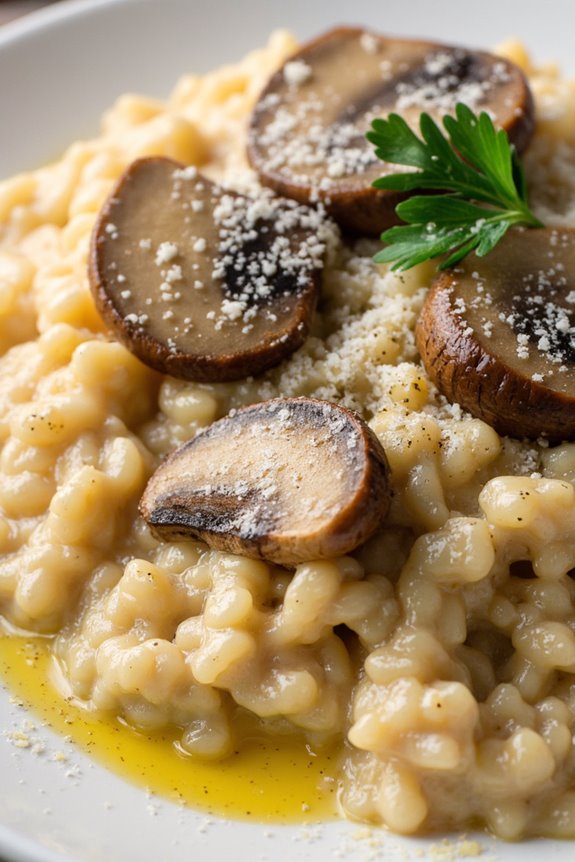
Creamy Mushroom Risotto is a classic French-inspired vegetarian dish that offers a rich, comforting meal perfect for any occasion. The creamy texture of the risotto complements the earthy flavors of the mushrooms, creating a dish that’s both luxurious and satisfying. This recipe is perfect for those looking to explore French cuisine without the use of meat, and it highlights the versatile nature of mushrooms as a main ingredient.
Whether you’re a seasoned chef or a home cook looking to try something new, this recipe will guide you through the process of creating a delicious and elegant meal.
Mushroom risotto is traditionally made using Arborio rice, which is known for its high starch content and ability to absorb flavors while maintaining a creamy consistency. The key to a perfect risotto is patience and attention to detail, as the dish requires constant stirring and gradual addition of liquid to achieve the desired texture.
This recipe serves 4-6 people, making it a wonderful choice for a family dinner or a small gathering with friends. With its rich flavors and velvety finish, this mushroom risotto is sure to impress even the most discerning palates.
Ingredients:
- 2 tablespoons olive oil
- 1 medium onion, finely chopped
- 2 cloves garlic, minced
- 250g (about 9 oz) Arborio rice
- 500g (about 18 oz) mixed mushrooms (such as cremini, shiitake, or button), sliced
- 1/2 cup white wine
- 1 liter (about 4 cups) vegetable broth
- 1/2 cup grated Parmesan cheese
- 100ml (about 1/2 cup) heavy cream
- Salt and pepper to taste
- Fresh parsley, chopped, for garnish
- Optional: A drizzle of truffle oil for serving
Cooking Instructions:
- Prepare the Broth: In a saucepan, bring the vegetable broth to a gentle simmer and maintain it at a low heat throughout the cooking process. This will guarantee that the risotto absorbs the liquid evenly as it cooks.
- Sauté the Vegetables: In a large pan, heat the olive oil over medium heat. Add the chopped onion and minced garlic, cooking until the onion becomes translucent and fragrant, about 3-4 minutes. Stir in the sliced mushrooms and cook until they’re softened and any liquid they release has evaporated, roughly 5-7 minutes.
- Toast the Rice: Add the Arborio rice to the pan with the mushrooms and onions. Stir well to coat the rice in the oil and cook for about 2 minutes, allowing the rice to toast slightly. This step enhances the nutty flavor of the rice.
- Deglaze with Wine: Pour in the white wine and stir continuously until the wine has mostly evaporated. This will add a depth of flavor to the risotto and help deglaze any bits stuck to the pan.
- Cook the Risotto: Begin adding the warm vegetable broth to the rice, one ladleful at a time. Stir frequently and only add more broth once the previous ladleful has been absorbed. Continue this process until the rice is creamy and tender, about 18-20 minutes.
- Add Final Touches: Once the rice is cooked to your desired consistency, stir in the heavy cream and grated Parmesan cheese. Season with salt and pepper to taste. Remove from heat and allow the risotto to sit for a minute or two to thicken.
- Serve: Serve the risotto hot, garnished with fresh parsley and a drizzle of truffle oil if desired. Enjoy the rich flavors and creamy texture of this comforting dish.
Extra Tips:
When making risotto, it’s important to use warm broth to prevent shocking the rice, which can affect the texture. Stirring frequently helps release the starches from the Arborio rice, contributing to the creamy consistency of the dish.
If possible, select a mix of mushrooms for a more complex flavor profile. Keep in mind that risotto is best served immediately, as it can become too thick if left to sit for too long. Adjust the seasoning at the end, as the Parmesan cheese can add a salty note to the risotto.
Braised Endives With Orange and Thyme
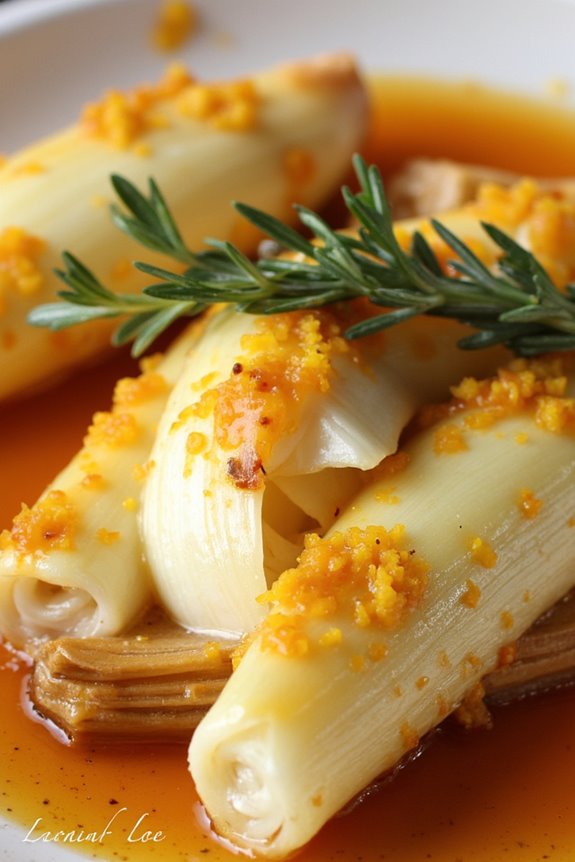
Braised Endives With Orange and Thyme is a delightful French vegetarian dish that brings together the subtle bitterness of endives with the sweet and citrusy notes of orange, all enhanced by the aromatic presence of thyme. This dish is perfect for a cozy dinner, offering a unique blend of flavors that are both comforting and invigorating.
The slow braising process allows the endives to absorb the vibrant flavors, resulting in a tender and flavorful main course that will surely impress your guests. This recipe is designed to serve 4-6 people, making it an ideal choice for a family meal or a small gathering.
The combination of ingredients not only makes for an elegant presentation but also provides a healthy and satisfying dish. The natural sweetness of the orange juice balances the bitterness of the endives, while the thyme adds an earthy depth that ties everything together. Whether you’re a seasoned cook or a beginner, this recipe is straightforward and rewarding.
Ingredients:
- 6 large endives
- 3 tablespoons olive oil
- 1 cup freshly squeezed orange juice
- 1 tablespoon orange zest
- 1 tablespoon honey
- 4 sprigs of fresh thyme
- Salt and pepper to taste
- 1 tablespoon butter
Cooking Instructions:
- Prepare the Endives: Trim the base of each endive and remove any damaged outer leaves. Cut the endives in half lengthwise.
- Sauté the Endives: In a large skillet, heat the olive oil over medium heat. Place the endives cut side down and cook until they begin to brown, about 5 minutes.
- Add the Liquid: Once the endives are browned, pour the orange juice into the skillet. Add the orange zest, honey, and thyme sprigs. Season with salt and pepper.
- Braise the Endives: Reduce the heat to low, cover the skillet, and let the endives braise for 25-30 minutes. Occasionally turn the endives and spoon the sauce over them to guarantee even cooking.
- Finish the Dish: Once the endives are tender, remove the lid and increase the heat to medium-high to reduce the sauce slightly. Stir in the butter and adjust the seasoning if necessary.
- Serve: Transfer the endives to a serving platter, drizzle with the remaining sauce, and garnish with additional thyme if desired.
Extra Tips:
To guarantee the best flavor, opt for fresh and firm endives. If your endives are too bitter for your taste, you can blanch them in boiling water for a minute before sautéing. This extra step will help mellow the bitterness.
Additionally, consider using a mixture of orange and lemon juice for a more complex citrus flavor. If fresh thyme is unavailable, dried thyme can be used, but remember to use a smaller amount as dried herbs are more concentrated.
Enjoy your Braised Endives With Orange and Thyme as a standalone dish or pair it with a side of crusty bread to soak up the delicious sauce.
Chickpea Socca With Ratatouille
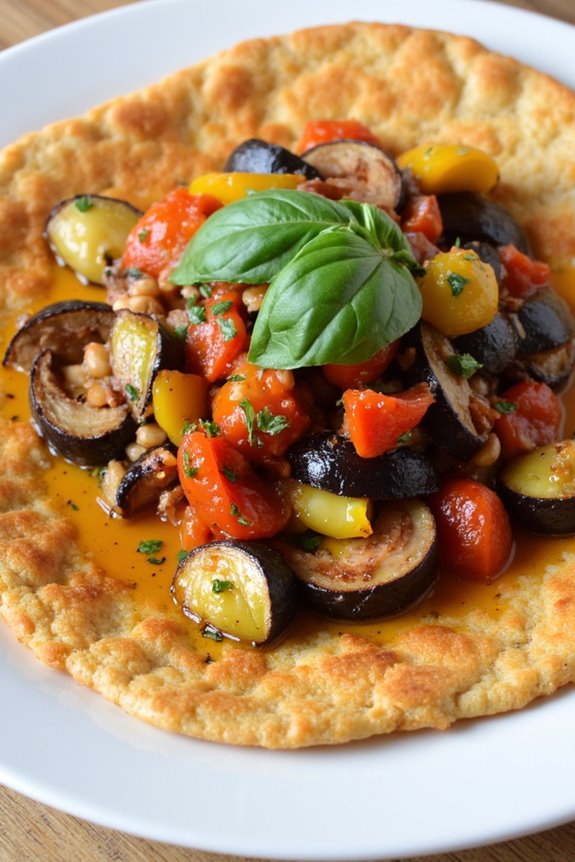
Chickpea Socca with Ratatouille is a delightful French vegetarian dish that combines the earthy flavors of chickpea flatbread with the vibrant, rustic taste of ratatouille. Originating from the south of France, this dish brings a taste of the Mediterranean to your table with its blend of fresh vegetables, aromatic herbs, and the subtle nuttiness of chickpea flour.
The socca, a gluten-free flatbread, serves as a perfect base to soak up all the delicious juices from the ratatouille, making it a satisfying main course for those seeking a healthy, plant-based meal.
Ratatouille, a Provençal stewed vegetable dish, is made using a variety of seasonal vegetables such as eggplants, zucchini, bell peppers, and tomatoes. The vegetables are simmered together with fragrant herbs like thyme and basil, creating a harmonious blend of flavors that pairs beautifully with the crisp, slightly chewy texture of the socca.
This dish isn’t only a feast for the palate but also a colorful addition to any dining table, showcasing the natural beauty and taste of fresh produce.
Ingredients for 4-6 Servings:
*For the Socca:*
- 2 cups chickpea flour
- 2 cups water
- 4 tablespoons olive oil
- 1 teaspoon salt
- 1 teaspoon freshly ground black pepper
For the Ratatouille:
- 2 tablespoons olive oil
- 1 large eggplant, diced
- 2 zucchinis, sliced
- 1 red bell pepper, diced
- 1 yellow bell pepper, diced
- 1 large onion, chopped
- 4 cloves garlic, minced
- 4 large tomatoes, chopped
- 1 teaspoon salt
- 1 teaspoon freshly ground black pepper
- 1 teaspoon dried thyme
- 1 teaspoon dried basil
- Fresh basil leaves for garnish
Cooking Instructions:
- Prepare the Socca Batter:
- In a large bowl, whisk together the chickpea flour, water, olive oil, salt, and pepper until smooth. Let the batter rest at room temperature for at least 30 minutes to allow the flour to absorb the liquid.
- Cook the Ratatouille:
- Heat olive oil in a large skillet over medium heat. Add the onion and garlic, sautéing until the onion becomes translucent.
- Add the eggplant, zucchinis, and bell peppers to the skillet. Cook for about 10 minutes, stirring occasionally, until the vegetables begin to soften.
- Stir in the tomatoes, salt, pepper, thyme, and basil. Lower the heat and let the mixture simmer for about 20-25 minutes, or until the vegetables are tender and the flavors are well combined.
- Cook the Socca:
- Preheat the oven to 450°F (230°C). Place a large oven-safe skillet or baking sheet in the oven to heat up.
- Once hot, carefully remove the skillet from the oven and add a tablespoon of olive oil to coat the bottom.
- Pour in enough socca batter to cover the bottom of the skillet in a thin layer. Bake for 8-10 minutes, or until the socca is lightly browned and crisp around the edges.
- Repeat the process with the remaining batter.
- Assemble the Dish:
- Place the socca on serving plates and top each with a generous portion of ratatouille. Garnish with fresh basil leaves before serving.
Extra Tips:
For a deeper flavor, consider roasting the vegetables for the ratatouille in the oven before combining them with the tomatoes and herbs. This can add a slightly caramelized taste to the dish that pairs wonderfully with the socca.
Additionally, you can customize the socca by adding various herbs or spices to the batter, such as rosemary or cumin, to give it a unique twist.
Finally, remember that socca is best enjoyed fresh out of the oven while it’s still warm and crisp, so timing the preparation of both components is key to serving them at their best.
Roasted Vegetable Galette With Goat Cheese

Roasted Vegetable Galette With Goat Cheese is a delightful French vegetarian main course that combines the rich, earthy flavors of roasted vegetables with the creamy tanginess of goat cheese, all encased in a buttery, flaky crust. This dish is perfect for any dinner party or a cozy family meal, offering a sophisticated yet comforting experience.
The galette’s rustic appearance adds charm to your dining table, making it a visually appealing centerpiece. Making this galette involves roasting a medley of seasonal vegetables until they achieve a caramelized sweetness and then layering them with creamy goat cheese on a homemade or store-bought pastry dough.
The dough is folded around the edges to encase the filling, resulting in a beautiful, free-form pie. The balance of textures and flavors – from the crisp, golden crust to the soft, savory filling – makes this dish a standout favorite. Suitable for serving 4-6 people, this recipe is a culinary celebration of simplicity and elegance.
Ingredients
- 1 sheet of store-bought puff pastry or homemade pie dough
- 2 tablespoons olive oil
- 1 large zucchini, sliced
- 1 red bell pepper, sliced
- 1 yellow bell pepper, sliced
- 1 medium-sized eggplant, sliced
- 1 red onion, sliced
- 2 cloves garlic, minced
- Salt and pepper to taste
- 1 teaspoon dried thyme
- 1 teaspoon dried basil
- 5 oz (about 150g) goat cheese, crumbled
- 1 egg, beaten (for egg wash)
- Fresh basil leaves for garnish
Cooking Instructions
- Preheat the Oven: Start by preheating your oven to 400°F (200°C) to verify it’s hot enough to properly roast the vegetables and bake the galette.
- Prepare the Vegetables: In a large bowl, combine sliced zucchini, red and yellow bell peppers, eggplant, and red onion. Add minced garlic, olive oil, salt, pepper, dried thyme, and dried basil. Toss everything together until the vegetables are well coated.
- Roast the Vegetables: Spread the seasoned vegetables evenly on a baking sheet. Roast them in the preheated oven for about 25-30 minutes, or until they’re tender and slightly caramelized. Stir halfway through to verify even roasting.
- Prepare the Dough: While the vegetables are roasting, roll out the puff pastry or pie dough on a lightly floured surface into a rough circle about 12 inches in diameter. Transfer the rolled-out dough onto a baking sheet lined with parchment paper.
- Assemble the Galette: Once the vegetables have cooled slightly, spread them evenly over the center of the dough, leaving a 2-inch border around the edges. Sprinkle the crumbled goat cheese over the top of the vegetables.
- Fold the Edges: Carefully fold the edges of the dough over the filling, pleating as you go to create a rustic edge. The center will remain open to reveal the colorful filling.
- Apply Egg Wash: Brush the exposed dough edges with the beaten egg to promote an even, golden-brown crust during baking.
- Bake the Galette: Place the assembled galette in the oven and bake for 25-30 minutes, or until the crust is golden brown and the cheese is slightly melted.
- Garnish and Serve: Remove the galette from the oven and let it cool slightly before garnishing with fresh basil leaves. Slice and serve warm.
Extra Tips
For the best results, use fresh, seasonal vegetables that are firm and ripe, as they’ll bring out the most flavor. If you prefer a more buttery crust, opt for homemade pie dough rather than store-bought pastry.
Additionally, feel free to experiment with the vegetable combinations according to what’s in season or your personal taste preferences. To enhance the dish further, consider adding a drizzle of balsamic glaze over the top before serving for an extra touch of sweetness and acidity.