

French cuisine has a special way of bringing people together with its heartwarming flavors.
Whether it’s a classic Coq Au Vin or a comforting Beef Bourguignon, these dishes tell stories of tradition and love.
In this list, you’ll find 11 easy French recipes that you can master tonight.
Each one offers a delightful taste of France that’s perfect for sharing with loved ones.
Ready to discover which could become your new favorite? Let’s explore!
Coq Au Vin
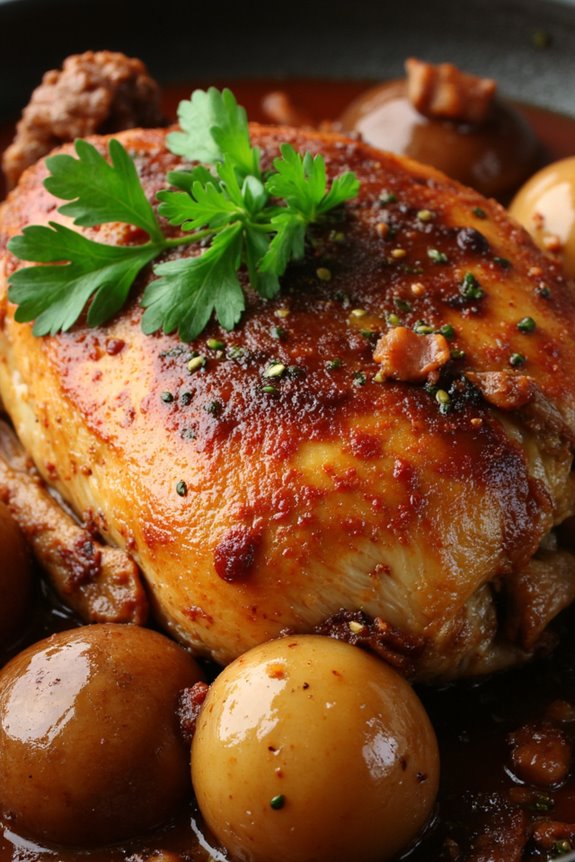
Coq Au Vin is a classic French dish that embodies rustic charm and flavors. This hearty meal, traditionally made with chicken, red wine, mushrooms, and bacon, brings the essence of French country cooking right to your dining table. The name translates to “rooster in wine,” but modern recipes commonly use chicken, making it more accessible for home cooks.
The slow-cooking process allows the ingredients to meld beautifully, resulting in tender meat and a rich sauce that pairs perfectly with crusty bread or creamy mashed potatoes. This dish not only showcases the delightful flavors of the ingredients but also makes for an impressive centerpiece for dinner gatherings.
The combination of aromatic herbs, savory bacon, and the depth of red wine creates a symphony of tastes that will transport you straight to the bistros of Burgundy. Whether you’re hosting friends or enjoying a cozy night in, Coq Au Vin is sure to impress and satisfy.
Ingredients (Serves 4-6)
- 4 chicken thighs, bone-in and skin-on
- 4 chicken drumsticks, bone-in and skin-on
- 4 slices of bacon, diced
- 1 cup pearl onions, peeled
- 2 cups mushrooms, quartered
- 3 cloves garlic, minced
- 2 cups red wine (preferably Burgundy)
- 1 cup chicken broth
- 2 tablespoons tomato paste
- 2 tablespoons all-purpose flour
- 2 tablespoons unsalted butter
- 1 teaspoon dried thyme
- 1 bay leaf
- Salt and pepper to taste
- Fresh parsley, chopped (for garnish)
Cooking Instructions
- Prepare the Chicken: Season the chicken pieces generously with salt and pepper. In a large Dutch oven or heavy pot, cook the diced bacon over medium heat until crispy. Remove the bacon with a slotted spoon and set it aside, leaving the rendered fat in the pot.
- Brown the Chicken: In the same pot, add the chicken pieces skin-side down and brown them on all sides for about 5-7 minutes. This step helps to develop flavor. Once browned, remove the chicken from the pot and set it aside with the bacon.
- Sauté Vegetables: Add the pearl onions and mushrooms to the pot. Sauté them in the bacon fat for about 5 minutes until they start to soften. Stir in the minced garlic and cook for an additional minute until fragrant.
- Create the Sauce: Stir in the tomato paste, and cook for 1-2 minutes. Sprinkle the flour over the vegetables and stir to combine, cooking for another minute. This will thicken the sauce.
- Deglaze with Wine: Pour in the red wine while scraping the bottom of the pot to release any browned bits. Then add the chicken broth, thyme, bay leaf, and the reserved bacon. Bring the mixture to a simmer.
- Add Chicken and Cook: Return the browned chicken pieces to the pot, ensuring they’re submerged in the liquid. Cover the pot and reduce the heat to low. Let it simmer gently for about 1.5 to 2 hours, or until the chicken is tender and fully cooked.
- Finish and Serve: Once the chicken is tender, remove the bay leaf. Stir in the butter to enrich the sauce and adjust the seasoning with salt and pepper to taste. Serve the Coq Au Vin hot, garnished with fresh parsley, alongside crusty bread or mashed potatoes.
Extra Tips
For the best results, choose a good-quality red wine that you’d enjoy drinking, as it greatly impacts the flavor of the dish. Additionally, marinating the chicken in wine and herbs a few hours before cooking can enhance the taste even further.
Feel free to customize the vegetables or add pearl barley for a twist. Finally, Coq Au Vin tastes even better the next day, so consider making it ahead of time for a deeper flavor!
Ratatouille
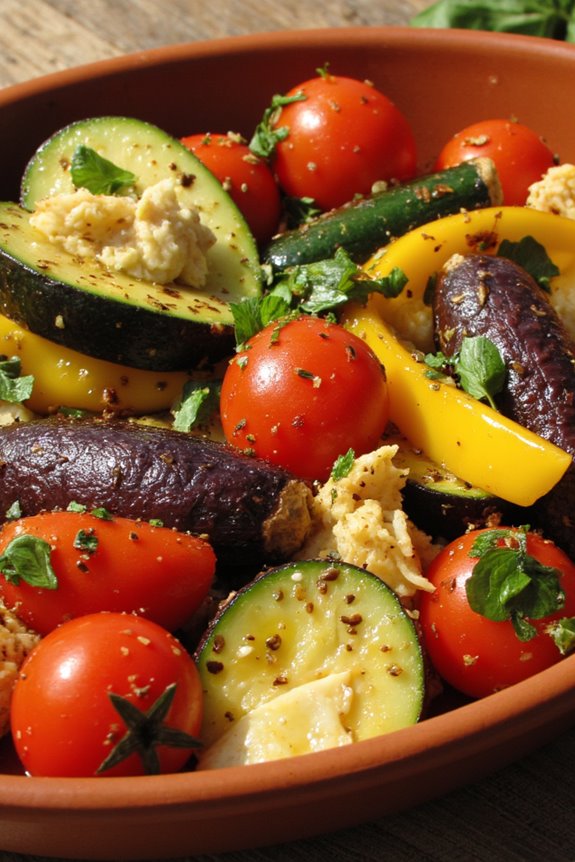
Ratatouille is a classic French dish that embodies the essence of summer with its colorful vegetables and aromatic herbs. Originating from the Provence region, this rustic vegetable stew combines eggplant, zucchini, bell peppers, and tomatoes, creating a delightful medley of flavors and textures. Traditionally served as a side dish, ratatouille can also shine as a main course when paired with crusty bread or over a bed of rice or pasta. The beauty of this dish lies in its simplicity, allowing the natural flavors of the vegetables to take center stage.
Preparing ratatouille isn’t only about cooking; it’s an opportunity to embrace the essence of French cuisine. This dish is versatile and can be customized according to seasonal vegetables or personal preferences. Whether you choose to roast, sauté, or simmer the ingredients, ratatouille is an excellent way to celebrate fresh produce. With each bite, you’ll experience a taste of southern France that’s both comforting and satisfying.
Ingredients (serves 4-6):
- 1 large eggplant, diced
- 2 medium zucchinis, sliced
- 1 large bell pepper (red or yellow), chopped
- 1 medium onion, diced
- 3 cloves garlic, minced
- 4 ripe tomatoes, diced (or 1 can of diced tomatoes)
- 1/4 cup olive oil
- 1 tablespoon fresh thyme (or 1 teaspoon dried thyme)
- 1 tablespoon fresh basil (or 1 teaspoon dried basil)
- Salt and pepper to taste
Cooking Instructions:
- Prepare the Vegetables: Start by washing and chopping all your vegetables. Dice the eggplant, slice the zucchinis, chop the bell pepper, and dice the onion and tomatoes. Mince the garlic. Confirm that all pieces are roughly the same size for even cooking.
- Sauté the Aromatics: In a large skillet or Dutch oven, heat the olive oil over medium heat. Add the diced onion and minced garlic, and sauté for about 3-4 minutes until the onion becomes translucent and fragrant. This step is essential as it builds the flavor base for the dish.
- Cook the Eggplant: Add the diced eggplant to the skillet. Stir well, and cook for about 5-7 minutes until the eggplant softens and begins to brown. Eggplant absorbs oil, so you may need to add a splash of water if it starts to stick to the pan.
- Add the Remaining Vegetables: Next, add the zucchini and bell pepper to the skillet. Stir the mixture well and cook for another 5 minutes, allowing the vegetables to soften slightly.
- Incorporate Tomatoes and Herbs: Add the diced tomatoes (or canned tomatoes) to the skillet along with thyme and basil. Season with salt and pepper. Stir everything together, then bring the mixture to a gentle simmer.
- Simmer the Ratatouille: Reduce the heat to low, cover the skillet, and let the ratatouille simmer for about 20-25 minutes. Stir occasionally, letting the flavors meld together. The dish should be thick and the vegetables tender, but not mushy.
- Taste and Adjust Seasoning: After simmering, taste the ratatouille and adjust the seasoning if necessary. You can add more herbs, salt, or pepper according to your preference.
- Serve: Once done, remove from heat and let it cool slightly. Ratatouille can be served warm or at room temperature, either as a side dish or as a main course with a side of bread or over pasta.
Extra Tips: When making ratatouille, feel free to experiment with different vegetables based on what’s in season or what you have on hand. For a richer flavor, consider roasting the vegetables in the oven before adding them to the stew.
Additionally, ratatouille can be made ahead of time, as it tastes even better the next day when the flavors have had time to develop. Store leftovers in an airtight container in the refrigerator for up to three days, or freeze for longer storage.
Quiche Lorraine

Quiche Lorraine is a classic French dish that combines a flaky pastry crust with a rich and creamy filling, often featuring crispy bacon or lardons, eggs, and cheese. This savory tart is perfect for any occasion, whether it’s a cozy weeknight dinner, a festive brunch, or a picnic in the park.
The beauty of quiche lies in its versatility; you can easily customize the filling with your favorite ingredients, making it a delightful dish that appeals to everyone.
To make a perfect Quiche Lorraine, it’s crucial to use quality ingredients and pay attention to the cooking process. The combination of custard and savory flavors creates a deliciously smooth texture that contrasts beautifully with the crispness of the crust.
Serve it warm or at room temperature, accompanied by a fresh salad or some sautéed greens for a complete meal that’s sure to impress your guests.
Ingredients (Serves 4-6):
- 1 pre-made pie crust (9 inches)
- 6 slices of bacon, chopped
- 1 cup shredded Gruyère cheese
- 4 large eggs
- 1 cup heavy cream
- 1 cup whole milk
- 1/4 teaspoon freshly grated nutmeg
- Salt and black pepper to taste
- 2 tablespoons chopped fresh chives (optional, for garnish)
Cooking Instructions:
1. Preheat the Oven: Begin by preheating your oven to 375°F (190°C). This guarantees that it reaches the right temperature while you prepare the quiche, resulting in an evenly cooked and golden crust.
2. Prepare the Pie Crust: If using a homemade pie crust, roll it out to fit a 9-inch pie dish and place it in the dish. If using a pre-made crust, simply place it in the dish and prick the bottom with a fork to prevent bubbling.
Bake the crust in the preheated oven for about 10 minutes, until lightly golden. Remove it from the oven and let it cool slightly.
3. Cook the Bacon: In a skillet over medium heat, cook the chopped bacon until crispy, about 6-8 minutes. Once cooked, use a slotted spoon to transfer the bacon to a paper towel-lined plate to drain excess grease.
4. Make the Custard: In a large mixing bowl, whisk together the eggs, heavy cream, whole milk, grated nutmeg, salt, and black pepper. Make sure the mixture is well combined and smooth.
5. Assemble the Quiche: Spread the cooked bacon evenly over the bottom of the baked pie crust. Sprinkle the shredded Gruyère cheese on top of the bacon. Carefully pour the egg and cream mixture over the cheese and bacon, ensuring it’s evenly distributed.
6. Bake the Quiche: Place the assembled quiche in the oven and bake for 35-40 minutes, or until the filling is set and the top is lightly browned. You can check for doneness by inserting a knife into the center; it should come out clean.
7. Cool and Serve: Once baked, remove the quiche from the oven and let it cool for about 10 minutes before slicing. Garnish with freshly chopped chives if desired, and serve warm or at room temperature.
Extra Tips:
When preparing Quiche Lorraine, feel free to experiment with different cheeses or add vegetables such as spinach or mushrooms to the filling for added flavor and nutrition.
If you prefer a lighter version, you can substitute half-and-half for the heavy cream, but be sure to adjust the seasoning accordingly. For an even flakier crust, consider chilling the pie crust in the fridge for 30 minutes before baking.
Enjoy your homemade quiche with a crisp green salad for a delightful meal!
Beef Bourguignon
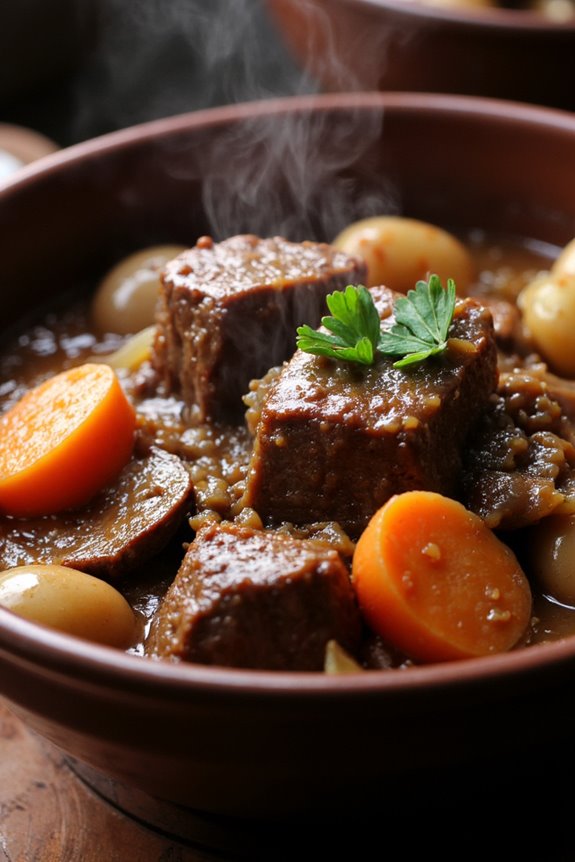
Beef Bourguignon, a classic French dish, is a rich and hearty beef stew that originates from the Burgundy region of France. This dish is famous for its tender chunks of beef, slow-cooked in red wine, and infused with aromatic herbs and vegetables. Traditionally served with crusty bread or over a bed of creamy mashed potatoes, Beef Bourguignon brings a taste of France right into your home kitchen.
The secret to its depth of flavor lies in the quality of the ingredients and the patience to let it simmer, allowing all the flavors to meld beautifully. This dish isn’t only a comforting meal but also perfect for entertaining, as it can be prepared in advance and simply reheated before serving.
The slow-cooking process transforms tougher cuts of beef into melt-in-your-mouth morsels, making it a favorite among meat lovers. Whether you’re cooking for a family gathering or a cozy dinner for two, Beef Bourguignon is sure to impress with its rich flavors and inviting aroma.
Ingredients (Serves 4-6):
- 2 lbs beef chuck, cut into 1.5-inch cubes
- 4 slices of bacon, diced
- 2 tablespoons olive oil
- 1 large onion, chopped
- 2 carrots, sliced
- 2 cloves garlic, minced
- 2 tablespoons tomato paste
- 1 bottle (750 ml) red wine (preferably Burgundy)
- 2 cups beef broth
- 1 bay leaf
- 1 teaspoon dried thyme
- 1 cup pearl onions, peeled
- 1 cup mushrooms, quartered
- Salt and pepper to taste
- Fresh parsley, for garnish
Cooking Instructions:
- Prepare the Beef: Start by seasoning the beef cubes with salt and pepper. This will help build flavor right from the beginning. In a large Dutch oven or heavy pot, heat the olive oil over medium-high heat. Add the diced bacon and cook until it becomes crispy. Remove the bacon and set aside, leaving the rendered fat in the pot.
- Brown the Beef: In the same pot, add the beef in batches to avoid overcrowding. Sear the beef on all sides until it’s nicely browned. This step is vital as it develops the deep flavors in the stew. Once browned, transfer the beef to a plate and set aside.
- Sauté the Vegetables: In the remaining fat, add the chopped onion and sliced carrots. Sauté for about 5 minutes until they begin to soften. Add the minced garlic and cook for an additional minute, stirring constantly to prevent burning.
- Combine Ingredients: Stir in the tomato paste and cook for another minute. Then, return the beef and bacon to the pot. Pour in the red wine and beef broth, scraping the bottom of the pot to release any browned bits. Add the bay leaf and thyme, and bring the mixture to a simmer.
- Slow Cook: Cover the pot and reduce the heat to low. Allow the Beef Bourguignon to simmer for about 2 to 3 hours, or until the beef is fork-tender. Stir occasionally and check to make sure it doesn’t stick to the bottom.
- Add Pearl Onions and Mushrooms: In the last 30 minutes of cooking, add the pearl onions and quartered mushrooms to the pot. This will add texture and flavor to the stew. Continue to simmer until the vegetables are tender.
- Final Seasoning: Once everything is cooked, taste and adjust seasoning with additional salt and pepper if needed. Remove the bay leaf before serving.
- Serve: Ladle the Beef Bourguignon into bowls or serve it family-style from the pot. Garnish with fresh parsley and enjoy with crusty bread or mashed potatoes.
Extra Tips:
For the best results, choose a good quality red wine, as it greatly influences the flavor of your dish. Additionally, if you have time, letting the stew sit overnight in the fridge allows the flavors to deepen even more.
When reheating, do so gently on the stove, adding a splash of broth or water if the sauce has thickened too much. Finally, don’t hesitate to experiment with additional herbs or vegetables to make this dish your own!
Bouillabaisse
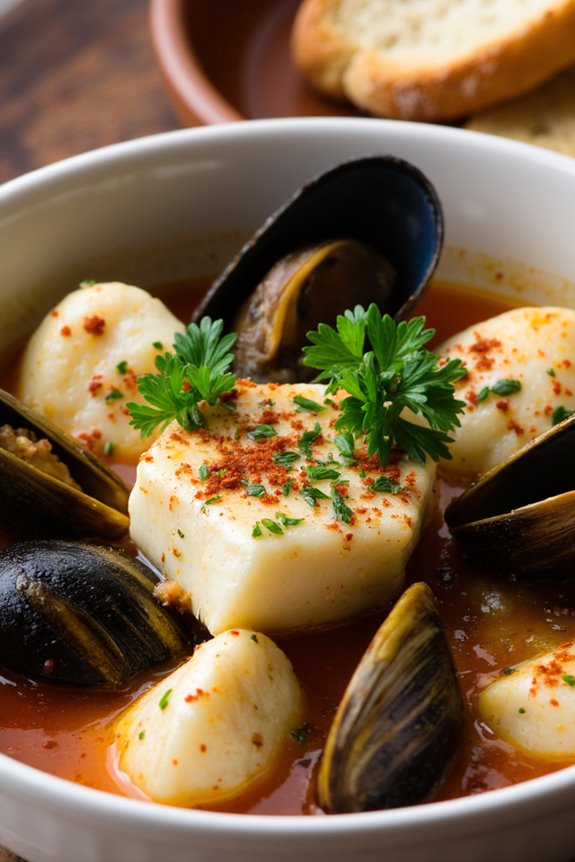
Bouillabaisse is a traditional Provençal fish stew that captures the essence of Southern France’s coastal cuisine. This hearty dish is typically made with a variety of fish and shellfish, infused with a medley of aromatic herbs and spices, and served with a rich broth that delights the palate.
Originating from the port city of Marseille, bouillabaisse was originally a humble fisherman’s meal, utilizing the catch of the day. Today, it’s celebrated as a gourmet dish, often enjoyed in fine dining restaurants and beloved in homes across France and beyond.
Preparing bouillabaisse is a rewarding experience that allows you to indulge in the flavors of the Mediterranean. The key to a successful bouillabaisse lies in the quality of the seafood and the broth. The dish is typically served with a side of rouille, a garlic and saffron mayonnaise, and crusty bread for dipping.
Whether you’re hosting a dinner party or treating yourself to a special meal, bouillabaisse is sure to impress with its aromatic flavors and vibrant presentation.
Ingredients (Serves 4-6)
- 1 lb firm white fish (such as cod or halibut), cut into chunks
- 1 lb mussels, cleaned and debearded
- 1 lb shrimp, peeled and deveined
- 1 large onion, finely chopped
- 2 leeks, cleaned and sliced
- 2 ripe tomatoes, diced
- 4 cloves garlic, minced
- 4 cups fish stock
- 1 cup dry white wine
- 1/4 tsp saffron threads
- 1 tsp fennel seeds
- 1 bay leaf
- 1/2 tsp red pepper flakes (optional)
- 1/4 cup olive oil
- Salt and pepper to taste
- Fresh parsley, chopped (for garnish)
- Rouille (for serving)
- Crusty bread (for serving)
Cooking Instructions
- Prepare the Broth: In a large pot, heat the olive oil over medium heat. Add the chopped onion, leeks, and garlic. Sauté for about 5-7 minutes until the vegetables are soft and translucent. This step is vital as it builds a flavorful base for the broth.
- Add Tomatoes and Spices: Stir in the diced tomatoes, saffron threads, fennel seeds, bay leaf, and red pepper flakes. Cook for an additional 5 minutes until the tomatoes break down and release their juices. This will enhance the aroma and flavor of the broth.
- Deglaze with Wine: Pour in the dry white wine and let it simmer for about 3-4 minutes, allowing the alcohol to evaporate and the flavors to meld. This step is fundamental for developing a rich depth of flavor in the stew.
- Add Fish Stock: Pour in the fish stock and bring the mixture to a gentle boil. Reduce the heat to low and let it simmer for about 10 minutes. This will allow the flavors to fully integrate while creating a fragrant broth.
- Cook the Seafood: Add the chunks of firm white fish, mussels, and shrimp to the pot. Cover and cook for another 5-7 minutes, or until the seafood is cooked through and the mussels have opened. Be mindful not to overcook the seafood, as it can become tough.
- Season and Serve: Taste the bouillabaisse and adjust the seasoning with salt and pepper as needed. Remove the bay leaf before serving. Ladle the stew into bowls, garnish with fresh parsley, and serve hot with rouille and crusty bread on the side.
Extra Tips
When making bouillabaisse, it’s important to select the freshest seafood available for the best flavor and texture. Consider visiting a local fish market to find high-quality ingredients.
Additionally, feel free to customize the seafood based on your preferences or what’s in season. Don’t skip the rouille; its garlicky, saffron-infused richness perfectly complements the broth and adds an authentic touch to your bouillabaisse experience.
Enjoy this dish with a glass of crisp white wine for a true taste of France!
French Onion Soup
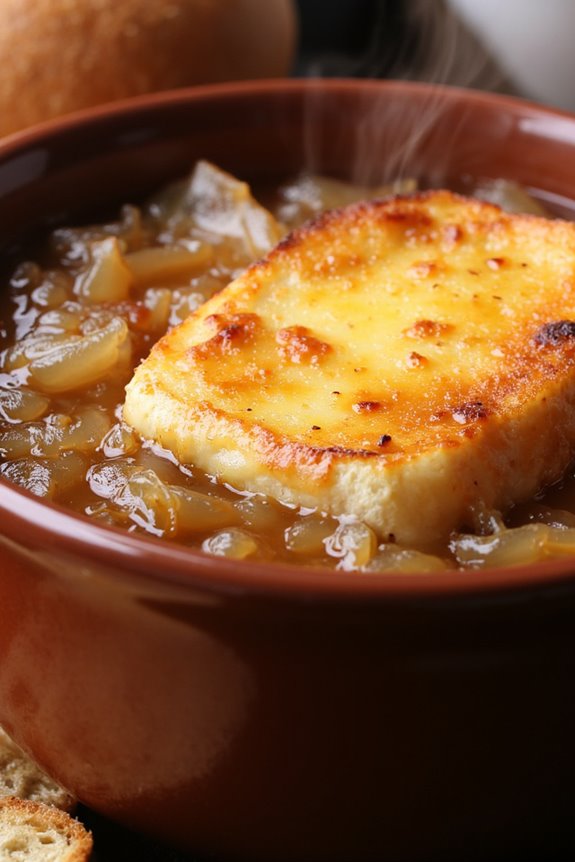
French Onion Soup is a classic dish that celebrates the rich flavors of caramelized onions and savory broth, topped with melted cheese and toasted bread. Originating from France, this comforting soup is perfect for a cozy dinner and has become a favorite around the world. The secret to a perfect French Onion Soup lies in the slow cooking of the onions, allowing them to transform into a sweet and deeply flavorful base for the soup.
To make a memorable French Onion Soup, you’ll need a few high-quality ingredients, along with some patience and care in preparing the onions. As they slowly caramelize, they develop a beautiful golden color and an irresistible aroma. The addition of beef or vegetable broth, along with a splash of white wine, elevates the soup’s flavor, while the crusty bread and melted cheese create a delightful topping that’s hard to resist.
Ingredients (Serves 4-6):
- 4 large yellow onions, thinly sliced
- 4 tablespoons unsalted butter
- 1 tablespoon olive oil
- 1 teaspoon sugar
- 4 cups beef broth (or vegetable broth for a vegetarian option)
- 1 cup dry white wine (optional)
- 2 tablespoons all-purpose flour
- 1 teaspoon fresh thyme leaves (or ½ teaspoon dried thyme)
- Salt and pepper to taste
- 6-8 slices of French baguette
- 1 ½ cups shredded Gruyère cheese (or Swiss cheese)
Cooking Instructions:
- Caramelize the Onions: In a large, heavy-bottomed pot, melt the butter and olive oil over medium heat. Add the thinly sliced onions and sprinkle with sugar. Stir to coat the onions in the butter. Cook the onions slowly, stirring occasionally, for about 30-40 minutes, or until they’re deeply caramelized and golden brown. This step is essential for developing the rich flavor of the soup.
- Add Flour: Once the onions are caramelized, sprinkle the flour over them and stir to combine. Cook for an additional 2-3 minutes. This will help to thicken the soup later on and give it a nice body.
- Deglaze with Wine: If using, pour in the white wine and scrape the bottom of the pot to release any flavorful bits stuck to the bottom. Allow the wine to simmer for about 5 minutes until it reduces slightly.
- Add Broth and Seasonings: Pour in the beef broth and add the thyme, salt, and pepper. Bring the mixture to a simmer and let it cook for about 20-30 minutes to allow the flavors to meld. Taste and adjust seasoning if necessary.
- Prepare the Bread: While the soup simmers, preheat your oven to 400°F (200°C). Arrange the slices of baguette on a baking sheet and toast them in the oven for about 5-10 minutes, or until they’re golden and crispy.
- Serve the Soup: Ladle the hot soup into oven-safe bowls. Place a slice of toasted baguette on top of each bowl and generously sprinkle with shredded Gruyère cheese. Place the bowls under the broiler for 2-3 minutes until the cheese is bubbly and golden.
- Enjoy: Remove the bowls from the oven (they will be very hot) and let them cool slightly before serving. Enjoy your homemade French Onion Soup with a sprinkle of fresh thyme if desired.
Extra Tips:
For an even deeper flavor, consider using a mix of beef and chicken broth or adding a splash of brandy or sherry at the deglazing step.
Don’t rush the caramelization process; low and slow is key to achieving that sweet, rich taste. You can also make the soup a day ahead, as the flavors will deepen and improve when stored in the fridge overnight. Just reheat before serving and add the toasted bread and cheese right before broiling.
Tarte Tatin

Tarte Tatin is a classic French dessert that combines the delightful sweetness of caramelized apples with a flaky pastry base. Legend has it that this dish was created accidentally by the Tatin sisters in the late 1800s at their hotel in Lamotte-Beuvron. The original idea was to make an apple pie, but a little mistake during preparation led to the apples being cooked in butter and sugar before being covered with pastry and baked. The result was a delicious upside-down tart that has since become a beloved staple in French cuisine.
Making Tarte Tatin at home is easier than it might seem, and the end result is an impressive dessert that will surely delight your guests. With just a handful of ingredients and a little patience, you can create this caramelized masterpiece that perfectly balances sweetness and acidity. Serve it warm with a scoop of vanilla ice cream or a dollop of crème fraîche for an extra special touch.
Ingredients (serving size: 4-6 people):
- 6 medium-sized apples (preferably Granny Smith or Golden Delicious)
- 100g (½ cup) unsalted butter
- 150g (¾ cup) granulated sugar
- 1 teaspoon vanilla extract
- 1 sheet of puff pastry (thawed if frozen)
- A pinch of salt
- Optional: ice cream or crème fraîche for serving
Cooking Instructions:
- Prepare the Apples: Start by peeling, coring, and quartering the apples. This step is vital as it allows the apples to cook evenly and caramelize beautifully. Set them aside once prepared.
- Make the Caramel: In a heavy-bottomed oven-safe skillet or frying pan, melt the butter over medium heat. Once melted, add the sugar and stir continuously until the mixture turns a light golden brown and has a smooth consistency. Be careful not to let it burn, as this will affect the flavor of your Tarte Tatin.
- Add the Apples: When the caramel is ready, add the prepared apple quarters to the skillet, arranging them in a circular pattern. Cook the apples in the caramel for about 10-15 minutes, occasionally turning them to guarantee they’re coated evenly. You’ll want them to soften slightly but not break apart.
- Add Vanilla and Salt: Once the apples have softened, add the vanilla extract and a pinch of salt to the skillet. This will enhance the flavor of the caramel and apples. Stir gently to combine.
- Top with Puff Pastry: Preheat your oven to 190°C (375°F). Roll out the puff pastry on a lightly floured surface if necessary, then carefully place it over the apples in the skillet, tucking the edges down around the apples. This will create a beautiful crust that will hold everything together.
- Bake: Transfer the skillet to the preheated oven and bake for about 25-30 minutes, or until the pastry is golden brown and puffed up. Keep an eye on it to prevent over-browning.
- Cool and Flip: Once baked, remove the skillet from the oven and let it cool for about 10 minutes. This resting period is essential as it allows the caramel to thicken slightly. To serve, place a large serving plate over the skillet and carefully invert the Tarte Tatin onto the plate. Be cautious, as the caramel will be hot.
- Serve: Slice the Tarte Tatin and serve it warm, optionally with a scoop of ice cream or a dollop of crème fraîche for a delightful pairing.
Extra Tips: When making Tarte Tatin, choose apples that hold their shape well during cooking, such as Granny Smith or Honeycrisp. Make sure to let the caramel cool slightly before inverting the tart to prevent it from spilling out. Additionally, you can add a dash of cinnamon or nutmeg to the caramel for an extra layer of flavor. Enjoy this classic dish with friends and family, and don’t forget to savor every bite!
Salade Niçoise
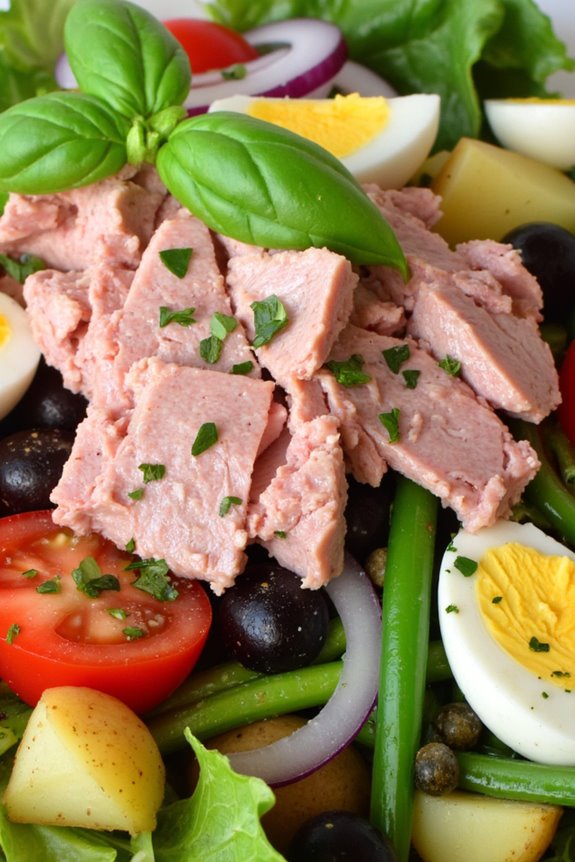
Salade Niçoise is a vibrant and colorful French salad that hails from the coastal city of Nice in the Provence region. This invigorating dish is a perfect representation of the Mediterranean diet, combining fresh vegetables, protein, and a light dressing to create a meal that’s both satisfying and healthy. Traditionally, it features ingredients such as tomatoes, green beans, olives, and hard-boiled eggs, often accompanied by tuna or anchovies.
Salade Niçoise can be served as a light lunch or dinner, making it an excellent choice for warm evenings or casual gatherings. The beauty of this salad lies in its versatility; you can adjust the ingredients according to your preferences or what you have on hand. Whether you choose to include fresh herbs, different types of protein, or even grains, each variation maintains the essence of this classic French dish.
With its delightful combination of flavors and textures, Salade Niçoise is sure to become a favorite in your dinner repertoire.
Ingredients (serving size of 4-6 people):
- 4 cups mixed salad greens (such as arugula, romaine, or butter lettuce)
- 2 cups ripe tomatoes, quartered
- 1 cup green beans, trimmed and blanched
- 1 cup small potatoes, boiled and quartered
- 1 can (5 oz) tuna in olive oil, drained and flaked
- 4 hard-boiled eggs, peeled and quartered
- ½ cup pitted black olives (preferably Niçoise or Kalamata)
- ¼ cup red onion, thinly sliced
- ¼ cup capers (optional)
- ¼ cup extra virgin olive oil
- 2 tablespoons red wine vinegar
- 1 teaspoon Dijon mustard
- Salt and pepper to taste
- Fresh basil leaves for garnish (optional)
Cooking Instructions:
1. Prepare the Vegetables: Start by washing and preparing your vegetables. Rinse the salad greens thoroughly and pat them dry. Quarter the tomatoes, trim and blanch the green beans in boiling water for about 3-4 minutes until tender yet crisp, then plunge them into ice water to stop the cooking process.
Boil the small potatoes until fork-tender, let them cool slightly, and then quarter them.
2. Prepare the Eggs: While the vegetables are cooking, place the eggs in a pot and cover them with cold water. Bring to a boil, then cover the pot and remove it from heat, letting the eggs sit for about 10-12 minutes.
Afterward, transfer the eggs to an ice bath to cool before peeling and quartering them.
3. Make the Dressing: In a small bowl, whisk together the extra virgin olive oil, red wine vinegar, Dijon mustard, salt, and pepper until well combined. Adjust the seasoning to taste. This dressing will enhance the flavors of the salad without overpowering them.
4. Assemble the Salad: In a large serving bowl or platter, layer the mixed greens as the base. Arrange the tomatoes, green beans, potatoes, and tuna on top of the greens.
Distribute the quartered hard-boiled eggs, olives, and sliced red onion evenly across the salad.
5. Drizzle with Dressing: Pour the dressing over the assembled salad, ensuring that all ingredients are lightly coated. Gently toss the salad together, if desired, or serve it in layers for a more visually appealing presentation.
6. Garnish and Serve: Finally, garnish the salad with fresh basil leaves, if using. Serve immediately, allowing guests to enjoy the vibrant colors and fresh flavors of this classic dish.
Extra Tips:
When making Salade Niçoise, feel free to customize the ingredients based on personal preference or seasonal availability. Consider adding other vegetables such as bell peppers or artichoke hearts for additional texture and flavor.
For an even heartier meal, you can incorporate cooked quinoa or chickpeas. Make sure to use high-quality olive oil and fresh ingredients to elevate the taste of the salad. If you’re preparing it ahead of time, keep the dressing separate until just before serving to maintain the freshness of the greens.
Enjoy your culinary journey through the south of France!
Chicken Provençal

Chicken Provençal is a delightful dish that hails from the sun-soaked region of Provence in France. This rustic recipe celebrates the flavors of the Mediterranean, combining tender chicken with vibrant ingredients like tomatoes, olives, and fresh herbs. It’s an ideal dish for a cozy family dinner or an intimate gathering with friends, offering both comfort and sophistication on your dinner table.
The beauty of Chicken Provençal lies in its simplicity, allowing the natural flavors of the ingredients to shine through. You can easily prepare this dish in one pot, making it not only delicious but also convenient. Whether served with crusty bread, over rice, or alongside a fresh salad, this dish is sure to impress your guests and leave them wanting more.
Ingredients (Serves 4-6):
- 4-6 bone-in chicken thighs and/or drumsticks
- Salt and black pepper, to taste
- 2 tablespoons olive oil
- 1 medium onion, diced
- 4 cloves garlic, minced
- 1 bell pepper, sliced (red or yellow)
- 1 can (14.5 oz) diced tomatoes, with juices
- 1 cup chicken broth
- 1 cup pitted olives (Kalamata or green)
- 1 tablespoon fresh thyme leaves (or 1 teaspoon dried thyme)
- 1 tablespoon fresh rosemary, chopped (or 1 teaspoon dried rosemary)
- Fresh basil leaves, for garnish
Cooking Instructions:
- Prepare the Chicken: Season the chicken thighs and drumsticks generously with salt and black pepper. This will help enhance the flavor of the meat as it cooks.
- Brown the Chicken: In a large, heavy-bottomed skillet or Dutch oven, heat the olive oil over medium heat. Add the chicken pieces skin-side down and cook for about 5-7 minutes until browned. Flip them over and brown the other side for another 5 minutes. Once browned, remove the chicken from the skillet and set aside.
- Sauté the Vegetables: In the same skillet, add the diced onion and cook for 2-3 minutes until translucent. Then add the minced garlic and sliced bell pepper, cooking for another 3-4 minutes until the vegetables are softened.
- Add Tomatoes and Broth: Pour in the canned diced tomatoes with their juices and chicken broth. Stir to combine, scraping up any browned bits from the bottom of the skillet for additional flavor.
- Combine and Simmer: Return the browned chicken pieces to the skillet, nestling them into the sauce. Add the olives, thyme, and rosemary. Bring the mixture to a gentle simmer, reduce the heat to low, cover the skillet, and let it cook for about 30-40 minutes, or until the chicken is cooked through and tender.
- Finish and Serve: Once the chicken is done, remove the lid and allow the sauce to reduce for a few more minutes if desired. Adjust the seasoning with additional salt and pepper if needed. Garnish with fresh basil leaves before serving.
Extra Tips:
For added depth of flavor, you can marinate the chicken in olive oil, garlic, and herbs for a few hours or overnight before cooking. This won’t only enhance the taste but also keep the chicken moist.
Additionally, feel free to customize the recipe by adding vegetables like zucchini or eggplant, or incorporating a splash of white wine for an extra layer of flavor. Serve with a side of crusty French bread to soak up the delicious sauce!
Crêpes Suzette

Crêpes Suzette is a classic French dessert that combines the delicate texture of crêpes with a luxurious orange-flavored sauce. Originating from France in the late 19th century, this delightful dish has become a staple in French cuisine, known for its elegant presentation and exquisite taste.
It’s often flambéed with orange liqueur, adding a dramatic flair that’s certain to impress your guests. Whether you’re hosting a special dinner or simply craving a sweet treat, Crêpes Suzette is an exceptional choice that offers a taste of French culinary finesse.
Making Crêpes Suzette might seem intimidating, but with a little practice, you can master this enchanting dish. The crêpes themselves are simple to prepare and can be made ahead of time, allowing you to focus on creating the delicious sauce.
Once you’ve combined the rich flavors of butter, sugar, orange juice, and liqueur, you’ll be ready to impress everyone at the dinner table with this delightful dessert.
Ingredients (Serves 4-6):
- 1 cup all-purpose flour
- 2 large eggs
- 1 ½ cups milk
- 2 tablespoons unsalted butter, melted
- 2 tablespoons granulated sugar
- 1 teaspoon vanilla extract
- Pinch of salt
- 4 tablespoons unsalted butter (for the sauce)
- ¼ cup granulated sugar (for the sauce)
- 1/2 cup freshly squeezed orange juice
- Zest of 1 orange
- 1/4 cup orange liqueur (like Grand Marnier or Cointreau)
- Optional: whipped cream or vanilla ice cream for serving
Cooking Instructions:
1. Prepare the Crêpe Batter: In a mixing bowl, combine the flour, eggs, milk, melted butter, sugar, vanilla extract, and a pinch of salt. Whisk the ingredients together until the batter is smooth and free of lumps. Allow the batter to rest for at least 30 minutes; this helps create tender crêpes.
2. Cook the Crêpes: Heat a non-stick skillet or crêpe pan over medium heat and lightly grease it with butter. Pour about 1/4 cup of the batter into the pan, tilting it to spread the batter evenly. Cook for about 1-2 minutes until the edges start to lift and the bottom is lightly golden. Flip the crêpe and cook for another minute until golden.
Repeat the process until all batter is used, stacking the cooked crêpes on a plate.
3. Make the Sauce: In a separate saucepan, melt the 4 tablespoons of butter over medium heat. Add the sugar and stir until it dissolves, then pour in the orange juice and zest. Stir continuously until the sauce thickens slightly, about 3-4 minutes.
4. Combine the Crêpes and Sauce: Fold each crêpe into quarters and place them in the saucepan with the orange sauce. Allow them to soak for a minute, turning them gently to coat in the sauce.
5. Flambé (Optional): For the flambé, carefully pour in the orange liqueur and ignite with a long lighter. Allow the flames to subside as the alcohol burns off, infusing the crêpes with flavor.
6. Serve: Once flambéed, transfer the crêpes to a serving plate, drizzling some of the sauce over the top. Optionally, serve with whipped cream or vanilla ice cream.
Extra Tips:
When making Crêpes Suzette, it’s important to guarantee that your crêpe batter is smooth and lump-free. Allowing the batter to rest not only improves the texture but also helps in achieving perfectly thin crêpes.
If you prefer a non-alcoholic version, simply omit the flambé step and enjoy the delicious orange sauce as is. Additionally, feel free to customize the sauce with other citrus fruits like lemon or lime for a unique twist!
Croque Monsieur

Croque Monsieur is a classic French dish that epitomizes comfort food with a delightful combination of savory ham, melted cheese, and creamy béchamel sauce, all nestled between slices of crusty bread.
Often served as a sandwich, it can be found in cafés and bistros throughout France, making it a beloved staple for lunch or a light dinner. The dish isn’t only delicious but also incredibly easy to prepare, making it a perfect choice for a casual yet elegant meal at home.
The origins of Croque Monsieur date back to the early 20th century, and its name translates to “mister crunch,” alluding to the crispy exterior of the sandwich.
While the traditional recipe is simple, it can be customized with various ingredients like different types of cheese or even sautéed vegetables. Whether you enjoy it as is or with a twist, Croque Monsieur is sure to impress your family and friends with its rich flavors and satisfying textures.
Ingredients (Serves 4-6)
- 8 slices of crusty bread (such as French baguette or pain de campagne)
- 4 slices of ham (preferably smoked or cured)
- 1 cup grated Gruyère cheese (or Emmental)
- 1 cup milk
- 2 tablespoons unsalted butter
- 2 tablespoons all-purpose flour
- 1 tablespoon Dijon mustard
- Salt and pepper, to taste
- Additional Gruyère cheese for topping
- Fresh parsley, for garnish (optional)
Cooking Instructions
- Prepare the Béchamel Sauce: In a saucepan over medium heat, melt the butter. Once melted, add the flour and whisk continuously for about 2 minutes to form a roux. Gradually pour in the milk while whisking to avoid lumps. Continue whisking until the sauce thickens, which should take about 5-7 minutes. Season with salt, pepper, and Dijon mustard. Remove from heat and mix in the grated cheese until melted and smooth.
- Assemble the Sandwiches: Preheat your oven to 400°F (200°C). Lay out four slices of bread on a clean surface. Place a slice of ham on each piece, then generously spread a layer of the béchamel sauce over the ham. Top with another slice of bread to create a sandwich.
- Prepare for Baking: Place the assembled sandwiches on a baking sheet lined with parchment paper. Pour any remaining béchamel sauce over the top of each sandwich, making sure it’s well-coated. Sprinkle additional grated cheese on top for a golden, cheesy crust.
- Bake the Sandwiches: Transfer the baking sheet to the preheated oven and bake for about 15-20 minutes, or until the sandwiches are golden brown and bubbly. For an extra crispy finish, you can place them under the broiler for the last 2-3 minutes, but keep a close eye to prevent burning.
- Serve and Enjoy: Once baked, remove the Croque Monsieur from the oven and allow them to cool for a minute or two. Garnish with fresh parsley if desired, then slice in half and serve immediately. Pair with a simple salad or some French fries for a complete meal.
Extra Tips
For an added twist, try substituting the ham with turkey or adding sautéed mushrooms for a vegetarian version.
You can also experiment with different cheeses to suit your taste; a mix of Gruyère and cheddar can provide a delightful flavor profile. If you want a more indulgent version, consider adding a fried egg on top, transforming it into a Croque Madame.
Always verify your béchamel sauce is smooth to achieve the best texture in your sandwich, and don’t skimp on the cheese for that perfect melt. Enjoy your culinary adventure into French cuisine!