

I have a soft spot for French desserts, but they can sometimes feel a bit too indulgent. That’s why I’m so excited to share some adorable mini versions that capture all the flavors we love, minus the guilt. Think of colorful Mini Macarons and perfectly sized Petite Madeleines. These little treats are not just eye candy; they offer a sweet escape that’s easy on the conscience. Ready to explore more of these bite-sized wonders?
Mini Macarons

Mini macarons are delightful bite-sized versions of the traditional French macaron, perfect for any occasion where you wish to impress with a touch of elegance and a pop of color. These delicate confections consist of two almond meringue cookies, which are crispy on the outside and chewy on the inside, sandwiched together with a rich filling. Their small size makes them ideal for parties, afternoon teas, or simply to enjoy as a sweet treat.
While the process of making macarons can be a bit finicky, the end result is worth every bit of effort. Creating mini macarons requires precision and patience, as the steps involved need careful attention to achieve the perfect texture and appearance. The batter must be mixed just right to form the characteristic “feet” at the base of each cookie, and the baking process must be closely monitored.
With this recipe, you’ll be able to make enough mini macarons to serve 4-6 people, guaranteeing everyone has a chance to savor these exquisite treats.
Ingredients (Serving Size: 4-6 people):
- 90g almond flour
- 150g powdered sugar
- 70g egg whites (about 2 large eggs)
- ¼ tsp cream of tartar
- 50g granulated sugar
- Gel food coloring (optional)
- 100g butter, softened (for filling)
- 200g powdered sugar (for filling)
- 1 tsp vanilla extract (for filling)
- 2 tbsp heavy cream (for filling)
Cooking Instructions:
- Prepare the Baking Sheets: Line two baking sheets with parchment paper or silicone baking mats. This will prevent the macarons from sticking and guarantee even baking.
- Sift Dry Ingredients: In a bowl, sift together the almond flour and powdered sugar. Sifting is essential to remove any lumps and guarantee a smooth batter.
- Beat Egg Whites: In a clean, dry bowl, beat the egg whites with the cream of tartar using an electric mixer on medium speed until frothy. Gradually add the granulated sugar and continue beating until stiff peaks form.
- Add Food Coloring: If using, add a few drops of gel food coloring to the egg whites and gently mix until the color is uniform.
- Fold in Dry Ingredients: Carefully fold the almond flour mixture into the egg whites in batches. Use a spatula and gently fold until the batter flows like lava and holds a ribbon shape for a few seconds.
- Pipe the Macarons: Transfer the batter to a piping bag fitted with a round tip. Pipe small circles (about 1 inch in diameter) onto the prepared baking sheets, spacing them apart. Tap the sheets on the counter to release any air bubbles.
- Rest the Macarons: Allow the piped macarons to sit at room temperature for 30-60 minutes until a skin forms on the surface. This step is vital for developing the characteristic feet.
- Preheat the Oven: Preheat your oven to 300°F (150°C) while the macarons rest.
- Bake the Macarons: Bake each tray for 15-18 minutes, turning halfway through, until the macarons are set and can be easily lifted from the parchment.
- Cool and Prepare Filling: Allow the macarons to cool completely on the baking sheets. Meanwhile, beat the softened butter, powdered sugar, vanilla extract, and heavy cream until light and fluffy to create the filling.
- Assemble the Macarons: Pair the macaron shells by size. Pipe or spread a small amount of filling onto the flat side of one shell and sandwich it with another shell.
- Mature the Macarons: For the best flavor and texture, refrigerate the assembled macarons for 24 hours before serving.
Extra Tips:
When making mini macarons, guarantee all your ingredients are at room temperature, which helps achieve the right consistency in the batter. Using gel food coloring instead of liquid helps maintain the batter’s consistency.
If you’re new to macaron-making, it can be helpful to draw circles on the parchment paper as a guide for piping uniform-sized macarons. Remember, practice makes perfect, so don’t be discouraged if your first batch isn’t flawless. With time, you’ll master the art of making perfect mini macarons.
Petite Madeleines
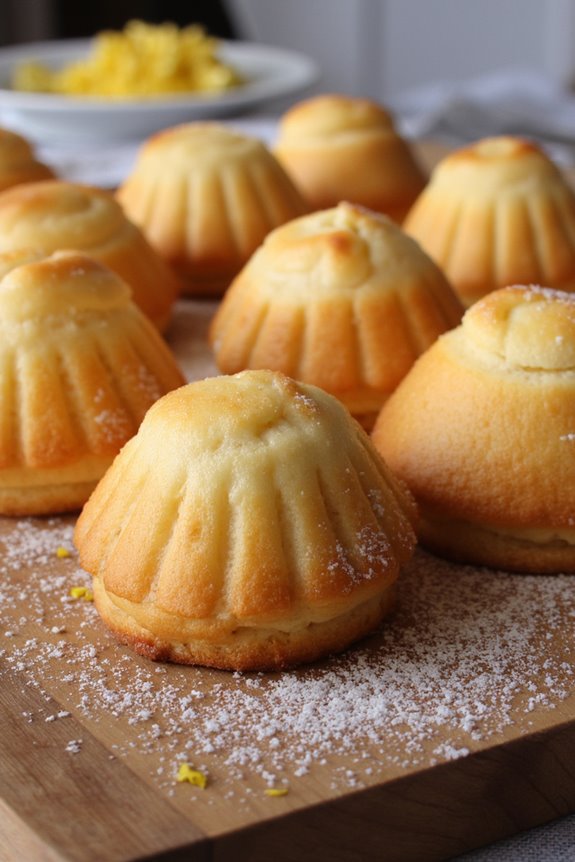
Petite Madeleines are a classic French treat that offer a delightful combination of buttery and slightly lemony flavors. These mini shell-shaped cakes are perfect for a tea party or as a sweet snack to indulge in anytime. The light, spongy texture of Petite Madeleines makes them a charming addition to any dessert table, and their size makes them easy to enjoy without feeling too guilty.
The secret to their unique shape and texture lies in the special madeleine pan and the gentle folding of ingredients, guaranteeing a fluffy yet moist crumb. Creating Petite Madeleines at home is a rewarding experience that brings the taste of France to your kitchen. The process involves a simple batter made from basic baking ingredients, with the addition of lemon zest for a revitalizing twist.
Whether you’re a novice baker or a seasoned pro, this recipe is straightforward and easy to follow, providing you with irresistible madeleines that your family and friends will adore. This recipe serves 4-6 people, making it perfect for small gatherings or personal enjoyment.
Ingredients:
- 1 cup all-purpose flour
- 1/2 cup granulated sugar
- 1/4 teaspoon salt
- 1/2 teaspoon baking powder
- 2 large eggs
- 1 teaspoon vanilla extract
- Zest of 1 lemon
- 1/2 cup unsalted butter, melted and cooled
- Confectioners’ sugar, for dusting
Instructions:
- Preheat the Oven: Begin by preheating your oven to 375°F (190°C). This guarantees that the madeleines bake evenly.
- Prepare the Pan: Lightly grease a madeleine pan with butter or non-stick spray to prevent the madeleines from sticking.
- Mix Dry Ingredients: In a medium-sized bowl, whisk together the flour, sugar, salt, and baking powder. This helps distribute the leavening agent evenly.
- Combine Wet Ingredients: In a separate bowl, beat the eggs until they’re frothy. Add in the vanilla extract and lemon zest, stirring to combine.
- Incorporate Butter: Gradually add the cooled, melted butter to the egg mixture, mixing thoroughly.
- Fold in Dry Ingredients: Gently fold the dry mixture into the wet ingredients using a spatula. Be careful not to overmix as this can lead to dense madeleines.
- Fill the Pan: Spoon the batter into the prepared madeleine pan, filling each mold about three-quarters full.
- Bake: Place the pan in the oven and bake for approximately 10-12 minutes, or until the edges are golden brown and the centers spring back when lightly touched.
- Cool and Dust: Once baked, remove the madeleines from the oven and allow them to cool in the pan for a few minutes before transferring them to a wire rack. Dust with confectioners’ sugar before serving.
Extra Tips:
To achieve the classic hump on the back of your madeleines, make certain your batter is well-chilled before baking. You can refrigerate the batter for an hour or overnight to enhance this characteristic shape.
Additionally, using a madeleine pan is essential for getting the distinctive shell shape. If you don’t have a madeleine pan, you can use mini muffin tins, although the shape will differ.
Ultimately, for peak flavor, use fresh lemon zest and high-quality vanilla extract. Enjoy your Petite Madeleines with a cup of tea or coffee for a true treat!
Mini Tarte Tatin
Mini Tarte Tatin is a delightful twist on the classic French dessert, offering a perfect balance of caramelized apples and flaky pastry in a bite-sized form. This miniature version isn’t only visually appealing but also delightful to savor, making it an ideal choice for entertaining or simply indulging in a sweet treat.
The mini tarte tatin is typically made with puff pastry, which provides a light and crisp texture that complements the rich, buttery caramel and tender apples.
Creating a mini tarte tatin involves preparing a luscious caramel sauce, gently cooking the apples until they’re tender and infused with the caramel’s deep flavor, and then covering them with a layer of puff pastry before baking. The result is a stunning, inverted tart that showcases the beautifully caramelized apples atop a golden pastry base. This recipe serves 4-6 people, making it perfect for a small gathering or a family dessert.
Ingredients (serving size: 4-6 people):
- 4 medium apples (such as Granny Smith or Honeycrisp)
- 1 cup granulated sugar
- 4 tablespoons unsalted butter
- 1 sheet puff pastry, thawed
- 1 teaspoon vanilla extract
- 1 teaspoon ground cinnamon
- A pinch of salt
Cooking Instructions:
- Prepare the Apples: Peel, core, and slice the apples into quarters. Try to keep the slices uniform for even cooking.
- Make the Caramel: In a medium-sized ovenproof skillet, add the sugar and cook over medium heat until it begins to melt. Stir occasionally until the sugar turns a golden brown, then add the butter. Stir until the butter is fully incorporated and the mixture is smooth.
- Add the Apples: Arrange the apple slices in a circular pattern over the caramel in the skillet, making sure they fit snugly. Sprinkle the cinnamon and a pinch of salt over the apples, and drizzle the vanilla extract on top.
- Cook the Apples: Allow the apples to cook in the caramel for about 10-12 minutes, occasionally basting them with the caramel sauce using a spoon. They should become tender but still hold their shape.
- Prepare the Puff Pastry: Roll out the puff pastry on a lightly floured surface to about 1/8-inch thickness. Cut the pastry into circles slightly larger than the skillet diameter.
- Cover the Apples: Place the puff pastry over the apples, tucking the edges down the sides of the skillet.
- Bake the Tarte Tatin: Preheat your oven to 375°F (190°C). Transfer the skillet to the oven and bake for 20-25 minutes, or until the pastry is puffed and golden brown.
- Cool and Invert: Allow the tarte to cool in the skillet for about 5 minutes. Carefully invert it onto a serving plate so the apples are on top.
- Serve: Cut into wedges and serve warm, optionally with a scoop of vanilla ice cream or a dollop of whipped cream.
Extra Tips:
When making the caramel, be vigilant and avoid stirring it too much initially to prevent crystallization. Use a skillet that can shift from stovetop to oven safely, such as a cast-iron skillet.
If the caramel hardens while you’re arranging the apples, don’t worry; it will melt again during baking. Make sure the puff pastry is well-chilled before baking to guarantee it puffs up nicely.
Enjoy your dessert fresh for the best texture, as the pastry may lose its crispness after a day.
Bite-Sized Financiers
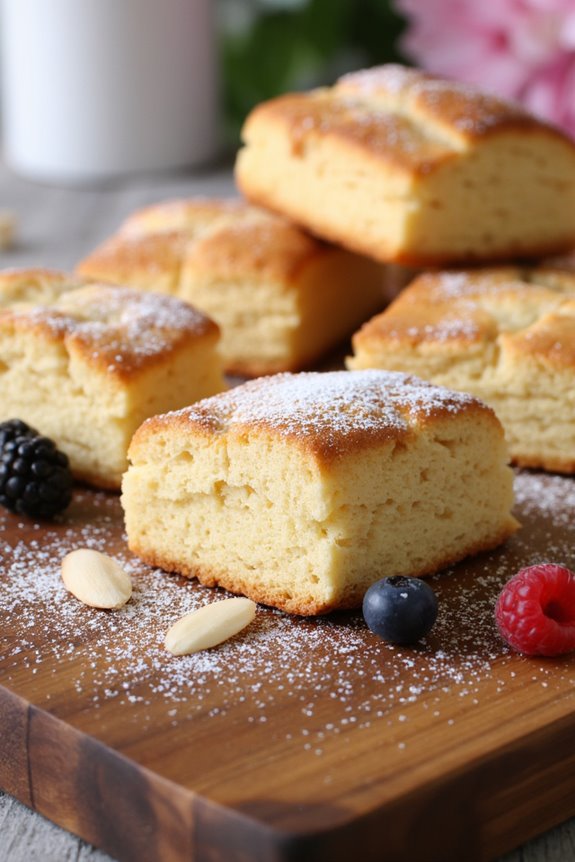
Delight your guests with these delicate, buttery Bite-Sized Financiers, a classic French pastry known for its rich nutty flavor and tender crumb. Traditionally made with almond flour, these mini treats are perfect for any occasion—from an elegant afternoon tea to a sophisticated dessert buffet. Their small size makes them an ideal choice for those who want to indulge in a sweet treat without overindulging.
With a crispy exterior and a moist, soft interior, Bite-Sized Financiers are sure to become a favorite in your mini dessert repertoire. The beauty of financiers lies in their simplicity and the quality of the ingredients used. The combination of browned butter, almond flour, and sugar creates a flavor profile that’s both rich and subtle.
These financiers are traditionally baked in small, rectangular molds, guaranteeing a perfect bite-sized portion. However, feel free to use any mini muffin or silicone mold you have on hand. Whether you serve them plain or with a sprinkle of powdered sugar, these little gems are sure to impress anyone who tries them.
Ingredients for 4-6 people:
- 1/2 cup (115g) unsalted butter
- 1 cup (100g) almond flour
- 1 cup (120g) powdered sugar
- 1/3 cup (40g) all-purpose flour
- 1/4 teaspoon salt
- 4 large egg whites
- 1 teaspoon vanilla extract
- Optional: sliced almonds or fresh berries for garnish
Cooking Instructions:
- Prepare the Browned Butter: Begin by melting the unsalted butter in a small saucepan over medium heat. Continue to cook, swirling the pan occasionally, until the butter turns a rich golden brown and has a nutty aroma. This should take about 5-7 minutes. Remove from heat and let it cool slightly.
- Mix Dry Ingredients: In a medium bowl, whisk together the almond flour, powdered sugar, all-purpose flour, and salt. Confirm that all dry ingredients are well combined and free of lumps.
- Whip Egg Whites: In a separate large mixing bowl, lightly beat the egg whites until frothy, but not stiff. They should be just foamy enough to incorporate air into the mixture.
- Combine Ingredients: Gradually fold the dry ingredients into the egg whites, mixing gently to maintain the airiness. Add the browned butter and vanilla extract, folding until the mixture is smooth and well combined.
- Prepare Molds: Preheat your oven to 350°F (175°C). Lightly grease your mini muffin or silicone molds to prevent sticking.
- Fill Molds: Spoon the batter into the prepared molds, filling each about 3/4 full. If desired, top each financier with a slice of almond or a small berry for added flavor and presentation.
- Bake: Place the molds in the preheated oven and bake for 12-15 minutes, or until the financiers are golden brown around the edges and a toothpick inserted into the center comes out clean.
- Cool and Serve: Remove the financiers from the oven and let them cool in the molds for a few minutes before transferring to a wire rack to cool completely. Serve at room temperature, dusted with powdered sugar if desired.
Extra Tips:
To ascertain your financiers have the perfect texture, be careful not to overmix the batter, as this can deflate the whipped egg whites and result in denser cakes. Additionally, using a high-quality butter will enhance the flavor of the browned butter, giving your financiers a richer taste.
If using berries, consider selecting smaller varieties like raspberries or blueberries to maintain the delicate balance of flavors. These financiers can be stored in an airtight container for up to three days, making them a convenient make-ahead option for entertaining.
Tiny Éclairs
Tiny Éclairs are a delightful miniature version of the classic French pastry, perfect for parties or as an elegant dessert option. These bite-sized treats consist of a delicate choux pastry shell, filled with a rich, creamy custard, and topped with a glossy chocolate glaze. Despite their diminutive size, they pack all the flavor and elegance of their larger counterparts, making them a sophisticated addition to any dessert spread.
Making Tiny Éclairs requires a bit of patience and attention to detail, but the result is worth the effort. The process involves preparing a choux pastry, guaranteeing it’s light and airy, and then piping it into small, uniform shapes. Once baked, the éclairs are filled with a luscious pastry cream and finished with a smooth chocolate glaze. These mini desserts serve 4-6 people, making them ideal for intimate gatherings or as a special treat for the family.
Ingredients (for 4-6 people):
- 1/2 cup water
- 1/4 cup unsalted butter
- 1/2 cup all-purpose flour
- 2 large eggs
- 1 cup milk
- 1/2 cup granulated sugar
- 2 tablespoons cornstarch
- 2 teaspoons vanilla extract
- 2 ounces semi-sweet chocolate
- 2 tablespoons heavy cream
- A pinch of salt
Cooking Instructions:
- Prepare the Choux Pastry: In a medium saucepan, combine water, butter, and a pinch of salt. Bring to a boil over medium heat. Once boiling, remove from heat and add flour all at once. Stir vigorously until the mixture forms a ball and pulls away from the pan’s sides.
- Incorporate Eggs: Let the dough cool slightly, then add eggs one at a time, beating well with a wooden spoon after each addition until the dough is smooth and glossy.
- Pipe the Dough: Preheat the oven to 400°F (200°C). Transfer the dough to a piping bag fitted with a round nozzle. Pipe small, finger-length shapes onto a baking sheet lined with parchment paper, spacing them about 2 inches apart.
- Bake the Éclairs: Bake in the preheated oven for 15-20 minutes or until the éclairs are puffed and golden brown. Avoid opening the oven door during baking to prevent deflation. Once done, remove from oven and let cool completely on a wire rack.
- Make the Pastry Cream: In a saucepan, heat milk until just simmering. In a separate bowl, whisk together sugar, cornstarch, and egg yolks. Gradually pour the hot milk into the egg mixture, whisking constantly. Return the mixture to the saucepan and cook over medium heat until it thickens. Remove from heat and stir in vanilla extract. Let it cool, then transfer to a piping bag.
- Fill the Éclairs: Once the éclairs are completely cool, use a small knife to make a slit at the bottom of each one. Pipe the cooled pastry cream into the éclairs until filled.
- Prepare the Chocolate Glaze: Melt chocolate with heavy cream in a heatproof bowl over a pan of simmering water, stirring until smooth. Dip the tops of the filled éclairs into the glaze and let the excess drip off. Place them back on the rack to set.
Extra Tips:
For the best results, ascertain all ingredients for the choux pastry are at room temperature before starting. This will help the dough come together smoothly.
If you’re new to making choux pastry, practice piping the dough on parchment paper before you begin to get the right size and shape.
Additionally, make sure to cool the pastry cream adequately before filling the éclairs to avoid melting the pastry shell.
Finally, be patient when dipping the éclairs in chocolate to achieve a smooth, professional finish. Enjoy these Tiny Éclairs as a delightful indulgence!
Mini Crème Brûlée

Mini Crème Brûlée is a delightful and elegant dessert that brings a touch of sophistication to any meal. The creamy, vanilla-infused custard topped with a layer of caramelized sugar creates a perfect balance of textures and flavors. These individual servings are perfect for entertaining, allowing each guest to enjoy their own perfectly portioned treat. The recipe for Mini Crème Brûlée is surprisingly simple, yet the results are bound to impress your friends and family.
When preparing Mini Crème Brûlée, it’s important to focus on the quality of ingredients. Using fresh cream, real vanilla extract, and eggs guarantees a rich and smooth custard. The process involves baking the custard in a water bath to achieve the ideal silky texture. Once baked and chilled, the exciting part is caramelizing the sugar on top, creating that signature crackling crust. This recipe serves 4-6 people, making it a great choice for small gatherings or intimate dinners.
Ingredients (Serves 4-6)
- 2 cups heavy cream
- 1 vanilla bean (or 1 teaspoon vanilla extract)
- 5 large egg yolks
- 1/2 cup granulated sugar (plus extra for topping)
- 1/4 teaspoon salt
Cooking Instructions
- Preheat the Oven: Begin by preheating your oven to 325°F (160°C). This temperature is ideal for gently cooking the custard without curdling.
- Prepare the Vanilla Cream: In a saucepan, combine the heavy cream and vanilla bean (split and seeds scraped out). Heat the mixture over medium heat until it just starts to simmer. Remove from heat and let it sit for 10 minutes to infuse the vanilla flavors.
- Mix the Egg Yolks: In a mixing bowl, whisk together the egg yolks, 1/2 cup sugar, and salt until the mixture is pale and slightly thickened.
- Combine the Mixtures: Slowly pour the warm vanilla cream into the egg yolk mixture, whisking constantly to prevent the eggs from cooking. Strain the mixture through a fine sieve into a clean bowl to remove any solids or vanilla bean pieces.
- Prepare the Ramekins: Place 4-6 small ramekins (depending on size) in a baking dish. Fill each ramekin with the custard mixture.
- Create a Water Bath: Pour hot water into the baking dish until it reaches halfway up the sides of the ramekins. This water bath helps to cook the custard evenly.
- Bake the Custard: Carefully place the baking dish in the preheated oven and bake for 35-40 minutes, or until the custards are set but still slightly jiggly in the center.
- Chill the Custards: Once baked, remove the ramekins from the water bath and let them cool to room temperature. Then, refrigerate the custards for at least 2 hours or until thoroughly chilled.
- Caramelize the Sugar: Just before serving, sprinkle a thin, even layer of granulated sugar over the top of each custard. Use a kitchen torch to melt and caramelize the sugar until it forms a golden brown crust.
Extra Tips
For the best Mini Crème Brûlée, use fresh, high-quality ingredients, as they’ll greatly enhance the flavor and texture of the dessert. If you don’t have a kitchen torch, you can caramelize the sugar under a broiler set on high, but be sure to watch it closely to prevent burning.
Serve the Mini Crème Brûlée immediately after caramelizing the sugar to enjoy the contrast between the warm, crispy topping and the cold, creamy custard. If you prefer a more intense vanilla flavor, consider adding a splash of vanilla extract along with the vanilla bean.
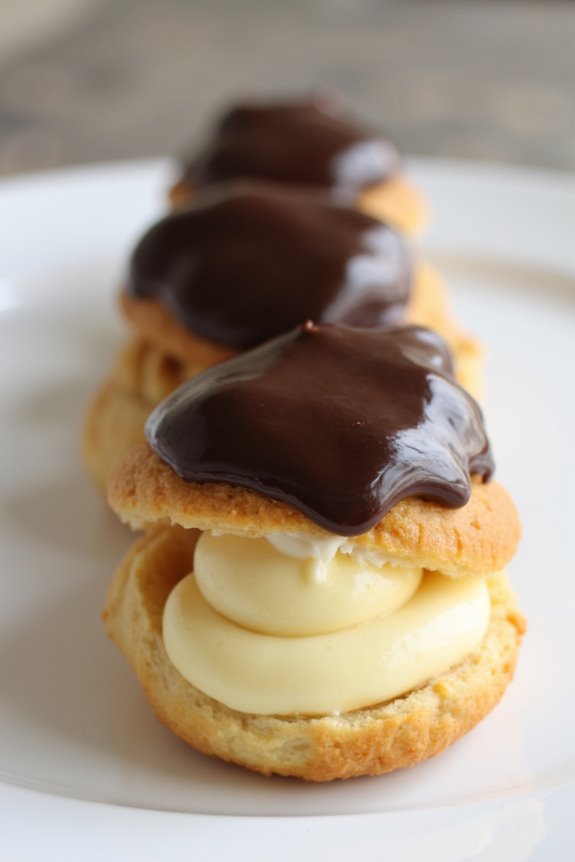
Miniature Profiteroles
Miniature Profiteroles are delightful little pastries that are sure to impress your guests or satisfy a craving for something sweet and elegant.
These small, perfectly round puffs are filled with a creamy custard or whipped cream and topped with a rich chocolate glaze, making them a luxurious treat that’s surprisingly easy to make.
Originating from French cuisine, profiteroles are a versatile dessert that can be adapted to suit various tastes and occasions. The miniature version is perfect for parties or as a sweet bite to finish off a meal.
Making Miniature Profiteroles at home involves creating a simple choux pastry, piping it into small rounds, and then baking them to golden perfection.
Once cooled, they’re filled with a luscious custard or light whipped cream and topped with a decadent chocolate glaze. This recipe serves 4-6 people, making it ideal for a small gathering or family dessert.
With a few precise steps and some attention to detail, you’ll be able to enjoy these delightful bites of pastry heaven.
Ingredients (serves 4-6):
- 1/2 cup water
- 1/4 cup unsalted butter
- 1/2 cup all-purpose flour
- 2 large eggs
- 1/4 teaspoon salt
- 1 tablespoon sugar
- 1 cup heavy cream
- 1 tablespoon powdered sugar
- 1 teaspoon vanilla extract
- 1/2 cup semisweet chocolate chips
- 1/4 cup heavy cream (for chocolate glaze)
Cooking Instructions:
- Prepare the Choux Pastry: Preheat your oven to 400°F (200°C) and line a baking sheet with parchment paper. In a medium saucepan, combine the water, butter, salt, and sugar. Heat over medium heat until the butter melts and the mixture begins to boil.
- Make the Dough: Remove the saucepan from the heat and immediately stir in the flour all at once. Return the saucepan to the heat and stir vigorously until the mixture forms a ball and leaves the sides of the pan, about 1-2 minutes. Transfer the dough to a mixing bowl and let it cool for about 5 minutes.
- Add Eggs to Dough: Add the eggs one at a time to the cooled dough, beating well after each addition, until you achieve a smooth and glossy dough.
- Pipe the Pastry: Transfer the dough to a piping bag fitted with a round tip. Pipe small rounds of dough (about 1 inch in diameter) onto the prepared baking sheet, leaving space between each round.
- Bake the Pastry: Bake in the preheated oven for 15-20 minutes, or until the profiteroles are puffed and golden brown. Don’t open the oven door during baking as this can cause them to deflate.
- Cool the Profiteroles: Once baked, remove from the oven and poke a small hole in the bottom of each profiterole with a skewer to let the steam escape. Allow them to cool completely on a wire rack.
- Prepare the Filling: In a mixing bowl, whip the heavy cream, powdered sugar, and vanilla extract until stiff peaks form. Transfer the whipped cream to a clean piping bag.
- Fill the Profiteroles: Once the profiteroles are cool, use the piping bag to fill each one with the whipped cream through the hole made earlier.
- Make the Chocolate Glaze: In a small saucepan, heat the chocolate chips and heavy cream over low heat, stirring constantly until smooth and melted.
- Glaze the Profiteroles: Dip the tops of each filled profiterole into the chocolate glaze or drizzle the glaze over the tops using a spoon. Allow the glaze to set before serving.
Extra Tips:
Ensure that the choux pastry dough is properly mixed after adding each egg to achieve the right consistency.
When baking, resist the urge to open the oven door too soon, as sudden changes in temperature can cause the profiteroles to collapse.
If you prefer a different filling, a classic pastry cream or flavored custard can be used instead of whipped cream.
For added flavor, consider topping the chocolate glaze with a sprinkle of chopped nuts or a dusting of confectioners’ sugar.
Small Canelés

Canelés, a classic French pastry, are known for their caramelized crust and tender, custardy interior. Originally from the Bordeaux region, these delightful mini desserts have made their way into the hearts of dessert lovers around the world. The key to a perfect canelé is achieving the right balance between the chewy, caramelized exterior and the soft, vanilla-infused inside.
Despite their sophisticated appearance, canelés are surprisingly simple to make, requiring only a few basic ingredients. They’re perfect for a small gathering or as an elegant finish to a dinner party.
The preparation of canelés requires a bit of patience, as the batter needs to rest, allowing the flavors to meld and the gluten to relax. Using traditional copper molds gives the best results, but silicone molds can be a convenient alternative. These small canelés are perfect for serving 4-6 people and will surely impress your guests with their rich flavor and unique texture.
Ingredients (for 4-6 servings):
- 500 ml whole milk
- 50 g unsalted butter
- 1 vanilla bean, split and scraped
- 100 g all-purpose flour
- 200 g granulated sugar
- 2 large eggs
- 2 large egg yolks
- 50 ml dark rum
- A pinch of salt
Cooking Instructions:
- Prepare the Batter: In a medium saucepan, combine the milk, butter, and vanilla bean (both seeds and pod). Heat over medium heat until the butter is melted and the milk is warm, but not boiling. Remove from heat and let it cool to room temperature. Discard the vanilla pod.
- Mix Dry Ingredients: In a large bowl, whisk together the flour, sugar, and salt. Make a well in the center and add the eggs and egg yolks. Stir until the mixture is smooth and well combined.
- Combine Wet and Dry Ingredients: Gradually pour the cooled milk mixture into the bowl with the flour and eggs, whisking continuously to avoid lumps. Add the dark rum and stir until the batter is smooth. Cover with plastic wrap and refrigerate for at least 24 hours, or up to 48 hours for best results.
- Preheat and Prepare Molds: Preheat your oven to 220°C (428°F). Generously coat the canelé molds with melted butter, making sure all surfaces are covered to prevent sticking.
- Fill and Bake: Fill each mold about 3/4 full with the chilled batter. Place the molds on a baking sheet and bake in the preheated oven for 15 minutes. Reduce the temperature to 180°C (356°F) and continue baking for an additional 45-50 minutes, or until the canelés are deeply caramelized and crusty on the outside.
- Cool and Serve: Remove the canelés from the oven and let them cool in the molds for a few minutes before transferring them to a wire rack to cool completely. Serve at room temperature.
Extra Tips:
For the best results, use traditional copper molds, which provide even heat distribution, leading to a perfect caramelized crust. If using silicone molds, make certain they’re well-greased to prevent sticking.
Resting the batter for at least 24 hours is vital as it allows the flavors to develop and helps achieve the desired texture. Additionally, be precise with the baking times and temperatures to guarantee the canelés are cooked to perfection, with a soft interior and a crunchy exterior.
Miniature Fraisier

The Miniature Fraisier is a delightful French dessert that beautifully combines fresh strawberries with a light and airy sponge cake, enriched by a rich crème mousseline. This elegant, individual-sized version of the classic Fraisier cake is perfect for entertaining guests or treating yourself to a special dessert experience.
With its vibrant layers and delicate flavors, it’s a stunning centerpiece for any occasion, offering a taste that’s as visually appealing as it’s delicious.
Creating Miniature Fraisiers involves preparing several components, including a genoise sponge, a silky mousseline cream, and the assembly of fresh strawberries. The process may seem intricate, but with a careful approach, the results are truly rewarding. This recipe yields 4-6 servings, guaranteeing there’s plenty to share with family and friends.
Ingredients:
- 4 large eggs
- 1 cup granulated sugar
- 1 cup all-purpose flour
- 1/2 teaspoon baking powder
- 1/4 cup unsalted butter, melted
- 1/2 cup whole milk
- 1 teaspoon vanilla extract
- 2 cups strawberries, hulled and halved
- 1 1/2 cups milk
- 1 vanilla bean, split and scraped
- 3 egg yolks
- 1/3 cup granulated sugar
- 1/4 cup cornstarch
- 1/2 cup unsalted butter, softened
- 1/4 cup almond paste
- Powdered sugar, for dusting
Cooking Instructions:
- Prepare the Genoise Sponge:
- Preheat your oven to 350°F (175°C). Grease and line a baking sheet with parchment paper.
- In a large mixing bowl, whisk the eggs and granulated sugar over a simmering pot of water until the mixture becomes thick and pale. Remove from heat.
- Gently fold in the sifted flour and baking powder, followed by the melted butter, confirming there are no lumps. Pour the batter into the prepared baking sheet, spreading evenly.
- Bake for 12-15 minutes until the sponge is golden and springs back when touched. Allow to cool on a wire rack.
- Make the Crème Mousseline:
- In a saucepan, heat the milk and vanilla bean until just simmering. Remove from heat and let it infuse for 15 minutes.
- In a bowl, whisk the egg yolks, sugar, and cornstarch until smooth. Gradually pour the warm milk into the egg mixture, whisking constantly.
- Return the mixture to the saucepan and cook over medium heat, stirring continuously until thickened. Remove from heat and let cool slightly.
- Beat in the softened butter and almond paste until smooth. Cover with plastic wrap and refrigerate until set.
- Assemble the Miniature Fraisiers:
- Using a round cutter, cut circles from the cooled sponge. Line the sides of individual ring molds with halved strawberries, cut side facing out.
- Fill the mold halfway with crème mousseline, confirming it fills the gaps between the strawberries. Place another sponge circle on top and add a final layer of cream.
- Smooth the top and refrigerate for at least 2 hours to set.
- Serve:
- Gently remove the ring molds and dust with powdered sugar before serving for an elegant finish.
Extra Tips:
When making the genoise sponge, be gentle when folding the ingredients to maintain the batter’s volume and avoid deflation.
Patience is key with the crème mousseline; confirm it thoroughly sets in the refrigerator before assembling the dessert.
If you don’t have ring molds, you can create makeshift versions using parchment paper and tape.
Finally, for an added touch, consider brushing the sponge layers with a light sugar syrup flavored with a splash of kirsch or rum for extra depth of flavor.
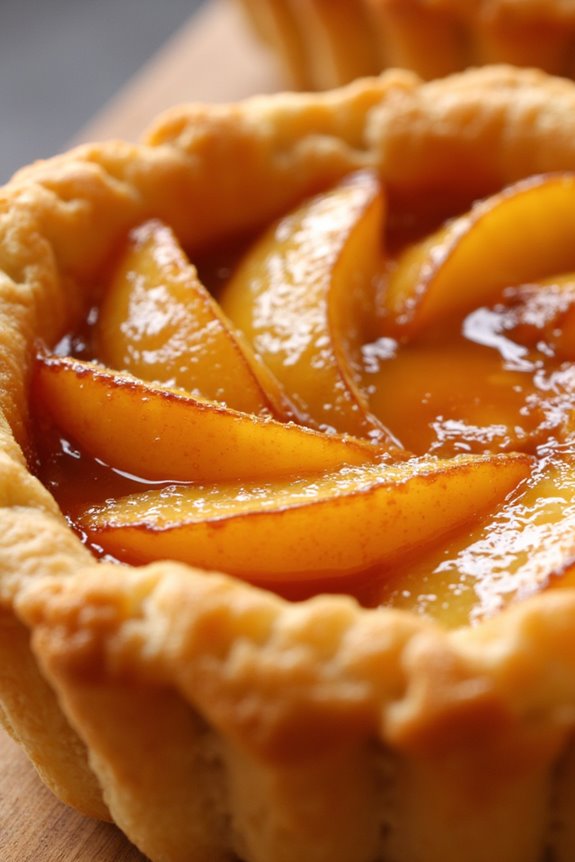
Miniature Lemon Tartlets

Miniature Lemon Tartlets are a delightful treat that packs a punch of citrusy flavor in every bite. These bite-sized desserts are perfect for parties, afternoon tea, or as a revitalizing end to a meal. The combination of a buttery, crumbly crust with a smooth, tangy lemon filling is sure to delight your taste buds.
Making these tartlets from scratch allows you to enjoy the freshness of the ingredients and the satisfaction of creating a delicious dessert masterpiece. Creating Miniature Lemon Tartlets is surprisingly simple and requires just a few basic ingredients. The key to achieving the perfect tartlet is to balance the tart and sweet flavors in the lemon filling while guaranteeing the crust is golden and crisp.
This recipe is designed to serve 4-6 people, making it an ideal choice for small gatherings or to enjoy with family and friends. Let’s plunge into the ingredients and steps needed to make these delightful treats.
Ingredients (serves 4-6):
- 1 cup all-purpose flour
- 1/4 cup powdered sugar
- 1/2 cup unsalted butter, cubed and chilled
- 1 tablespoon cold water
- 1/2 cup granulated sugar
- 2 large eggs
- 1/3 cup freshly squeezed lemon juice
- 1 tablespoon lemon zest
- 2 tablespoons heavy cream
- A pinch of salt
Instructions:
- Prepare the Crust: In a mixing bowl, combine the all-purpose flour and powdered sugar. Add the chilled, cubed butter to the dry ingredients. Using a pastry cutter or your fingers, blend the butter into the flour mixture until it resembles coarse crumbs.
- Form the Dough: Add the cold water to the flour and butter mixture and mix until the dough begins to come together. Form the dough into a ball, wrap it in plastic wrap, and refrigerate for at least 30 minutes.
- Preheat the Oven: Preheat your oven to 350°F (175°C).
- Roll Out the Dough: On a lightly floured surface, roll out the chilled dough to about 1/8-inch thickness. Use a round cookie cutter or glass to cut out circles slightly larger than your mini tartlet pans.
- Fit the Dough into the Pans: Gently press each dough circle into the mini tartlet pans, trimming any excess dough. Prick the bottoms with a fork to prevent bubbling.
- Blind Bake the Crusts: Place a small piece of parchment paper into each tartlet and fill with pie weights or dried beans. Bake in preheated oven for 10 minutes. Remove weights and parchment, then bake for an additional 5-7 minutes until lightly golden. Allow to cool.
- Make the Lemon Filling: In a medium saucepan, whisk together the granulated sugar, eggs, lemon juice, lemon zest, heavy cream, and a pinch of salt. Cook over medium heat, stirring constantly, for about 8-10 minutes or until the mixture thickens enough to coat the back of a spoon.
- Fill the Tartlets: Spoon the lemon filling into the cooled tartlet shells, filling them just to the brim.
- Chill and Set: Refrigerate the filled tartlets for at least 1 hour to allow the filling to set properly before serving.
Extra Tips:
For an added touch of elegance, consider garnishing the Miniature Lemon Tartlets with a small dollop of whipped cream or a thin lemon slice. Confirm that your butter is adequately chilled before incorporating it into the flour, as this will help achieve a flakier crust.
If you find the lemon filling too tangy, you can adjust the sweetness by adding a bit more sugar to taste. These tartlets can be stored in the refrigerator for up to two days, making them a great make-ahead dessert option.