

As the temperatures drop, I find myself longing for the cozy embrace of French cuisine. A steaming bowl of French Onion Soup or a pot of Coq au Vin bubbling on the stove offers a comforting escape from the chill. These recipes aren’t just about the food—they’re about creating warmth and togetherness on winter evenings. Let’s explore some delightful options that will bring comfort to your table this season.
French Onion Soup
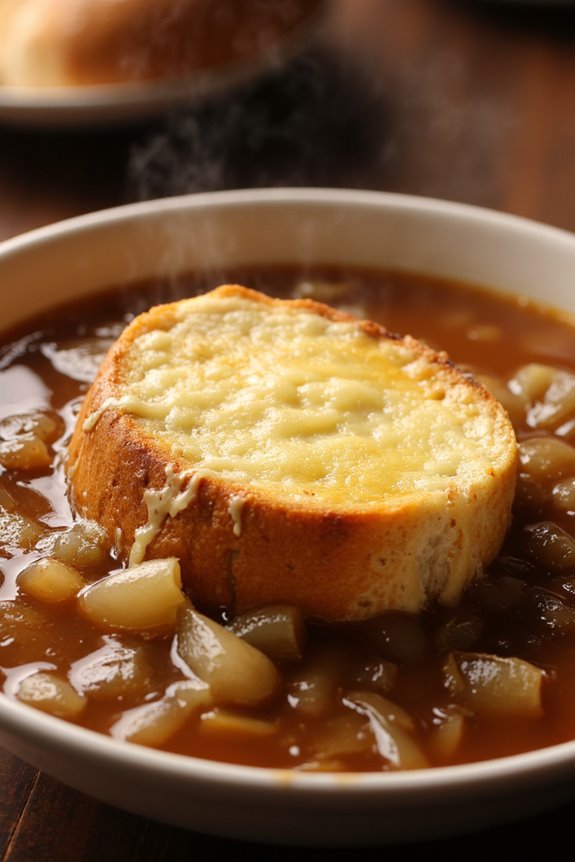
French Onion Soup is a classic dish that showcases the rich flavors of caramelized onions, savory beef broth, and gooey melted cheese. Originating from France, this comforting soup has become a favorite around the world, especially during the chilly winter months. The key to a perfect French Onion Soup lies in the slow-cooking process that transforms the onions into a sweet, caramelized base, which is then enhanced with aromatic herbs and spices.
To elevate this dish, it’s traditionally served with a crusty bread topped with Gruyère cheese, which is broiled until bubbly and golden brown. The combination of the warm, hearty soup and the cheesy topping creates a delightful contrast that’s sure to warm you from the inside out. Whether enjoyed as a starter or a main course, French Onion Soup is a delightful way to embrace the flavors of winter.
Ingredients (Serves 4-6)
- 4 large onions (yellow or sweet)
- 4 tablespoons unsalted butter
- 1 tablespoon olive oil
- 1 teaspoon sugar
- 4 cups beef broth (or vegetable broth for a vegetarian option)
- 1 cup dry white wine (optional)
- 1 tablespoon all-purpose flour
- 1 teaspoon fresh thyme leaves (or ½ teaspoon dried thyme)
- Salt and pepper to taste
- 4-6 slices of crusty bread (like baguette)
- 1 ½ cups grated Gruyère cheese
Cooking Instructions
- Caramelize the Onions: Begin by slicing the onions thinly. In a large, heavy-bottomed pot, heat the butter and olive oil over medium heat. Add the onions and a pinch of salt. Cook the onions slowly, stirring occasionally, for about 30-40 minutes until they’re deeply caramelized and golden brown. This step is vital as it builds the soup’s flavor.
- Add Sugar and Flour: Once the onions are caramelized, sprinkle the sugar over them and stir. The sugar will enhance the sweetness of the onions. After about 2 minutes, add the flour to the onions, stirring well to combine. This will help thicken the soup slightly.
- Deglaze the Pot: Pour in the white wine (if using) to deglaze the pot. Scrape up any browned bits from the bottom of the pot as the wine simmers for about 2-3 minutes. This adds depth to the flavor of the soup.
- Add Broth and Seasoning: Pour in the beef broth and add the thyme, along with salt and pepper to taste. Bring the mixture to a boil, then reduce the heat and let it simmer for about 20-30 minutes. This allows the flavors to meld together beautifully.
- Prepare the Topping: While the soup is simmering, preheat your broiler. Arrange the bread slices on a baking sheet and toast them under the broiler for a couple of minutes on each side until golden brown. Remove from the oven and set aside.
- Serve the Soup: Ladle the hot soup into oven-safe bowls, placing a slice of toasted bread on top of each serving. Generously sprinkle the grated Gruyère cheese over the bread.
- Broil Until Bubbling: Place the bowls under the broiler for about 3-5 minutes or until the cheese is melted, bubbly, and golden brown. Keep a close eye on them to prevent burning.
- Garnish and Enjoy: Carefully remove the bowls from the oven and let them cool for a minute before serving. Enjoy your homemade French Onion Soup while it’s hot!
Extra Tips
For an even richer flavor, consider using a combination of beef and chicken broth. Additionally, feel free to experiment with different cheeses; while Gruyère is traditional, Swiss or Emmental can also work well.
Always slice the onions evenly for uniform cooking, and don’t rush the caramelization process; patience is key to achieving that deep, sweet flavor. Finally, serve the soup with a simple side salad for a complete meal!
Coq Au Vin
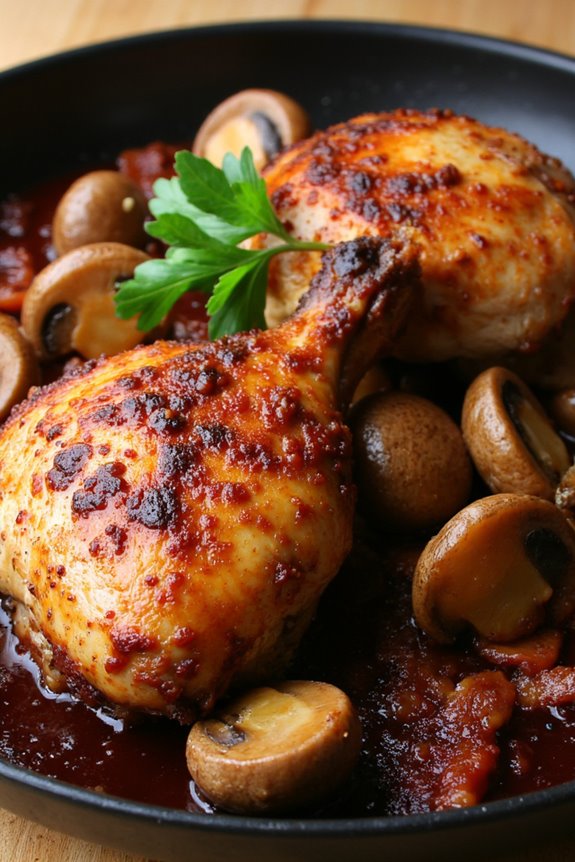
Coq Au Vin is a classic French dish that translates to “rooster in wine,” although it’s commonly made with chicken today. This rustic meal hails from the Burgundy region, where the rich flavors of wine, mushrooms, and herbs meld together to create a deeply satisfying sauce. Traditionally, this dish was prepared with a whole rooster, but for convenience, chicken pieces are often used to bring this hearty recipe to life.
Coq Au Vin is perfect for winter gatherings or a cozy family dinner and pairs beautifully with a crusty loaf of bread or creamy mashed potatoes.
The beauty of Coq Au Vin lies in its simplicity and the depth of flavor achieved through slow cooking. As the chicken simmers in red wine, the meat becomes tender and infused with the aromatic notes of garlic, thyme, and bay leaves. The addition of sautéed mushrooms and lardons (or bacon) adds a delightful richness to the dish, making it a comforting meal that warms the soul during cold winter nights.
This dish truly embodies the essence of French home cooking, inviting you to savor each bite with a glass of the same wine used for cooking.
Ingredients (Serves 4-6):
- 4-6 chicken thighs and drumsticks (bone-in, skin-on)
- 1 cup of red wine (preferably Burgundy)
- 2 cups of chicken broth
- 4 slices of bacon or lardons, chopped
- 1 medium onion, diced
- 2 cloves of garlic, minced
- 2 cups of mushrooms, quartered
- 2 tablespoons of tomato paste
- 1 tablespoon of all-purpose flour
- 2 teaspoons of fresh thyme leaves (or 1 teaspoon dried thyme)
- 2 bay leaves
- Salt and freshly ground pepper, to taste
- Fresh parsley, for garnish
- Olive oil, for cooking
Cooking Instructions:
- Prepare the Chicken: Season the chicken pieces generously with salt and pepper. In a large Dutch oven or heavy pot, heat a drizzle of olive oil over medium-high heat. Add the chicken pieces, skin-side down, and brown them for about 5-7 minutes on each side until golden. Remove the chicken from the pot and set aside.
- Cook the Bacon: In the same pot, add the chopped bacon or lardons. Cook over medium heat until they’re crispy and have rendered their fat, about 5 minutes. Remove the bacon with a slotted spoon and set aside, leaving the fat in the pot.
- Sauté the Vegetables: Add the diced onion to the pot and sauté for about 3-4 minutes until it becomes translucent. Stir in the minced garlic and cook for another minute until fragrant. Add the quartered mushrooms and continue to cook for about 5 minutes until they’re browned and tender.
- Add the Tomato Paste and Flour: Stir in the tomato paste and cook for another minute. Sprinkle the flour over the mixture and stir well to combine, cooking for an additional minute to eliminate the raw flour taste.
- Deglaze with Wine: Pour in the red wine, scraping the bottom of the pot to deglaze and incorporate any browned bits. This will enhance the flavor of the sauce. Allow the wine to simmer for about 2-3 minutes.
- Combine Ingredients: Return the chicken and bacon to the pot. Pour in the chicken broth, and add the thyme and bay leaves. Bring to a gentle simmer.
- Slow Cook: Cover the pot and reduce heat to low. Let the dish simmer for about 45 minutes to 1 hour, or until the chicken is tender and cooked through. Stir occasionally to guarantee even cooking.
- Finish the Sauce: After cooking, remove the chicken and set it aside. Increase the heat to medium-high and let the sauce simmer uncovered for about 10 minutes to thicken slightly. Adjust seasoning with salt and pepper as desired.
- Serve: Return the chicken to the pot to warm through before serving. Garnish with fresh parsley and serve hot with a side of crusty bread or mashed potatoes.
Extra Tips:
When preparing Coq Au Vin, using a good quality red wine will greatly enhance the flavor of the dish, so choose one that you enjoy drinking.
Additionally, feel free to customize the recipe by adding other vegetables like carrots or pearl onions for extra sweetness and texture. For an even deeper flavor, marinate the chicken in wine, garlic, and herbs the night before, allowing the flavors to penetrate the meat.
Finally, don’t rush the cooking process; the longer and slower you cook it, the more flavorful the dish will become!
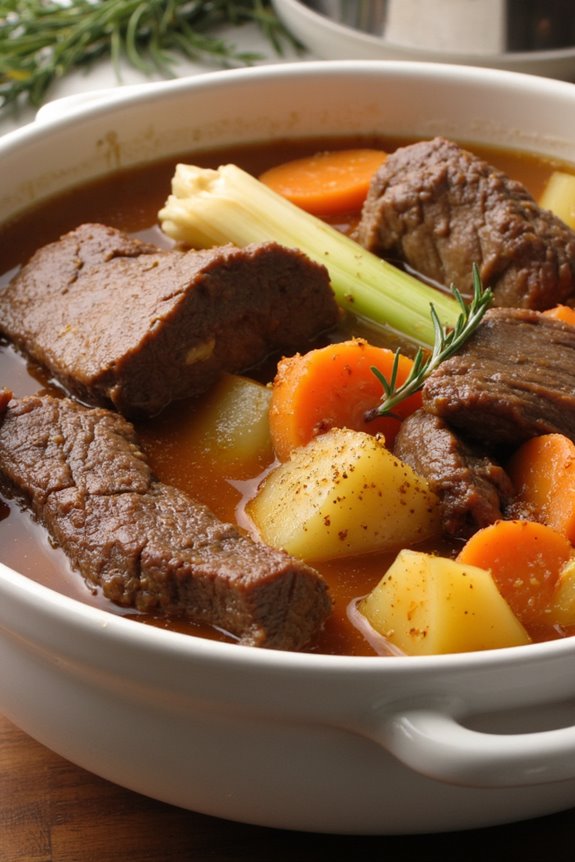
Beef Bourguignon
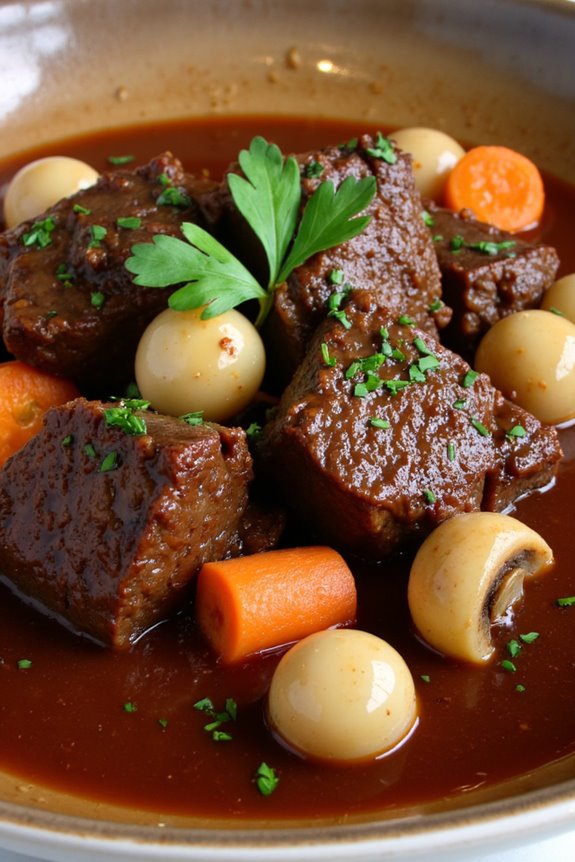
Beef Bourguignon, also known as “Boeuf Bourguignon,” is a classic French dish that hails from the Burgundy region. This hearty stew combines tender cuts of beef with a rich red wine sauce, aromatic vegetables, and fragrant herbs, creating a dish that’s perfect for warming up during the cold winter months.
Traditionally slow-cooked, this dish allows the flavors to meld beautifully, resulting in a comforting meal that can be served with crusty bread, mashed potatoes, or buttered noodles. While it takes time to prepare, the result is well worth the effort and will surely impress family and friends alike.
To make Beef Bourguignon, you’ll need to gather quality ingredients that will contribute to the depth of flavor in the stew. The key is to use a good-quality red wine, preferably from Burgundy, which will enhance the dish’s authenticity.
Don’t rush through the preparation; taking the time to brown the meat properly and let the sauce reduce will elevate the final result. With patience and care, you can create a dish that not only satisfies the palate but also warms the soul.
Ingredients (Serves 4-6):
- 2 pounds beef chuck, cut into 2-inch cubes
- 1/4 cup all-purpose flour
- Salt and pepper, to taste
- 4 tablespoons olive oil
- 6 ounces bacon, diced
- 1 large onion, chopped
- 2 carrots, sliced
- 2 cloves garlic, minced
- 2 cups red wine (preferably Burgundy)
- 2 cups beef broth
- 1 tablespoon tomato paste
- 1 bouquet garni (a bundle of herbs, typically thyme, bay leaf, and parsley)
- 8 ounces pearl onions, peeled
- 8 ounces mushrooms, quartered
- Fresh parsley, chopped (for garnish)
Cooking Instructions:
- Prepare the Beef: Season the beef cubes with salt and pepper. Dredge them in flour, shaking off any excess. This flour coating will help thicken the sauce later.
- Sear the Beef: In a large Dutch oven or heavy pot, heat 2 tablespoons of olive oil over medium-high heat. Add the beef in batches, making sure not to overcrowd the pot. Sear the beef on all sides until browned, about 5-7 minutes. Remove the beef and set aside.
- Cook the Bacon: In the same pot, add the diced bacon and cook until it’s crispy, about 5 minutes. This will render the fat necessary for sautéing the vegetables.
- Sauté the Vegetables: Add the chopped onion and sliced carrots to the pot. Stir and cook for about 5 minutes until the onions are translucent. Add the minced garlic and cook for an additional minute.
- Deglaze the Pot: Pour in the red wine, scraping up any browned bits stuck to the bottom of the pot. This adds depth to the flavor of the sauce.
- Combine Ingredients: Return the seared beef to the pot along with any accumulated juices. Stir in the beef broth, tomato paste, and the bouquet garni. Bring the mixture to a gentle simmer.
- Slow Cook: Cover the pot and reduce the heat to low. Allow the stew to cook for about 2 to 3 hours, or until the beef is tender and the flavors have developed, stirring occasionally.
- Add Onions and Mushrooms: In the final 30 minutes of cooking, add the pearl onions and quartered mushrooms to the pot. Stir to combine and continue to cook until the vegetables are tender.
- Adjust Seasoning and Serve: Once cooked, taste the stew and adjust the seasoning with salt and pepper as needed. Remove the bouquet garni before serving. Garnish with freshly chopped parsley before serving.
Extra Tips: When making Beef Bourguignon, choose a wine that you enjoy drinking, as its flavor will greatly influence the dish.
For an even richer taste, consider allowing the stew to cool and refrigerate it overnight; this will enhance the flavors further. When reheating, do so gently to avoid toughening the meat.
Finally, pairing this dish with a glass of the same wine used in cooking will create a delightful dining experience. Enjoy your culinary adventure through the heart of France!
Ratatouille
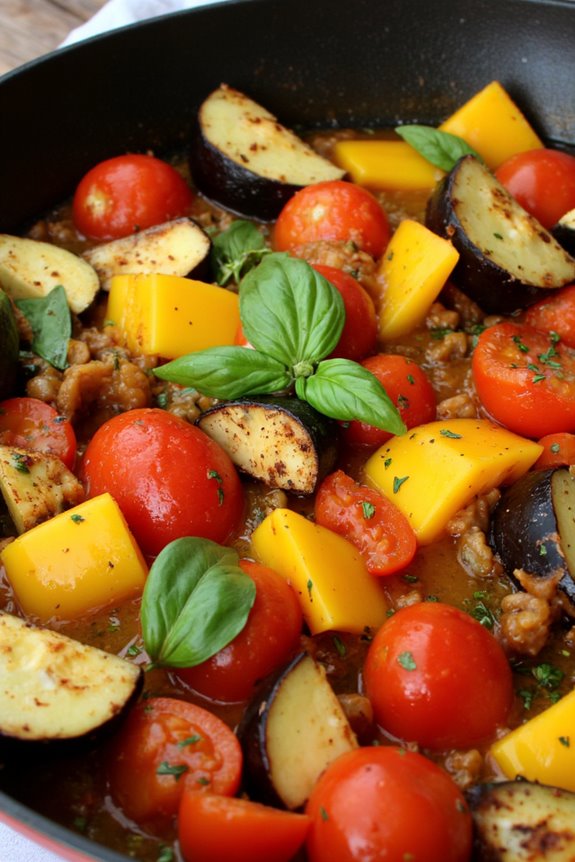
Ratatouille is a classic French Provençal dish that showcases a medley of seasonal vegetables, creating a vibrant and hearty dish perfect for the winter months. Originating from Nice, this dish isn’t only a delicious way to enjoy fresh produce but also a celebration of rustic French cooking.
Traditionally, ratatouille is made with eggplant, zucchini, bell peppers, tomatoes, onions, and herbs, all simmered together to create a fragrant and flavorful stew that warms the soul.
This vegetable dish can be served as a main course or a side dish and pairs wonderfully with crusty bread, rice, or pasta. Ratatouille can also be enjoyed warm or at room temperature, making it versatile for any occasion. Plus, it’s an excellent dish for meal prep as the flavors deepen and improve when allowed to sit for a day or two in the refrigerator.
Let’s plunge into making this comforting winter recipe.
Ingredients (Serving Size: 4-6 people)
- 1 medium eggplant, diced
- 2 medium zucchinis, sliced
- 1 large onion, chopped
- 2 bell peppers (red and yellow), chopped
- 4 ripe tomatoes, diced (or 1 can of diced tomatoes)
- 3 cloves garlic, minced
- 1/4 cup olive oil
- 1 teaspoon dried thyme
- 1 teaspoon dried basil
- Salt and pepper to taste
- Fresh basil leaves for garnish (optional)
Cooking Instructions
- Prepare the Vegetables: Start by washing and chopping all the vegetables. Dice the eggplant, slice the zucchinis, chop the onion and bell peppers, and dice the tomatoes. Mince the garlic. This step guarantees that all veggies are ready to go and will cook evenly.
- Sauté the Onions and Garlic: In a large, heavy-bottomed pot or Dutch oven, heat the olive oil over medium heat. Add the chopped onions and sauté for about 5 minutes until they’re translucent. Then, add the minced garlic and sauté for an additional minute until fragrant. This step lays the foundation for the flavors of the dish.
- Add Eggplant and Bell Peppers: Next, add the diced eggplant and chopped bell peppers to the pot. Stir well and cook for about 8-10 minutes until the vegetables begin to soften. Stir occasionally to prevent sticking. The eggplant will absorb some of the oil and become tender.
- Incorporate Zucchini and Tomatoes: Add the sliced zucchinis and diced tomatoes (along with their juices, if using canned) to the pot. Stir to combine everything. Season with salt, pepper, dried thyme, and dried basil. This combination of herbs will infuse the ratatouille with a classic Provençal flavor.
- Simmer the Ratatouille: Bring the mixture to a gentle boil, then reduce the heat to low. Cover the pot and let it simmer for about 30-40 minutes, stirring occasionally, until all the vegetables are tender and the flavors meld together. This slow cooking is crucial for achieving the dish’s depth of flavor.
- Adjust Seasoning and Serve: Once the vegetables are tender, taste and adjust seasoning if necessary. If you prefer a thicker consistency, you can remove the lid and let it cook for an additional 10-15 minutes. Serve warm, garnished with fresh basil leaves if desired.
Extra Tips
When making ratatouille, feel free to experiment with the vegetables based on what you have available. Other great options include mushrooms, squash, or even carrots.
To enhance the flavor, consider adding a splash of balsamic vinegar or a pinch of red pepper flakes for a bit of heat. Ratatouille is also an excellent dish to make ahead of time, as the flavors will continue to develop over a day or two in the fridge.
Reheat gently on the stovetop or in the oven before serving. Enjoy your culinary adventure with this delightful French winter classic!
Creamy Potato Gratin
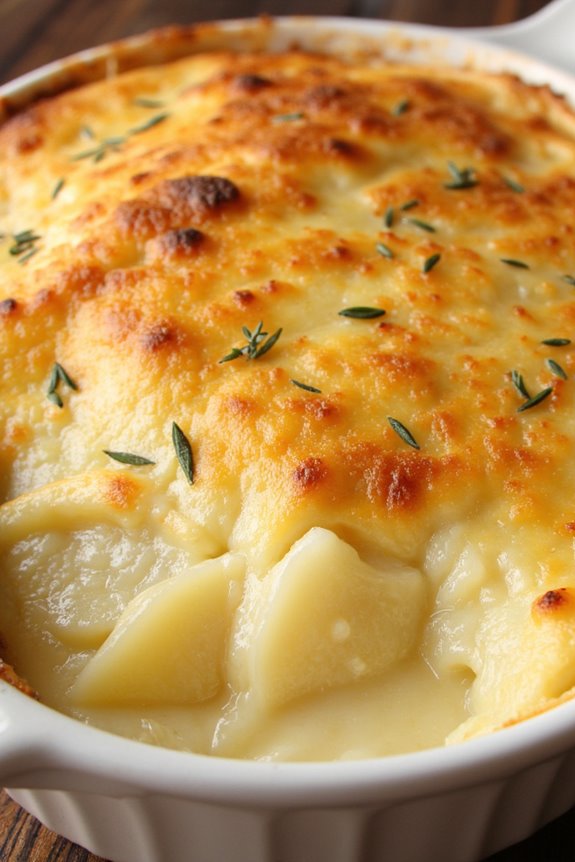
Creamy Potato Gratin is a quintessential French dish that’s perfect for the colder months, providing warmth and comfort to the soul. This indulgent recipe features layers of thinly sliced potatoes, rich cream, and a blend of cheese, baked to perfection until golden and bubbling. It’s a harmonious combination of flavors and textures that elevates any meal, making it a favorite for both family dinners and festive gatherings.
The beauty of Creamy Potato Gratin lies in its simplicity and the ability to customize it according to personal preferences. You can use different types of cheese for varied flavor profiles, add herbs for an aromatic touch, or even incorporate ingredients like garlic or onions to enhance the dish further. Whether served alongside a roast or enjoyed as a standalone dish, Creamy Potato Gratin is sure to impress and delight.
Ingredients (Serves 4-6):
- 1.5 kg (3.3 lbs) potatoes (preferably Yukon Gold or Russet)
- 500 ml (2 cups) heavy cream
- 250 ml (1 cup) milk
- 2 cloves garlic, minced
- 150 g (1.5 cups) grated Gruyère cheese
- 100 g (1 cup) grated Parmesan cheese
- Salt and pepper, to taste
- 2 tbsp unsalted butter
- Fresh thyme or rosemary (optional, for garnish)
Cooking Instructions:
- Preheat the Oven: Begin by preheating your oven to 170°C (340°F). A properly heated oven guarantees that the gratin bakes evenly, resulting in a creamy texture and a beautifully browned top.
- Prepare the Potatoes: Peel the potatoes and slice them thinly, about 1/8 inch thick. A mandoline slicer can be helpful for achieving uniform slices. This step is essential as evenly sized potatoes will cook at the same rate, guaranteeing a consistent texture throughout the gratin.
- Make the Cream Mixture: In a mixing bowl, combine the heavy cream, milk, minced garlic, salt, and pepper. Stir well to combine. This mixture will envelop the potatoes, lending the gratin its rich, creamy character.
- Layer the Potatoes: In a greased baking dish, start layering the potato slices. Begin with a layer of potatoes, then pour a portion of the cream mixture over them. Sprinkle some Gruyère cheese on top before adding the next layer of potatoes. Repeat this process until all the potatoes, cream mixture, and cheese are used, finishing with a layer of cheese on top.
- Bake the Gratin: Dot the top of the gratin with small pieces of unsalted butter. Cover the baking dish with aluminum foil and place it in the preheated oven. Bake for about 45 minutes, then remove the foil and bake for an additional 20-30 minutes, or until the potatoes are tender and the top is golden brown and bubbly.
- Let it Rest: Once baked, remove the gratin from the oven and let it rest for about 10-15 minutes before serving. This resting period allows the dish to set, making it easier to slice and serve.
- Garnish and Serve: Optionally, sprinkle fresh thyme or rosemary on top for added flavor. Serve hot as a side dish or a main course.
Extra Tips:
For an added depth of flavor, consider sautéing some onions or leeks in butter until soft before layering them with the potatoes. You can also experiment with different cheeses like cheddar or blue cheese for a unique twist.
Be sure to taste the cream mixture for seasoning before pouring it over the potatoes; adjust the salt and pepper as needed. If you prefer a crustier top, broil the gratin for a few minutes at the end of baking, but watch it closely to avoid burning!
Bouillabaisse
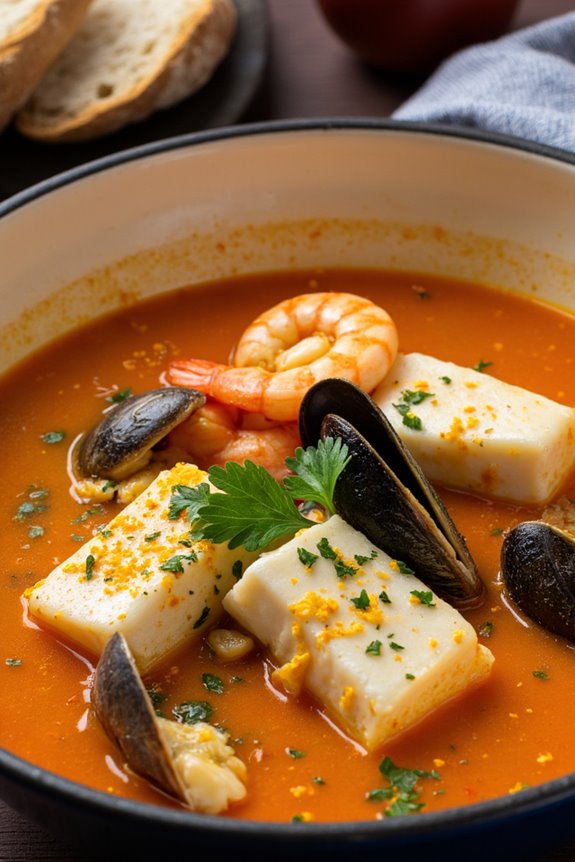
Bouillabaisse is a traditional Provençal fish stew that originates from the port city of Marseille. This flavorful dish combines a variety of fresh fish and shellfish with a fragrant broth infused with herbs, spices, and aromatic vegetables.
Historically, bouillabaisse was a humble meal prepared by fishermen using the catch of the day, but it has since evolved into a beloved culinary masterpiece that showcases the rich seafood offerings of the Mediterranean. The dish isn’t only a feast for the palate but also a celebration of the coastal culture and cuisine of southern France.
To prepare the perfect bouillabaisse, it’s essential to use the freshest seafood available, as well as quality ingredients for the broth. The broth is typically made with a base of onions, leeks, tomatoes, and garlic, flavored with saffron and orange zest for a unique depth of flavor.
Served with a side of rouille, a garlic mayo spread, and crusty bread, bouillabaisse is a hearty and satisfying meal, perfect for warming up during the winter months.
Ingredients (Serves 4-6)
- 1/4 cup olive oil
- 1 large onion, chopped
- 2 leeks, white part only, sliced
- 3 cloves garlic, minced
- 2 medium tomatoes, chopped
- 1 teaspoon saffron threads
- 1/2 teaspoon dried thyme
- 1/2 teaspoon fennel seeds
- 1 bay leaf
- 6 cups fish stock or water
- 1 pound firm white fish (such as cod or haddock), cut into chunks
- 1 pound mussels, cleaned and debearded
- 1 pound shrimp, peeled and deveined
- 1/4 cup fresh parsley, chopped
- Zest of 1 orange
- Salt and pepper to taste
- Crusty bread, for serving
- Rouille (for serving)
Cooking Instructions
- Heat the Olive Oil: In a large pot, heat the olive oil over medium heat. This will be the base for sautéing your vegetables and will add richness to the broth.
- Sauté the Vegetables: Add the chopped onion and sliced leeks to the pot. Sauté for about 5 minutes until they’re softened and translucent. Then, add the minced garlic and chopped tomatoes, cooking for an additional 3-4 minutes until the tomatoes have broken down.
- Add the Spices: Stir in the saffron threads, dried thyme, fennel seeds, and bay leaf. Allow the spices to cook with the vegetables for 1-2 minutes, releasing their aromatic flavors into the mixture.
- Pour in the Stock: Add the fish stock or water to the pot and bring the mixture to a boil. Once boiling, reduce the heat to a simmer and let it cook for about 15-20 minutes. This time allows the flavors to meld together beautifully.
- Add the Seafood: Carefully add the chunks of firm white fish, mussels, and shrimp to the pot. Stir gently to combine, and cover the pot. Cook for an additional 5-7 minutes, or until the mussels have opened and the fish is cooked through.
- Season and Garnish: Taste the bouillabaisse and season with salt and pepper as needed. Add the chopped parsley and orange zest for a fresh finish.
- Serve: Ladle the bouillabaisse into bowls, ensuring each serving has a variety of seafood. Serve with crusty bread and a side of rouille for spreading.
Extra Tips
When making bouillabaisse, the quality of the seafood is paramount, so choose the freshest options available at your local market or fishmonger.
Feel free to mix and match different types of fish and shellfish according to your preference and availability. Additionally, if saffron is hard to find or too expensive, you can substitute it with a pinch of turmeric for color, though the flavor will differ.
Bouillabaisse is best enjoyed fresh, but leftovers can be stored in the fridge and reheated gently for a comforting meal the next day.
Cassoulet
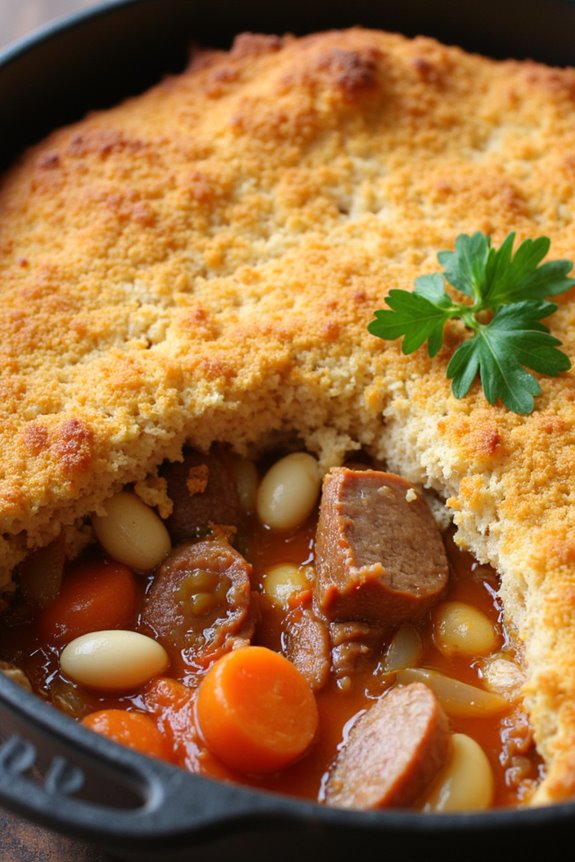
Cassoulet is a hearty and traditional French dish that hails from the southwestern region of France, particularly the towns of Castelnaudary, Carcassonne, and Toulouse. This rustic casserole is primarily made with white beans and a variety of meats, often including duck, sausage, and pork. The slow-cooked dish is deeply flavorful and perfect for warming up during the chilly winter months. The combination of tender beans and rich, savory meats makes it a beloved staple in French cuisine.
Preparing cassoulet can take some time, but the end result is well worth the effort. The dish is typically cooked in a heavy pot, allowing the flavors to meld beautifully over hours of simmering. Historically, cassoulet was a peasant dish meant to feed large families, making it the perfect option for gatherings or family dinners. Once you master this recipe, you’ll have a delicious and comforting meal that embodies the essence of French winter cooking.
Ingredients (Serves 4-6):
- 1 lb dried white beans (such as cannellini or Great Northern)
- 4 cups chicken or vegetable broth
- 1 lb pork shoulder, cut into chunks
- 1 lb duck legs or confit duck
- 1 lb pork sausage, sliced
- 1 large onion, chopped
- 2 cloves garlic, minced
- 2 carrots, chopped
- 1 cup diced tomatoes (canned or fresh)
- 2 bay leaves
- 1 tsp dried thyme
- 1 tsp smoked paprika
- Salt and pepper to taste
- 1 cup breadcrumbs (for topping)
- 2 tbsp olive oil
- Fresh parsley, chopped (for garnish)
Cooking Instructions:
- Prepare the Beans: Begin by rinsing the dried white beans under cold water. Soak the beans in a large bowl of water overnight. This will help soften the beans and reduce cooking time. Alternatively, you can use a quick soak method by boiling the beans for 2 minutes and then letting them sit for 1 hour.
- Brown the Meats: In a large, heavy-bottomed pot or Dutch oven, heat the olive oil over medium heat. Add the pork shoulder pieces and duck legs, browning them on all sides for about 5-7 minutes. This step will enhance the flavor of the dish through caramelization.
- Sauté Vegetables: Once the meats are browned, remove them from the pot and set aside. In the same pot, add the chopped onion, garlic, and carrots. Sauté until the onions become translucent, about 5 minutes. This will build a flavor base for the cassoulet.
- Combine Ingredients: Return the browned meats to the pot and add the soaked beans (drained), diced tomatoes, chicken broth, bay leaves, thyme, smoked paprika, salt, and pepper. Stir everything together to combine the ingredients well.
- Simmer: Bring the mixture to a gentle boil, then reduce the heat to low. Cover the pot and let the cassoulet simmer for 1.5 to 2 hours. Stir occasionally and add more broth if needed to keep it moist. The goal is to achieve tender beans and fully cooked meats.
- Add Sausage: About 30 minutes before the cassoulet is done simmering, add the sliced pork sausage to the pot. This will allow the sausage to cook through and impart its flavor into the dish.
- Prepare the Topping: In a small bowl, combine the breadcrumbs with a drizzle of olive oil and a pinch of salt. Mix well to create a crumbly topping.
- Finish the Dish: After the cassoulet has finished simmering, preheat your oven to 375°F (190°C). Sprinkle the breadcrumb mixture evenly over the top of the cassoulet. Place the pot in the oven and bake for 20-30 minutes, or until the topping is golden and crispy.
- Serve: Remove the cassoulet from the oven and let it rest for a few minutes before serving. Garnish with fresh parsley and serve warm, allowing everyone to enjoy the rich, comforting flavors.
Extra Tips:
When preparing cassoulet, feel free to customize the meats based on your preferences; some variations include adding lamb or using different types of sausages. For an even deeper flavor, you can consider making it a day in advance and reheating it, as the flavors will continue to develop overnight.
Finally, don’t hesitate to adjust the seasoning to your taste, ensuring that your cassoulet is just the way you like it. Enjoy this classic French dish with a side of crusty bread and a good glass of red wine for a truly authentic experience!
Tarte Tatin
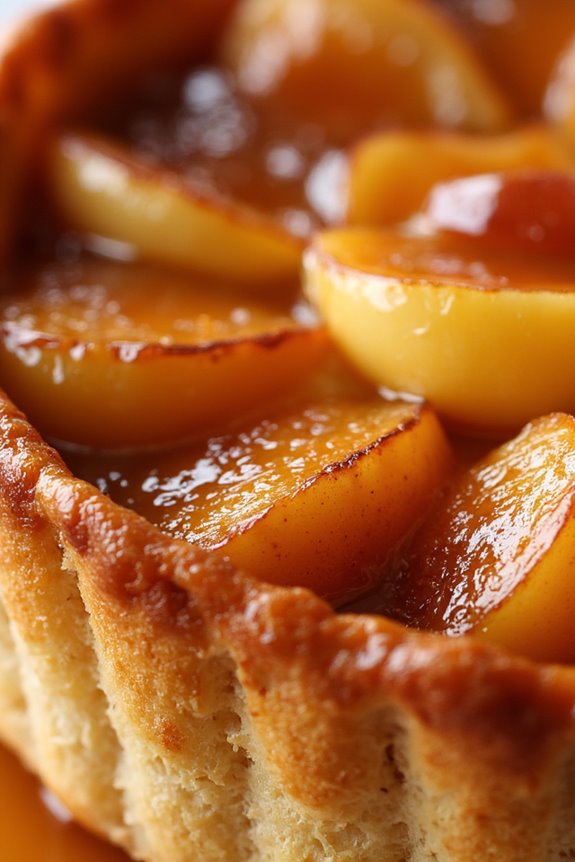
Tarte Tatin is a classic French dessert that beautifully showcases the sweet, caramelized flavors of apples, making it a perfect treat for the winter months. This upside-down tart originated in the Loire Valley and has become a beloved dish in French cuisine. The dish features tender, buttery pastry crust enveloping luscious apples cooked in a rich caramel sauce, resulting in a delightful balance of flavors and textures.
It’s typically served warm, often accompanied by a scoop of vanilla ice cream or a dollop of crème fraîche, making it a comforting indulgence during chilly evenings.
Making a Tarte Tatin may seem challenging, but with a few simple steps, you can create this impressive dessert at home. The secret to a perfect Tarte Tatin lies in the choice of apples and achieving the right level of caramelization. Tart apples like Granny Smith or Braeburn work best, as they hold their shape and provide a nice contrast to the sweetness of the caramel.
With the right techniques, you can impress your family and friends with this elegant yet rustic dessert that captures the essence of French winter cooking.
Ingredients (Serves 4-6):
- 6 medium-sized tart apples (such as Granny Smith or Braeburn)
- 100g (1/2 cup) unsalted butter
- 150g (3/4 cup) granulated sugar
- 1 teaspoon vanilla extract
- 1 teaspoon lemon juice
- 1 sheet of puff pastry (thawed if frozen)
- A pinch of salt
Cooking Instructions:
- Prepare the Apples: Start by peeling, coring, and cutting the apples in half. This will allow them to cook evenly and create a nice presentation for your tart. Toss the apple halves with lemon juice to prevent browning.
- Make the Caramel: In a large, oven-safe skillet, melt the butter over medium heat. Once melted, add the sugar and a pinch of salt. Stir continuously until the mixture turns a golden brown color and achieves a smooth caramel consistency. Be careful not to burn the caramel.
- Add the Apples: Carefully arrange the apple halves, cut side up, in the skillet over the caramel. Pack them tightly together, as they’ll shrink while cooking. Add the vanilla extract and cook the apples in the caramel for about 10-15 minutes, basting them occasionally with the syrup. You want the apples to be slightly softened but still hold their shape.
- Preheat the Oven: While the apples are cooking, preheat your oven to 190°C (375°F). This will guarantee that your tart cooks evenly when it goes in.
- Cover with Pastry: Once the apples are adequately caramelized, remove the skillet from the heat. Roll out the puff pastry to fit over the apples, trimming it as necessary. Carefully place the pastry over the apples, tucking the edges down inside the skillet.
- Bake the Tart: Transfer the skillet to the preheated oven and bake for 25-30 minutes, or until the pastry is golden brown and puffed. Keep an eye on it to prevent over-browning.
- Invert the Tart: Once baked, remove the skillet from the oven and let it cool for a couple of minutes. Carefully run a knife around the edges to loosen the pastry. Place a large plate over the skillet and quickly but carefully invert the tart onto the plate. The caramelized apples should be on top, glistening beautifully.
- Serve: Slice the Tarte Tatin into wedges and serve warm, accompanied by vanilla ice cream or crème fraîche if desired.
Extra Tips:
When making Tarte Tatin, the choice of apples is essential. Opt for a mix of tart and sweet apples to achieve a balanced flavor. Additionally, if you prefer a deeper caramel flavor, allow the sugar to cook a bit longer before adding the apples, but watch closely to avoid burning.
For an added twist, you can sprinkle some cinnamon or nutmeg over the apples before covering with pastry to enhance the warming winter spices. Enjoy this classic dish that’s sure to impress!
Croque Monsieur

Croque Monsieur is a classic French sandwich that has won the hearts of many with its rich flavors and delightful textures. This iconic dish consists of layers of ham and cheese, all enveloped in crispy, golden-brown bread. Traditionally topped with béchamel sauce, the Croque Monsieur is a perfect comfort food for chilly winter days, making it an ideal addition to your French winter recipes repertoire.
Its simplicity and indulgence make it suitable for both casual family meals and elegant gatherings alike.
To elevate your Croque Monsieur experience, consider using a high-quality cheese like Gruyère or Emmental, which melt beautifully and add a nutty flavor. You can also experiment with different types of bread, such as sourdough or brioche, to give your sandwich a unique twist. Whether enjoyed as a lunch option or served alongside a salad for dinner, this warm, cheesy delight is sure to please anyone who encounters it.
Ingredients (serving size: 4-6 people)
- 8 slices of white bread (preferably sourdough or pain de mie)
- 8 slices of ham (preferably French jambon de Paris)
- 8 slices of Gruyère or Emmental cheese
- 4 tablespoons of unsalted butter (for spreading)
- 2 tablespoons of all-purpose flour
- 1 cup of milk
- 1/4 teaspoon of nutmeg
- Salt and pepper to taste
- 1/2 cup of grated Gruyère or Emmental cheese (for topping)
Cooking Instructions
- Prepare the Béchamel Sauce: In a medium saucepan over medium heat, melt 2 tablespoons of butter. Once melted, add the flour and whisk for about 2 minutes until it forms a paste (roux). Gradually pour in the milk while continuously whisking to avoid lumps. Continue cooking until the sauce thickens, about 5-7 minutes. Season with salt, pepper, and nutmeg, then set aside.
- Assemble the Sandwiches: Take 4 slices of bread and spread a thin layer of butter on one side of each slice. On the unbuttered side, layer a slice of ham followed by a slice of cheese. Place the remaining 4 slices of bread on top, buttered side up, to create sandwiches.
- Cook the Sandwiches: In a large skillet over medium heat, place the sandwiches and cook until the bottom is golden brown, about 3-4 minutes. Carefully flip the sandwiches and cook the other side for an additional 3-4 minutes. If your skillet isn’t large enough, you may need to cook them in batches.
- Add the Béchamel Sauce and Cheese: Preheat your oven to 400°F (200°C). Once the sandwiches are cooked, place them on a baking sheet. Spoon the béchamel sauce generously over the top of each sandwich and sprinkle the grated cheese on top.
- Bake: Place the baking sheet in the preheated oven and bake for about 10-12 minutes, or until the cheese is bubbly and golden brown.
- Serve: Remove the Croque Monsieur from the oven and let them cool for a minute. Cut each sandwich in half and serve immediately, garnished with a sprinkle of freshly ground black pepper if desired.
Extra Tips
For a touch of sophistication, consider adding a layer of sautéed mushrooms or spinach inside your sandwich for added flavor and nutrition. If you want to make a Croque Madame, simply top each sandwich with a fried egg before serving.
Quiche Lorraine

Quiche Lorraine is a classic French dish that embodies the warmth and comfort of winter cuisine. Originating from the Lorraine region of France, this savory pie features a buttery crust filled with a rich custard made from eggs, cream, and cheese, often complemented by crispy bacon or lardons.
It’s a versatile dish that can be enjoyed warm or at room temperature, making it perfect for holiday gatherings, brunches, or a cozy dinner at home. The beauty of Quiche Lorraine lies in its simplicity and the depth of flavor that comes from just a few quality ingredients.
This dish not only showcases the essence of French culinary tradition but also allows for endless variations, such as adding vegetables or different types of cheese. Whether you serve it alongside a fresh salad or as part of a larger spread, this quiche is sure to impress and satisfy your guests.
Ingredients (Serves 4-6):
- 1 pre-made pie crust (9-inch)
- 6 slices of bacon or lardons, chopped
- 1 cup heavy cream
- 3 large eggs
- 1 cup grated Gruyère cheese
- 1/2 teaspoon salt
- 1/4 teaspoon black pepper
- 1/4 teaspoon nutmeg (optional)
- 1 tablespoon chopped fresh chives (optional, for garnish)
Cooking Instructions:
- Preheat the Oven: Start by preheating your oven to 375°F (190°C). This guarantees that your quiche will bake evenly and get a nice golden crust.
- Prepare the Pie Crust: Place the pre-made pie crust into a 9-inch pie dish. Gently press it into the dish and trim any excess dough hanging over the edges. Prick the bottom of the crust with a fork to prevent it from puffing up during baking.
- Cook the Bacon: In a skillet over medium heat, cook the chopped bacon or lardons until they’re crispy, about 5-7 minutes. Once cooked, use a slotted spoon to transfer the bacon to a paper towel-lined plate to drain excess fat.
- Make the Custard Mixture: In a mixing bowl, whisk together the heavy cream, eggs, salt, black pepper, and nutmeg (if using) until well combined. This mixture will form the basis of your quiche filling.
- Combine Ingredients: Add the cooked bacon and grated Gruyère cheese into the custard mixture, stirring gently to combine. Confirm that the bacon and cheese are evenly distributed throughout the mixture.
- Fill the Crust: Pour the custard mixture into the prepared pie crust, spreading it out evenly. Be careful not to overfill, as the mixture will puff up while baking.
- Bake: Place the quiche in the preheated oven and bake for about 30-35 minutes, or until the top is golden brown and the center is set. You can test for doneness by inserting a knife into the center; it should come out clean.
- Cool and Serve: Once baked, remove the quiche from the oven and allow it to cool for about 10 minutes. This resting time will help the custard firm up a bit more, making it easier to slice. Serve warm or at room temperature, garnished with fresh chives if desired.
Extra Tips:
For a perfect Quiche Lorraine, verify your ingredients are at room temperature before mixing, as this helps to create a smoother custard. If you prefer a richer flavor, you can substitute half of the heavy cream with whole milk.
Additionally, feel free to experiment with different cheeses or add sautéed vegetables, like spinach or mushrooms, for a unique twist on this classic recipe. Always keep an eye on the quiche towards the end of the baking time to prevent over-browning, and remember that it will continue to cook slightly as it cools. Enjoy your homemade Quiche Lorraine!
Coquilles Saint-Jacques

Coquilles Saint-Jacques, or scallops in their shells, is a classic French dish that embodies the essence of coastal cuisine. This elegant dish features succulent scallops baked in a creamy sauce, often accompanied by a topping of breadcrumbs and cheese, creating a delightful contrast of textures.
Traditionally served in the scallop shells, it’s not only a feast for the palate but also for the eyes, making it a perfect choice for special occasions or cozy winter dinners.
The preparation of Coquilles Saint-Jacques is relatively straightforward, making it accessible for home cooks who want to impress their guests. With its rich flavors and luxurious presentation, this dish is sure to transport you straight to a charming bistro by the sea.
Pair it with a crisp white wine and a fresh baguette for a complete dining experience that celebrates the heart of French culinary tradition.
Ingredients (Serves 4-6)
- 12 large sea scallops
- 2 tablespoons unsalted butter
- 1 small onion, finely chopped
- 2 cloves garlic, minced
- 1 cup heavy cream
- 1/2 cup dry white wine
- 1/2 cup grated Gruyère cheese
- 1/2 cup breadcrumbs
- 2 tablespoons fresh parsley, chopped
- Salt and pepper, to taste
- 1 tablespoon lemon juice
- 4-6 scallop shells (or gratin dishes)
Cooking Instructions
- Prepare the Scallops: Rinse the scallops under cold water and pat them dry with a paper towel. Season with salt and pepper. If using shells, verify they’re clean and dry.
- Sauté Aromatics: In a large skillet, melt the butter over medium heat. Add the chopped onion and cook until translucent, about 5 minutes. Stir in the minced garlic and cook for an additional minute until fragrant, being careful not to let it burn.
- Make the Sauce: Pour in the white wine and allow it to simmer for about 2 minutes to reduce slightly. Then, add the heavy cream and lemon juice, stirring to combine. Let the mixture simmer gently for about 5-7 minutes until it thickens slightly. Season with salt and pepper to taste.
- Combine with Scallops: Add the scallops to the skillet and gently fold them into the creamy sauce. Cook for about 3-4 minutes until the scallops are just opaque and tender. Be careful not to overcook them, as they can become tough.
- Assemble the Dish: Preheat the oven to broil. Spoon the scallop and sauce mixture into the prepared scallop shells or gratin dishes. Sprinkle the tops with breadcrumbs and then the grated Gruyère cheese, ensuring an even layer.
- Broil: Place the filled shells or dishes on a baking tray and broil in the oven for about 3-5 minutes, or until the top is golden brown and bubbling. Keep a close eye on them to prevent burning.
- Garnish and Serve: Remove from the oven and sprinkle the chopped parsley over the top for a fresh touch. Serve immediately, allowing guests to enjoy the dish hot out of the oven.
Extra Tips
When preparing Coquilles Saint-Jacques, be sure to use the freshest scallops you can find for the best flavor and texture. If scallops aren’t available, shrimp or other shellfish can be a great alternative.
Additionally, feel free to customize the dish by adding your favorite herbs or spices to the sauce for a personal touch. For a more decadent version, consider incorporating a splash of brandy or a hint of nutmeg to elevate the flavor profile further.
Enjoy your culinary journey into French winter cuisine!
Pot-au-Feu
Pot-au-Feu, a classic French winter dish, translates to “pot on the fire.” This hearty stew is a comforting meal that brings together various cuts of meat, vegetables, and aromatic herbs, all simmered slowly to create a rich and flavorful broth.
Traditionally served as a communal dish, Pot-au-Feu is perfect for family gatherings or cozy dinners during the colder months. The beauty of this dish lies in its versatility; you can easily adjust the ingredients according to what you have on hand or your family’s preferences.
The dish typically features beef, but you can also include other meats like chicken or pork for added depth. The vegetables, which may include carrots, turnips, and leeks, add both color and nutrition, making this a wholesome meal. As the ingredients simmer together, the flavors meld, creating a delicious broth that can be served on its own or with a side of crusty bread.
With its rustic charm and homey appeal, Pot-au-Feu is sure to warm your heart and soul.
Ingredients (Serves 4-6)
- 2 lbs beef chuck or brisket
- 1 lb beef shank or oxtail
- 4 medium carrots, peeled and cut into large chunks
- 3 medium potatoes, peeled and quartered
- 2 leeks, cleaned and cut into large pieces
- 1 medium onion, halved
- 2 cloves garlic, smashed
- 1 bouquet garni (a bundle of herbs including thyme, bay leaf, and parsley)
- 8 cups water
- Salt and pepper to taste
- Optional: Mustard and cornichons for serving
Cooking Instructions
- Prepare the Ingredients: Begin by cutting all your vegetables and meats as specified in the ingredients list. Confirm that the beef is cut into large, manageable pieces to allow for even cooking. This preparation step is essential for a well-cooked Pot-au-Feu.
- Brown the Meat: In a large Dutch oven or heavy pot, add a bit of oil over medium-high heat. Once hot, carefully add the beef chuck, brisket, and shank. Sear the meat on all sides until browned, about 5-7 minutes. This step enhances the flavor of the broth by creating a rich base.
- Add Water and Aromatics: After browning the meat, pour in 8 cups of water, and bring to a gentle boil. Skim off any foam that rises to the surface, which helps clarify the broth. Add the halved onion, smashed garlic, and bouquet garni to the pot.
- Simmer the Broth: Reduce the heat to low and cover the pot. Allow the broth to simmer for about 2 hours. The long, slow simmer will extract the flavors from the meat and herbs, resulting in a delicious broth.
- Incorporate Vegetables: After 2 hours, add the carrots, leeks, and potatoes to the pot. Season with salt and pepper. Cover and continue to simmer for an additional 30-45 minutes, or until the vegetables are tender and the meat is fork-tender.
- Serve the Dish: Once everything is cooked, remove the pot from the heat. Carefully remove the meat and vegetables using a slotted spoon and place them on a serving platter. Strain the broth through a fine-mesh sieve to remove the aromatics, and serve it in bowls alongside the meat and vegetables.
Extra Tips
When making Pot-au-Feu, feel free to experiment with different vegetables like parsnips or celery for added flavor.
It’s also a great idea to let the stew rest for a few hours or even overnight; the flavors will deepen and improve over time. When serving, provide condiments like Dijon mustard and cornichons on the side to complement the rich taste of the broth.
Enjoy your homemade Pot-au-Feu as a delightful meal that embodies the essence of French comfort food!
Daube Provençale
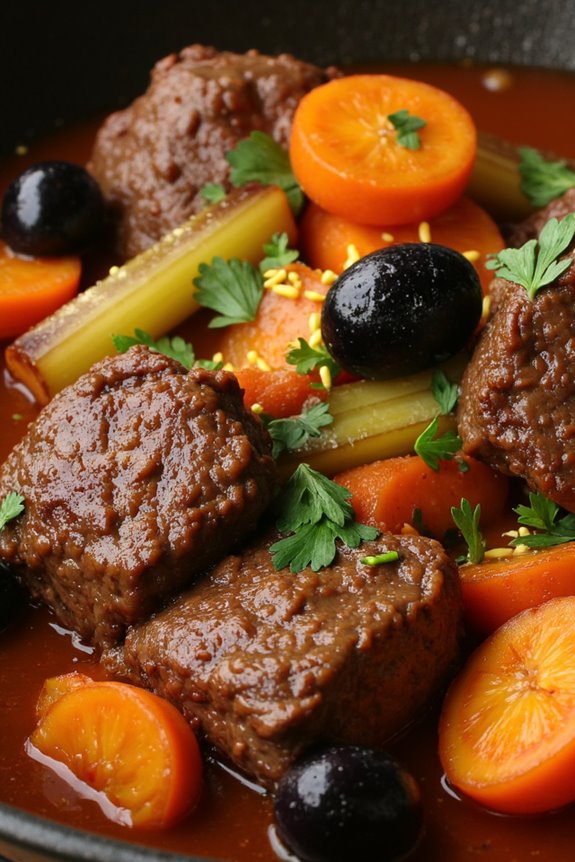
Daube Provençale is a traditional French dish that hails from the Provence region, known for its rich flavors and comforting qualities, making it perfect for winter meals. This hearty beef stew is braised in red wine and is typically flavored with aromatic herbs, garlic, and vegetables, resulting in a deliciously tender and flavorful dish. The slow cooking process allows the beef to absorb the wine and herb-infused broth, producing a meal that warms both the body and soul.
To create an authentic Daube Provençale, it’s vital to choose the right cut of meat, typically a chuck roast or brisket, which benefits from long, slow cooking. Many recipes also include elements like olives and orange zest, which add a unique twist to the flavor profile. This dish is best served with crusty bread or over a bed of creamy polenta, allowing you to soak up every drop of the savory sauce.
Ingredients (Servings: 4-6)
- 2 to 3 lbs beef chuck roast, cut into 2-inch cubes
- 1 bottle (750 ml) red wine (preferably a Côtes du Rhône)
- 2 tablespoons olive oil
- 1 large onion, diced
- 2 carrots, sliced
- 2 celery stalks, sliced
- 4 cloves garlic, minced
- 1 tablespoon tomato paste
- 2-3 sprigs fresh thyme
- 1 bay leaf
- Salt and pepper, to taste
- 1 cup black olives, pitted and halved
- Zest of 1 orange
- Fresh parsley, for garnish
Cooking Instructions
- Marinate the Beef: In a large bowl, combine the beef cubes with the red wine, thyme, bay leaf, and a pinch of salt and pepper. Cover and let marinate in the refrigerator for at least 4 hours or overnight. This step infuses the meat with flavor and tenderness.
- Sear the Meat: After marinating, remove the beef from the marinade and pat it dry with paper towels. In a large Dutch oven or heavy pot, heat the olive oil over medium-high heat. Sear the beef cubes in batches until browned on all sides, about 5 minutes per batch. This step creates a rich crust that enhances the overall flavor of the stew.
- Sauté the Vegetables: Once all the beef is browned, remove it from the pot and set aside. In the same pot, add the diced onion, sliced carrots, and celery. Sauté for about 5-7 minutes until the vegetables are softened. Stir in the minced garlic and tomato paste, cooking for an additional minute to release the flavors.
- Deglaze the Pot: Pour in the reserved marinade (wine and herbs) and bring to a simmer, scraping the bottom of the pot with a wooden spoon to release any browned bits. This deglazing step is essential as it adds depth of flavor to the dish.
- Combine and Cook: Return the seared beef to the pot, adding the olives and orange zest. Bring the mixture to a gentle simmer, then cover and reduce the heat to low. Let the stew cook for 2 to 3 hours, stirring occasionally, until the beef is tender and the flavors meld together beautifully.
- Serve: Before serving, taste and adjust seasoning with salt and pepper if needed. Garnish with fresh parsley and serve hot with crusty bread or over polenta.
Extra Tips
For the best results, choose a robust red wine that you’d enjoy drinking, as it will greatly impact the flavor of the dish. Additionally, consider preparing Daube Provençale a day in advance; the flavors deepen and improve as it sits. Reheat gently, allowing the stew to come back up to temperature without boiling to maintain the tenderness of the meat.
Don’t hesitate to customize the recipe by adding seasonal vegetables or herbs to suit your taste!
Chocolate Fondant
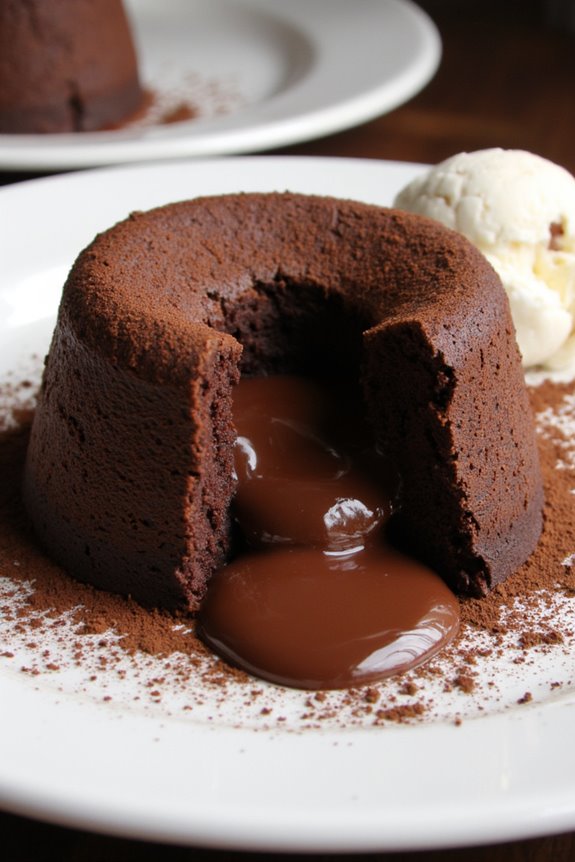
Chocolate Fondant is a classic French dessert that brings a touch of elegance to any winter dinner table. This rich, molten chocolate cake is famous for its gooey center that flows like lava when you cut into it. It’s a delightful treat that pairs beautifully with a scoop of vanilla ice cream or a dollop of whipped cream, making it perfect for special occasions or a cozy night in.
The warm, decadent chocolate flavor is sure to impress your family and friends, making them believe you’ve mastered the art of French patisserie.
Making Chocolate Fondant is simpler than it seems, and with a few key ingredients, you can create a restaurant-quality dessert in the comfort of your own kitchen. The beauty of this dish lies not only in its taste but also in its presentation, as it can be served in individual ramekins for a sophisticated touch.
Follow these steps, and soon you’ll be savoring the rich, chocolatey goodness of this delightful winter treat.
Ingredients (Serves 4-6):
- 200g dark chocolate (70% cocoa)
- 100g unsalted butter
- 150g granulated sugar
- 3 large eggs
- 3 large egg yolks
- 100g all-purpose flour
- A pinch of salt
- Optional: cocoa powder for dusting ramekins
Cooking Instructions:
- Preheat the Oven: Start by preheating your oven to 200°C (390°F). This guarantees that the fondant cooks evenly and achieves that perfect molten center.
- Prepare the Ramekins: Grease 4-6 individual ramekins with butter and dust them with cocoa powder. This will help the fondants release easily after baking.
- Melt Chocolate and Butter: In a heatproof bowl, combine the dark chocolate and unsalted butter. Place the bowl over a pot of simmering water (bain-marie) and let it melt, stirring occasionally until smooth. Remove from heat and let cool slightly.
- Whisk Eggs and Sugar: In a separate mixing bowl, whisk together the granulated sugar, whole eggs, and egg yolks until the mixture is pale and slightly thickened. This will help incorporate air into the batter, resulting in a lighter texture.
- Combine Mixtures: Gradually pour the melted chocolate and butter mixture into the egg mixture, stirring continuously to combine. Make sure the chocolate isn’t too hot to avoid cooking the eggs.
- Add Flour and Salt: Gently fold in the all-purpose flour and a pinch of salt until just mixed. Be careful not to overmix, as this can lead to a denser fondant.
- Fill Ramekins: Divide the batter evenly among the prepared ramekins, filling them about three-quarters full to allow space for rising.
- Bake: Place the ramekins on a baking tray and bake in the preheated oven for 10-12 minutes. The edges should be set, but the centers should still be soft and slightly jiggly.
- Cool and Serve: Remove the fondants from the oven and let them cool for 1 minute. Carefully run a knife around the edges to loosen, then invert onto plates. Serve immediately, preferably with ice cream or whipped cream.
Extra Tips:
When making Chocolate Fondant, timing is vital to achieve that perfect molten center. If you prefer a firmer texture, you can bake them for an additional minute, but be cautious, as over-baking may result in a less gooey interior.
You can also prepare the batter in advance and refrigerate it in the ramekins; just add an extra minute or two to the baking time if baking straight from the fridge. For a special touch, consider adding a splash of espresso or orange zest to the batter for an enhanced flavor profile.
Enjoy this delightful dessert!
Crêpes Suzette

Crêpes Suzette is a classic French dessert that combines the delicate, thin crêpes with a sumptuous orange sauce that’s both sweet and slightly tangy. Originating in the late 19th century, this dish is often flambéed with Grand Marnier or orange liqueur, adding a theatrical flair to its presentation.
The lightness of the crêpes paired with the rich, citrusy sauce makes it an exquisite treat for any special occasion, especially during the chilly winter months.
Making Crêpes Suzette requires a bit of patience and practice, especially when preparing the crêpes themselves. However, once you master the technique, you’ll find that the process becomes a delightful ritual.
The combination of flavors and textures, from the soft crêpes to the warm, aromatic sauce, will surely impress your family and friends. Let’s immerse ourselves in this delicious recipe that serves 4-6 people.
Ingredients
- 1 cup all-purpose flour
- 2 large eggs
- 1 1/2 cups milk
- 2 tablespoons unsalted butter, melted
- 2 tablespoons sugar
- 1 teaspoon vanilla extract
- Pinch of salt
- 1/4 cup unsalted butter (for the sauce)
- 1/4 cup sugar (for the sauce)
- Zest of 1 orange
- 1/2 cup fresh orange juice
- 1/4 cup Grand Marnier or other orange liqueur
- Fresh mint leaves (for garnish)
Cooking Instructions
1. Prepare the Crêpe Batter: In a mixing bowl, whisk together the all-purpose flour, eggs, milk, melted butter, sugar, vanilla extract, and a pinch of salt until you achieve a smooth batter.
Allow the batter to rest for at least 30 minutes; this helps the gluten relax and results in more tender crêpes.
2. Cook the Crêpes: Heat a non-stick skillet or crêpe pan over medium heat and lightly grease it with butter.
Pour about 1/4 cup of batter into the pan, quickly tilting it to spread the batter evenly across the surface.
Cook for about 1-2 minutes or until the edges start to lift and the bottom is lightly golden. Flip the crêpe and cook for another 1 minute.
Repeat with the remaining batter, stacking the crêpes on a plate and covering them with a clean kitchen towel to keep warm.
3. Make the Orange Sauce: In a separate saucepan, melt 1/4 cup of unsalted butter over medium heat.
Add in the sugar and orange zest, stirring until the sugar dissolves. Pour in the fresh orange juice and bring the mixture to a gentle simmer.
Allow it to cook for a few minutes until it thickens slightly, stirring occasionally.
4. Flambé the Sauce: Remove the sauce from the heat, and carefully add the Grand Marnier.
Return to the heat and ignite the sauce with a long lighter or match (be cautious, as this can create a flame).
Allow the flames to subside as the alcohol burns off, which should take about 1-2 minutes.
5. Combine Crêpes and Sauce: Fold each crêpe into quarters and place them in the pan with the orange sauce.
Allow the crêpes to heat through for about a minute in the sauce, making sure they absorb the flavors.
6. Serve: Transfer the crêpes to serving plates, drizzle with the remaining sauce, and garnish with fresh mint leaves.
Serve immediately, enjoying the delightful aroma and flavors.
Extra Tips
When making Crêpes Suzette, verify your skillet is at the right temperature; too hot can burn the crêpes, while too cool can make them tough.
If you find that the batter is too thick after resting, you can add a splash of milk to thin it out.
For a unique twist, feel free to experiment with different citrus juices, like lemon or grapefruit, alongside the orange.
Finally, practice makes perfect with crêpe flipping, so don’t be discouraged if your first few attempts aren’t flawless!