

When I think of French cuisine, I envision vibrant colors and fresh flavors that dance on the palate. These 12 delicate recipes capture that essence, offering a gentle yet satisfying approach to meals. From the comforting warmth of Light French Onion Soup to the refreshing Quinoa Salad with Goat Cheese, each dish celebrates seasonal produce. Let’s explore how to create elegant meals that are simple to prepare and delightful to share.
Ratatouille Tart
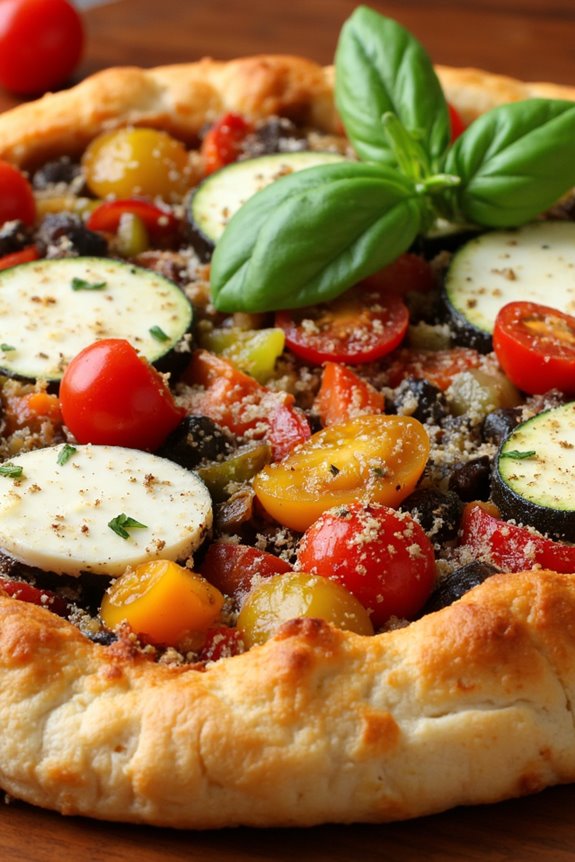
Ratatouille Tart is a delightful twist on the traditional French ratatouille dish, transforming it into a stunning and savory tart. This recipe blends the vibrant flavors of seasonal vegetables, including zucchini, eggplant, and bell peppers, with a flaky pastry base. Perfect for a light lunch or dinner, this tart not only looks impressive but is also packed with wholesome ingredients, making it a great choice for those looking for a healthy yet satisfying meal.
The beauty of the Ratatouille Tart lies in its versatility. You can customize the filling based on the vegetables you have on hand or the ones that are in season. With a hint of fresh herbs and a touch of cheese, this tart is sure to impress family and friends alike. Serve it warm or at room temperature, and pair it with a simple green salad for a complete meal.
Ingredients (Serves 4-6):
- 1 sheet of puff pastry
- 1 medium eggplant, diced
- 1 medium zucchini, sliced
- 1 medium red bell pepper, diced
- 1 medium yellow bell pepper, diced
- 1 medium onion, thinly sliced
- 2 cloves garlic, minced
- 1 cup cherry tomatoes, halved
- 1 tablespoon olive oil
- 1 teaspoon dried thyme
- 1 teaspoon dried basil
- Salt and pepper to taste
- 1 cup shredded mozzarella cheese
- 1/4 cup grated Parmesan cheese
- Fresh basil leaves for garnish (optional)
Cooking Instructions:
- Preheat the Oven: Begin by preheating your oven to 400°F (200°C). This will guarantee that the pastry cooks evenly and becomes golden and flaky.
- Prepare the Vegetables: In a large mixing bowl, combine the diced eggplant, zucchini, red and yellow bell peppers, sliced onion, minced garlic, and halved cherry tomatoes. Drizzle with olive oil and sprinkle with dried thyme, dried basil, salt, and pepper. Toss everything together until the vegetables are well coated.
- Sauté the Mixture: Heat a large skillet over medium-high heat and add the vegetable mixture. Sauté for about 5-7 minutes, stirring occasionally, until the vegetables are slightly softened. This step enhances the flavors and reduces excess moisture.
- Roll Out the Pastry: On a lightly floured surface, roll out the puff pastry to fit a 9-inch tart pan. Gently press the pastry into the pan, and trim any excess with a knife. Prick the bottom with a fork to prevent it from puffing up during baking.
- Layer the Filling: Spread the sautéed vegetable mixture evenly over the prepared pastry base. Make sure to distribute it well to guarantee even cooking.
- Add Cheese: Sprinkle the shredded mozzarella cheese evenly over the top of the vegetables, followed by the grated Parmesan cheese. This will create a delicious cheesy crust as the tart bakes.
- Bake the Tart: Place the tart in the preheated oven and bake for 25-30 minutes, or until the pastry is golden brown and the cheese is bubbly. Keep an eye on it to prevent over-browning.
- Cool and Serve: Once baked, remove the tart from the oven and let it cool for about 10 minutes. This allows the filling to set slightly, making it easier to slice. Garnish with fresh basil leaves, if desired, and serve warm or at room temperature.
Extra Tips:
For an even more flavorful Ratatouille Tart, consider adding a layer of ricotta cheese on the pastry before adding the vegetables, which adds creaminess.
Additionally, feel free to experiment with different herbs, such as rosemary or oregano, to suit your taste. To keep the tart crispy, store leftovers in the refrigerator without covering them tightly, as this can cause the pastry to become soggy. Enjoy your culinary creation!
Light French Onion Soup
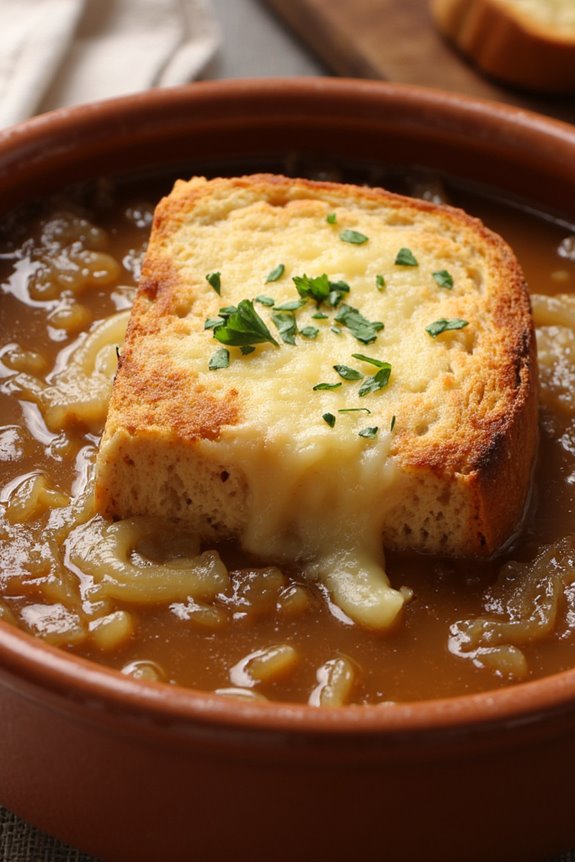
Light French Onion Soup is a delightful twist on the classic French dish that’s both comforting and healthy. This version uses less fat and focuses on enhancing the natural sweetness of the onions, resulting in a soup that’s rich in flavor yet light on calories. Perfect for a cozy evening or as a starter for a dinner party, this dish combines the aromatic essence of caramelized onions with a savory broth, topped with a sprinkle of cheese and crusty bread.
Preparing Light French Onion Soup is a straightforward process that will fill your kitchen with a wonderful aroma. The key to this soup is the slow caramelization of the onions, which brings out their natural sugars and deep flavors. With minimal ingredients and a little patience, you can create a hearty and satisfying soup that’s sure to impress your family and friends.
Ingredients (Serves 4-6):
- 4 large onions, thinly sliced
- 2 tablespoons olive oil
- 1 teaspoon salt
- 1 teaspoon sugar
- 4 cups low-sodium vegetable or beef broth
- 1 teaspoon dried thyme
- 1 bay leaf
- Freshly ground black pepper, to taste
- 4-6 slices of whole-grain baguette or crusty bread
- 1 cup grated Gruyère cheese (or any light cheese of your choice)
- Fresh parsley, for garnish (optional)
Cooking Instructions:
1. Caramelize the Onions: In a large, heavy-bottomed pot, heat the olive oil over medium heat. Add the sliced onions and salt. Cook the onions slowly, stirring occasionally, for about 15 minutes until they soften.
Sprinkle the sugar over the onions, which will help to enhance their caramelization. Continue to cook, stirring often, for an additional 30-40 minutes, until the onions are deep golden brown and caramelized.
2. Add Broth and Herbs: Once the onions are caramelized, add the vegetable or beef broth to the pot. Stir in the dried thyme and bay leaf. Bring the mixture to a simmer, then reduce the heat to low.
Allow the soup to cook for another 15-20 minutes so the flavors can meld together.
3. Season the Soup: After simmering, taste the soup and season it with freshly ground black pepper. You may want to adjust the salt depending on your preference and the saltiness of your broth.
4. Prepare the Bread: While the soup is simmering, preheat your oven to 400°F (200°C). Place the slices of baguette on a baking sheet and toast them in the oven for about 5-7 minutes, until they’re slightly crispy and golden.
5. Serve the Soup: Ladle the soup into bowls, and top each bowl with a slice of toasted bread. Sprinkle the grated Gruyère cheese generously over the bread.
Place the bowls under the broiler for 2-3 minutes, or until the cheese is melted and bubbly.
6. Garnish and Enjoy: Remove the bowls from the oven and let them cool slightly. If desired, garnish with fresh parsley before serving. Enjoy your Light French Onion Soup warm!
Extra Tips:
For added depth of flavor, consider adding a splash of white wine to the onions after they’ve caramelized but before you add the broth. This will enhance the richness of the soup.
Additionally, if you prefer a vegetarian version, simply use vegetable broth and skip any meat-based ingredients. Finally, feel free to experiment with different cheeses or herbs to customize the soup to your taste!
Quinoa Salad With Goat Cheese

Quinoa Salad with Goat Cheese is a delightful and nutritious dish that embodies the essence of French cuisine while being easy to prepare. This salad is perfect for a light lunch or as a side dish at dinner gatherings. With its colorful presentation and the tangy flavor of goat cheese, it offers an invigorating and satisfying meal that’s packed with protein, fiber, and essential nutrients.
This recipe features a base of fluffy quinoa, combined with fresh vegetables and creamy goat cheese, creating a harmonious balance of textures and flavors. The addition of a zesty vinaigrette enhances the overall taste, making it a perfect centerpiece for any table. Whether you’re looking to impress guests or enjoy a healthy meal at home, this quinoa salad is sure to please.
Ingredients (Serves 4-6):
- 1 cup quinoa, rinsed
- 2 cups water or vegetable broth
- 1 cup cherry tomatoes, halved
- 1 cucumber, diced
- 1 bell pepper (any color), diced
- 1/4 red onion, finely chopped
- 1/2 cup fresh parsley, chopped
- 1/2 cup goat cheese, crumbled
- 1/4 cup olive oil
- 2 tablespoons red wine vinegar
- 1 teaspoon Dijon mustard
- Salt and pepper to taste
Cooking Instructions:
- Cook the Quinoa: In a medium saucepan, bring 2 cups of water or vegetable broth to a boil. Add the rinsed quinoa, reduce the heat to low, cover, and simmer for about 15 minutes or until the quinoa is fluffy and all the liquid is absorbed. Remove from heat and let it sit covered for 5 minutes, then fluff it with a fork.
- Prepare the Vegetables: While the quinoa is cooking, prepare the vegetables. Halve the cherry tomatoes, dice the cucumber and bell pepper, and finely chop the red onion and parsley. This step adds freshness and vibrant colors to the salad.
- Make the Vinaigrette: In a small bowl, whisk together the olive oil, red wine vinegar, Dijon mustard, salt, and pepper. This vinaigrette will bring all the flavors together and add a bright, zesty taste to the salad.
- Combine Ingredients: In a large mixing bowl, combine the cooked quinoa, prepared vegetables, and crumbled goat cheese. Pour the vinaigrette over the mixture and toss gently to combine, ensuring that all ingredients are evenly coated.
- Taste and Adjust: Before serving, taste the salad and adjust seasoning with additional salt and pepper if necessary. You may also want to add a little more olive oil or vinegar based on your preference.
- Serve: Transfer the quinoa salad to a serving dish. You can garnish it with extra parsley or goat cheese, if desired. Enjoy it immediately or refrigerate for 30 minutes to allow the flavors to meld together.
Extra Tips:
To enhance the flavor and presentation of your Quinoa Salad with Goat Cheese, consider adding toasted nuts or seeds for a crunchy texture. You can also substitute other vegetables based on what’s in season or your personal preference, such as spinach, arugula, or roasted vegetables.
This salad can be made in advance and stored in the refrigerator, making it a convenient option for meal prep or picnics. Enjoy the versatility of this dish by serving it warm or cold!
Herb-Crusted Baked Fish

Herb-Crusted Baked Fish is a delightful and healthy dish that captures the essence of French cuisine while being incredibly easy to prepare. This recipe is perfect for those who want to enjoy a light meal packed with flavors and nutrients. The combination of fresh herbs and a crispy crust not only enhances the taste of the fish but also makes it visually appealing, making it a great choice for a family dinner or entertaining guests.
To make this dish even more inviting, you can pair it with a side of roasted vegetables or a fresh green salad. The simplicity of the ingredients allows the natural flavors of the fish to shine, while the herb crust adds a delightful crunch. With just a few steps, you’ll have a delicious meal that’s sure to impress everyone at the table.
Ingredients (Serves 4-6):
- 4-6 fillets of white fish (such as cod, haddock, or tilapia)
- 1 cup fresh breadcrumbs
- 1/4 cup grated Parmesan cheese
- 2 tablespoons fresh parsley, chopped
- 2 tablespoons fresh dill, chopped
- 2 tablespoons fresh chives, chopped
- 2 cloves garlic, minced
- 1/4 cup olive oil
- Salt and pepper, to taste
- Lemon wedges, for serving
Cooking Instructions:
- Preheat the Oven: Start by preheating your oven to 400°F (200°C). This guarantees that the fish cooks evenly and the herb crust becomes golden and crispy.
- Prepare the Fish: Rinse the fish fillets under cold water and pat them dry with paper towels. Place the fillets in a single layer on a baking sheet lined with parchment paper. Season both sides of the fish with salt and pepper to enhance the flavor.
- Make the Herb Crust Mixture: In a mixing bowl, combine the fresh breadcrumbs, grated Parmesan cheese, chopped parsley, dill, chives, minced garlic, and olive oil. Mix well until all ingredients are combined and the breadcrumbs are evenly coated with the oil.
- Apply the Herb Crust: Spoon the herb mixture generously over each fish fillet, pressing down gently to make sure it adheres to the fish. This will create a lovely crust that will add both flavor and texture.
- Bake the Fish: Place the baking sheet in the preheated oven and bake for about 15-20 minutes, or until the fish flakes easily with a fork and the crust is golden brown. Keep an eye on it to avoid overcooking.
- Serve: Once done, remove the fish from the oven and let it rest for a couple of minutes. Serve the herb-crusted baked fish with lemon wedges on the side for an extra burst of freshness.
Extra Tips:
For added flavor, consider marinating the fish in a little lemon juice and olive oil for about 30 minutes before cooking. This not only enhances the taste but also helps to keep the fish moist during baking.
Additionally, if you prefer a spicier kick, feel free to add a pinch of red pepper flakes to the herb crust mixture. Enjoy your meal with a side of steamed vegetables or a crisp salad for a complete, healthy dinner!
Lemon and Asparagus Risotto
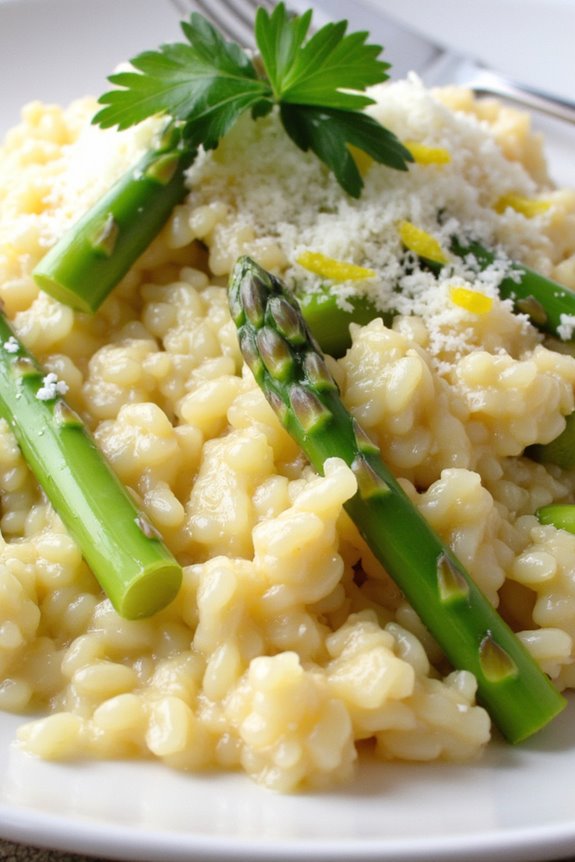
Risotto is a classic Italian dish that has won hearts with its creamy texture and rich flavors. In this Easy French Light recipe for Lemon and Asparagus Risotto, we combine the traditional elements of risotto with the invigorating zest of lemon and the vibrant crunch of asparagus. This dish is perfect for a light spring or summer dinner, offering a delightful balance between the earthiness of the asparagus and the bright citrus notes.
The beauty of this dish lies in its simplicity. The secret to a perfect risotto is to cook the rice slowly, allowing it to absorb the flavors of the broth while stirring consistently to achieve that creamy consistency. This Lemon and Asparagus Risotto not only pleases the palate but is also a feast for the eyes, making it a fantastic addition to your culinary repertoire.
Ingredients (Serves 4-6):
- 1 cup Arborio rice
- 4 cups vegetable broth
- 1 cup fresh asparagus, trimmed and cut into 1-inch pieces
- 1 small onion, finely chopped
- 2 cloves garlic, minced
- 1/2 cup white wine (optional)
- 1/2 cup grated Parmesan cheese
- 1 lemon (juice and zest)
- 2 tablespoons olive oil
- Salt and pepper to taste
- Fresh parsley for garnish (optional)
Cooking Instructions:
- Prepare the Broth: In a saucepan, heat the vegetable broth over low heat. Keep it warm throughout the cooking process, as adding cold broth will slow down the cooking of the risotto.
- Sauté the Aromatics: In a large pan, heat the olive oil over medium heat. Add the chopped onion and sauté until translucent, about 3-4 minutes. Stir in the minced garlic and cook for another minute until fragrant.
- Toast the Rice: Add the Arborio rice to the pan and stir well to coat the grains in the oil. Toast the rice for about 2 minutes, stirring frequently. This step helps to enhance the nutty flavor of the rice.
- Deglaze with Wine: If using, pour in the white wine and let it simmer, stirring until the wine is mostly absorbed by the rice. This adds depth to the flavor of the dish.
- Add the Broth Gradually: Begin adding the warm vegetable broth one ladle at a time, stirring gently. Wait until the liquid is mostly absorbed before adding the next ladle. Continue this process for about 15 minutes.
- Incorporate Asparagus: After 15 minutes of cooking, add the asparagus pieces to the risotto. Continue adding broth and stirring for another 5-10 minutes, or until the rice is creamy and al dente.
- Finish with Lemon and Cheese: Once the risotto reaches your desired consistency, remove the pan from heat. Stir in the lemon juice, lemon zest, and grated Parmesan cheese. Season with salt and pepper to taste.
- Serve and Garnish: Spoon the risotto into bowls and, if desired, garnish with fresh parsley for an added touch of color and flavor.
Extra Tips:
When making Lemon and Asparagus Risotto, it’s essential to use fresh asparagus for the best flavor and texture. You can also experiment with different types of cheese, such as Pecorino or Gruyère, for a unique twist.
If you prefer a more substantial meal, add grilled chicken or shrimp on top. Finally, remember that risotto is best enjoyed immediately after cooking, as it tends to thicken upon standing.
Spinach and Feta Galette

The Spinach and Feta Galette is a rustic yet elegant dish that celebrates the delightful flavors of fresh spinach and tangy feta cheese. This savory tart is an excellent choice for a light lunch, dinner, or even as an appetizer for a gathering. With a flaky, buttery crust enveloping a vibrant filling, it combines comfort and sophistication in every bite.
The galette’s free-form style makes it accessible to even novice bakers, allowing you to impress your guests without the fuss of traditional pastry-making. This recipe isn’t only easy to follow but also adaptable. You can substitute or add other vegetables based on what’s in season or available in your pantry.
The combination of spinach and feta is a classic pairing, but feel free to experiment with additional herbs or cheeses to suit your taste. Serve it warm or at room temperature, and enjoy this delightful dish that brings a touch of French flair to your table.
Ingredients (serving size: 4-6 people)
- 1 pre-made pie crust or puff pastry
- 4 cups fresh spinach, washed and chopped
- 1 cup feta cheese, crumbled
- 1 medium onion, finely chopped
- 2 cloves garlic, minced
- 2 large eggs
- 1/2 cup heavy cream
- 1 tablespoon olive oil
- 1 teaspoon dried oregano
- Salt and pepper to taste
- 1 egg (for egg wash)
- Fresh parsley or dill for garnish (optional)
Cooking Instructions
- Preheat the Oven: Start by preheating your oven to 400°F (200°C). This step is vital as it guarantees the galette will cook evenly and achieve a golden brown crust.
- Sauté the Vegetables: In a large skillet, heat the olive oil over medium heat. Add the chopped onion and garlic, cooking until the onion becomes translucent (about 5 minutes). This step enhances the flavors and adds depth to your filling.
- Add the Spinach: Gradually add the chopped spinach to the skillet, stirring until it wilts down. This should take about 3-4 minutes. Season with salt, pepper, and dried oregano, then remove from heat and let it cool slightly.
- Prepare the Filling: In a mixing bowl, whisk together the eggs and heavy cream until well combined. Stir in the sautéed spinach mixture and crumbled feta cheese until everything is evenly mixed. This creamy filling complements the flaky crust beautifully.
- Roll Out the Dough: On a lightly floured surface, roll out your pie crust or puff pastry into a large circle (about 12 inches in diameter). Transfer it to a baking sheet lined with parchment paper.
- Assemble the Galette: Spoon the spinach and feta filling into the center of the rolled-out dough, leaving a 2-inch border around the edges. Carefully fold the edges of the dough over the filling, pleating as necessary to create a rustic look.
- Egg Wash: Beat the additional egg and brush it over the exposed crust for a shiny finish. This step will give your galette a beautiful golden color when baked.
- Bake: Place the galette in the preheated oven and bake for 30-35 minutes, or until the crust is golden brown and the filling is set. Keep an eye on it towards the end to prevent over-browning.
- Cool and Serve: Once baked, remove the galette from the oven and let it cool for about 10 minutes. Garnish with fresh parsley or dill if desired, then slice and serve warm or at room temperature.
Extra Tips
When making the Spinach and Feta Galette, consider using a combination of fresh herbs like basil or thyme to enhance the flavor profile. Confirm your spinach is well-drained after cooking to avoid a soggy crust.
If you want to add a touch of sweetness, a few sun-dried tomatoes can complement the savory filling beautifully. Finally, feel free to experiment with different cheeses or add a sprinkle of nutmeg for an extra layer of flavor!
Grilled Vegetable Salad
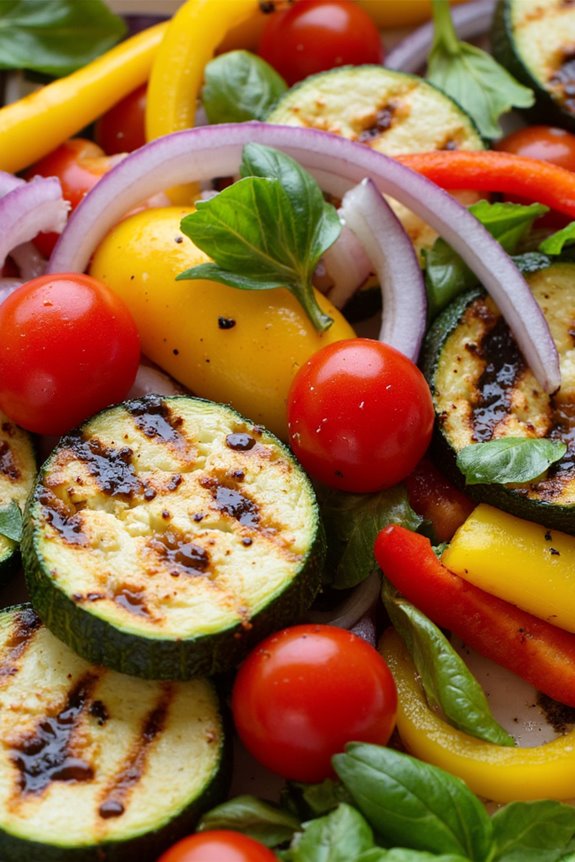
Grilled Vegetable Salad is a vibrant and invigorating dish that brings together the flavors of seasonal vegetables, enhanced by the smoky char from the grill. This easy-to-make salad is perfect for summer gatherings or as a light meal that highlights the natural goodness of fresh produce.
The beauty of this dish lies in its versatility; you can mix and match vegetables according to your preference or what’s in season, making it a staple in any health-conscious cook‘s repertoire.
To elevate the flavors, this salad is drizzled with a simple vinaigrette made from olive oil, balsamic vinegar, and herbs, resulting in a delightful balance of tanginess and richness. Packed with nutrients and bursting with color, the Grilled Vegetable Salad isn’t only a feast for the eyes but also a wholesome option for those looking to enjoy a healthy yet satisfying meal.
Serve it alongside grilled meats or as a stand-alone dish to impress your guests with its deliciousness and health benefits.
Ingredients (Serves 4-6)
- 1 zucchini, sliced into rounds
- 1 yellow squash, sliced into rounds
- 1 red bell pepper, cut into strips
- 1 yellow bell pepper, cut into strips
- 1 red onion, cut into wedges
- 1 cup cherry tomatoes, halved
- 3 tablespoons olive oil
- 2 tablespoons balsamic vinegar
- 2 cloves garlic, minced
- Salt and pepper, to taste
- Fresh basil or parsley, for garnish
Cooking Instructions
- Prepare the Vegetables: Start by washing and cutting all the vegetables. Slice the zucchini and yellow squash into rounds, cut the bell peppers into strips, and wedge the red onion. Halve the cherry tomatoes. This step guarantees that all vegetables are ready to be grilled evenly.
- Marinate the Vegetables: In a large bowl, combine the sliced zucchini, yellow squash, red bell pepper, yellow bell pepper, red onion, and cherry tomatoes. Drizzle with olive oil and balsamic vinegar, then add minced garlic, salt, and pepper. Toss well to confirm all the vegetables are coated in the marinade. Allow the vegetables to marinate for at least 15 minutes; this helps enhance their flavor.
- Preheat the Grill: While the vegetables are marinating, preheat your grill to medium-high heat. Making sure the grill is hot enough is essential for achieving those perfect grill marks and smoky flavor.
- Grill the Vegetables: Once the grill is hot, place the marinated vegetables directly onto the grill grate or use a grill basket. Cook for about 5 to 7 minutes on each side, or until the vegetables are tender and have nice grill marks. Be sure to turn them occasionally for even cooking.
- Assemble the Salad: Once grilled, remove the vegetables from the grill and let them cool slightly. On a large platter, arrange the grilled vegetables. Drizzle any remaining marinade over them for added flavor. Garnish with fresh basil or parsley for a pop of color and freshness.
- Serve and Enjoy: Serve the Grilled Vegetable Salad warm or at room temperature as a side dish or a light main course. Enjoy the beautiful medley of flavors and textures!
Extra Tips
When making Grilled Vegetable Salad, feel free to experiment with different vegetables such as asparagus, eggplant, or mushrooms for varied flavors and textures.
Also, consider adding some crumbled feta cheese or grilled chicken for additional protein. For a touch of sweetness, you can toss in some roasted corn or sliced avocados.
Finally, verify you don’t overcrowd the grill to avoid steaming the vegetables; this helps maintain their crispness and enhances their grilled flavor.
Chicken Provençal With Olives

Chicken Provençal With Olives is a delightful dish that showcases the vibrant flavors of the Mediterranean. This recipe embodies the essence of French cuisine with its aromatic herbs, tender chicken, and the briny flavor of olives. It’s an easy-to-make dish that’s perfect for a family dinner or a gathering with friends, allowing you to enjoy a taste of Provence right in your own kitchen.
The combination of fresh tomatoes, garlic, and olives creates a rich sauce that complements the chicken beautifully. This dish isn’t only flavorful but also light, making it a great option for those looking to enjoy a delicious meal without the heaviness often associated with traditional French recipes. Serve it with crusty bread or a simple salad to complete your dining experience.
Ingredients (Serves 4-6):
- 4-6 chicken thighs, bone-in and skin-on
- Salt and pepper, to taste
- 2 tablespoons olive oil
- 1 medium onion, chopped
- 4 cloves garlic, minced
- 1 cup cherry tomatoes, halved
- 1 cup pitted green olives, sliced
- 1 tablespoon fresh thyme leaves (or 1 teaspoon dried thyme)
- 1 tablespoon fresh rosemary, chopped (or 1 teaspoon dried rosemary)
- 1 cup low-sodium chicken broth
- 1 tablespoon balsamic vinegar
- Fresh parsley, chopped (for garnish)
Cooking Instructions:
- Prepare the Chicken: Season the chicken thighs generously with salt and pepper on both sides. This step is important as it enhances the flavor of the chicken during cooking.
- Sear the Chicken: In a large skillet or Dutch oven, heat the olive oil over medium-high heat. Add the chicken thighs, skin side down, and sear until the skin is golden brown and crisp, about 5-7 minutes. Flip the chicken and sear for another 5 minutes. This step will create a flavorful crust that locks in moisture.
- Sauté the Aromatics: Remove the chicken from the skillet and set aside. In the same skillet, add the chopped onion and cook until softened, about 3-4 minutes. Add the minced garlic and sauté for an additional minute until fragrant. This will build a flavorful base for the sauce.
- Add Tomatoes and Olives: Stir in the halved cherry tomatoes, sliced olives, thyme, and rosemary. Cook for about 2-3 minutes until the tomatoes start to soften. This step adds a burst of flavor and color to the dish.
- Deglaze and Simmer: Pour in the chicken broth and balsamic vinegar, scraping up any browned bits from the bottom of the skillet. Return the chicken to the skillet, skin side up, and bring the mixture to a gentle simmer. Cover and cook for 25-30 minutes, or until the chicken is cooked through and reaches an internal temperature of 165°F (75°C). This guarantees the chicken is tender and infused with the flavors of the sauce.
- Serve: Once cooked, remove the skillet from heat and let it rest for a few minutes. Garnish with chopped fresh parsley before serving. This adds a touch of freshness and color to the dish.
Extra Tips:
For an even more flavorful dish, consider marinating the chicken in olive oil, garlic, and herbs for a few hours or overnight before cooking. You can also customize the recipe by adding other vegetables such as bell peppers or zucchini.
If you prefer a thicker sauce, you can let it simmer uncovered for a few extra minutes to reduce the liquid. Enjoy your Chicken Provençal with Olives with a side of rustic bread, which is perfect for soaking up the delicious sauce!
Zucchini Noodles With Tomato Sauce
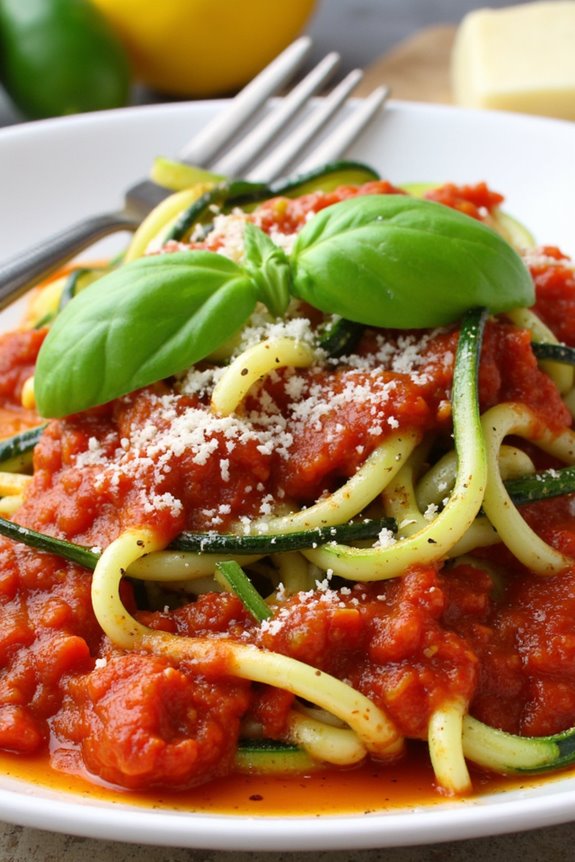
Zucchini noodles, also known as “zoodles,” are a delightful low-carb alternative to traditional pasta. They aren’t only easy to make but also packed with nutrients, making them a perfect option for a light meal. When paired with a rich tomato sauce, zucchini noodles create a satisfying and delicious dish that’s sure to please everyone at the table.
This dish is especially great during the summer months when zucchini is in season, allowing you to enjoy the fresh flavors of the garden.
Making zucchini noodles with tomato sauce is a straightforward process that requires minimal cooking skills. The key is to spiralize the zucchini into noodles and sauté them to achieve the perfect texture. The tomato sauce can be made from scratch or store-bought, depending on your preference.
This recipe serves 4-6 people, making it ideal for family dinners or gatherings with friends.
Ingredients (serves 4-6):
- 4 medium zucchinis
- 2 tablespoons olive oil
- 3 cloves garlic, minced
- 1 can (28 oz) crushed tomatoes
- 1 teaspoon dried oregano
- 1 teaspoon dried basil
- Salt and pepper, to taste
- Fresh basil leaves, for garnish
- Grated Parmesan cheese, for serving (optional)
Cooking Instructions:
- Prepare the Zucchini Noodles: Start by washing the zucchinis thoroughly. Using a spiralizer, slice the zucchinis into noodle shapes. If you don’t have a spiralizer, you can use a vegetable peeler to create thin ribbons. Set the zucchini noodles aside.
- Cook the Tomato Sauce: In a large skillet, heat the olive oil over medium heat. Add the minced garlic and sauté for about 1-2 minutes, or until fragrant. Be careful not to burn the garlic, as this can make the sauce taste bitter.
- Add the Tomatoes: Pour in the crushed tomatoes, and stir well. Add the dried oregano and basil, and season with salt and pepper to taste. Allow the sauce to simmer for about 10-15 minutes, stirring occasionally, until it thickens slightly.
- Cook the Zucchini Noodles: In a separate pan, heat a little olive oil over medium heat. Add the zucchini noodles and sauté for about 3-5 minutes, just until they’re tender but still have a slight crunch. Avoid overcooking them, as they can become mushy.
- Combine and Serve: Once the zucchini noodles are cooked, drain any excess moisture if necessary. Add the prepared tomato sauce to the pan with the zucchini noodles and toss gently to combine. Serve immediately, garnished with fresh basil leaves and grated Parmesan cheese if desired.
Extra Tips:
When preparing zucchini noodles, it’s crucial to avoid excess moisture, as it can make the dish watery. To help mitigate this, you can sprinkle the zoodles with a little salt and let them sit for 10-15 minutes before cooking, which will draw out some of the moisture.
Additionally, feel free to customize the sauce by adding your favorite vegetables or proteins for a heartier meal. Enjoy experimenting with flavors and making this dish your own!
Creamy Cauliflower Purée

Creamy Cauliflower Purée is a delightful and healthy alternative to traditional mashed potatoes. This elegant dish combines the subtle sweetness of cauliflower with a rich, creamy texture that’s sure to impress your guests. Not only is it light on calories, but it also packs a nutritional punch, making it a perfect side dish for any meal.
The use of simple ingredients allows the natural flavors of the cauliflower to shine through, while the creamy consistency makes it a comforting option. This purée is easy to prepare and can be made in under 30 minutes, making it a great choice for weeknight dinners or entertaining.
With just a few key ingredients and a blender, you can create a velvety smooth purée that pairs wonderfully with grilled meats, roasted vegetables, or served as a base for sauces. Follow this recipe to bring a touch of French cuisine to your table in a light and flavorful way.
Ingredients (serving size: 4-6 people)
- 1 large head of cauliflower, cut into florets
- 2 tablespoons unsalted butter
- ½ cup heavy cream or whole milk
- Salt, to taste
- Freshly ground black pepper, to taste
- Chives or parsley, finely chopped (for garnish, optional)
Cooking Instructions
- Prepare the Cauliflower: Begin by washing the cauliflower thoroughly under cold water. Remove the leaves and cut the cauliflower into small florets to guarantee they cook evenly. This will help break down the vegetable quickly during the cooking process.
- Cook the Cauliflower: In a large pot, add the cauliflower florets and cover them with water. Add a pinch of salt to the water to season the cauliflower as it cooks. Bring the pot to a boil over medium-high heat and then reduce the heat to simmer. Cook the cauliflower for about 10-12 minutes or until it’s fork-tender.
- Drain the Cauliflower: Once the cauliflower is cooked, carefully drain it in a colander to remove excess water. Allow it to sit for a minute to confirm that it isn’t watery, as excess moisture can affect the texture of your purée.
- Blend the Ingredients: Transfer the drained cauliflower to a food processor or blender. Add the unsalted butter and heavy cream (or whole milk) to the cauliflower. Blend on high until the mixture is smooth and creamy. You may need to stop and scrape down the sides a few times to confirm everything is well incorporated.
- Season the Purée: Once the cauliflower is blended to your desired consistency, taste the purée and season it with salt and freshly ground black pepper. Blend again briefly to mix in the seasonings.
- Serve: Transfer the creamy cauliflower purée to a serving dish. If desired, sprinkle with finely chopped chives or parsley for an added touch of color and flavor. Serve warm as a delightful side to your favorite main dishes.
Extra Tips
For an extra layer of flavor, consider adding roasted garlic or a sprinkle of nutmeg to the purée. This dish can also be made ahead of time and reheated gently on the stove or in the microwave.
If you find your purée is too thick, you can easily thin it out by adding a little more cream or milk until you reach your desired consistency. Enjoy this creamy cauliflower purée as a light yet satisfying addition to your meal!
Poached Pears in Red Wine

Poached Pears in Red Wine is a classic French dessert that showcases the delicate flavors of ripe pears infused with the rich notes of wine and spices. This elegant dish isn’t only visually stunning, but also incredibly simple to prepare, making it a perfect choice for dinner parties or a cozy night in.
The pears become tender and luscious as they soak in the fragrant red wine, creating a delightful contrast between the sweetness of the fruit and the depth of the wine. This recipe is a wonderful way to enjoy the natural flavors of pears while adding a touch of sophistication to your meal.
You can serve the poached pears warm or chilled, and they pair beautifully with a scoop of vanilla ice cream or a dollop of whipped cream. Whether you’re looking to impress guests or simply indulge in a sweet treat, Poached Pears in Red Wine will surely satisfy your cravings.
Ingredients (Serves 4-6):
- 4 medium-sized ripe pears, peeled and cored
- 1 bottle (750 ml) of dry red wine
- 1 cup granulated sugar
- 1 cinnamon stick
- 2 star anise pods
- 1 vanilla bean, split and scraped (or 1 teaspoon of vanilla extract)
- Zest of 1 orange
- Juice of 1 orange
- A pinch of salt
Cooking Instructions:
- Prepare the Pears: Begin by peeling the pears, leaving the stems intact for presentation. Carefully cut a small slice off the bottom of each pear so they can stand upright in the poaching liquid. This will help them maintain their shape during cooking.
- Combine Ingredients: In a large saucepan, combine the red wine, sugar, cinnamon stick, star anise pods, split vanilla bean (or vanilla extract), orange zest, orange juice, and a pinch of salt. Stir the mixture over medium heat until the sugar has completely dissolved.
- Poach the Pears: Once the wine mixture is simmering, gently place the prepared pears into the saucepan. Make sure they’re submerged in the liquid as much as possible. Reduce the heat to low and cover the pan. Allow the pears to poach for about 20-30 minutes, turning them occasionally, until they’re tender but not mushy. You can test their doneness by inserting a knife; it should slide in easily.
- Cool and Reduce the Sauce: Once the pears are cooked, carefully remove them from the poaching liquid and set them aside to cool. Increase the heat to medium-high and let the poaching liquid simmer uncovered for about 10-15 minutes, or until it thickens and reduces to a syrupy consistency.
- Serve: To serve, place each poached pear on a plate and drizzle with the reduced red wine sauce. You can garnish with additional orange zest or a sprinkle of cinnamon for an extra touch.
Extra Tips: When choosing pears for this recipe, look for varieties that are ripe but still firm, such as Bosc or Anjou, as they hold their shape well during poaching.
To enhance the flavor, consider adding other spices like cloves or a splash of brandy to the poaching liquid. For an elegant touch, serve the poached pears with a scoop of mascarpone cheese or whipped cream, and don’t forget to reserve some of the poaching liquid to drizzle on top!
Lavender Honey Yogurt Parfait

Indulging in a Lavender Honey Yogurt Parfait brings a touch of French elegance to your breakfast or dessert table. This delightful dish layers creamy yogurt with the floral notes of lavender and the sweetness of honey, creating a rejuvenating and light treat that isn’t only pleasing to the palate but also visually stunning.
Perfect for a brunch gathering or a quiet evening at home, this parfait is a versatile dish that can be enjoyed any time of the day. The combination of Greek yogurt, honey, and lavender creates a harmonious blend of flavors, while the addition of granola and fresh fruits adds texture and color.
This recipe is simple to prepare and can be customized with your favorite fruits or toppings, making it a perfect canvas for creativity. Get ready to impress your family and friends with this easy yet sophisticated dessert!
Ingredients (Serves 4-6)
- 4 cups Greek yogurt
- 1/4 cup honey
- 1 tablespoon culinary lavender (dried)
- 1 teaspoon vanilla extract
- 2 cups granola
- 2 cups mixed fresh berries (strawberries, blueberries, raspberries)
- Fresh mint leaves (for garnish, optional)
Cooking Instructions
- Infuse the Honey with Lavender: In a small saucepan, combine the honey and dried lavender. Heat the mixture over low heat, stirring occasionally until warmed through. Allow the mixture to steep for about 15 minutes, then strain to remove the lavender. Let the infused honey cool to room temperature.
- Prepare the Yogurt Mixture: In a large mixing bowl, combine the Greek yogurt and vanilla extract. Once the lavender-infused honey has cooled, add it to the yogurt mixture and stir until well combined. Taste and adjust sweetness with additional honey if desired.
- Layer the Parfait: In individual serving glasses or bowls, start by adding a layer of the yogurt mixture at the bottom. Follow this with a layer of granola, then add a layer of mixed berries. Repeat the layers until the glasses are filled, finishing with a layer of yogurt on top.
- Garnish and Chill: For a finishing touch, garnish the top of each parfait with a few fresh berries and a sprig of mint if using. Cover the parfaits with plastic wrap and refrigerate for at least 30 minutes to allow the flavors to meld together and the parfait to chill.
- Serve: Once chilled, serve the lavender honey yogurt parfaits as a delightful breakfast or dessert option. Enjoy!
Extra Tips
When preparing the Lavender Honey Yogurt Parfait, feel free to experiment with different types of yogurt, such as coconut or almond yogurt, for a dairy-free option.
Additionally, you can switch up the fruits according to the season; peaches or mangoes would work beautifully in the summer, while apples and pears are perfect for fall. Don’t hesitate to make the infused honey ahead of time, as it can be stored in a sealed container for up to two weeks, making meal prep easier for your next parfait creation!