

There’s something truly charming about French desserts.
The best part? You don’t even need to turn on the oven to create something special.
Think of a creamy chocolate mousse or a refreshing lemon curd parfait, each bringing its own unique flavor.
As you try these no-bake recipes, you’ll appreciate the simplicity and elegance.
Let’s uncover these delightful secrets together!
Classic Chocolate Mousse
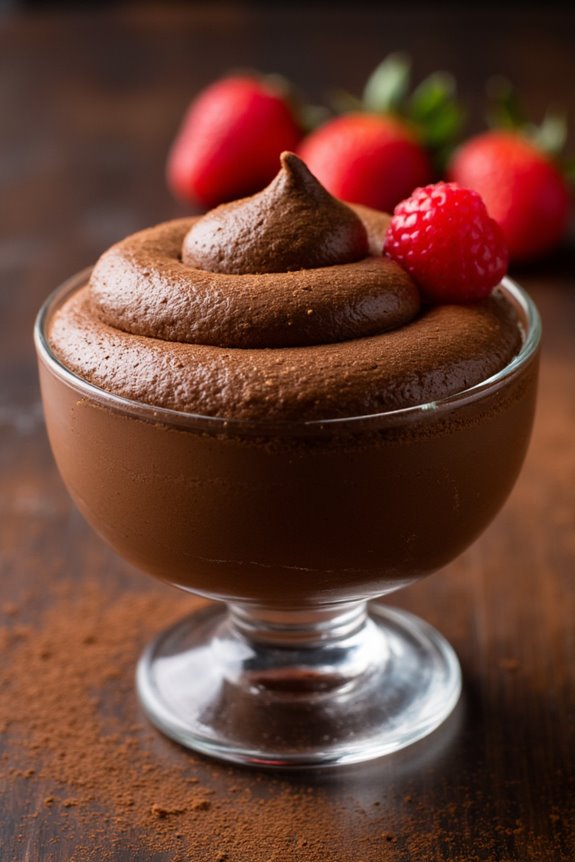
Classic Chocolate Mousse is a beloved French dessert that embodies the rich and velvety essence of chocolate, all without requiring any baking. Perfect for any occasion, this no-bake treat is sure to impress your guests with its luxurious texture and intense chocolate flavor. The simplicity of this recipe allows the chocolate to shine, making it a favorite among chocolate lovers everywhere.
With just a few ingredients and an effortless preparation, you can create a decadent dessert that feels both elegant and indulgent. This recipe for Classic Chocolate Mousse serves 4-6 people, making it an ideal choice for small gatherings or family dinners. The key to achieving the perfect mousse lies in the balance of ingredients and the gentle folding technique, which preserves the airy texture.
As the mousse chills, it sets into a light yet satisfying dessert that melts in your mouth with each spoonful. Whether served on its own or garnished with whipped cream and fresh berries, this mousse is sure to be a hit.
Ingredients:
- 200g dark chocolate (at least 70% cocoa), chopped
- 3 large eggs, separated
- 50g granulated sugar
- 1 teaspoon vanilla extract
- A pinch of salt
- 250ml heavy cream
Instructions:
- Melt the Chocolate: Begin by melting the chopped dark chocolate. Use a double boiler or a heatproof bowl set over a pot of simmering water. Stir occasionally until the chocolate is completely melted and smooth. Remove from heat and let it cool slightly.
- Prepare the Egg Yolks: In a medium-sized mixing bowl, whisk together the egg yolks, granulated sugar, and vanilla extract until the mixture is pale and thick.
- Combine Chocolate and Yolks: Gently fold the melted chocolate into the egg yolk mixture, ensuring it’s well combined. The mixture should be smooth and uniform.
- Beat the Egg Whites: In a separate clean bowl, add the egg whites and a pinch of salt. Beat the egg whites with an electric mixer until they form stiff peaks, indicating they’re firm and glossy.
- Incorporate Egg Whites: Carefully fold the beaten egg whites into the chocolate mixture in three batches. Use a spatula to gently fold, ensuring you maintain as much air in the mixture as possible for a light texture.
- Whip the Cream: In another bowl, whip the heavy cream until soft peaks form. Be cautious not to over-whip the cream, as this can lead to a grainy texture.
- Combine Cream and Chocolate Mixture: Gently fold the whipped cream into the chocolate mixture until no streaks remain. The mousse should look light and airy.
- Chill the Mousse: Spoon the mousse into individual serving dishes or a large serving bowl. Cover with plastic wrap and refrigerate for at least 2 hours or until set.
- Serve: Once chilled, serve your Classic Chocolate Mousse as is or with optional garnishes like whipped cream, fresh berries, or a dusting of cocoa powder.
Extra Tips:
When preparing Classic Chocolate Mousse, using high-quality chocolate is essential for the best flavor and texture. Make sure all your equipment is dry before beating the egg whites, as even a small amount of moisture can prevent them from reaching the desired stiffness.
Additionally, when folding the ingredients, take care to do so gently to preserve the mousse’s lightness. If you prefer a sweeter mousse, you can adjust the sugar to taste. Finally, plan ahead to give the mousse ample time to chill and set, ensuring the ultimate indulgent experience.
Lemon Curd Parfait
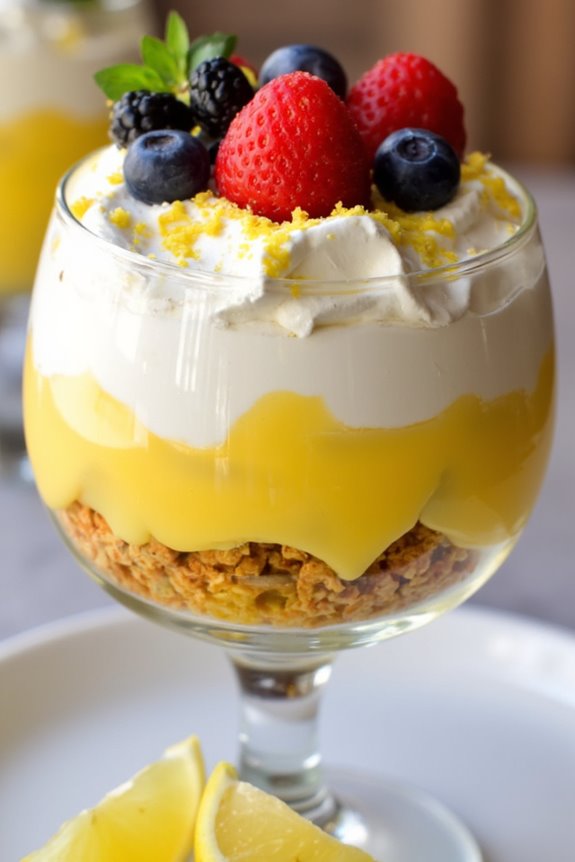
The Lemon Curd Parfait is a delightful and invigorating no-bake French dessert that’s perfect for any occasion. Its creamy, tangy lemon curd is layered with crunchy and sweet elements to create a beautiful symphony of flavors and textures. This dessert is visually appealing when served in individual glasses or jars, making it a charming addition to any dessert table. The combination of zesty lemon, rich cream, and a hint of sweetness makes it a revitalizing treat that will leave your guests craving for more.
One of the best aspects of this Lemon Curd Parfait is its simplicity and ease of preparation. With no baking involved, it’s an ideal choice during the warmer months when you want to avoid turning on the oven. The layers can be prepared in advance and assembled shortly before serving, allowing you to focus on enjoying time with your guests rather than being stuck in the kitchen. This recipe serves 4-6 people, making it perfect for a small gathering or family dessert.
Ingredients:
- 1 cup store-bought or homemade lemon curd
- 1 cup heavy cream
- 2 tablespoons powdered sugar
- 1 teaspoon vanilla extract
- 1 cup granola or crushed graham crackers
- Fresh berries (such as raspberries or blueberries) for garnish
- Lemon zest for garnish
Instructions:
- Prepare the Whipped Cream: In a large mixing bowl, combine the heavy cream, powdered sugar, and vanilla extract. Use a hand mixer or a stand mixer to whip the cream until soft peaks form. Be careful not to overwhip, as you want the cream to be light and airy.
- Layer the Parfaits: Start by adding a spoonful of granola or crushed graham crackers to the bottom of each serving glass or jar. This will serve as the crunchy base for your parfait.
- Add the Lemon Curd: Spoon a layer of lemon curd over the granola or graham crackers. You can use a piping bag for more precision if desired. Make sure the layer is even and covers the entire base.
- Add Whipped Cream: Top the lemon curd with a generous layer of whipped cream. Use a spoon or a piping bag to create an even layer. Repeat the layers until the glasses or jars are filled, finishing with a final dollop of whipped cream on top.
- Garnish: Decorate each parfait with fresh berries and a sprinkle of lemon zest for a pop of color and added flavor. The berries add a burst of freshness that complements the rich cream and tangy lemon curd.
- Chill: Place the parfaits in the refrigerator for at least 30 minutes before serving. This will allow the flavors to meld together and the parfaits to firm up slightly.
Extra Tips:
For a personalized touch, feel free to experiment with different types of granola or add a layer of crushed nuts for additional texture. If you prefer a sweeter dessert, you can adjust the amount of powdered sugar in the whipped cream to your liking. When making homemade lemon curd, verify it’s completely cooled before layering in the parfaits.
For a more vibrant presentation, consider serving the parfaits in clear glasses or jars to showcase the beautiful layers.
No-Bake Tarte Tatin
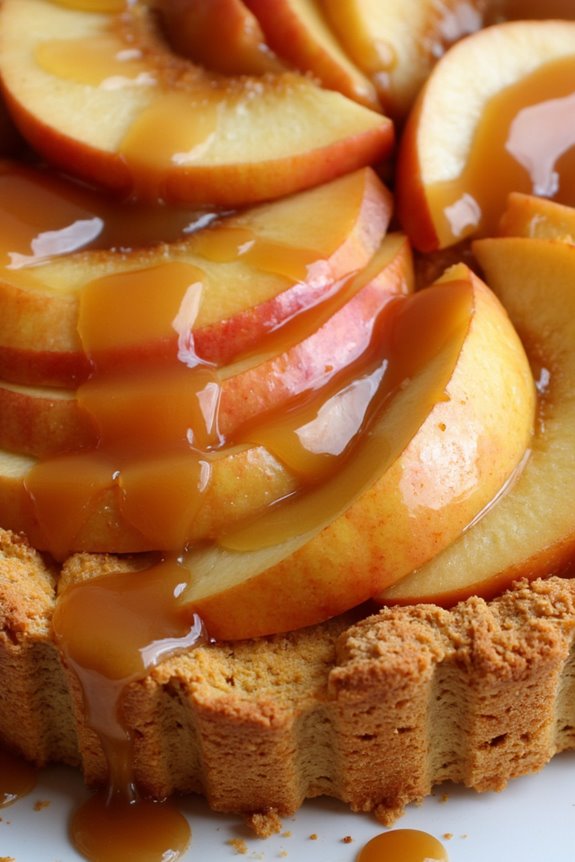
No-Bake Tarte Tatin is a modern twist on the classic French dessert that traditionally features caramelized apples cooked under a layer of buttery pastry. This no-bake version captures the essence and flavors of the original without the need for an oven, making it an excellent option for those who prefer a simpler, quicker preparation.
Perfect for warm summer days or when you’re short on time, this recipe retains the rich, buttery caramel flavors and tender fruit textures that make Tarte Tatin so beloved.
The secret to the no-bake method lies in the clever use of a stovetop caramel sauce and a crisp pastry base that doesn’t require baking. The apples are gently simmered in the caramel until they reach a golden, tender perfection, then arranged on top of a pre-made biscuit or cake base.
The result is a visually stunning and deliciously satisfying dessert that will impress your dinner guests without the fuss of traditional baking.
Ingredients (Serves 4-6):
- 4 medium-sized apples, preferably Granny Smith or Golden Delicious
- 1 cup granulated sugar
- 1/2 cup unsalted butter
- 1 teaspoon vanilla extract
- 1/2 teaspoon ground cinnamon
- A pinch of salt
- 2 tablespoons lemon juice
- 8-10 digestive biscuits (or similar)
- Whipped cream or vanilla ice cream, for serving (optional)
Instructions:
- Prepare the Apples:
- Peel, core, and slice the apples into even wedges. Toss the apple slices in lemon juice to prevent browning and set them aside.
- Make the Caramel:
- In a large non-stick skillet, melt the butter over medium heat. Add the granulated sugar and stir continuously until the sugar dissolves and the mixture begins to turn a golden brown color, forming a caramel. This should take about 5 to 7 minutes.
- Cook the Apples:
- Add the apple slices to the caramel in the skillet. Sprinkle with ground cinnamon and a pinch of salt. Gently stir and cook the apples for 10-12 minutes until they’re tender and well-coated with the caramel sauce.
- Prepare the Base:
- While the apples are cooking, crush the digestive biscuits into fine crumbs. You can do this by placing them in a resealable plastic bag and using a rolling pin. Spread the crumbs evenly in the bottom of a serving dish or pie pan to form the base.
- Assemble the Tarte Tatin:
- Once the apples are ready, carefully arrange them on top of the biscuit crumb base. Pour any remaining caramel sauce from the skillet over the apples for added flavor and sheen.
- Chill and Serve:
- Allow the Tarte Tatin to cool and set for at least 30 minutes in the refrigerator. This will help the flavors meld together. Serve chilled, optionally topped with a dollop of whipped cream or a scoop of vanilla ice cream.
Extra Tips:
For best results, use apples that hold their shape well when cooked, such as Granny Smith or Golden Delicious. If you prefer a thicker caramel, simply allow it to cook a bit longer before adding the apples, but be cautious not to burn it.
If you like a bit of extra flavor, consider adding a splash of Calvados or brandy to the caramel sauce. Remember to handle the hot caramel with care, as it can cause burns. Enjoy your no-bake Tarte Tatin as a revitalizing and elegant dessert option.
Raspberry Mille-Feuille
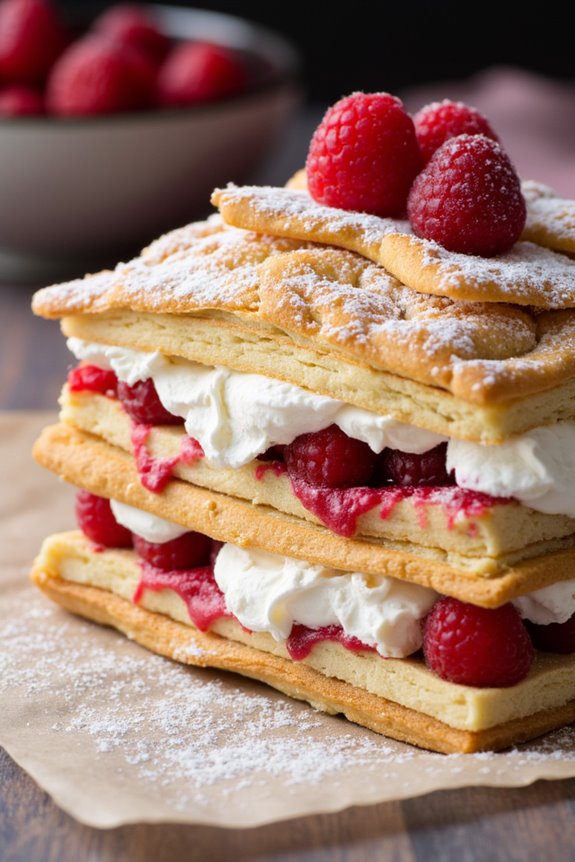
Raspberry Mille-Feuille is a classic French dessert that beautifully combines layers of flaky pastry with luscious cream and fresh raspberries. The “mille-feuille,” which translates to “a thousand leaves,” traditionally involves layers of puff pastry, but in this no-bake version, we use store-bought puff pastry sheets to save time and effort.
This elegant dessert is perfect for impressing your guests without the need for an oven, making it a delightful addition to any gathering or special occasion.
This no-bake Raspberry Mille-Feuille is a symphony of textures and flavors. The crispy puff pastry contrasts with the smooth, creamy filling, while the tartness of fresh raspberries adds a revitalizing burst of flavor. Topped with powdered sugar, this dessert isn’t only delicious but visually stunning.
Prepare this Raspberry Mille-Feuille for a light yet indulgent treat that embodies the sophistication of French patisserie.
Ingredients (Serves 4-6):
- 2 sheets of store-bought puff pastry
- 1 cup heavy cream
- 1/4 cup powdered sugar
- 1 teaspoon vanilla extract
- 1 1/2 cups fresh raspberries
- Additional powdered sugar for dusting
Instructions:
- Prepare the Puff Pastry Layers: Start by thawing the store-bought puff pastry sheets according to the package instructions. Once thawed, carefully unfold them and cut each sheet into three equal rectangles. This will give you a total of six rectangles, which will form the layers of your mille-feuille.
- Create the Cream Filling: In a mixing bowl, combine the heavy cream, powdered sugar, and vanilla extract. Use an electric mixer to whip the mixture until stiff peaks form. This will be your creamy filling for the mille-feuille.
- Assemble the Layers: Place one rectangle of puff pastry on a serving platter. Spread a generous layer of the whipped cream over the pastry, then add a layer of fresh raspberries. Repeat this process, layering pastry, cream, and raspberries until you have used all six rectangles of pastry, ending with a layer of pastry on top.
- Dust and Serve: Lightly dust the top layer with powdered sugar for a decorative finish. Allow the mille-feuille to chill in the refrigerator for at least 30 minutes before serving to let the flavors meld and the cream set slightly.
Extra Tips:
When assembling the mille-feuille, confirm that the whipped cream is evenly spread across each layer to maintain stability. If the raspberries are large, consider slicing them in half for a more even layer.
To prevent the puff pastry from becoming soggy, serve the dessert shortly after assembling. For additional flavor, you can add a hint of lemon zest to the cream or a drizzle of chocolate sauce over the top before serving.
Pistachio Crème Brûlée Cups
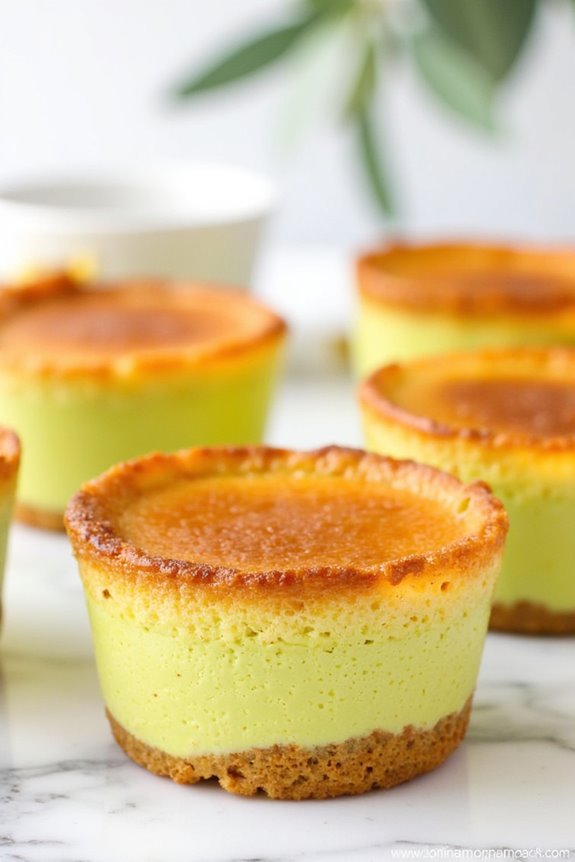
Pistachio Crème Brûlée Cups are a delightful no-bake twist on the classic French dessert, offering a rich and creamy texture with a nutty flavor. This dessert is perfect for those who appreciate the smooth, custard-like quality of crème brûlée but prefer a hassle-free preparation without the need for baking.
The combination of pistachio and vanilla creates a luxurious flavor profile that’s both elegant and indulgent, making it an ideal choice for serving at a dinner party or special occasion.
These no-bake cups are set in the refrigerator, allowing the flavors to meld together beautifully and providing a cool, invigorating treat. The crunchy caramelized sugar topping, achieved with a simple kitchen torch, contrasts perfectly with the creamy pistachio filling.
Serving these in individual cups not only makes for a stunning presentation but also guarantees that each guest has their own perfectly portioned dessert to enjoy.
Ingredients (Serves 4-6):
- 1 cup shelled pistachios
- 2 cups heavy cream
- 1/2 cup granulated sugar
- 4 large egg yolks
- 1 teaspoon vanilla extract
- 1/4 teaspoon salt
- Extra granulated sugar for caramelizing
Instructions:
- Prepare the Pistachios: Start by finely grinding the shelled pistachios in a food processor until they reach a coarse powder consistency. Be careful not to over-process them into a paste.
- Heat the Cream: In a medium saucepan, combine the heavy cream and ground pistachios. Heat the mixture over medium heat until it just begins to simmer. Remove from heat and let it steep for about 15 minutes to infuse the flavors.
- Mix the Base: In a separate bowl, whisk together the egg yolks, granulated sugar, vanilla extract, and salt until the mixture is smooth and slightly thickened.
- Combine Mixtures: Gradually whisk the infused cream into the egg yolk mixture, ensuring it’s well combined. Strain the mixture through a fine-mesh sieve to remove any solid pistachio particles, leaving a smooth custard base.
- Set the Custard: Pour the custard mixture into individual serving cups. Refrigerate for at least 4 hours or until set.
- Caramelize the Sugar: Just before serving, sprinkle an even layer of granulated sugar over the top of each custard. Use a kitchen torch to carefully caramelize the sugar, creating a crisp, golden-brown crust.
Extra Tips:
To guarantee the best texture and flavor, use fresh, high-quality pistachios and cream. If you don’t have a kitchen torch, you can caramelize the sugar under a broiler, but be sure to watch closely to avoid burning.
For an extra hint of flavor, consider adding a touch of almond extract when mixing the custard. If you prefer a smoother custard, you can strain the cream mixture twice.
Finally, these delightful cups can be prepared a day in advance, making them perfect for stress-free hosting.
Coffee Éclair Icebox Cake
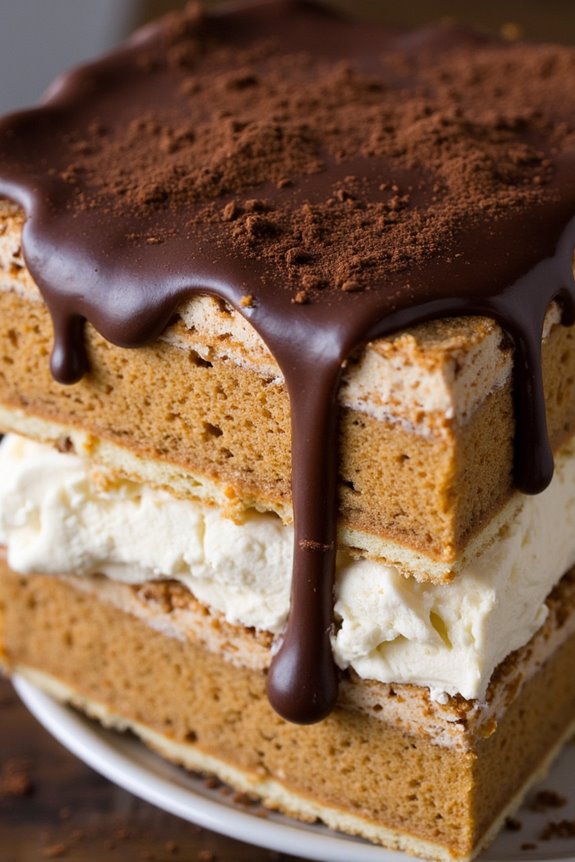
Coffee Éclair Icebox Cake is a delightful no-bake dessert that brings together the classic flavors of coffee and chocolate in a creamy, layered delight. This dish is perfect for those who love the taste of traditional French éclairs but are looking for an easier, no-fuss method to enjoy them.
The cake consists of layers of coffee-soaked graham crackers and a rich chocolate ganache, all enveloped by a velvety coffee-flavored cream cheese filling. With its creamy texture and decadent flavors, this icebox cake is bound to be a hit at any gathering.
The beauty of the Coffee Éclair Icebox Cake lies in its simplicity and the depth of flavor it offers without the need for an oven. As the cake rests in the refrigerator, the graham crackers absorb the coffee and become soft, mimicking the texture of choux pastry found in traditional éclairs.
The combination of coffee and chocolate creates an irresistible dessert that pairs perfectly with a scoop of vanilla ice cream or a dollop of whipped cream. This recipe is designed to serve 4-6 people, making it an ideal option for small gatherings or family dinners.
Ingredients (serving size: 4-6 people):
- 18 graham crackers
- 2 cups heavy cream
- 1/2 cup brewed coffee, cooled
- 8 oz cream cheese, softened
- 1 cup powdered sugar
- 1 teaspoon vanilla extract
- 1/4 cup unsweetened cocoa powder
- 1 cup semi-sweet chocolate chips
- 1/2 cup strong brewed coffee
- 1 tablespoon sugar (optional)
Instructions:
- Prepare the Ganache: In a small saucepan, heat 1/2 cup heavy cream over medium heat until it begins to simmer. Remove from heat and add the semi-sweet chocolate chips. Let it sit for a couple of minutes, then stir until smooth and glossy. Set aside to cool slightly.
- Make the Coffee Cream Cheese Filling: In a large mixing bowl, beat the softened cream cheese and powdered sugar until smooth and creamy. Add 1/2 cup brewed coffee and vanilla extract, mixing until well combined. Gradually add the remaining 1 1/2 cups of heavy cream, beating until the mixture holds soft peaks.
- Layer the Cake: Dip each graham cracker briefly in the cooled coffee, then lay them in a single layer at the bottom of a 9×13-inch baking dish. Spread one-third of the coffee cream cheese filling over the graham crackers. Drizzle with one-third of the chocolate ganache. Repeat the layers two more times, ending with the ganache on top.
- Chill the Cake: Cover the dish with plastic wrap and refrigerate for at least 4 hours, preferably overnight, to allow the flavors to meld and the graham crackers to soften.
- Serve: Before serving, you can dust the top with cocoa powder or shavings of chocolate for extra appeal. Slice and serve chilled.
Extra Tips:
For a more intense coffee flavor, consider using espresso instead of brewed coffee. If you prefer a sweeter dessert, add a tablespoon of sugar to the coffee used for dipping the graham crackers.
Ascertain the cream cheese is at room temperature before mixing to avoid lumps in the filling. For a creative twist, add a layer of sliced bananas or strawberries between the layers for a fruity touch.
Finally, if you find the ganache too thick after cooling, gently reheat it or add a splash of cream to achieve the desired consistency.
Strawberry Charlotte
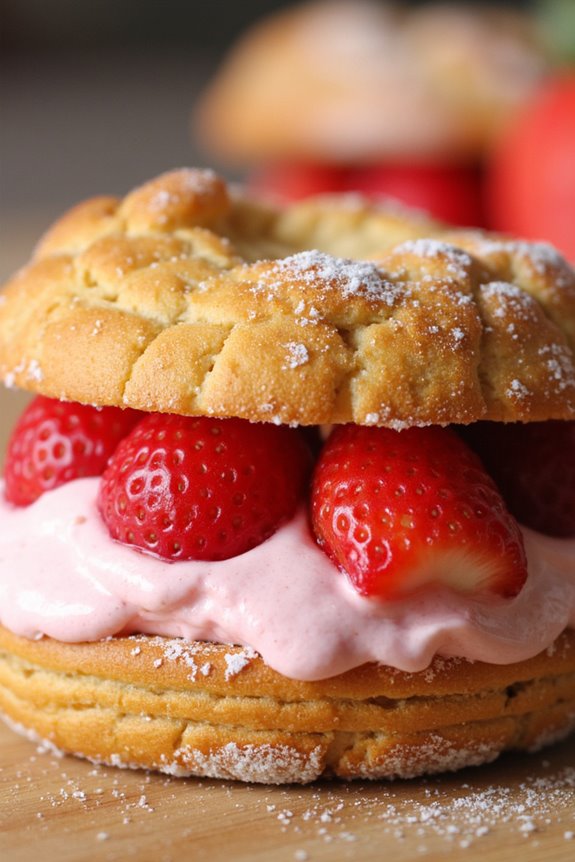
Strawberry Charlotte is a classic French dessert that combines the invigorating taste of strawberries with a light, creamy filling, all encased in a delicate ladyfinger shell. This no-bake dessert is perfect for warm weather and special occasions, offering a sweet, fruity twist that’s bound to impress your guests.
The Strawberry Charlotte is known for its beautiful presentation and delightful combination of textures—from the crisp ladyfingers to the smooth mousse-like filling.
The preparation of this dessert involves layering fresh strawberries and a fluffy cream mixture within a mold lined with ladyfingers. The process is simple and requires no baking, making it an ideal choice for those seeking an elegant dessert without the fuss of using an oven.
The following recipe serves 4-6 people and provides a step-by-step guide to creating this delicious treat.
Ingredients (Serves 4-6):
- 24-30 ladyfingers (depending on the mold size)
- 1 pound fresh strawberries
- 1/2 cup granulated sugar
- 1 tablespoon lemon juice
- 1 tablespoon water
- 1 teaspoon unflavored gelatin
- 1 cup heavy cream
- 1 teaspoon vanilla extract
Instructions:
1. Prepare the Strawberries: Rinse the strawberries thoroughly under running water. Hull and slice half of the strawberries, setting them aside for the filling.
Take the remaining strawberries and puree them in a blender along with lemon juice and granulated sugar until smooth. Strain the puree through a fine sieve to remove seeds.
2. Set the Gelatin: In a small bowl, combine the water and gelatin. Let it sit for about 5 minutes to allow the gelatin to bloom.
Next, gently heat the gelatin mixture over low heat until it’s fully dissolved. Add the dissolved gelatin to the strawberry puree and mix well.
3. Whip the Cream: In a separate bowl, whip the heavy cream with vanilla extract until soft peaks form.
Carefully fold the whipped cream into the strawberry puree, guaranteeing a light and airy consistency.
4. Line the Mold: Line the sides and bottom of a round cake mold (about 8 inches in diameter) with ladyfingers.
Make sure they’re snug and upright around the perimeter of the mold.
5. Assemble the Charlotte: Pour half of the strawberry cream mixture into the lined mold.
Add a layer of sliced strawberries. Top with the remaining cream mixture, smoothing the surface with a spatula. Cover with a few more ladyfingers on top, pressing gently to confirm the filling is compact.
6. Chill the Dessert: Cover the Charlotte with plastic wrap and refrigerate for at least 4 hours, or until set.
This allows the flavors to meld and the dessert to firm up properly.
7. Serve: Once set, carefully remove the Charlotte from the mold and place it on a serving plate.
Garnish with additional fresh strawberries or a dusting of powdered sugar if desired.
Extra Tips:
For the best results, choose ripe, fragrant strawberries as they’ll greatly enhance the flavor of your dessert.
If you find the ladyfingers too dry, lightly brush them with a simple syrup or a splash of liqueur before lining the mold.
Additionally, to promote easy removal from the mold, consider lining the mold with parchment paper or using a springform pan.
Almond Nougatine
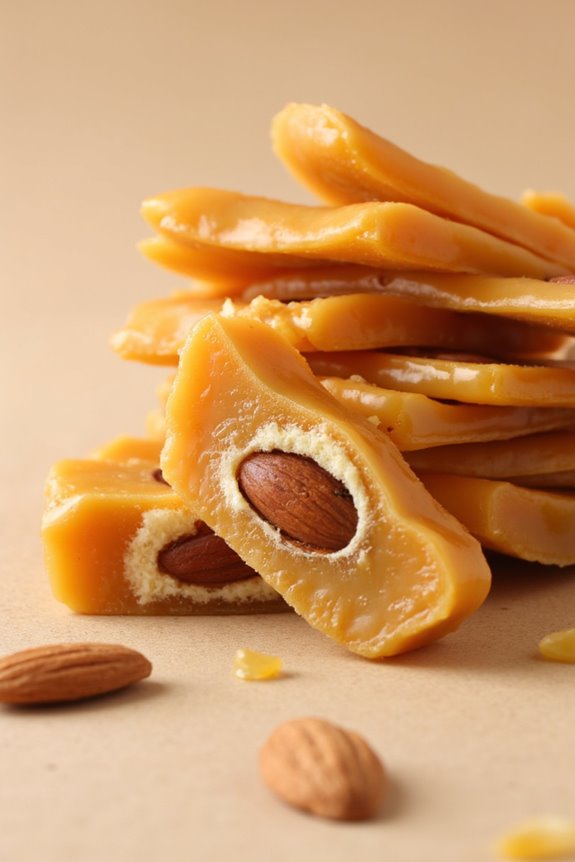
Almond Nougatine is a classic French confection that combines the delightful flavors of caramelized sugar and roasted almonds into a crunchy, brittle treat. This no-bake dessert is perfect for those who enjoy a sweet and nutty flavor profile without the need to turn on the oven.
With its shiny appearance and rich taste, Almond Nougatine makes for a sophisticated addition to any dessert table or a thoughtful homemade gift.
To make Almond Nougatine, you’ll need to start by preparing a simple caramel, which will serve as the binding element for the almonds. The key to achieving the perfect nougatine is to carefully control the caramelization process, guaranteeing the sugar reaches the ideal golden brown hue without burning.
The almonds, which should be lightly toasted in advance, will add a delightful crunch and nuttiness to the sweetness of the caramel. This recipe serves 4-6 people, making it ideal for small gatherings or as a special treat for family and friends.
Ingredients:
- 1 cup granulated sugar
- 1/4 cup water
- 1 tablespoon light corn syrup
- 1 1/2 cups sliced almonds, lightly toasted
- 1/2 teaspoon vanilla extract
- A pinch of salt
Instructions:
- Prepare the Almonds: Begin by preheating a skillet over medium heat. Add the sliced almonds and toast them lightly, stirring frequently to prevent burning. Once they’re golden brown and fragrant, remove them from the heat and set aside to cool.
- Make the Caramel: In a medium-sized saucepan, combine the granulated sugar, water, and light corn syrup. Stir gently to dissolve the sugar, then place the saucepan over medium heat. Without stirring, allow the mixture to come to a boil. Continue to cook until it reaches a golden amber color, swirling the pan occasionally to guarantee even caramelization.
- Combine Ingredients: Once the caramel has reached the desired color, immediately remove it from the heat. Carefully stir in the vanilla extract and a pinch of salt, followed by the toasted almonds. Mix quickly and thoroughly to guarantee the almonds are evenly coated with the caramel.
- Shape the Nougatine: Quickly pour the almond-caramel mixture onto a silicone baking mat or parchment paper. Use a heatproof spatula to spread it into an even layer, about 1/4 inch thick. Allow the nougatine to cool completely at room temperature.
- Break into Pieces: Once fully cooled and hardened, break the nougatine into desired pieces. Serve as a standalone treat or use it as a decorative element for other desserts.
Extra Tips:
When making the caramel, be sure to keep a close eye on the sugar as it can quickly shift from perfectly golden to burnt. If you find the caramel is setting too quickly as you mix in the almonds, you can briefly return the saucepan to low heat to keep it workable.
Always use a silicone mat or parchment paper for easy release of the nougatine once it has cooled. To enhance the flavor, consider adding a pinch of cinnamon or a splash of almond extract along with the vanilla.
Honey Lavender Panna Cotta
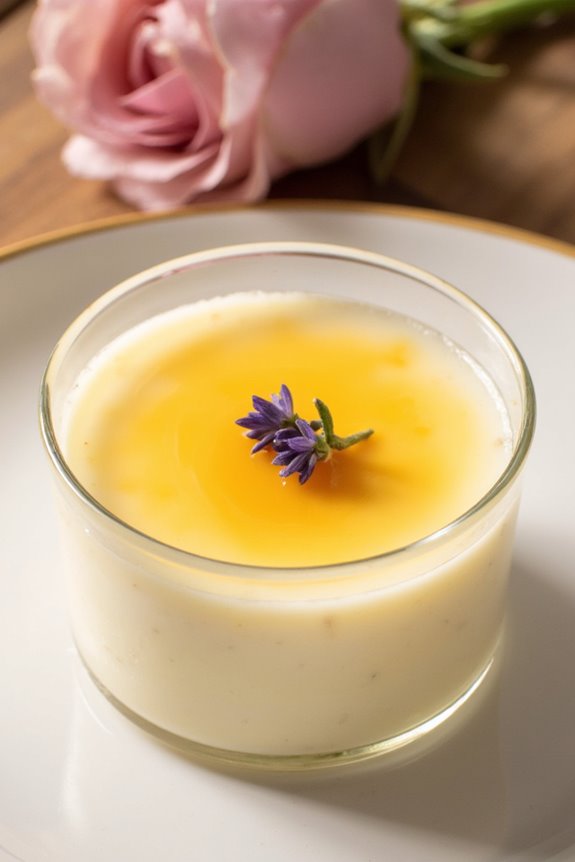
Delight your taste buds with the enchanting flavors of Honey Lavender Panna Cotta, a delightful no-bake French dessert. This elegant dish combines the creamy richness of panna cotta with the subtle floral notes of lavender and the natural sweetness of honey. Perfect for a sophisticated dinner party or a simple indulgence, this dessert is as pleasing to the eye as it’s to the palate.
The gentle wobble of the panna cotta creates a delicate texture that melts in your mouth, leaving a lingering hint of lavender and honey. The preparation of Honey Lavender Panna Cotta is straightforward and requires no baking, making it an ideal choice for those looking for an impressive yet effortless dessert.
The key to achieving the perfect flavor balance lies in the infusion of lavender into the cream, which must be done carefully to avoid overpowering the dish. The addition of honey not only sweetens the panna cotta but also enhances its natural floral aroma. This recipe serves 4-6 people, guaranteeing that everyone at your table can indulge in this delightful treat.
Ingredients:
- 2 cups heavy cream
- 1 cup whole milk
- 1/4 cup honey
- 2 teaspoons dried culinary lavender
- 2 1/2 teaspoons powdered gelatin
- 3 tablespoons cold water
- 1 teaspoon pure vanilla extract
- A pinch of salt
Instructions:
- Prepare the Lavender Cream: In a medium saucepan, combine the heavy cream, whole milk, honey, and dried lavender. Place the saucepan over medium heat and bring the mixture to a simmer. Once it begins to simmer, remove the saucepan from heat and let the lavender steep in the cream mixture for about 15 minutes to infuse its flavor.
- Bloom the Gelatin: While the lavender is steeping, sprinkle the powdered gelatin over the cold water in a small bowl. Let it sit for about 5 minutes, allowing the gelatin to absorb the water and bloom.
- Strain the Cream Mixture: After steeping, strain the cream mixture through a fine-mesh sieve into a clean saucepan to remove the lavender buds. Discard the lavender and return the strained cream mixture to the stovetop.
- Combine Gelatin and Cream: Gently reheat the strained cream mixture over low heat. Add the bloomed gelatin and stir continuously until the gelatin has completely dissolved. This should take about 2-3 minutes. Be careful not to let the mixture boil.
- Flavor the Panna Cotta: Remove the saucepan from heat and stir in the vanilla extract and a pinch of salt. Mix well to make sure the flavors are evenly distributed.
- Set the Panna Cotta: Pour the mixture into individual serving glasses or ramekins. Allow them to cool to room temperature, then cover with plastic wrap and refrigerate for at least 4 hours, or until the panna cotta is set.
Extra Tips:
When making Honey Lavender Panna Cotta, it’s essential to control the steeping time of the lavender to prevent the flavor from becoming too strong or soapy. Taste the cream mixture after steeping and adjust if necessary.
If you prefer a stronger honey flavor, you can drizzle a little extra honey on top of the panna cotta before serving. For an elegant presentation, garnish the panna cotta with a few fresh lavender sprigs or edible flowers.
Additionally, make certain that the gelatin is completely dissolved to achieve a smooth texture; undissolved gelatin can lead to a gritty finish.
White Chocolate Lavender Mousse
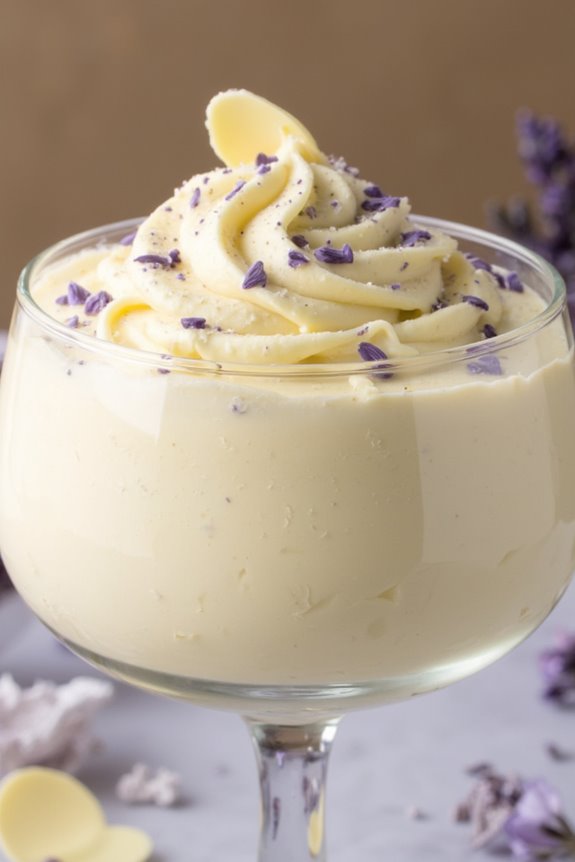
White Chocolate Lavender Mousse is a luxurious, no-bake French dessert that combines the rich, creamy texture of white chocolate with the delicate, floral notes of lavender. Perfect for a dinner party or a special occasion, this dessert is both sophisticated and surprisingly simple to prepare. The mousse is light and airy, making it an excellent finish to a meal without feeling overly indulgent.
By infusing lavender into cream and blending it with melted white chocolate, you’ll create a unique and aromatic flavor profile that will impress your guests. Lavender is a versatile herb often associated with relaxation and calm, and when paired with sweet, creamy white chocolate, it creates a delightful harmony of flavors.
This recipe requires no baking, making it a convenient choice for those looking to create a stunning dessert without the fuss of an oven. Once prepared, the mousse can be served in elegant glasses or bowls, topped with a sprinkle of lavender petals or a dusting of white chocolate shavings for a touch of sophistication.
Ingredients for 4-6 servings:
- 1 cup heavy cream
- 1 tablespoon dried culinary lavender
- 8 ounces white chocolate, chopped
- 2 tablespoons unsalted butter
- 2 large eggs, separated
- 1/4 cup granulated sugar
- 1 teaspoon vanilla extract
- A pinch of salt
Instructions:
- Infuse the Cream: In a small saucepan, heat the heavy cream over medium heat until it starts to simmer. Remove from heat and stir in the dried culinary lavender. Cover and allow the lavender to steep in the cream for about 20 minutes. Strain the cream through a fine sieve to remove the lavender, then set aside.
- Melt the Chocolate: In a heatproof bowl, combine the chopped white chocolate and unsalted butter. Set the bowl over a pot of simmering water, making certain the bottom of the bowl doesn’t touch the water. Stir the mixture until the chocolate and butter have melted completely and are smooth. Remove from heat and let cool slightly.
- Prepare the Egg Yolks: In a separate bowl, whisk together the egg yolks and granulated sugar until the mixture is pale and thick. Gradually whisk in the vanilla extract and the slightly cooled white chocolate mixture until well combined.
- Whip the Cream: Using an electric mixer, beat the infused cream until soft peaks form. Gently fold the whipped cream into the chocolate mixture until no streaks remain.
- Whip the Egg Whites: In a clean bowl, beat the egg whites with a pinch of salt until stiff peaks form. Gently fold the egg whites into the chocolate and cream mixture, taking care not to deflate the mixture.
- Chill the Mousse: Divide the mousse evenly among serving glasses or bowls. Cover and refrigerate for at least 2 hours, or until set.
- Serve: Just before serving, optionally garnish with lavender petals or white chocolate shavings for an elegant finish.
Extra Tips:
When preparing White Chocolate Lavender Mousse, verify that all ingredients are at room temperature before starting to achieve a smooth and consistent texture.
Be cautious when melting the white chocolate as it can easily seize or burn; using a double boiler method helps prevent this. Additionally, when folding the whipped cream and egg whites into the chocolate mixture, use a gentle hand to maintain the airy texture of the mousse.
If you prefer a stronger lavender flavor, adjust the amount of dried lavender accordingly, but be cautious as too much can overpower the dessert.
Chilled Cherry Clafoutis
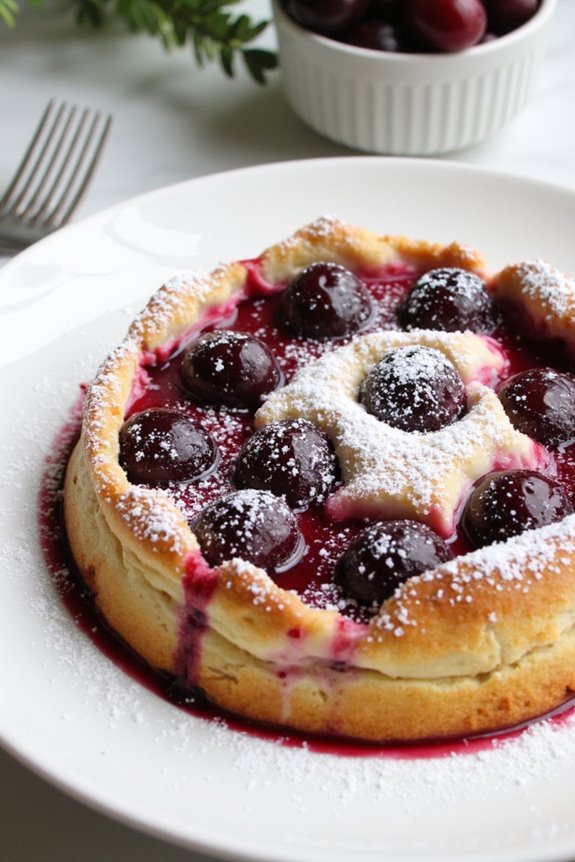
Chilled Cherry Clafoutis is a delightful no-bake French dessert that combines the sweetness of cherries with a rich, custard-like base. This dessert is perfect for summer gatherings or as a revitalizing treat after a hearty meal. The best part about this clafoutis is that it requires no baking, making it an easy and convenient option for those hot days when you want something sweet but don’t want to turn on the oven.
The Chilled Cherry Clafoutis is traditionally made with fresh cherries, but you can also use frozen or canned cherries if that’s what you have on hand. The clafoutis is set in the refrigerator rather than baked, allowing the flavors to meld together beautifully. It’s served cold, which makes it a revitalizing and elegant dessert that can easily impress your guests without much hassle.
Ingredients (serves 4-6 people):
- 2 cups fresh cherries, pitted
- 1/2 cup granulated sugar
- 1 cup heavy cream
- 1 cup whole milk
- 4 large egg yolks
- 1 tablespoon vanilla extract
- 1/4 cup cornstarch
- 1/4 teaspoon salt
- Powdered sugar for dusting (optional)
Cooking Instructions:
- Prepare the Cherries: Start by washing and pitting the cherries. Once cleaned, set them aside to drain any excess moisture.
- Mix the Custard Base: In a medium-sized mixing bowl, whisk together the egg yolks, granulated sugar, and vanilla extract until the mixture is smooth and slightly pale. This guarantees the sugar is well incorporated with the yolks.
- Combine Dairy and Thickeners: In a separate saucepan, combine the heavy cream and whole milk, and heat gently over medium heat until warm but not boiling. Slowly whisk in the cornstarch and salt, guaranteeing there are no lumps, and continue to whisk until the mixture thickens slightly.
- Temper the Egg Mixture: Gradually add the warm milk mixture to the egg yolk mixture, whisking constantly to prevent the eggs from cooking. This step is vital for achieving a smooth custard.
- Cook the Custard: Return the mixture to the saucepan and cook over low heat, stirring continuously until the custard thickens and coats the back of a spoon. Remove from heat and let it cool slightly.
- Assemble the Clafoutis: In a serving dish or individual cups, arrange the pitted cherries at the bottom. Pour the slightly cooled custard over the cherries, ensuring they’re evenly distributed.
- Chill the Dessert: Cover the dish or cups with plastic wrap and refrigerate for at least 4 hours or until set. The custard will firm up as it chills.
- Serve: Before serving, dust the top with powdered sugar if desired. Serve chilled for the best experience.
Extra Tips: For a more intense cherry flavor, consider macerating the cherries in a bit of sugar and kirsch (cherry brandy) before assembling the dessert. This step can enhance the overall taste and add a subtle boozy note.
Additionally, if you prefer a smoother texture, you can strain the custard through a fine mesh sieve before pouring it over the cherries to remove any lumps or cooked egg bits.