

When I first ventured into the world of French pastries, I was amazed at how effortlessly delightful the experience could be. With recipes like classic puff pastry and quick croissants, I discovered that even as a beginner, creating something impressive is within reach. Each step is clear, and the ingredients are easy to find. Are you curious about which recipe will become your new favorite? Let’s explore some delightful options together that will elevate your baking game.
Classic Puff Pastry

Classic puff pastry is a versatile and flaky pastry that can be used in a variety of dishes, from sweet to savory. This dough is known for its many layers, which create a light and airy texture when baked. While it may seem intimidating to make from scratch, with a little patience and practice, you can achieve professional-quality puff pastry at home.
This recipe will guide you through the process step-by-step, guaranteeing you have all the tools and knowledge you need to succeed.
Puff pastry requires a few key ingredients: flour, butter, water, and salt. The technique involves layering the dough with butter and rolling it out multiple times to create those signature flaky layers. Once you master the basics of making puff pastry, you can use it for various dishes such as tarts, turnovers, or even as a base for elegant desserts. Prepare to impress your friends and family with this classic French pastry staple.
Ingredients (serving size: 4-6 people)
- 2 cups all-purpose flour
- 1 teaspoon salt
- 1 cup unsalted butter, chilled and cut into small cubes
- 1/2 cup cold water
Instructions
- Mix Dry Ingredients: In a large mixing bowl, combine the flour and salt. Stir the mixture until the salt is evenly distributed throughout the flour. This guarantees that every layer of your puff pastry is seasoned properly.
- Add Butter: Add the chilled, cubed butter to the flour mixture. Using a pastry cutter or your fingertips, mix the butter into the flour until the mixture resembles coarse crumbs. Be careful not to overwork the butter; you want to keep some larger pieces intact to create the flaky layers.
- Incorporate Water: Gradually add the cold water, mixing until the dough begins to come together. You may not need all the water, so add it slowly until the dough is moist but not sticky.
- Form the Dough: Turn the dough out onto a lightly floured surface and shape it into a rectangle. Wrap the dough in plastic wrap and refrigerate for at least 1 hour. This resting period allows the gluten to relax, making it easier to roll out later.
- Roll and Fold: After chilling, remove the dough from the refrigerator and place it on a floured surface. Roll it out into a large rectangle, about 1/4 inch thick. Fold the dough into thirds (like a letter) and give it a quarter turn. This is known as a “turn.” Repeat this rolling and folding process a total of four times, refrigerating the dough for 30 minutes between each turn. This will create the layers that define puff pastry.
- Final Chill: After completing the turns, wrap the dough in plastic wrap and refrigerate for at least 1 hour before using. This final chill helps to firm up the butter, guaranteeing that your pastry bakes perfectly.
Extra Tips
When making puff pastry, temperature is vital. Always work with cold ingredients and keep the dough chilled to prevent the butter from melting into the flour. This will help you achieve the desired flaky layers.
Additionally, if you’re pressed for time, you can make the pastry a day in advance and store it in the refrigerator, or even freeze it for later use.
Finally, when baking, make sure your oven is fully preheated to achieve the best rise and golden color on your pastry.
Quick and Easy Croissants
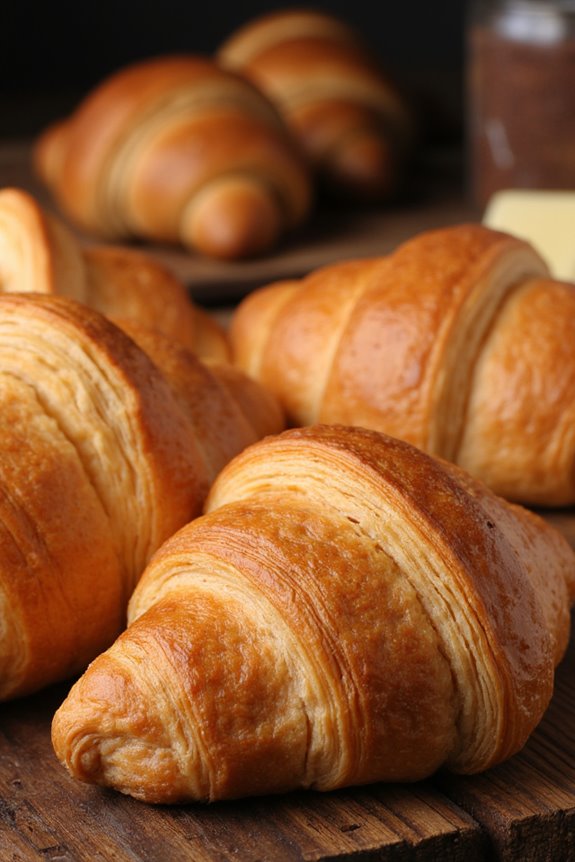
Croissants are a beloved French pastry known for their flaky, buttery layers and crescent shape. While traditional croissant recipes can be quite labor-intensive, this quick and easy version allows you to enjoy homemade croissants without spending hours in the kitchen.
Using simple ingredients and a few shortcuts, you can whip up a batch of delicious croissants that are perfect for breakfast, brunch, or an afternoon treat.
These quick and easy croissants are made using ready-made puff pastry, which greatly reduces preparation time while still delivering that signature flaky texture. With just a few straightforward steps, you can have fresh croissants ready to serve to your family and friends. Gather your ingredients and get ready to impress everyone with your baking skills!
Ingredients (serving size: 4-6 people)
- 1 package of puff pastry (2 sheets)
- 1/2 cup of unsalted butter, melted
- 1/4 cup of granulated sugar
- 1/2 teaspoon of salt
- 1 egg (for egg wash)
- 1 tablespoon of water (for egg wash)
Cooking Instructions
- Preheat the Oven: Begin by preheating your oven to 400°F (200°C). This guarantees that the croissants will bake evenly and achieve that golden brown color when they come out of the oven.
- Prepare the Puff Pastry: Thaw the puff pastry sheets according to package instructions. Once thawed, lightly flour your work surface and roll out each sheet to smooth it out and increase its size slightly. Aim for a rectangular shape.
- Cut the Pastry: Using a sharp knife or pizza cutter, slice each sheet of puff pastry into triangles. A good size is to make each triangle about 4 inches wide at the base and 8 inches tall. You should get about 6 triangles from each sheet, totaling 12 triangles.
- Shape the Croissants: Starting at the base of each triangle, roll the pastry tightly towards the tip. Make sure that you’re rolling it up in a way that keeps the layers intact. Place the rolled croissants on a parchment-lined baking sheet, with the tip underneath to prevent them from unrolling.
- Prepare the Egg Wash: In a small bowl, whisk together the egg and water to create an egg wash. This mixture will give your croissants a beautiful, shiny finish.
- Brush the Croissants: Using a pastry brush, gently apply the egg wash to the tops of each croissant. This step is important for achieving that lovely golden color during baking.
- Bake the Croissants: Place the baking sheet in the preheated oven and bake for 15-20 minutes, or until the croissants are puffed up and golden brown. Keep an eye on them to avoid over-baking.
- Cool and Serve: Once baked, remove the croissants from the oven and let them cool on a wire rack for a few minutes. Serve warm, plain or with your favorite jam or butter.
Extra Tips
For an extra touch of flavor, consider adding a sprinkle of cinnamon or a touch of vanilla extract to the melted butter before brushing it onto the pastry.
You can also fill the croissants with chocolate, almond paste, or ham and cheese before rolling them up for a delicious variation. Make sure to serve the croissants fresh, as they’re best enjoyed right out of the oven!
Almond Cream Tart

The Almond Cream Tart, known as “Tarte à la Crème d’Amande” in French, is a delightful pastry that combines a buttery tart crust with a rich almond cream filling.
This classic French dessert is perfect for special occasions or a sweet treat to enjoy with coffee or tea. The almond flavor isn’t only comforting but also adds a touch of elegance to your dessert table, making it a favorite among pastry lovers.
Making an Almond Cream Tart requires some attention to detail, but the results are worth the effort. The tart crust is flaky and crisp, providing a perfect base for the smooth and creamy almond filling.
This recipe serves 4-6 people and is sure to impress your family and friends with its delicious flavor and beautiful presentation.
Ingredients:
- 1 pre-made tart crust (9-inch)
- 1/2 cup unsalted butter, softened
- 1/2 cup granulated sugar
- 2 large eggs
- 1 cup almond flour
- 1 teaspoon vanilla extract
- 1 tablespoon all-purpose flour
- 1/4 teaspoon salt
- Sliced almonds (for topping)
- Powdered sugar (for dusting, optional)
Cooking Instructions:
- Preheat the Oven: Begin by preheating your oven to 350°F (175°C). This guarantees that your tart will bake evenly and develop a beautiful golden color.
- Prepare the Tart Crust: If you’re using a pre-made tart crust, place it in a 9-inch tart pan and press it into the bottom and up the sides. Use a fork to prick the bottom of the crust to prevent bubbles from forming during baking. If you prefer, you can make your own tart crust from scratch.
- Make the Almond Cream Filling: In a mixing bowl, cream the softened butter and granulated sugar until light and fluffy. This step is essential as it incorporates air into the mixture, resulting in a lighter filling.
- Add Eggs and Flavorings: Beat in the eggs one at a time, making sure each is fully incorporated before adding the next. Then, mix in the almond flour, vanilla extract, all-purpose flour, and salt until smooth. This creates a rich and flavorful almond cream.
- Fill the Tart Shell: Pour the almond cream filling into the prepared tart crust, spreading it evenly with a spatula. The filling should be just below the edge of the crust to allow for slight expansion during baking.
- Top with Almonds: Sprinkle sliced almonds over the top of the almond cream filling. This not only adds a decorative touch but also enhances the almond flavor.
- Bake the Tart: Place the tart in the preheated oven and bake for 30-35 minutes, or until the filling is set and the top is lightly golden. Keep an eye on it to prevent over-browning.
- Cool and Serve: Once baked, remove the tart from the oven and allow it to cool in the pan for about 10 minutes. Carefully remove the tart from the pan and transfer it to a serving plate. Dust with powdered sugar, if desired, before slicing and serving.
Extra Tips:
For the best results, make sure that all your ingredients are at room temperature before you begin mixing. This will help create a smoother filling and a better texture overall.
You can also experiment by adding a splash of almond extract for a more intense flavor or incorporating fresh fruits like raspberries or sliced pears on top before serving.
Enjoy your homemade Almond Cream Tart with a dollop of whipped cream or a scoop of vanilla ice cream for an extra indulgent treat!
Savory Cheese Palmiers
Savory Cheese Palmiers are a delightful and elegant addition to any appetizer spread. These flaky, buttery pastries are made from puff pastry and filled with a delicious mixture of cheese and herbs. They’re easy to prepare and can be baked to golden perfection, making them a perfect finger food for parties, gatherings, or as a snack at home. The best part is that they can be made ahead of time and frozen for later use, guaranteeing you always have a scrumptious treat on hand.
To give your palmiers a unique twist, feel free to experiment with different types of cheeses or add in some finely chopped herbs like rosemary, thyme, or chives. The combination of the crispy pastry with the savory, melted cheese creates an irresistible bite that will surely impress your guests. Whether served warm or at room temperature, these Savory Cheese Palmiers are bound to be a hit.
Ingredients (Serves 4-6 people)
- 1 sheet of puff pastry (thawed if frozen)
- 1 cup grated cheese (such as Gruyère, cheddar, or a mix)
- 1/4 cup grated Parmesan cheese
- 1/2 teaspoon garlic powder
- 1/2 teaspoon dried oregano or Italian seasoning
- 1/4 teaspoon salt
- 1/4 teaspoon black pepper
- 1 egg (beaten, for egg wash)
Cooking Instructions
- Preheat the Oven: Begin by preheating your oven to 400°F (200°C). This guarantees that the palmiers will bake evenly and achieve a perfect golden color.
- Prepare the Puff Pastry: On a lightly floured surface, roll out the sheet of puff pastry into a rectangle. You want it to be about 1/8 inch thick. If it’s too thick, the palmiers won’t puff up properly during baking.
- Make the Cheese Filling: In a medium bowl, combine the grated cheese, Parmesan cheese, garlic powder, oregano, salt, and pepper. Mix them well to guarantee the spices are evenly distributed throughout the cheese.
- Spread the Filling: Evenly sprinkle the cheese mixture over the entire surface of the rolled-out puff pastry. Use your hands to gently press the cheese into the pastry to help it stick.
- Fold the Pastry: Starting from one long side, tightly roll the puff pastry towards the center until you reach the middle. Repeat this with the other long side so that the two rolls meet in the center. You should now have a log shape.
- Chill the Logs: Wrap the rolled pastry log in plastic wrap and place it in the refrigerator for about 15-20 minutes. This will help firm up the pastry, making it easier to slice.
- Slice the Palmiers: Remove the chilled log from the refrigerator and slice it into 1/2 inch thick pieces. Lay these slices cut-side up on a parchment-lined baking sheet.
- Apply Egg Wash: Brush the tops of the palmiers with the beaten egg. This will give them a beautiful golden finish when baked.
- Bake: Place the baking sheet in the preheated oven and bake for 12-15 minutes, or until the palmiers are puffed and golden brown. Keep an eye on them, as baking times may vary slightly depending on your oven.
- Cool and Serve: Once baked, remove the palmiers from the oven and let them cool for a few minutes. Serve warm or at room temperature.
Extra Tips
To add even more flavor to your Savory Cheese Palmiers, consider incorporating finely chopped olives, sun-dried tomatoes, or cooked bacon into the cheese mixture.
Additionally, if you want a more pronounced flavor, try using flavored puff pastry, such as those infused with herbs or spices.
Finally, if you have leftover palmiers, they can be stored in an airtight container for up to 2 days, or frozen for longer storage—just reheat them in a warm oven before serving!
Fruit Galette
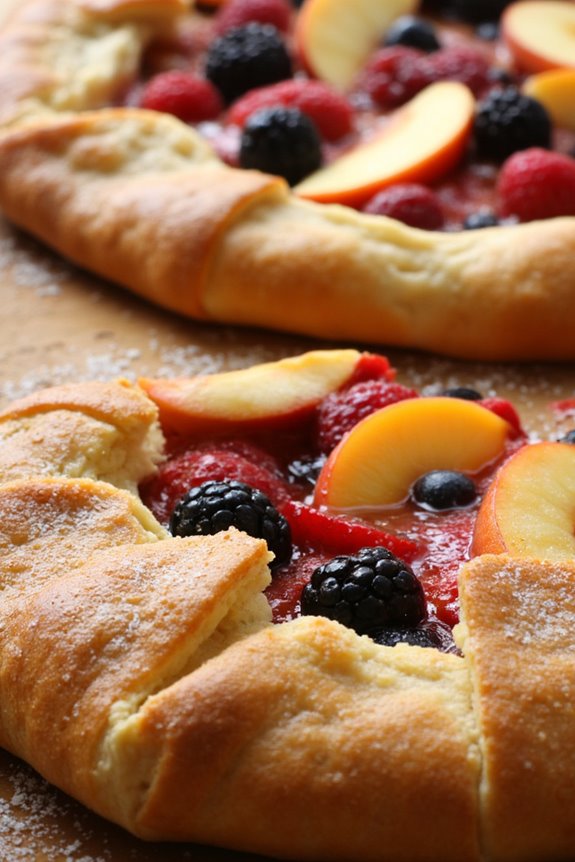
A fruit galette is a rustic, free-form pastry that showcases the beauty and flavor of seasonal fruits. This delightful dessert isn’t only easy to make but also allows for creativity with the type of fruit you choose. Whether you prefer peaches, berries, or apples, a fruit galette is a fantastic way to highlight fresh ingredients with a flaky crust that’s both buttery and tender.
To make a fruit galette, you’ll start with a simple pastry dough that can be prepared in advance, giving you more time to enjoy the baking process. The filling is typically a mixture of fresh fruit, sugar, and a touch of flour or cornstarch to absorb excess juices. Once assembled, the galette is baked until golden brown, resulting in a delicious dessert that’s perfect for any occasion, from casual family dinners to festive gatherings.
Ingredients (Serves 4-6):
- 1 ½ cups all-purpose flour
- ½ cup unsalted butter, chilled and diced
- ¼ cup granulated sugar
- 1/4 teaspoon salt
- 4-5 tablespoons ice water
- 2 cups mixed fresh fruit (such as sliced peaches, berries, or apples)
- 2 tablespoons granulated sugar (for fruit filling)
- 1 tablespoon cornstarch (or flour)
- 1 teaspoon vanilla extract
- 1 egg (for egg wash)
- 1 tablespoon coarse sugar (for topping)
Cooking Instructions:
- Make the Dough: In a mixing bowl, combine the flour, sugar, and salt. Add the chilled butter pieces and use a pastry cutter or your fingers to blend until the mixture resembles coarse crumbs. Gradually add the ice water, one tablespoon at a time, mixing until the dough comes together. Form it into a disc, wrap in plastic wrap, and refrigerate for at least 30 minutes.
- Prepare the Filling: While the dough chills, wash and slice your chosen fruits. In a separate bowl, toss the fruit with sugar, cornstarch, and vanilla extract until well combined. Set aside to allow the juices to blend.
- Preheat the Oven: Preheat your oven to 400°F (200°C). Line a baking sheet with parchment paper to prevent sticking.
- Roll Out the Dough: On a lightly floured surface, roll out the chilled dough into a rough circle, about 12 inches in diameter. It doesn’t have to be perfect, as the rustic quality is part of the charm of a galette.
- Assemble the Galette: Transfer the rolled dough to the prepared baking sheet. Spoon the fruit filling into the center of the dough, leaving about a 2-inch border. Gently fold the edges of the dough over the fruit, pleating it as you go to create a rustic look.
- Add Egg Wash and Sugar: In a small bowl, beat the egg and brush it over the exposed crust of the galette. Sprinkle coarse sugar on top for extra sweetness and texture.
- Bake: Place the galette in the preheated oven and bake for 30-35 minutes, or until the crust is golden brown and the fruit is bubbling. Keep an eye on it to prevent over-browning.
- Cool and Serve: Once baked, remove the galette from the oven and let it cool for about 10 minutes. This will allow the juices to thicken slightly before serving. Slice and enjoy warm or at room temperature.
Extra Tips:
For a more intense flavor, consider adding a sprinkle of cinnamon or nutmeg to the fruit filling. Additionally, using a combination of fruits can enhance the overall taste and aesthetic of the galette.
If you have any leftover dough, you can make mini galettes or use it for other sweet or savory recipes. Serve with a scoop of vanilla ice cream or a dollop of whipped cream to take your dessert to the next level!
Chocolate Éclairs

Chocolate éclairs are a classic French pastry that aren’t only delicious but also a delight to make. These delicate pastries are made from choux pastry, which is piped into long shapes, baked until golden, and then filled with rich pastry cream. Topped with a glossy chocolate glaze, éclairs are perfect for special occasions or whenever you’re in the mood for a sweet treat.
While they may seem intimidating at first, with a little patience and practice, you can bring the taste of a French patisserie into your own kitchen.
Making chocolate éclairs involves a few steps, but each part is straightforward. The choux pastry is the foundation of the éclairs, and it’s key to get the consistency just right for that light and airy texture.
Once baked and cooled, they can be filled with luscious pastry cream, and finished off with a decadent chocolate glaze. Perfect for impressing guests or indulging yourself, these éclairs are sure to be a hit.
Ingredients (Serves 4-6 people)
- 1 cup all-purpose flour
- 1/2 cup unsalted butter
- 1 cup water
- 4 large eggs
- 1 teaspoon sugar
- 1/4 teaspoon salt
- 2 cups pastry cream (store-bought or homemade)
- 4 ounces semisweet chocolate
- 1/2 cup heavy cream
- 1 tablespoon powdered sugar (optional)
Cooking Instructions
1. Prepare the Choux Pastry:
In a medium saucepan, combine the water, butter, sugar, and salt. Bring to a boil over medium heat. Once boiling, add the flour all at once and stir vigorously with a wooden spoon until the mixture forms a ball and pulls away from the sides of the pan.
Remove from heat and let it cool for a few minutes.
2. Incorporate the Eggs:
After the dough has cooled slightly, add the eggs one at a time, mixing well after each addition. The dough should become smooth, glossy, and a bit thick. You may need to use a hand mixer for this step to achieve the proper consistency.
3. Pipe the Éclairs:
Preheat your oven to 400°F (200°C). Line a baking sheet with parchment paper. Transfer the choux pastry to a piping bag fitted with a large round tip.
Pipe long lines (about 4-5 inches) onto the prepared baking sheet, leaving space between each éclair.
4. Bake the Éclairs:
Bake in the preheated oven for about 25-30 minutes or until they’re puffed and golden brown. Avoid opening the oven door during baking, as this can cause the éclairs to deflate.
Once baked, remove them from the oven and let them cool completely on a wire rack.
5. Prepare the Pastry Cream:
If you’re making your own pastry cream, follow your recipe to prepare it. Once made, let it cool. If using store-bought, simply set it aside until ready to fill the éclairs.
6. Fill the Éclairs:
Once the éclairs are completely cool, use a small knife or a piping bag to make a small hole in the side of each éclair. Fill each éclair with pastry cream, ensuring they’re generously filled but not overstuffed.
7. Make the Chocolate Glaze:
In a small saucepan, heat the heavy cream until it’s just about to boil. Remove from heat and add the chopped chocolate, stirring until smooth and glossy.
Allow it to cool slightly before using.
8. Glaze the Éclairs:
Dip the top of each filled éclair into the chocolate glaze or use a spoon to drizzle it over the top. Allow the glaze to set for a few minutes before serving.
Extra Tips
When making chocolate éclairs, verify that your ingredients are at room temperature before starting, as this can help achieve a smoother dough.
Keep an eye on the baking process, as each oven can be different. If you prefer a sweeter touch, dust the finished éclairs with powdered sugar before serving.
Enjoy your homemade chocolate éclairs with a cup of coffee or tea for a truly indulgent experience!
Tarte Tatin

Tarte Tatin is a classic French dessert that combines the rich flavors of caramelized apples with a flaky pastry crust.
Legend has it that this dish was created by accident at the Hôtel Tatin in Lamotte-Beuvron, France, when one of the sisters preparing a traditional apple pie inadvertently flipped the cooking process. Instead of placing the apples on top of the pastry, she cooked the apples in butter and sugar before covering them with the pastry and baking the whole dish. The result was an upside-down tart that has since become a staple in French cuisine.
The beauty of Tarte Tatin lies in its simplicity, yet the flavors are anything but ordinary. Using fresh, tart apples, a little sugar, butter, and a good quality puff pastry, you can create a deliciously sweet and buttery dessert that’s certain to impress.
Serve it warm with a dollop of crème fraîche or a scoop of vanilla ice cream for an indulgent treat. This recipe serves 4-6 people and is perfect for gatherings or special occasions.
Ingredients:
- 6 medium-sized tart apples (like Granny Smith or Braeburn)
- 1 cup granulated sugar
- 1/2 cup unsalted butter
- 1 teaspoon vanilla extract
- 1 sheet of puff pastry (thawed if frozen)
- 1 tablespoon lemon juice
- Pinch of salt
Cooking Instructions:
- Prepare the Apples: Start by peeling, coring, and slicing the apples into quarters. Place them in a bowl and toss with lemon juice to prevent browning. The tartness of the apples is vital for balancing the sweetness of the caramel.
- Make the Caramel: In a heavy, oven-safe skillet (preferably cast iron), melt the butter over medium heat. Once melted, sprinkle the sugar evenly over the butter. Cook without stirring until the sugar begins to dissolve and turns a golden amber color. This process takes about 5-7 minutes, but watch it closely to avoid burning.
- Add the Apples: Carefully add the apple quarters to the caramel, arranging them in a circular pattern if possible. Cook for another 10-15 minutes, stirring occasionally, until the apples soften and begin to soak in the caramel. Add the vanilla extract and a pinch of salt for extra flavor.
- Preheat the Oven: While the apples are cooking, preheat your oven to 375°F (190°C). This will guarantee that the tart cooks evenly once it’s placed in the oven.
- Top with Puff Pastry: Roll out the puff pastry on a lightly floured surface to a size that covers the skillet. Gently place the pastry over the apples, tucking the edges down around the apples.
- Bake the Tart: Place the skillet in the preheated oven and bake for 25-30 minutes, or until the pastry is golden brown and puffed up. Keep an eye on it to make sure it doesn’t overbake.
- Invert the Tart: Once baked, remove the skillet from the oven and let it cool for about 5-10 minutes. Carefully invert the tart onto a large serving plate. Be cautious as the caramel may still be hot and bubbly.
- Serve: Allow the Tarte Tatin to cool slightly before slicing and serving. It’s best enjoyed warm, accompanied by a scoop of vanilla ice cream or a dollop of crème fraîche.
Extra Tips:
When making Tarte Tatin, it’s essential to select the right type of apple; tart varieties will hold their shape and provide a nice contrast to the sweet caramel.
For added depth, you can sprinkle in some cinnamon or nutmeg when cooking the apples. Remember to handle the hot caramel with care, as it can cause burns.
If you find that the tart is stuck to the skillet when inverting, gently run a knife around the edges to loosen it before flipping. Enjoy this delightful dessert with friends and family!
Lemon Meringue Tart
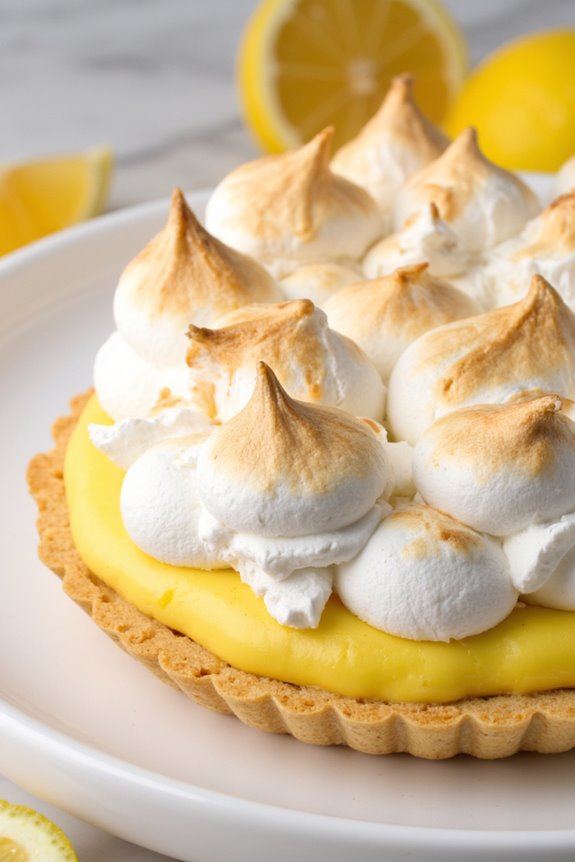
Lemon Meringue Tart is a delightful French pastry that combines a buttery, flaky crust with a tangy lemon custard filling, topped with a light and airy meringue. This dessert is perfect for those who enjoy the invigorating taste of citrus balanced with the sweetness of meringue. Whether you’re hosting a dinner party or simply want to indulge yourself, this tart is sure to impress with its vibrant flavors and beautiful presentation.
Making a Lemon Meringue Tart may seem intimidating, but with a bit of patience and attention to detail, you can create a stunning dessert that will wow your guests. The key to a successful tart lies in the quality of your ingredients and the precision of your technique. From making the perfect pastry crust to whipping the meringue to the right consistency, each step is essential for achieving the ideal balance of textures and flavors in this classic French treat.
Ingredients (Serves 4-6):
- 1 pre-made pie crust or homemade tart shell
- 1 cup granulated sugar
- 1/4 cup cornstarch
- 1/4 teaspoon salt
- 1 cup water
- 3 large egg yolks
- 1/2 cup freshly squeezed lemon juice
- Zest of 1 lemon
- 2 tablespoons unsalted butter
- 3 large egg whites
- 1/4 teaspoon cream of tartar
- 1/2 cup granulated sugar (for meringue)
Cooking Instructions:
- Prepare the Tart Shell: If using a pre-made pie crust, follow the package instructions for blind baking. If making your own, roll out the dough, fit it into a tart pan, and chill it for 30 minutes. Preheat the oven to 375°F (190°C). Line the crust with parchment paper and fill with pie weights or dried beans. Bake for 15-20 minutes until golden. Remove from the oven, discard the weights and parchment, and let cool.
- Make the Lemon Filling: In a medium saucepan, whisk together 1 cup sugar, cornstarch, and salt. Gradually add the water while stirring to combine. Cook over medium heat, stirring constantly until the mixture thickens and boils. In a separate bowl, whisk the egg yolks. Once the mixture is boiling, slowly pour a little of it into the egg yolks to temper them, then whisk the yolks back into the saucepan. Cook for an additional 2 minutes, then remove from heat. Stir in lemon juice, lemon zest, and butter until smooth.
- Fill the Tart Shell: Pour the lemon filling into the cooled tart shell, spreading it evenly. Allow it to cool to room temperature, then refrigerate for at least 30 minutes to set.
- Make the Meringue: In a clean mixing bowl, beat the egg whites with cream of tartar on medium speed until soft peaks form. Gradually add 1/2 cup sugar, continuing to beat until stiff peaks form and the meringue is glossy.
- Top the Tart: Once the lemon filling is set, spread the meringue over the tart, making sure to seal the edges to prevent shrinking. Use the back of a spoon to create peaks and swirls in the meringue.
- Bake the Meringue: Preheat the oven to 350°F (175°C). Place the tart in the oven and bake for about 10-12 minutes, or until the meringue is lightly browned. Keep a close eye on it to prevent burning.
- Cool and Serve: Remove the tart from the oven and let it cool completely at room temperature. Chill in the refrigerator for at least another hour before slicing and serving.
Extra Tips:
When making Lemon Meringue Tart, it’s important to confirm that your mixing bowls and utensils are completely clean and free of any grease, especially when whipping the egg whites for the meringue. This will help achieve maximum volume and stability.
Additionally, using fresh lemon juice and zest will enhance the flavor of the filling, giving it that vibrant citrus taste that pairs so beautifully with the sweet meringue.
Finally, for an extra touch, you can lightly toast the meringue with a kitchen torch for a beautiful caramelized finish before serving. Enjoy your delightful creation!
Cream Puffs
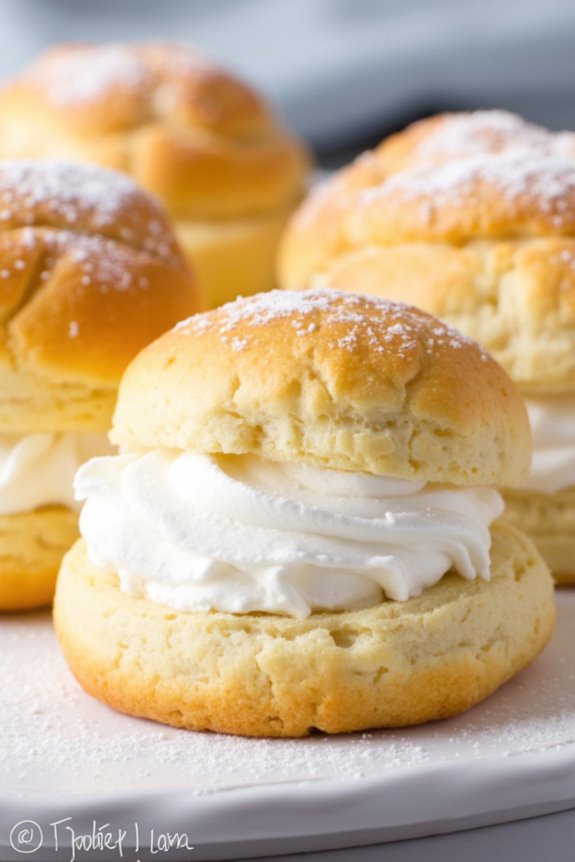
Cream puffs, or “choux à la crème,” are a delightful French pastry that features a light and airy pastry shell filled with a rich cream filling. These little puffs are created from a simple choux pastry dough, which puffs up beautifully when baked.
The versatility of cream puffs allows for endless variations, including sweet fillings like whipped cream or pastry cream, as well as savory options. Perfect for both special occasions and casual gatherings, cream puffs are certain to impress guests and satisfy your sweet tooth.
Making cream puffs may seem intimidating, but with a little patience and practice, you can master this elegant treat. The key to achieving the perfect puff lies in the precise combination of ingredients and baking techniques.
Once you have created the airy pastry shells, you can fill them with your favorite cream filling and dust them with powdered sugar for a beautiful presentation. Whether served as a dessert or a snack, cream puffs are a classic French indulgence that everyone will enjoy.
Ingredients (Serves 4-6):
- 1 cup water
- 1/2 cup unsalted butter
- 1 cup all-purpose flour
- 1/4 teaspoon salt
- 4 large eggs
- 1 cup heavy cream
- 1/4 cup powdered sugar (plus more for dusting)
- 1 teaspoon vanilla extract
Cooking Instructions:
1. Prepare the Choux Pastry: In a medium saucepan, combine the water and unsalted butter over medium heat. Stir until the butter is melted and the mixture comes to a gentle boil.
Once boiling, remove the saucepan from the heat and quickly add the all-purpose flour and salt, stirring vigorously with a wooden spoon until the dough forms a ball and pulls away from the sides of the pan.
2. Incorporate the Eggs: Allow the dough to cool for about 5 minutes. Once it’s slightly warm, add the eggs one at a time, mixing well after each addition. The dough should become smooth and glossy.
It’s ready when it falls from the spoon in a thick ribbon.
3. Shape and Bake the Pastry: Preheat your oven to 400°F (200°C). Line a baking sheet with parchment paper. Using a pastry bag fitted with a round tip, pipe small mounds of dough (about 1.5 inches in diameter) onto the prepared baking sheet, leaving space between each puff.
Bake for 25-30 minutes or until the puffs are golden brown and puffed up.
4. Make the Cream Filling: While the puffs are baking, prepare the filling. In a medium bowl, whip the heavy cream with the powdered sugar and vanilla extract until soft peaks form.
Be careful not to overwhip, as this can cause the cream to become grainy.
5. Fill the Cream Puffs: Once the pastry shells are cool, use a sharp knife to make a small slit in the bottom of each puff. Use a piping bag to fill each puff with the whipped cream mixture.
Alternatively, you may cut the puffs in half and spoon the filling inside before replacing the top.
6. Serve and Enjoy: Dust the filled cream puffs with additional powdered sugar just before serving. These delightful treats can be enjoyed immediately or stored in the refrigerator for a couple of hours.
Extra Tips:
When making cream puffs, verify your butter is melted completely before adding the flour, as this helps create a smooth dough.
A key to successful puffs isn’t opening the oven door while they’re baking, as this can cause them to deflate. For an added twist, consider flavoring your cream filling with cocoa powder, citrus zest, or even liqueurs for a gourmet touch.
Enjoy your homemade cream puffs!
Brie and Fig Puff Pastry Bites
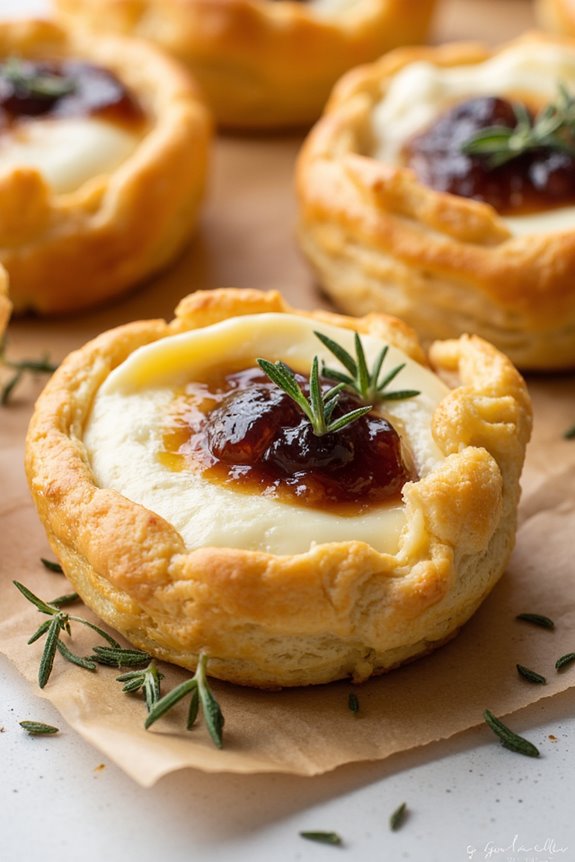
Brie and Fig Puff Pastry Bites are an exquisite appetizer that combines the creamy richness of Brie cheese with the sweet, fruity notes of fig. This delicious finger food is perfect for gatherings, holiday parties, or just a cozy night in. The flaky puff pastry serves as the ideal vessel for the rich filling, making each bite a delightful experience.
With minimal effort and a few simple ingredients, you can impress your guests with these elegant treats. The beauty of Brie and Fig Puff Pastry Bites lies in their versatility. You can use fresh figs when in season or opt for fig jam for a more convenient option. The recipe is easily customizable; feel free to add herbs like thyme or rosemary for an aromatic twist.
Whether you’re an experienced home cook or a beginner, these bites are sure to become a favorite in your repertoire.
Ingredients (Serves 4-6)
- 1 sheet of puff pastry, thawed
- 8 ounces of Brie cheese, cut into small pieces
- 1/2 cup of fig jam
- 1 egg, beaten (for egg wash)
- Fresh thyme leaves (optional, for garnish)
- Salt and pepper to taste
Cooking Instructions
- Preheat the Oven: Begin by preheating your oven to 400°F (200°C). This guarantees that the puff pastry will rise beautifully and achieve a golden-brown color during baking.
- Prepare the Puff Pastry: On a lightly floured surface, roll out the thawed puff pastry sheet to smooth out any creases. Cut the pastry into squares of about 3 inches by 3 inches. You can make approximately 12 squares from one sheet.
- Assemble the Bites: Place a small piece of Brie cheese and a teaspoon of fig jam in the center of each pastry square. Be careful not to overfill, as this may cause the filling to spill out during baking.
- Fold and Seal: Fold each pastry square diagonally to create a triangle shape. Press the edges together firmly to seal. You can use a fork to crimp the edges for extra security and a decorative touch.
- Apply Egg Wash: Brush the tops of each pastry with the beaten egg. This egg wash will give the pastries a beautiful golden finish as they bake.
- Bake: Place the assembled puff pastry bites on a baking sheet lined with parchment paper. Bake in the preheated oven for 15-20 minutes, or until the pastries are puffed and golden brown.
- Garnish and Serve: Once baked, remove the bites from the oven and let them cool slightly. If desired, sprinkle with fresh thyme leaves and season with a pinch of salt and pepper before serving.
Extra Tips
For an even more sophisticated flavor, consider adding a drizzle of honey over the baked pastry bites before serving. If using fresh figs, ensure they’re ripe for the best flavor.
You can also experiment with different cheeses, such as goat cheese or camembert, to create your own unique twist on this recipe. These bites can be made ahead of time and frozen; just bake them straight from the freezer, adding a few extra minutes to the baking time.
Enjoy your delightful Brie and Fig Puff Pastry Bites!
Apple Turnovers
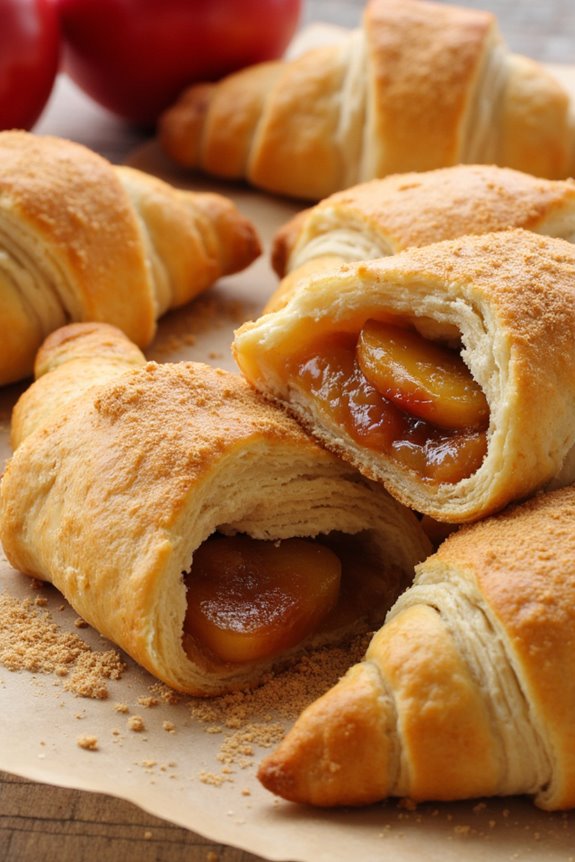
Apple turnovers are a delightful French pastry that combines flaky, buttery puff pastry with a sweet and spiced apple filling. This classic treat is perfect for breakfast, a snack, or dessert and is certain to impress anyone who takes a bite. The combination of warm, caramelized apples with the crisp pastry creates a delicious contrast that’s hard to resist.
Making apple turnovers at home isn’t only simple but also allows you to customize the filling to your taste.
To attain the perfect apple turnover, you’ll want to use fresh apples along with a blend of spices such as cinnamon and nutmeg to enhance the natural sweetness of the fruit. The pastry can be made from scratch, but for a quicker option, store-bought puff pastry works beautifully. With just a few ingredients and steps, you can create these scrumptious pastries that are perfect for sharing or enjoying all by yourself.
Ingredients (Serves 4-6)
- 2 large apples (such as Granny Smith or Honeycrisp), peeled, cored, and diced
- 1 tablespoon lemon juice
- 1/4 cup granulated sugar
- 1 teaspoon ground cinnamon
- 1/4 teaspoon ground nutmeg
- 1 tablespoon unsalted butter
- 1 package (17.3 oz) frozen puff pastry, thawed
- 1 egg, beaten (for egg wash)
- 1 tablespoon coarse sugar (for sprinkling, optional)
Cooking Instructions
- Prepare the Filling: In a medium saucepan over medium heat, melt the butter. Add the diced apples, lemon juice, granulated sugar, cinnamon, and nutmeg. Cook for about 5-7 minutes, stirring occasionally, until the apples are tender but not mushy. Remove from heat and let the mixture cool slightly.
- Preheat the Oven: Preheat your oven to 400°F (200°C). Line a baking sheet with parchment paper to prevent the turnovers from sticking.
- Roll Out the Pastry: On a lightly floured surface, roll out the thawed puff pastry sheets to smooth out any creases. Cut each sheet into squares, approximately 4×4 inches.
- Fill the Pastry: Place a spoonful of the apple filling in the center of each pastry square. Be careful not to overfill, as this can cause the turnovers to burst during baking.
- Seal the Turnovers: Fold the pastry over to form a triangle shape. Press the edges together to seal, then use a fork to crimp the edges for a decorative touch. This also helps to guarantee the filling stays inside while baking.
- Apply Egg Wash: Brush the tops of each turnover with the beaten egg to give them a golden color when baked. If desired, sprinkle coarse sugar over the tops for added sweetness and texture.
- Bake the Turnovers: Place the filled and sealed turnovers on the prepared baking sheet. Bake in the preheated oven for 20-25 minutes or until they’re golden brown and puffed up.
- Cool and Serve: Remove the turnovers from the oven and allow them to cool on a wire rack for a few minutes before serving. Enjoy warm or at room temperature.
Extra Tips
When making apple turnovers, feel free to experiment with different types of apples to find your preferred flavor profile. If you want to add a twist, consider incorporating dried fruits, nuts, or even a drizzle of caramel sauce before sealing the turnovers.
Additionally, for a more pronounced flavor, you can let the apple filling sit for a few minutes after cooking to allow the spices to meld together. Enjoy your homemade apple turnovers fresh out of the oven, or store them in an airtight container for a few days, reheating them in the oven for the best texture.
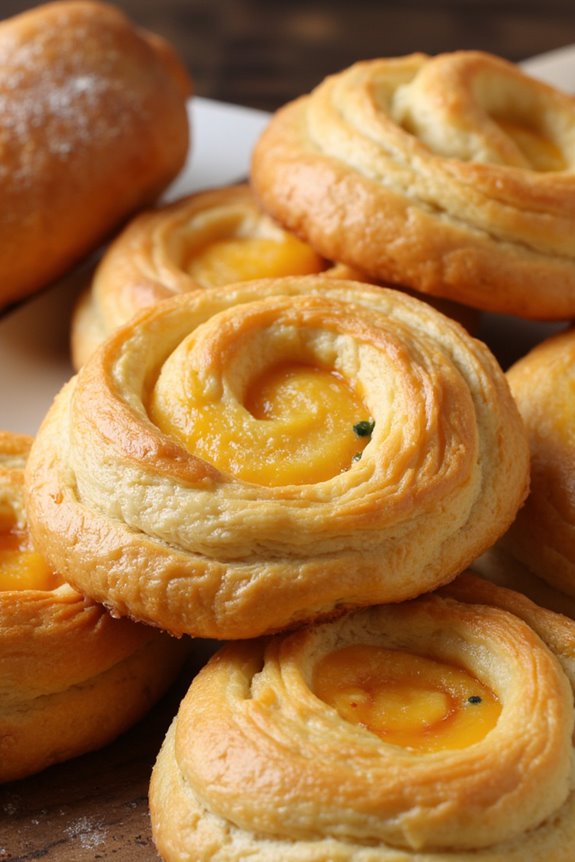
Raspberry Danish Pastry
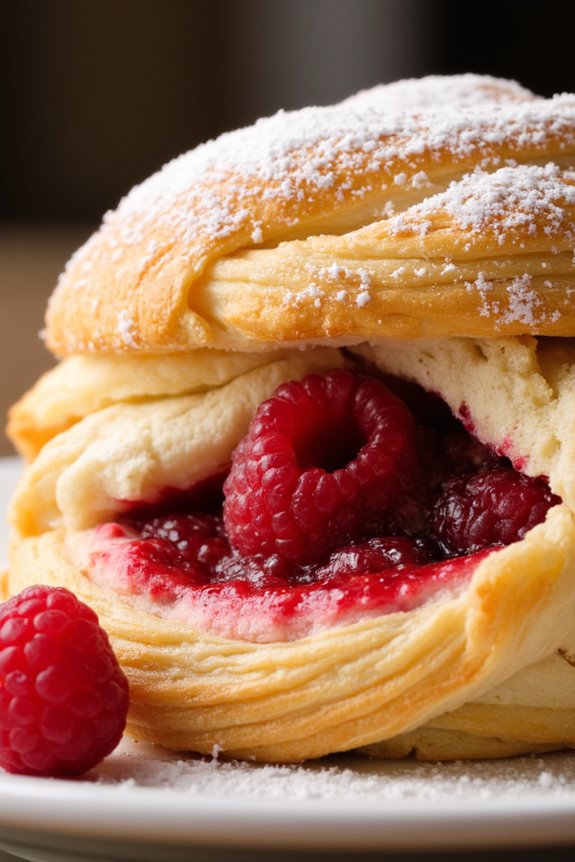
Raspberry Danish Pastry is a delightful treat that combines the flaky, buttery layers of pastry with the sweet and tangy flavor of fresh raspberries. Originating from Denmark, this pastry is perfect for breakfast, brunch, or a sweet snack with coffee or tea.
The process of making Danish pastry can seem intimidating at first, but with a little patience and practice, you’ll be able to create this impressive dessert that will impress your family and friends.
This recipe for Raspberry Danish Pastry is designed to serve 4-6 people, making it an ideal option for a small gathering or a cozy family breakfast. The combination of the light, airy pastry and the bright raspberry filling creates a perfect balance of flavors and textures.
Once you master this recipe, feel free to experiment with other fruit fillings such as strawberries, blueberries, or even cream cheese for a different twist!
Ingredients:
- 1 sheet of puff pastry (thawed)
- 1 cup fresh raspberries
- 1/4 cup granulated sugar
- 2 tablespoons cornstarch
- 1 teaspoon lemon juice
- 1 egg (beaten, for egg wash)
- 1 tablespoon milk (for egg wash)
- Powdered sugar (for dusting)
Cooking Instructions:
- Preheat the Oven: Begin by preheating your oven to 400°F (200°C). This guarantees that your Raspberry Danish Pastry will bake evenly and achieve that golden-brown color.
- Prepare the Puff Pastry: Roll out the thawed puff pastry on a lightly floured surface to smooth it out. Use a rolling pin to guarantee it’s about 1/8 inch thick. Cut the pastry into a rectangle or square, approximately 8 inches by 8 inches, and place it on a baking sheet lined with parchment paper.
- Make the Raspberry Filling: In a medium bowl, combine the fresh raspberries, granulated sugar, cornstarch, and lemon juice. Gently toss the ingredients together until the raspberries are well coated. This mixture will create a delicious filling once baked.
- Assemble the Pastry: Cut diagonal slits along the edges of the pastry, leaving a solid center for the filling. Spoon the raspberry mixture into the center of the pastry, ensuring not to overfill it. Fold the slits over the center, creating a braided effect.
- Apply Egg Wash: In a small bowl, whisk together the beaten egg and milk to create an egg wash. Brush this mixture over the folded edges of the pastry to give it a beautiful, shiny finish while it bakes.
- Bake the Danish: Place the baking sheet with the assembled pastry in the preheated oven. Bake for about 20-25 minutes, or until the pastry is puffed and golden brown. Keep an eye on it to avoid burning.
- Cool and Dust: Once baked, remove the Raspberry Danish Pastry from the oven and let it cool for about 10 minutes. Before serving, dust with powdered sugar for an elegant touch.
Extra Tips:
When making Raspberry Danish Pastry, it’s important to keep your puff pastry cold until you’re ready to bake. This helps in achieving that flaky texture.
If you find the pastry becoming too warm while you work with it, pop it back in the refrigerator for a few minutes. Additionally, feel free to customize your filling by adding a splash of vanilla extract or almond extract for an extra layer of flavor.
Enjoy your homemade pastry fresh, as it’s best served on the same day it’s baked!