

When I think of French desserts, I envision vibrant fruits transforming into exquisite treats. Each recipe tells a story of seasonal flavors, from the caramelized goodness of Tarte Tatin to the delicate poached pears in red wine. These simple yet elegant desserts not only showcase the beauty of fresh ingredients but also invite a touch of sophistication to any gathering. Curious about how to bring these delightful flavors to your own table? Let’s explore these mouthwatering creations together.
Tarte Tatin With Seasonal Apples
Tarte Tatin is a classic French dessert that showcases the simplicity and elegance of seasonal apples, caramelized perfectly to create a delightful upside-down tart. Originating from the Tatin sisters in the late 19th century, this dish has become a beloved staple in French cuisine. The beauty of Tarte Tatin lies in its balance of flavors: the sweetness of the apples, the richness of the buttery pastry, and the deep, caramelized notes that develop during the cooking process.
Making Tarte Tatin is a rewarding experience that will fill your kitchen with the irresistible aroma of baked apples. Using fresh, seasonal apples guarantees that your tart is bursting with flavor, making it the perfect dessert for gatherings or a special family dinner. With a crisp pastry base and a luscious topping of caramelized apples, this dessert is sure to impress anyone who takes a bite.
Ingredients (Serves 4-6):
- 6 medium-sized seasonal apples (such as Granny Smith or Honeycrisp)
- 1 cup granulated sugar
- 1/2 cup unsalted butter (1 stick)
- 1 teaspoon vanilla extract
- 1 teaspoon ground cinnamon (optional)
- 1 sheet of puff pastry, thawed
- Pinch of salt
- Flour for dusting
Cooking Instructions:
- Prepare the Apples: Start by peeling, coring, and quartering the apples. This step is essential as it allows the apples to cook evenly and guarantees that they’re tender when the tart is finished. Set the prepared apples aside.
- Make the Caramel: In a heavy, oven-proof skillet (preferably cast iron), melt the butter over medium heat. Once melted, add the sugar and stir continuously until the mixture turns a golden amber color. Be careful not to let it burn. This caramel will provide the base for your apples, so achieving the right color and consistency is vital.
- Add the Apples: Once the caramel is ready, carefully add the apple quarters to the skillet, arranging them in a circular pattern. Cook the apples for about 10 minutes, turning them occasionally until they’re slightly tender and coated with caramel. This step enhances the flavor and creates a beautiful caramelized layer.
- Season the Apples: Stir in the vanilla extract, ground cinnamon (if using), and a pinch of salt. This adds depth and complexity to the flavor profile of your tart. Confirm the apples are well coated with the caramel and seasonings.
- Preheat the Oven: While the apples are cooking, preheat your oven to 400°F (200°C). This allows the pastry to crisp up perfectly once placed in the oven.
- Add the Puff Pastry: Roll out the puff pastry on a lightly floured surface to fit over the skillet. Carefully place the pastry over the apples, tucking the edges down around the apples to seal in the flavors. This will create a beautiful crust that contrasts nicely with the tender apples.
- Bake: Transfer the skillet to the preheated oven and bake for 25-30 minutes, or until the pastry is golden brown and puffed up. Keep an eye on the tart to prevent it from over-browning.
- Invert the Tart: Once baked, remove the skillet from the oven and let it cool for a few minutes. Carefully run a knife around the edges to loosen the tart, then place a large serving plate upside down over the skillet and quickly invert it. This step is vital for presenting the tart beautifully with the caramelized apples on top.
- Serve: Allow the Tarte Tatin to cool slightly before serving. This dessert is best enjoyed warm, optionally accompanied by a scoop of vanilla ice cream or a dollop of whipped cream.
Extra Tips:
When preparing Tarte Tatin, choose apples that hold their shape well during cooking, such as Granny Smith or Honeycrisp, for the best texture. If you’re looking to elevate your tart, consider adding a splash of apple brandy or Calvados to the caramel for a hint of sophistication. Confirm that the puff pastry is fully thawed before use, as this will help it rise beautifully in the oven.
Finally, if you have leftovers, Tarte Tatin can be reheated in the oven for a few minutes to regain its crispiness!
Raspberry Clafoutis
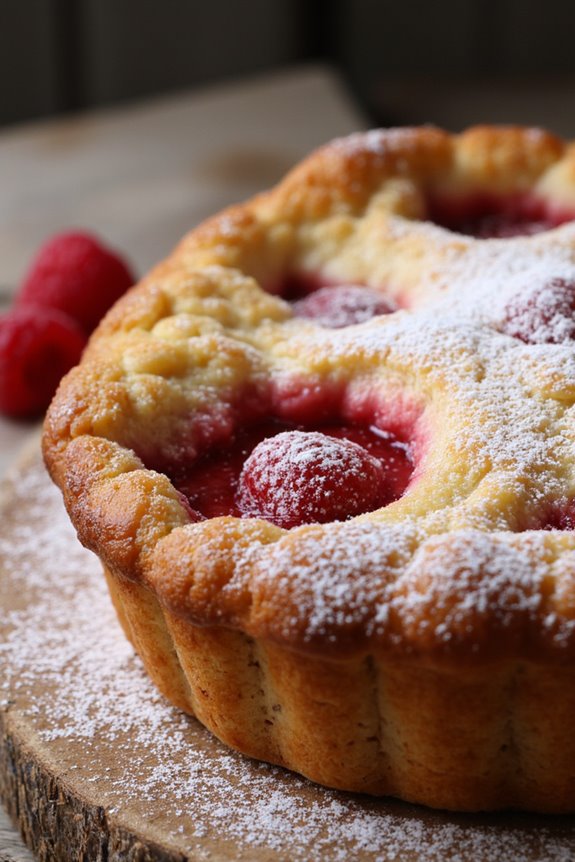
Raspberry Clafoutis is a delightful French dessert that combines the flavors of sweet, juicy raspberries with a custard-like batter. Traditionally made with black cherries, clafoutis is a versatile dish that can be adapted to incorporate various fruits.
The beauty of this dessert lies in its simplicity and the capability to bring out the natural sweetness of the fruit, making it a perfect choice for a light dessert that can be enjoyed any time of the year.
This dish isn’t only easy to prepare, but it also requires minimal ingredients, most of which you probably already have in your kitchen. The clafoutis is baked until puffed and golden, creating a lovely contrast between the tender fruit and the soft, creamy batter.
Once cooled, it can be dusted with powdered sugar or served with a dollop of whipped cream for an extra touch of indulgence.
Ingredients (serves 4-6 people):
- 1 cup fresh raspberries
- 3 large eggs
- 1 cup milk
- 1/2 cup granulated sugar
- 1 teaspoon vanilla extract
- 1/2 cup all-purpose flour
- 1/4 teaspoon salt
- 1 tablespoon unsalted butter (for greasing the dish)
- Powdered sugar (for dusting, optional)
Cooking Instructions:
- Preheat the Oven: Begin by preheating your oven to 350°F (175°C). This guarantees that the clafoutis bakes evenly and achieves a lovely golden color.
- Prepare the Baking Dish: Grease a 9-inch round baking dish or a similar-sized oven-safe dish with the unsalted butter. This prevents the clafoutis from sticking and makes for easier serving later on.
- Arrange the Raspberries: Evenly distribute the fresh raspberries across the bottom of the greased baking dish. You can use whole raspberries or slice them in half if they’re particularly large.
- Make the Batter: In a mixing bowl, whisk together the eggs, granulated sugar, and vanilla extract until well combined. Gradually add in the milk while continuing to whisk until the mixture is smooth.
- Incorporate Dry Ingredients: Sift the all-purpose flour and salt into the egg mixture. Stir gently just until combined—be careful not to overmix, as this can lead to a denser texture.
- Combine and Pour: Pour the batter over the raspberries in the baking dish, ensuring they’re covered evenly. The raspberries will float slightly during baking, creating a beautiful presentation.
- Bake: Place the baking dish in the preheated oven and bake for 35-40 minutes, or until the clafoutis is puffed, golden brown, and a toothpick inserted in the center comes out clean.
- Cool and Serve: Remove the clafoutis from the oven and let it cool for about 10-15 minutes. Dust with powdered sugar before serving, if desired. Slice into wedges and enjoy warm or at room temperature.
Extra Tips:
For the best flavor and texture, use ripe, fresh raspberries that are in season. If you only have frozen raspberries, you can still use them; just be sure to thaw and drain any excess moisture before adding them to the dish.
To elevate your clafoutis, consider adding a splash of almond extract or a bit of lemon zest to enhance the flavors. Serve it with a scoop of vanilla ice cream or a dollop of crème fraîche for a delightful contrast to the warm clafoutis.
Fresh Strawberry Galette
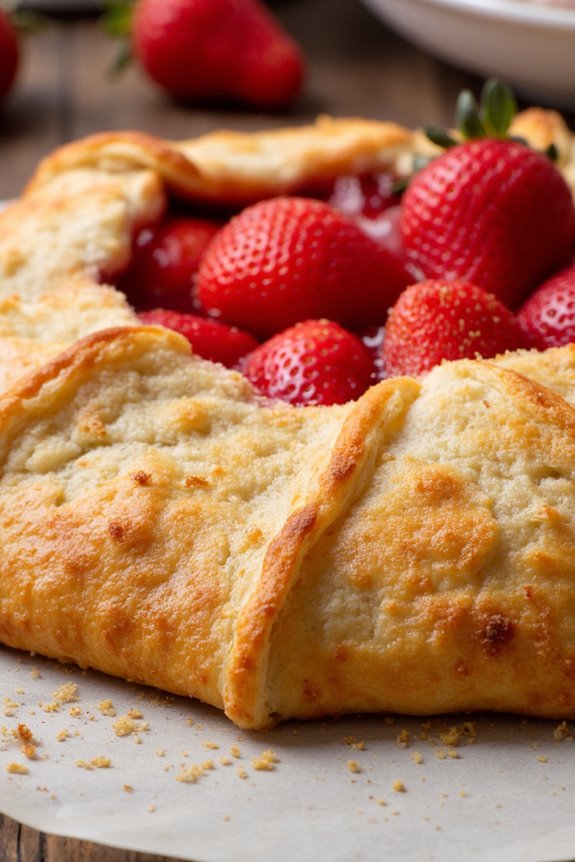
The Fresh Strawberry Galette is a delightful French dessert that combines the sweetness of ripe strawberries with a buttery, flaky crust. This rustic tart isn’t only visually appealing but also incredibly simple to make, making it a perfect choice for both experienced bakers and novices alike.
The galette showcases the natural flavors of fresh strawberries, allowing them to shine through while being complemented by a hint of sugar and a splash of lemon juice. This dessert is ideal for summer gatherings, picnics, or a sweet ending to any meal.
Creating a Fresh Strawberry Galette is an excellent way to celebrate the bounty of fresh strawberries available during the warmer months. The beauty of a galette lies in its freeform shape, which means you don’t need to worry about perfecting the edges or making a flawless pie.
Instead, you can embrace the rustic charm of this dessert, which invites creativity and personal flair. Serve it warm with a scoop of vanilla ice cream or a dollop of whipped cream for an indulgent treat that everyone will love.
Ingredients (serving size: 4-6 people)
- 1 ½ cups all-purpose flour
- 1 teaspoon granulated sugar
- ½ teaspoon salt
- ½ cup unsalted butter, cold and cubed
- 6-8 tablespoons ice water
- 2 cups fresh strawberries, hulled and halved
- ¼ cup granulated sugar (adjust based on sweetness of strawberries)
- 1 tablespoon cornstarch
- 1 tablespoon fresh lemon juice
- 1 teaspoon vanilla extract
- 1 egg, beaten (for egg wash)
- Turbinado sugar (for sprinkling)
Cooking Instructions
- Prepare the Dough: In a large mixing bowl, combine the flour, sugar, and salt. Add the cold, cubed butter and use a pastry cutter or your fingers to mix until the mixture resembles coarse crumbs. Gradually add the ice water, one tablespoon at a time, mixing until the dough begins to come together. Avoid overmixing.
- Chill the Dough: Form the dough into a disk, wrap it in plastic wrap, and refrigerate for at least 1 hour. Chilling the dough helps to relax the gluten and firm up the butter, resulting in a flaky crust.
- Preheat the Oven: Preheat your oven to 400°F (200°C). This step guarantees that the galette will bake evenly and achieve a golden-brown crust.
- Prepare the Filling: In a medium bowl, combine the sliced strawberries, granulated sugar, cornstarch, lemon juice, and vanilla extract. Toss gently to coat the strawberries evenly and set aside to let the flavors meld.
- Roll out the Dough: On a lightly floured surface, roll out the chilled dough into a circle about 12 inches in diameter. It doesn’t have to be perfect; the rustic look is part of the charm. Transfer the rolled-out dough to a parchment-lined baking sheet.
- Assemble the Galette: Spoon the strawberry mixture into the center of the dough, leaving a 2-inch border around the edges. Gently fold the edges of the dough over the filling, overlapping as necessary to create a pleated effect.
- Apply Egg Wash and Sprinkle Sugar: Brush the edges of the folded dough with the beaten egg to give it a beautiful golden color when baked. Sprinkle turbinado sugar over the crust for added crunch and sweetness.
- Bake the Galette: Place the galette in the preheated oven and bake for 35-40 minutes, or until the crust is golden brown and the filling is bubbly. Keep an eye on it, as oven temperatures can vary.
- Cool and Serve: Once baked, remove the galette from the oven and allow it to cool for about 10-15 minutes. Serve warm or at room temperature, sliced into wedges.
Extra Tips
For the best flavor and texture, use fresh, ripe strawberries as they’ll provide the natural sweetness and juiciness needed for the galette. If fresh strawberries aren’t available, you can substitute with frozen strawberries, but be sure to thaw and drain excess moisture before use.
Experiment with other fruits, such as peaches or blueberries, for a variation on the classic strawberry galette. Finally, if you have any leftover galette, store it in an airtight container at room temperature for up to two days, or refrigerate for longer freshness.
Poached Pears in Red Wine
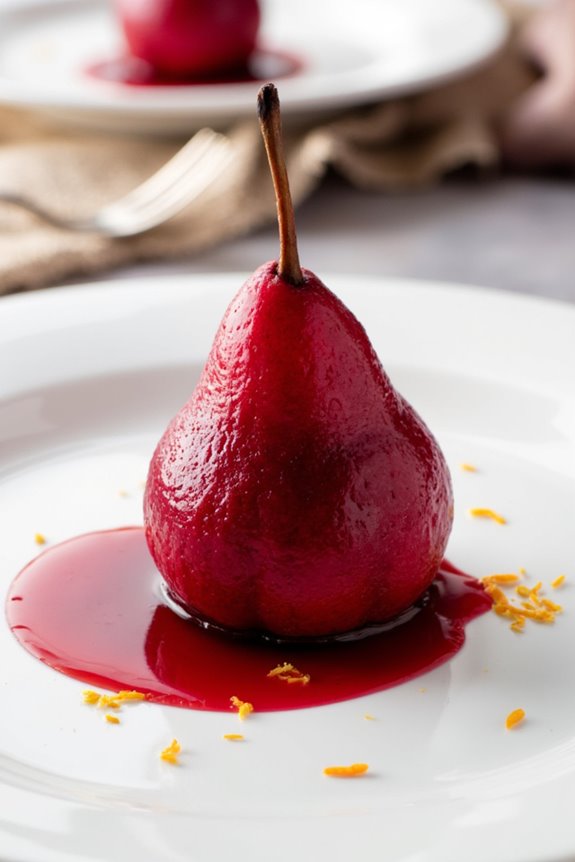
Poached pears in red wine is a classic French dessert that combines the elegance of poached fruit with the rich flavors of red wine and warm spices. This delightful dish isn’t only visually stunning but also incredibly simple to prepare, making it a perfect choice for any dinner party or special occasion.
The pears soak up the sweet and aromatic wine mixture, resulting in a tender and flavorful dessert that’s guaranteed to impress your guests. To enhance the experience, this dessert can be served warm or cold, and it’s often accompanied by a scoop of vanilla ice cream or a dollop of whipped cream.
The deep red color of the wine-stained pears adds a striking presentation to any plate, making poached pears in red wine a memorable finish to any meal. With just a few ingredients and some patience, you can create a show-stopping dessert that embodies the essence of French cuisine.
Ingredients (Serves 4-6)
- 4-6 firm ripe pears (such as Bosc or Anjou)
- 1 bottle of red wine (750 ml, preferably a fruity variety)
- 1 cup granulated sugar
- 1 cinnamon stick
- 2-3 star anise
- 1-2 cloves
- Zest of 1 orange
- Zest of 1 lemon
- 1 tablespoon vanilla extract (optional)
Cooking Instructions
1. Prepare the Pears: Start by peeling the pears, leaving the stems intact for presentation. You can core them from the bottom or leave them whole, depending on your preference. To prevent browning, you may want to rub the peeled pears with a little lemon juice.
2. Combine Ingredients: In a large saucepan, combine the red wine, granulated sugar, cinnamon stick, star anise, cloves, orange zest, lemon zest, and vanilla extract (if using). Stir the mixture over medium heat until the sugar is completely dissolved.
3. Add the Pears: Once the wine mixture is simmering, gently place the pears into the saucepan. Confirm that the pears are mostly submerged in the liquid. If necessary, you can cover the pears with a piece of parchment paper to keep them submerged.
4. Poach the Pears: Allow the pears to poach gently over low heat for about 20-30 minutes. The cooking time can vary depending on the ripeness of the pears. The goal is to cook them until they’re tender but not mushy. You can check their doneness by inserting a knife or skewer into the thickest part of the pear.
5. Cool and Serve: Once the pears are cooked, remove them from the heat and let them cool in the poaching liquid. For enhanced flavor, refrigerate the pears in the liquid for a few hours or overnight.
When ready to serve, remove the pears from the liquid and reduce the poaching liquid over medium heat until it thickens into a syrup, if desired.
6. Plate and Garnish: Serve the pears on a plate drizzled with the reduced poaching liquid. You can garnish with a sprinkle of fresh orange zest or a sprig of mint for added color and flavor.
Extra Tips
For an extra touch of flavor, consider adding other spices such as cardamom or nutmeg to the poaching liquid. You can also experiment with the type of red wine you use, as different varieties will impart varying flavors to the pears.
For an adult twist, you may add a splash of brandy or orange liqueur to the poaching liquid. Finally, serving the poached pears with a scoop of creamy vanilla ice cream or a dollop of whipped cream can elevate the dessert even further, providing a delightful contrast to the warm, spiced pears.
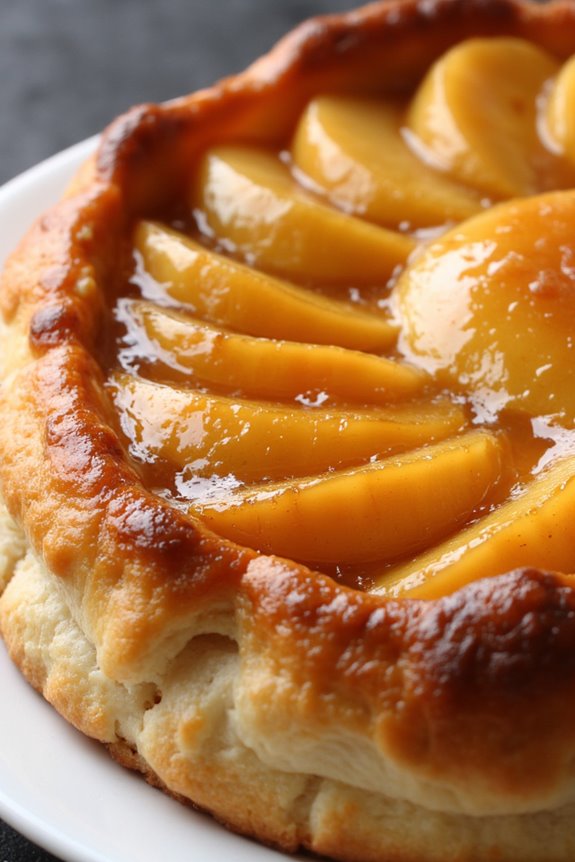
Apricot and Almond Tart
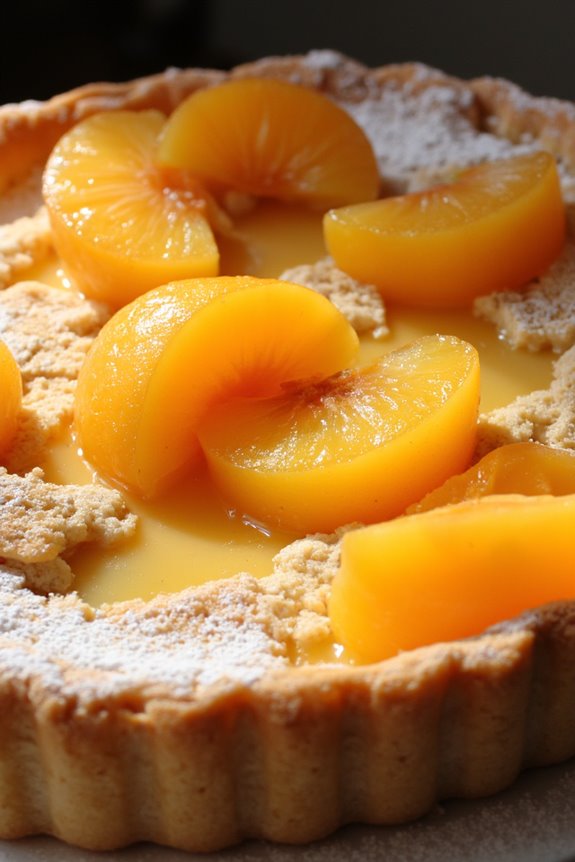
The Apricot and Almond Tart is a delightful French dessert that perfectly balances the sweetness of ripe apricots with the rich, nutty flavor of almonds.
This tart isn’t only visually appealing with its golden apricot topping but also easy to prepare, making it an ideal choice for both novice and seasoned bakers. Served at room temperature or slightly warm, this dessert pairs beautifully with a dollop of crème fraîche or a scoop of vanilla ice cream.
The tart’s buttery crust acts as a canvas for the vibrant apricots and almond frangipane filling, offering a texture that’s both tender and crumbly. The combination of flavors and textures will transport you to a quaint French patisserie, making it a perfect dessert for any occasion, from family gatherings to elegant dinner parties.
Ingredients (Serves 4-6)
- 1 pre-made tart shell (9-inch)
- 6-8 fresh apricots, halved and pitted
- 1 cup almond flour
- 1/2 cup granulated sugar
- 1/4 cup unsalted butter, softened
- 2 large eggs
- 1 teaspoon vanilla extract
- 1 tablespoon all-purpose flour
- 1/4 teaspoon almond extract
- Pinch of salt
- Powdered sugar (for dusting, optional)
Cooking Instructions
- Prepare the Tart Shell: If using a homemade tart crust, roll out the dough on a lightly floured surface and transfer it to a 9-inch tart pan. Press the dough into the pan and trim the edges. If using a pre-made tart shell, make sure it’s thawed if frozen and set aside.
- Preheat the Oven: Preheat your oven to 350°F (175°C). This step is essential as it guarantees even baking of the tart.
- Make the Almond Filling: In a mixing bowl, combine the almond flour, granulated sugar, softened butter, eggs, vanilla extract, all-purpose flour, almond extract, and a pinch of salt. Use an electric mixer or whisk to blend the ingredients until smooth and creamy.
- Assemble the Tart: Pour the almond filling into the prepared tart shell, smoothing it out evenly with a spatula. Gently arrange the apricot halves, cut side up, on top of the filling.
- Bake the Tart: Place the tart in the preheated oven and bake for about 30-35 minutes, or until the filling is set and the top is lightly golden. You can check for doneness by inserting a toothpick into the filling; it should come out clean.
- Cool and Serve: Once baked, remove the tart from the oven and allow it to cool in the pan for about 10 minutes. Carefully remove the tart from the pan and let it cool completely on a wire rack. Dust with powdered sugar before serving, if desired.
Extra Tips
For the best flavor, choose ripe but firm apricots, as they’ll hold their shape during baking while providing a delicious burst of sweetness.
If apricots are out of season, you can also experiment with other fruits such as peaches or plums. Additionally, feel free to enhance the almond flavor by adding slivered almonds on top of the tart before baking. This not only adds a pleasing crunch but also elevates the visual appeal of the dessert.
Lemon Meringue Pie
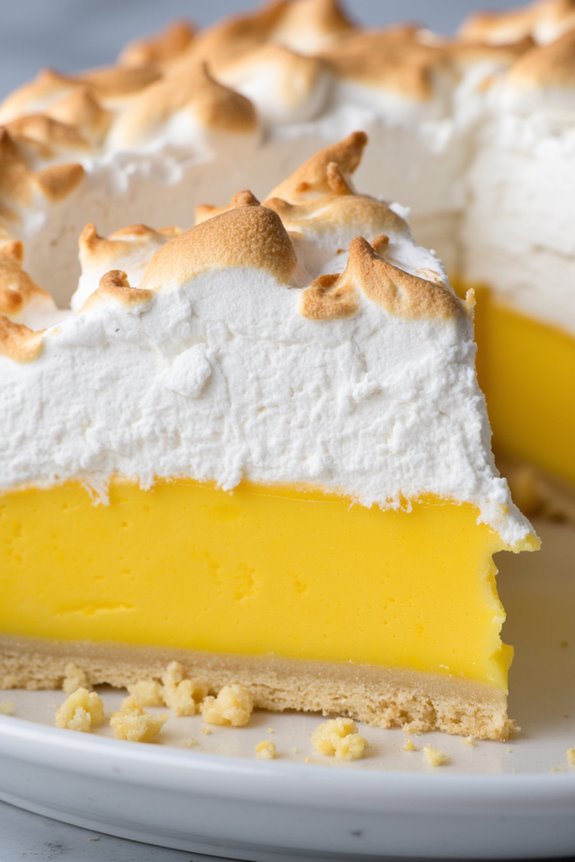
Lemon Meringue Pie is a classic French dessert that tantalizes taste buds with its harmonious blend of tart lemon filling, fluffy meringue, and a buttery crust. This delightful dish is perfect for any occasion, whether it’s a sunny picnic or a cozy family dinner. The bright, zesty flavor of the lemon filling cuts through the sweetness of the meringue, making it an irresistible treat that balances flavors beautifully.
Preparing Lemon Meringue Pie can be an enjoyable adventure in the kitchen. The key to achieving a perfect pie lies in the quality of the ingredients and the technique used to whip the meringue. With a crisp crust, a luscious lemon filling, and a cloud-like topping, this pie will impress your guests and leave them wanting more.
Whether you’re a seasoned baker or a novice, this recipe is simple enough to follow, yet sophisticated enough to wow your friends and family.
Ingredients (Serves 4-6)
- 1 pre-made pie crust (9 inches)
- 1 cup granulated sugar
- 1/4 cup cornstarch
- 1/4 teaspoon salt
- 1 1/2 cups water
- 3 large egg yolks
- 1/2 cup freshly squeezed lemon juice
- Zest of 1 lemon
- 2 tablespoons unsalted butter
- 3 large egg whites
- 1/4 teaspoon cream of tartar
- 1/2 cup granulated sugar (for meringue)
Cooking Instructions
- Prepare the Pie Crust: Preheat your oven to 350°F (175°C). Place the pre-made pie crust in a 9-inch pie dish and prick the bottom with a fork to prevent bubbling. Bake for about 10-12 minutes or until lightly golden. Remove from the oven and set aside to cool.
- Make the Lemon Filling: In a medium saucepan, combine 1 cup granulated sugar, cornstarch, and salt. Slowly add 1 1/2 cups of water while whisking to dissolve the dry ingredients. Cook over medium heat, stirring constantly until the mixture thickens and starts to bubble.
- Incorporate Egg Yolks: In a separate bowl, whisk the egg yolks lightly. Once the mixture in the saucepan is bubbling, scoop out a small amount and gradually whisk it into the egg yolks to temper them. Then, pour the tempered egg yolk mixture back into the saucepan, stirring continuously. Add the lemon juice, lemon zest, and butter, and continue to cook for another 2-3 minutes until thickened. Remove from heat.
- Fill the Pie Crust: Pour the lemon filling into the baked pie crust, spreading it evenly. Set aside to cool while you prepare the meringue.
- Prepare the Meringue: In a clean bowl, beat the egg whites with an electric mixer until soft peaks form. Add the cream of tartar and continue beating. Gradually add 1/2 cup granulated sugar while beating until stiff peaks form and the meringue is glossy.
- Top the Pie: Spread the meringue over the lemon filling, making sure to seal it all the way to the edges to prevent shrinking. Use a spatula to create peaks for a decorative look.
- Bake the Meringue: Bake the pie in the oven at 350°F (175°C) for about 10-12 minutes, or until the meringue is golden brown. Keep an eye on it to avoid burning.
- Cool and Serve: Once baked, remove the pie from the oven and let it cool at room temperature. For best results, refrigerate for a few hours before serving to allow the filling to set completely.
Extra Tips
When making Lemon Meringue Pie, verify that your mixing bowl and beaters are completely clean and free of any grease, as this can affect the meringue’s ability to whip up properly.
It’s also essential to use fresh lemon juice for the best flavor. If you prefer a sweeter meringue, you can adjust the sugar content slightly. Finally, allow the pie to cool completely before slicing to ensure clean cuts and a beautiful presentation!
Blueberry Crêpes
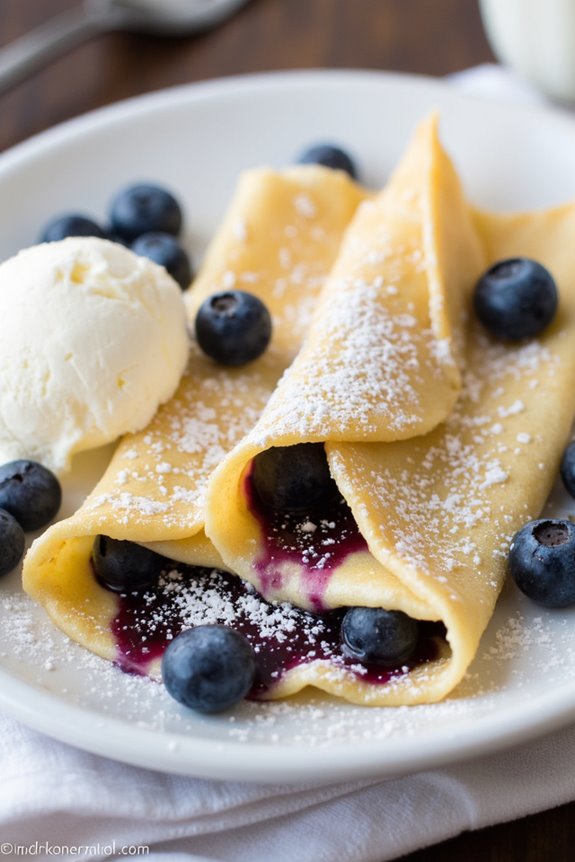
Blueberry crêpes are a delightful French dessert that combines the light and delicate texture of crêpes with the sweet and tangy flavor of fresh blueberries. These thin pancakes are versatile and can be filled with a variety of ingredients, but when paired with blueberries, they become a heavenly treat perfect for breakfast, brunch, or dessert.
The simplicity of the crêpe batter allows the blueberries to shine, creating a dish that’s both elegant and satisfying. Making blueberry crêpes isn’t only easy but also a fun activity for the whole family. You can customize the filling and toppings, such as whipped cream, vanilla ice cream, or a dusting of powdered sugar.
With a few simple ingredients and some basic cooking techniques, you can impress your friends and family with this classic French dish. Let’s explore the recipe, which will serve 4-6 people.
Ingredients
- 1 cup all-purpose flour
- 2 large eggs
- 1 ½ cups milk
- 2 tablespoons melted butter
- 1 tablespoon sugar
- ½ teaspoon salt
- 1 cup fresh blueberries (plus extra for serving)
- Powdered sugar (for dusting)
- Whipped cream or vanilla ice cream (optional, for serving)
Cooking Instructions
1. Prepare the Crêpe Batter: In a mixing bowl, whisk together the flour, eggs, milk, melted butter, sugar, and salt until smooth. The batter should be thin and free of lumps. Let the batter rest for about 30 minutes at room temperature. This allows the flour to hydrate, resulting in more tender crêpes.
2. Heat the Pan: Heat a non-stick skillet or crêpe pan over medium heat. Lightly grease the pan with a small amount of butter or oil, making sure it’s evenly coated. If using a non-stick surface, you may not need much fat.
3. Cook the Crêpes: Pour about ¼ cup of batter into the center of the hot pan, tilting and swirling the pan to evenly coat the bottom. Cook for about 1-2 minutes, or until the edges start to lift and the bottom is golden brown.
Carefully flip the crêpe using a spatula and cook for another 30 seconds to 1 minute on the other side. Remove the crêpe and place it on a plate. Repeat the process until all the batter is used, stacking the crêpes on top of each other.
4. Add the Blueberries: Once the crêpes are cooked, take one crêpe and place a tablespoon of fresh blueberries in the center. Fold the crêpe over the filling to create a half-moon shape or roll it up like a burrito. You can also stack the crêpes with layers of blueberries in between if desired.
5. Serve: Arrange the filled crêpes on a serving platter. Dust with powdered sugar and garnish with additional fresh blueberries. Serve warm with whipped cream or a scoop of vanilla ice cream on the side, if desired.
Extra Tips
When making crêpes, verify your batter is well-mixed but not overworked to maintain a light texture. If you find the batter is too thick, you can add a little more milk to reach the desired consistency.
For added flavor, consider infusing the batter with vanilla extract or a splash of orange liqueur. Experiment with different fillings such as Nutella, banana slices, or even savory options like cheese and ham for a delicious twist on this classic dish!
Peach Melba
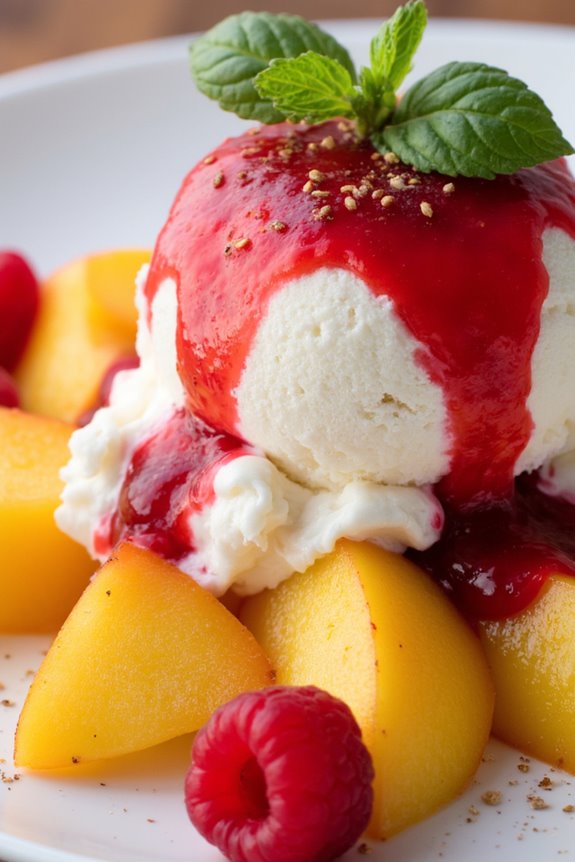
Peach Melba is a classic French dessert that elegantly combines the sweet, juicy flavor of fresh peaches with the creamy texture of vanilla ice cream and the tartness of raspberry sauce. This delightful dish was created by the famous chef Auguste Escoffier in the late 19th century in honor of the Australian soprano Nellie Melba.
The simplicity of the ingredients allows each component to shine, making it a favorite among dessert lovers. Perfect for summer gatherings or a special occasion, Peach Melba isn’t only delicious but also visually stunning, with its vibrant colors and elegant presentation.
To prepare this delightful dessert, you’ll need ripe peaches, which are the star of the dish, along with creamy vanilla ice cream and a homemade raspberry sauce that adds a rejuvenating contrast. The combination of these elements results in a dessert that’s both indulgent and light.
Whether you’re serving it at a dinner party or enjoying it on a warm afternoon, Peach Melba is sure to impress your guests and satisfy your sweet tooth.
Ingredients (Serves 4-6)
- 4 ripe peaches
- 1 cup fresh raspberries
- 1 cup granulated sugar
- 1 cup water
- 1 tablespoon lemon juice
- 1 teaspoon vanilla extract
- 4-6 scoops of vanilla ice cream
- Fresh mint leaves (for garnish, optional)
Cooking Instructions
1. Prepare the Peaches: Begin by bringing a pot of water to a boil. While the water is heating, prepare an ice bath by filling a large bowl with ice and cold water. Once the water is boiling, gently lower the peaches into the pot and blanch them for about 30 seconds. Immediately transfer the peaches to the ice bath to stop the cooking process.
Once cooled, peel the skins off the peaches, remove the pits, and cut them into halves or quarters.
2. Make the Raspberry Sauce: In a small saucepan, combine the fresh raspberries, sugar, water, and lemon juice. Bring the mixture to a gentle boil over medium heat, stirring frequently. Allow it to simmer for about 5-7 minutes, or until the raspberries break down and the sauce thickens slightly.
Remove from heat and strain the sauce through a fine mesh sieve to remove the seeds, yielding a smooth raspberry sauce. Stir in the vanilla extract and set aside to cool.
3. Assemble the Dessert: To serve, place a scoop of vanilla ice cream in the center of each serving plate. Arrange the peach slices around the ice cream. Drizzle the raspberry sauce generously over the peaches and ice cream, allowing it to pool on the plate.
If desired, garnish with fresh mint leaves for an added touch of color and flavor.
4. Serve Immediately: Peach Melba is best enjoyed right after assembling to guarantee the ice cream remains cold and the peaches are fresh. Serve it to your guests and savor the delightful combination of flavors.
Extra Tips
For the best results, choose peaches that are ripe but still firm to the touch, as this will enhance their flavor and texture. If fresh raspberries aren’t available, you can substitute them with frozen raspberries; just make sure to thaw and drain them before use.
Additionally, feel free to experiment with different types of ice cream, such as peach or raspberry sorbet, for a unique twist on this traditional dessert. Enjoy the vibrant flavors of summer with this elegant Peach Melba!
Fig and Honey Tart
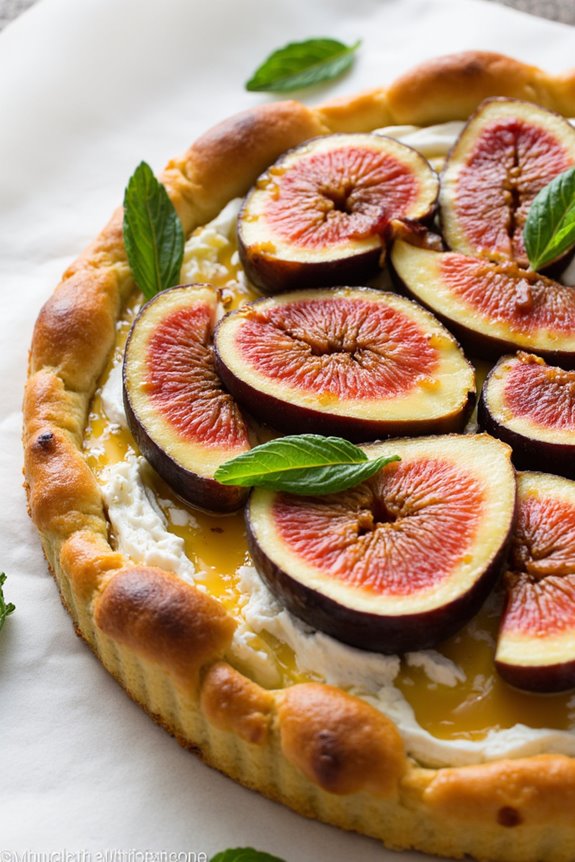
The Fig and Honey Tart is a delightful French dessert that beautifully combines the sweetness of ripe figs with the rich flavor of honey, all nestled in a buttery, flaky pastry crust.
This elegant tart is perfect for special occasions or as a sweet ending to a lovely meal. It’s not only visually appealing but also offers a lovely balance of textures and flavors, making it a favorite among dessert lovers.
Making this tart is a rewarding experience that allows you to showcase fresh, seasonal ingredients. The preparation involves creating a simple pastry crust, filling it with a creamy mixture, and topping it with fresh figs.
Once baked, a drizzle of honey adds a finishing touch that elevates the entire dessert. This recipe serves 4-6 people, making it an ideal choice for gatherings or family dinners.
Ingredients:
- 1 pre-made tart shell (9-inch)
- 8 fresh ripe figs, halved
- 1 cup ricotta cheese
- 1/2 cup heavy cream
- 1/4 cup honey (plus extra for drizzling)
- 1 teaspoon vanilla extract
- 1 tablespoon lemon juice
- 1 tablespoon cornstarch
- Pinch of salt
- Fresh mint leaves for garnish (optional)
Cooking Instructions:
1. Preheat the Oven: Begin by preheating your oven to 350°F (175°C). This guarantees that your tart will bake evenly and achieve that perfect golden crust.
2. Prepare the Tart Shell: If using a pre-made tart shell, place it on a baking sheet. If you’re making your own pastry, roll it out to fit your tart pan and prick the bottom with a fork to prevent bubbling during baking.
Pre-bake the tart shell for 10-12 minutes or until lightly golden. Remove from the oven and let it cool slightly.
3. Make the Filling: In a mixing bowl, combine the ricotta cheese, heavy cream, honey, vanilla extract, lemon juice, cornstarch, and a pinch of salt.
Use a hand mixer or whisk to blend until the mixture is smooth and creamy. This filling will provide a luscious base for the figs.
4. Assemble the Tart: Pour the ricotta filling into the cooled tart shell, spreading it evenly. Arrange the halved figs on top of the filling, cut side up, in a decorative pattern.
This not only enhances the visual appeal of the tart but also allows the figs to caramelize slightly during baking.
5. Bake the Tart: Place the assembled tart back in the oven and bake for 25-30 minutes, or until the filling is set and the figs are softened.
The edges of the tart should be lightly golden.
6. Cool and Serve: Once baked, remove the tart from the oven and allow it to cool for at least 15 minutes. Drizzle with additional honey before serving and garnish with fresh mint leaves if desired.
Slice and enjoy your delicious Fig and Honey Tart!
Extra Tips:
When selecting figs for your tart, opt for ripe ones that yield slightly when pressed, indicating their sweetness.
If fresh figs aren’t available, dried figs can be used, but they should be rehydrated in warm water for about 30 minutes before use. Additionally, feel free to experiment with the flavors by adding a sprinkle of cinnamon or nutmeg to the filling for an extra warmth.
For a more decadent dessert, serve the tart with a dollop of whipped cream or a scoop of vanilla ice cream on the side.
Passion Fruit Sorbet
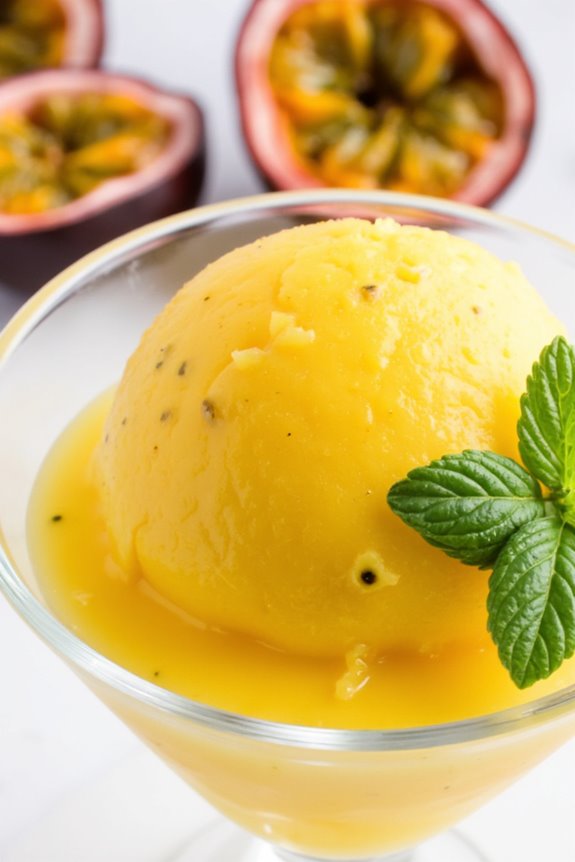
Passion Fruit Sorbet is a rejuvenating and vibrant dessert that perfectly captures the essence of tropical flavors. This delightful treat isn’t only a great way to cool down on a hot day, but it also offers a unique taste experience with its sweet yet tangy profile. Made primarily from the pulp of fresh passion fruits, this sorbet is simple to prepare and requires minimal ingredients, making it an ideal choice for both novice and experienced cooks alike.
The beauty of Passion Fruit Sorbet lies in its versatility. It can be served on its own, paired with other desserts, or used as a palate cleanser between courses. With just a few easy steps, you can whip up this light and fruity dessert that will impress your guests and leave them craving more. So, gather your ingredients and get ready to indulge in the tropical flavors of this exquisite sorbet.
Ingredients (Serves 4-6):
- 1 cup passion fruit pulp (fresh or frozen)
- 3/4 cup granulated sugar
- 1 cup water
- 1 tablespoon fresh lime juice
- A pinch of salt
Cooking Instructions:
- Prepare the Passion Fruit Pulp: If using fresh passion fruits, cut them in half and scoop out the pulp into a bowl. Be sure to strain out any seeds if desired. If using frozen pulp, allow it to thaw slightly before measuring.
- Make the Simple Syrup: In a small saucepan, combine the water and granulated sugar. Heat over medium heat, stirring occasionally until the sugar dissolves completely. This should take about 3-5 minutes. Once dissolved, remove from heat and allow the syrup to cool.
- Combine Ingredients: In a mixing bowl, combine the cooled simple syrup with the passion fruit pulp, fresh lime juice, and a pinch of salt. Stir well to guarantee all the ingredients are evenly mixed.
- Chill the Mixture: Place the mixture in the refrigerator and chill for about 1-2 hours. This step is essential as it helps the flavors to meld and enhances the overall taste of the sorbet.
- Churn the Sorbet: Pour the chilled mixture into an ice cream maker and churn according to the manufacturer’s instructions until it reaches a soft-serve consistency. This usually takes about 20-25 minutes.
- Freeze the Sorbet: Transfer the churned sorbet into a lidded container and spread it evenly. Place the container in the freezer for at least 4 hours or until firm.
- Serve: Once the sorbet is firm, scoop it into bowls or dessert glasses. You can garnish with additional passion fruit seeds or fresh mint leaves if desired.
Extra Tips:
For an even more intense flavor, try adding a splash of coconut milk to the mixture before churning; this will give the sorbet a creamier texture and a hint of coconut flavor.
Always verify your ingredients are as fresh as possible, especially the passion fruit, to achieve the best taste. If you don’t have an ice cream maker, you can still make this sorbet by pouring the mixture into a shallow dish and stirring it every 30 minutes until frozen solid.
Enjoy your homemade Passion Fruit Sorbet!
Cherry Financier
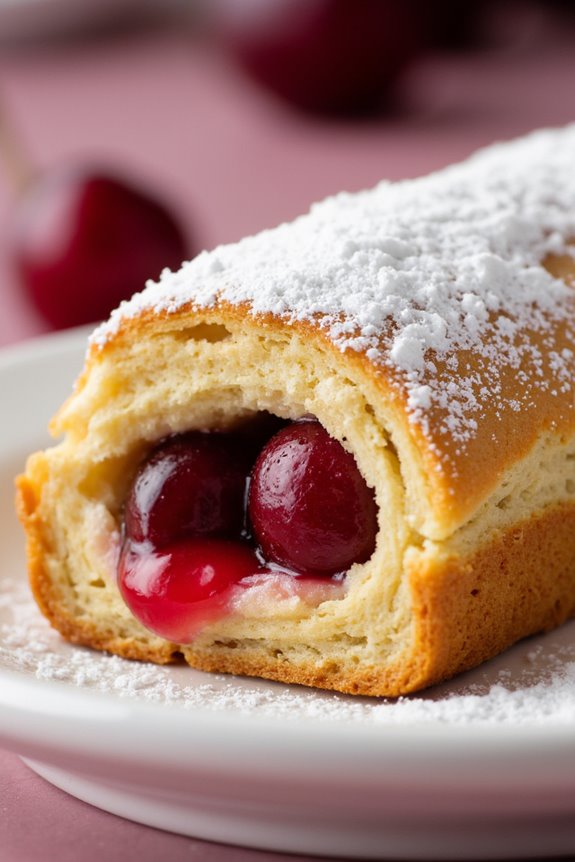
Cherry Financier is a delightful French dessert that marries the rich, buttery flavor of a classic financier with the sweet-tart burst of fresh cherries. Originating in the late 19th century, this almond-flavored cake is known for its moist texture and is perfect for both casual gatherings and elegant dinner parties. The cherry adds a beautiful pop of color and a revitalizing taste, making it a favorite among fruit desserts.
This simple yet sophisticated treat is easy to prepare, requiring minimal ingredients and time. The financier itself is made with ground almonds, which give it a unique nutty flavor, while the cherries provide a juicy contrast. Whether served warm or at room temperature, Cherry Financier is sure to impress and satisfy any sweet tooth.
Ingredients (Serves 4-6)
- 1 cup (100g) ground almonds
- 1/2 cup (65g) all-purpose flour
- 1 cup (200g) granulated sugar
- 1/2 teaspoon baking powder
- 1/4 teaspoon salt
- 4 large egg whites
- 1/2 cup (115g) unsalted butter, melted and slightly cooled
- 1 teaspoon vanilla extract
- 1 cup (150g) fresh cherries, pitted and halved
- Powdered sugar, for dusting (optional)
Cooking Instructions
- Preheat the Oven: Begin by preheating your oven to 350°F (175°C). This step is essential as it guarantees that the financier will bake evenly and develop a lovely golden color.
- Prepare the Baking Pan: Grease a rectangular or square baking pan (approximately 9×5 inches) with butter or line it with parchment paper to prevent sticking. This will help the financier come out easily once baked.
- Mix Dry Ingredients: In a large mixing bowl, whisk together the ground almonds, all-purpose flour, granulated sugar, baking powder, and salt. Combining these dry ingredients first will guarantee that the baking powder is evenly distributed throughout the batter.
- Whisk Egg Whites: In a separate bowl, use a whisk or electric mixer to beat the egg whites until they’re frothy but not stiff. This will add air into the batter, helping the financier achieve a light and airy texture.
- Combine Mixtures: Gently fold the frothy egg whites into the dry ingredients until just combined. Be careful not to overmix, as this can deflate the batter.
- Add Butter and Vanilla: Slowly drizzle in the melted butter and vanilla extract while folding the batter gently. This adds richness and flavor to the financier.
- Incorporate Cherries: Gently fold in the halved cherries, ensuring they’re evenly distributed throughout the batter without breaking them up too much.
- Pour Batter into Pan: Pour the batter into the prepared baking pan, using a spatula to spread it evenly. This ensures that the cake bakes uniformly.
- Bake: Place the pan in the preheated oven and bake for 25-30 minutes or until the top is golden and a toothpick inserted in the center comes out clean. Keep an eye on the financier to prevent overbaking.
- Cool and Serve: Once baked, remove the financier from the oven and allow it to cool in the pan for 10 minutes. Then, transfer it to a wire rack to cool completely. Dust with powdered sugar before slicing and serving, if desired.
Extra Tips
For the best flavor, use ripe, fresh cherries, as they’ll add the most sweetness and juiciness to your financier. If cherries are out of season, you can substitute them with other fruits like raspberries or blueberries.
Additionally, feel free to experiment by adding a splash of almond extract for an extra layer of flavor or by incorporating a handful of chopped nuts for added texture. Enjoy your Cherry Financier as a charming dessert alongside coffee or tea!
Coconut and Mango Panna Cotta
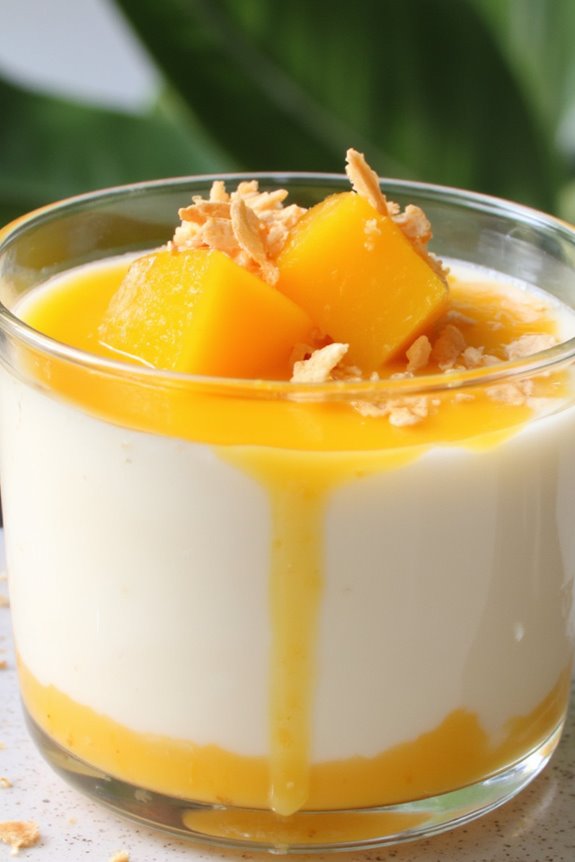
Coconut and Mango Panna Cotta is a delightful twist on the classic Italian dessert, combining the rich, creamy texture of panna cotta with the tropical flavors of coconut and mango. This light and invigorating dessert is perfect for warm weather or any occasion where you want to impress your guests with something special.
The best part is that it’s relatively easy to make and can be prepared in advance, allowing you to enjoy your time with family and friends instead of stressing over dessert.
The panna cotta itself has a luscious coconut flavor, while the mango adds a vibrant sweetness that balances the creaminess. This dessert can be served in individual cups or glasses, making for a beautiful presentation. Topped with a simple mango sauce or fresh mango slices, it’s sure to be a hit at any gathering.
Let’s explore the ingredients and cooking instructions to create this exquisite Coconut and Mango Panna Cotta.
Ingredients (Serves 4-6):
- 1 cup coconut milk
- 1 cup heavy cream
- 1/2 cup sugar
- 1 packet (2 1/4 teaspoons) unflavored gelatin
- 1/4 cup cold water
- 1 teaspoon vanilla extract
- 1 ripe mango, peeled and diced
- 2 tablespoons lime juice
- Pinch of salt
Cooking Instructions:
- Prepare the Gelatin: In a small bowl, sprinkle the unflavored gelatin over the cold water. Let it sit for about 5-10 minutes until it blooms and absorbs the water, becoming a gel-like consistency.
- Heat the Coconut Mixture: In a saucepan, combine the coconut milk, heavy cream, and sugar. Heat over medium heat while stirring until the sugar is fully dissolved and the mixture is hot but not boiling. Remove from heat.
- Incorporate the Gelatin: Once the coconut mixture is hot, add the bloomed gelatin to the saucepan. Stir well until the gelatin is completely dissolved. Make sure there are no lumps and the mixture is smooth.
- Add Flavors: Stir in the vanilla extract and a pinch of salt into the mixture. This enhances the flavors of the panna cotta.
- Pour into Molds: Pour the coconut panna cotta mixture into individual cups or molds. Allow them to cool at room temperature for about 30 minutes, then cover and refrigerate for at least 4 hours, or until set.
- Prepare the Mango Sauce: In a small bowl, combine the diced mango and lime juice. Gently mix to coat the mango pieces. Let it sit for about 15 minutes to allow the flavors to meld.
- Serve the Panna Cotta: Once the panna cotta is set, gently run a knife along the edge of the molds to loosen. Invert the molds onto serving plates, or simply serve them in the cups. Top with the mango mixture before serving.
Extra Tips:
When making Coconut and Mango Panna Cotta, make certain that all your ingredients are at room temperature to help them combine smoothly.
If you prefer a sweeter dessert, feel free to adjust the sugar according to your taste. For added texture, consider garnishing with toasted coconut flakes or fresh mint leaves.
If you want to impress your guests further, serve the panna cotta with a drizzle of passion fruit sauce for an extra tropical flair. Enjoy!
Lemon Verbena Fruit Salad
Lemon Verbena Fruit Salad is a revitalizing and vibrant dish that showcases the delightful flavors of seasonal fruits complemented by the unique aromatic notes of lemon verbena. This light and zesty dessert is perfect for warm days or as a palate cleanser between heavier courses.
With its bright colors and fresh ingredients, this salad not only looks appealing but also offers a delightful combination of sweetness and herbal invigorating quality that will leave your guests impressed.
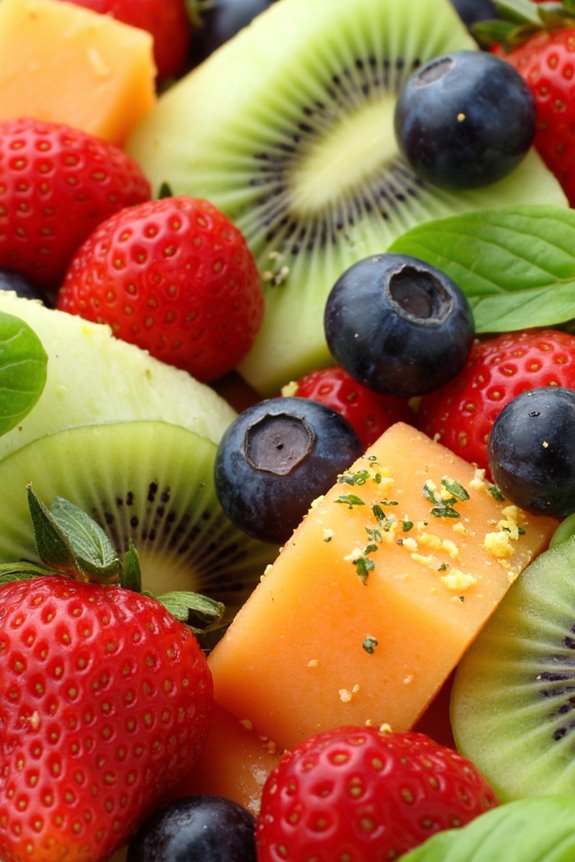
In this recipe, we’ll combine a variety of fruits, such as strawberries, kiwi, and melon, with a lemon verbena infusion that elevates the dish to a new level. The lemon verbena adds a citrusy fragrance that perfectly complements the sweetness of the fruits, making it an ideal dessert for any occasion.
Whether you’re hosting a summer gathering or simply looking for a light treat after dinner, this Lemon Verbena Fruit Salad is sure to be a hit.
Ingredients (Serves 4-6)
- 2 cups strawberries, hulled and quartered
- 2 cups cantaloupe, diced
- 2 cups honeydew melon, diced
- 2 ripe kiwis, peeled and sliced
- 1 cup blueberries
- 1/4 cup fresh lemon verbena leaves, chopped
- 1/4 cup honey
- 1 tablespoon fresh lemon juice
- Zest of 1 lemon
Cooking Instructions
- Prepare the Fruits: Begin by washing all the fruits thoroughly. Hull the strawberries and cut them into quarters. Dice the cantaloupe and honeydew melon into bite-sized pieces, and slice the kiwis. Place all the prepared fruits into a large mixing bowl.
- Make the Lemon Verbena Dressing: In a small bowl, combine the chopped lemon verbena leaves, honey, fresh lemon juice, and lemon zest. Mix well until the honey is fully incorporated with the lemon juice and the lemon verbena is evenly distributed.
- Combine Fruits and Dressing: Pour the lemon verbena dressing over the bowl of mixed fruits. Gently toss the fruits with the dressing using a spatula or spoon, ensuring that all the pieces are coated without mashing them.
- Chill the Salad: Cover the bowl with plastic wrap or a lid and place it in the refrigerator. Allow the salad to chill for at least 30 minutes. This will help the flavors meld together and enhance the overall taste of the dish.
- Serve: After chilling, give the salad one last gentle toss before serving. Spoon the fruit salad into individual bowls or a large serving platter, and garnish with additional lemon verbena leaves if desired.
Extra Tips
When preparing Lemon Verbena Fruit Salad, feel free to customize the fruit selection based on what’s in season or your personal preferences. Other fruits like peaches, mangoes, or raspberries can also work beautifully in this salad.
Additionally, if you’re unable to find lemon verbena, you can substitute it with fresh mint for an equally revitalizing twist. Be sure to serve the salad chilled for the best flavor experience!