

The aroma of freshly baked bread is simply irresistible, isn’t it? These 13 rustic French bread recipes are perfect for turning any dinner into something truly special. Each recipe captures the essence of traditional French baking with simple ingredients and loving techniques. From the classic baguette to savory stuffed breads, there’s something here to elevate your meal. Which one will you try first?
Classic French Baguette
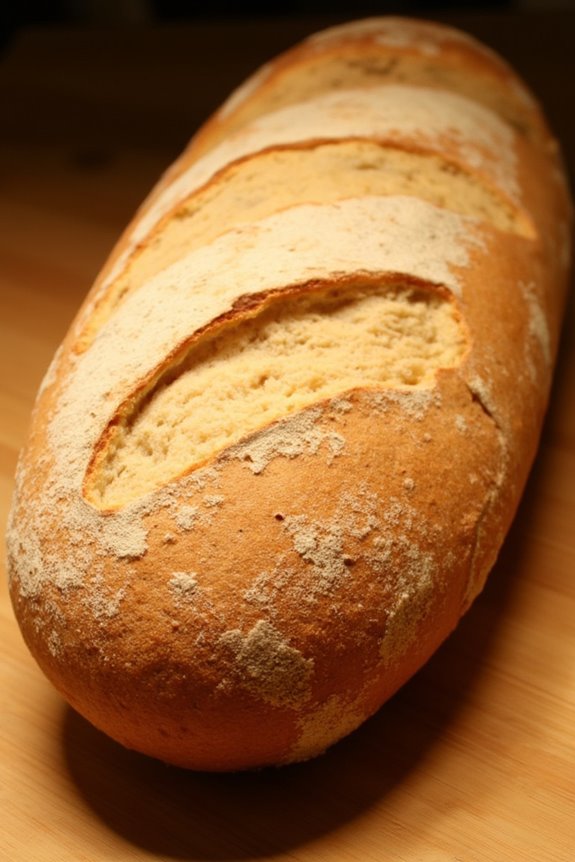
There’s nothing quite like the aroma of freshly baked bread wafting through your kitchen, and a classic French baguette is the epitome of artisanal baking. This simple yet elegant bread has a crispy crust and a soft, airy interior, making it perfect for sandwiches, garlic bread, or simply slathered with butter.
With just a few basic ingredients, you can recreate this iconic French staple right in your own home, impressing family and friends with your baking prowess.
Baking a classic French baguette requires patience and attention to detail, as it involves a few stages of fermentation and shaping. The process may seem intimidating at first, but with practice, you’ll find that making baguettes can be a rewarding and enjoyable experience.
Whether you’re serving your baguette with a hearty stew, as part of a cheese platter, or enjoying it straight from the oven, this recipe is sure to become a beloved addition to your dinner repertoire.
Ingredients (Serves 4-6 people):
- 4 cups all-purpose flour
- 1 ½ cups warm water (about 100°F)
- 2 teaspoons instant yeast
- 2 teaspoons salt
- 1 tablespoon sugar
- Cornmeal (for dusting)
Cooking Instructions:
- Prepare the Dough: In a large bowl, combine the warm water, instant yeast, and sugar. Let it sit for about 5 minutes until it becomes frothy. This indicates that the yeast is active. Next, add the flour and salt to the mixture. Stir with a wooden spoon until a shaggy dough forms.
- Knead the Dough: Transfer the dough onto a lightly floured surface. Knead the dough for about 10 minutes until it becomes smooth and elastic. You can also use a stand mixer with a dough hook attachment for this step, mixing on medium speed for about 7 minutes.
- First Rise: Place the kneaded dough in a lightly oiled bowl, cover it with a clean kitchen towel, and let it rise in a warm place for about 1 to 1.5 hours, or until it has doubled in size.
- Shape the Baguettes: Once the dough has risen, punch it down to release the air. Divide the dough into two equal pieces. Shape each piece into a rectangle and then roll it tightly from one end to the other to form a baguette shape. Pinch the seams to seal.
- Second Rise: Place the shaped baguettes onto a baking sheet lined with parchment paper and dusted with cornmeal. Cover them with a towel and let them rise for another 30-45 minutes until they’re puffy.
- Preheat the Oven: While the baguettes are rising, preheat your oven to 450°F (230°C). Place a shallow baking pan on the bottom rack of the oven to create steam during baking.
- Score the Baguettes: Once the baguettes have risen, use a sharp knife or a lame to make several diagonal slashes on the top of each baguette. This helps the bread expand while baking.
- Bake: Carefully place the baking sheet with the baguettes in the oven. Pour a cup of hot water into the shallow baking pan below to create steam. Bake for 20-25 minutes until the baguettes are golden brown and sound hollow when tapped on the bottom.
- Cool: Remove the baguettes from the oven and let them cool on a wire rack for at least 20 minutes before slicing.
Extra Tips:
To achieve an even better crust, consider placing a cast-iron skillet in the oven while preheating and add ice cubes to it when you place the baguettes in the oven. This additional steam will help create a crustier exterior.
Additionally, try experimenting with different flours, such as bread flour, for a chewier texture, or adding herbs and spices to the dough for a unique twist. Enjoy your freshly baked baguettes with your favorite dips or as a side to your dinner!
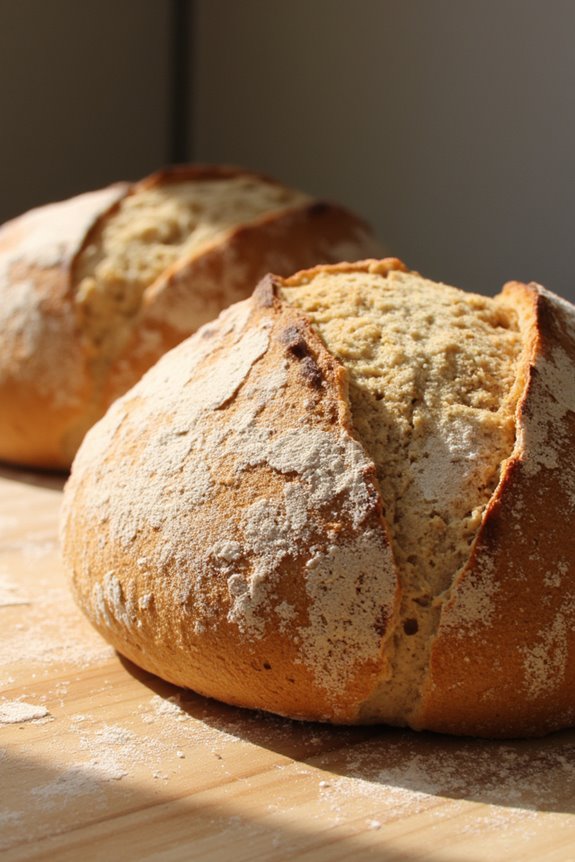
Rustic Country Boule
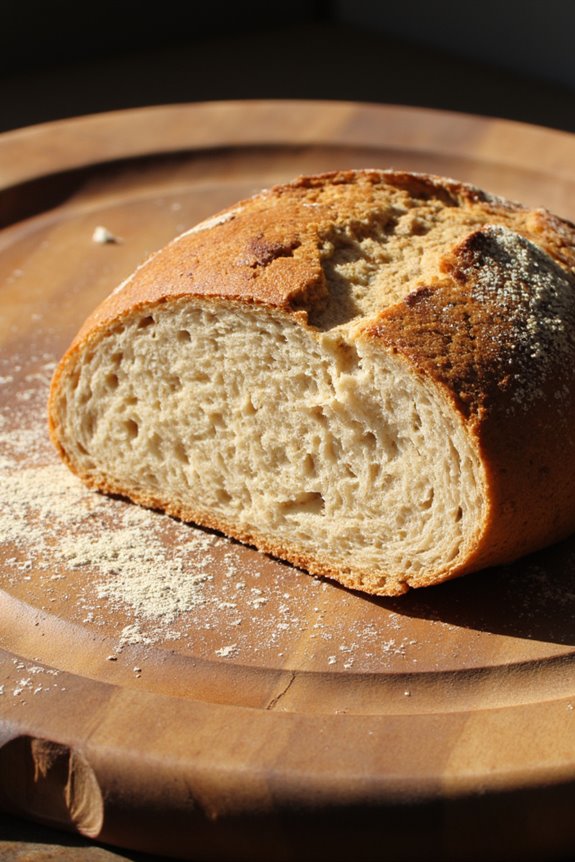
Rustic Country Boule is a classic French bread that embodies the essence of homemade baking. Its crusty exterior and soft, airy interior make it the perfect accompaniment to any meal, whether it’s served alongside a hearty stew or used for dipping into a savory soup. The simplicity of the ingredients allows the natural flavors to shine through, while the fermentation process develops a deep, rich taste.
Making this rustic loaf isn’t just about the end product, but also about the rewarding process of kneading and shaping the dough. This bread is ideal for gatherings, as it can serve a group of 4-6 people. The recipe is straightforward, requiring minimal ingredients, but it does require some patience for the dough to rise. With just a few hours of waiting, you’ll be rewarded with a beautifully baked boule that will impress your family and friends.
So roll up your sleeves and get ready to create a delightful Rustic Country Boule right in your own kitchen!
Ingredients:
- 3 cups all-purpose flour
- 1 ½ teaspoons salt
- 1 teaspoon active dry yeast
- 1 ¼ cups warm water (about 110°F)
- Additional flour for dusting
Cooking Instructions:
- Mix the Dough: In a large mixing bowl, combine the flour, salt, and active dry yeast. Stir these dry ingredients together until they’re well mixed. Gradually pour in the warm water while stirring with a wooden spoon or spatula until a shaggy dough forms. Confirm all the flour is incorporated.
- First Rise: Cover the bowl with a clean kitchen towel or plastic wrap. Let the dough rise at room temperature for about 12-18 hours. This long fermentation allows the flavors to develop and the dough to rise. You know it’s ready when the surface is bubbly and the dough has doubled in size.
- Shape the Dough: Once the dough has risen, generously flour a clean work surface. Turn the dough out onto the floured surface and sprinkle a little flour on top. Using your hands, gently stretch and fold the dough over itself a few times to shape it into a round ball. Be careful not to deflate the dough too much.
- Second Rise: Place the shaped dough onto a floured piece of parchment paper. Cover it with a towel and let it rise for another 1-2 hours, or until it has puffed up considerably.
- Preheat the Oven: About 30 minutes before baking, preheat your oven to 450°F (230°C). Place a Dutch oven (or any heavy oven-safe pot with a lid) inside the oven to heat up.
- Bake the Boule: Carefully remove the hot Dutch oven from the oven. Using the parchment paper, lift the dough and place it into the pot. Cover with the lid and return it to the oven. Bake for 30 minutes with the lid on, then remove the lid and bake for an additional 15-20 minutes until the crust is deep golden brown.
- Cool the Bread: Once baked, carefully remove the boule from the pot and let it cool on a wire rack for at least 30 minutes before slicing. This cooling time is essential as it allows the interior crumb to set properly.
Extra Tips: When making Rustic Country Boule, be mindful of the hydration level of your dough. If your kitchen is particularly humid, you may need to adjust the amount of flour slightly.
Also, for added flavor, consider incorporating herbs or garlic into the dough before the first rise. Finally, using a digital thermometer to check the internal temperature of the bread should read around 200°F when fully baked, confirming a perfectly cooked loaf. Enjoy your baking!
Herb-Infused Focaccia

Herb-Infused Focaccia is a delightful and aromatic bread that perfectly complements any rustic French dinner. This Italian-inspired bread is known for its airy texture and golden crust, infused with fragrant herbs that elevate its flavor profile. The simple combination of flour, water, yeast, and fresh herbs makes it a great addition to your meal, whether served as an appetizer, alongside a salad, or as a base for a delicious sandwich.
Baking focaccia at home isn’t only rewarding but also allows you to customize the herbs and toppings to suit your taste. The process is straightforward, requiring minimal kneading and rising time. You’ll love the way your kitchen fills with the scent of freshly baked bread, and the crispy, herb-studded crust will have everyone reaching for more at the dinner table.
Ingredients (serving size: 4-6 people)
- 4 cups all-purpose flour
- 2 teaspoons salt
- 1 packet (2 ¼ teaspoons) instant yeast
- 1 ½ cups warm water (about 110°F)
- ¼ cup olive oil (plus more for drizzling)
- 2 tablespoons fresh rosemary, chopped
- 2 tablespoons fresh thyme, chopped
- Coarse sea salt for sprinkling
- Optional: Cherry tomatoes, olives, or garlic cloves for topping
Cooking Instructions
- Mix the Dry Ingredients: In a large mixing bowl, whisk together the flour, salt, and instant yeast until well combined. This guarantees that the yeast is evenly distributed throughout the flour, which is vital for proper rising.
- Add Wet Ingredients: Pour in the warm water and ¼ cup of olive oil. Using a wooden spoon or your hands, mix until a sticky dough forms. The stickiness indicates that the dough has enough hydration, which is fundamental for a light and airy focaccia.
- Knead the Dough: Transfer the dough to a lightly floured surface and knead it for about 5-7 minutes until it becomes smooth and elastic. If the dough is too sticky, you can add a little more flour as needed. Kneading develops the gluten, giving the bread its structure.
- First Rise: Place the dough in a lightly greased bowl, cover it with a damp towel or plastic wrap, and let it rise in a warm place for about 1 hour or until it has doubled in size. This fermentation process allows the flavors to develop and the dough to rise.
- Shape the Dough: Once risen, punch down the dough to release excess air. Transfer it to a greased baking sheet and gently stretch it out to fit the pan. Use your fingers to create dimples all over the surface of the dough, which will help the toppings stick.
- Add Herbs and Toppings: Drizzle additional olive oil over the surface of the dough, then sprinkle the chopped rosemary, thyme, and coarse sea salt. If desired, add cherry tomatoes, olives, or garlic cloves on top for added flavor.
- Second Rise: Cover the dough again and let it rise for another 20-30 minutes until it puffs up slightly. This step is important for achieving that fluffy interior.
- Bake: Preheat your oven to 425°F (220°C). Bake the focaccia for 20-25 minutes or until the top is golden brown and crispy. The high temperature helps create a crusty exterior while keeping the inside soft.
- Cool and Serve: Once baked, remove the focaccia from the oven and let it cool slightly on a wire rack before slicing. Serve warm, drizzled with extra olive oil if desired.
Extra Tips
For the best flavor, consider letting your focaccia dough rise slowly in the refrigerator overnight. This extended fermentation enhances the bread’s taste and texture.
Additionally, feel free to experiment with different herbs or toppings to create your perfect version of herb-infused focaccia. Pair it with a good quality olive oil for dipping or serve it alongside your favorite dipping sauces for a delectable starter at your rustic French dinner.
Whole Wheat Pain De Mie
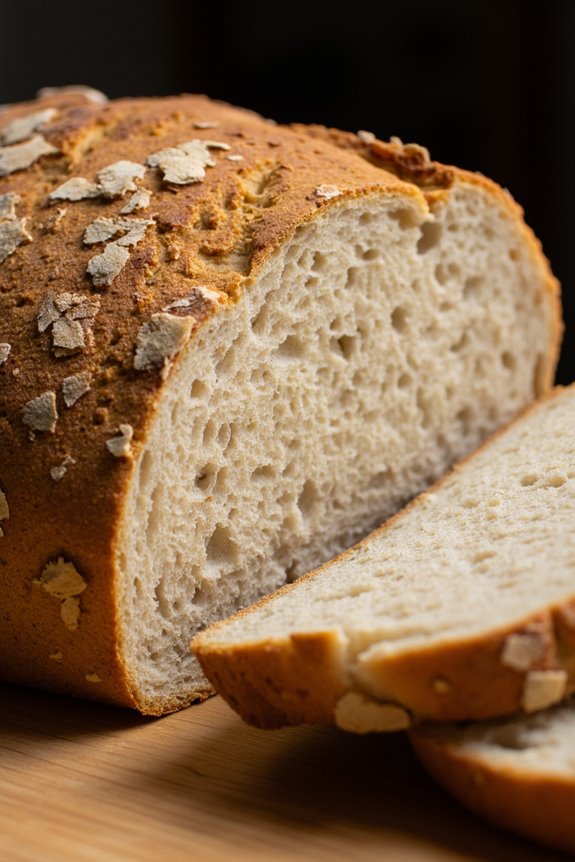
Whole Wheat Pain De Mie is a delightful twist on the classic French bread, offering a heartier texture and a nutty flavor, making it perfect for a rustic dinner. This bread is made using whole wheat flour, which not only enhances its nutritional value but also provides a rich taste that pairs beautifully with various toppings and spreads.
Ideal for sandwiches, toast, or served alongside soups and salads, this bread is sure to become a staple in your kitchen. The process of making Whole Wheat Pain De Mie involves a few simple steps but does require some patience, as the dough needs to rise to achieve the perfect texture.
With just a handful of ingredients and a little bit of time, you can create a loaf that’s crusty on the outside and soft on the inside. Gather your ingredients and get ready to impress your family and friends with this wholesome bread recipe.
Ingredients (Serves 4-6)
- 2 cups whole wheat flour
- 1 cup all-purpose flour
- 1 ½ teaspoons salt
- 1 tablespoon sugar
- 2 teaspoons instant yeast
- 1 ¼ cups warm water (about 110°F)
- 1 tablespoon olive oil
- Additional flour for dusting
Cooking Instructions
- Prepare the Dough: In a large mixing bowl, combine the whole wheat flour, all-purpose flour, salt, sugar, and instant yeast. Mix the dry ingredients until they’re well incorporated. Make a well in the center of the mixture and pour in the warm water and olive oil.
- Mix and Knead: Using a wooden spoon or your hands, mix the ingredients together until a shaggy dough forms. Transfer the dough to a lightly floured surface and knead it for about 10 minutes. You want the dough to be smooth and elastic, which indicates that the gluten has developed properly.
- First Rise: Shape the kneaded dough into a ball and place it in a lightly greased bowl, turning it to coat all sides with oil. Cover the bowl with a clean kitchen towel or plastic wrap and let it rise in a warm place until it doubles in size, approximately 1 to 1.5 hours.
- Shape the Loaf: Once the dough has risen, gently punch it down to release the air. Transfer it back to a floured surface and shape it into a tight rectangle. Place the dough seam-side down into a greased pain de mie pan or a regular loaf pan.
- Second Rise: Cover the shaped dough with a kitchen towel and allow it to rise again for about 30-45 minutes, or until it has puffed up and fills the pan.
- Preheat the Oven: About 15 minutes before baking, preheat your oven to 375°F (190°C). This guarantees the oven is hot enough to give your bread a nice crust.
- Bake the Bread: Once the dough has risen, place it in the preheated oven and bake for 25-30 minutes, or until the loaf is golden brown and sounds hollow when tapped on the bottom. If you’re using a pain de mie pan, you can remove the lid for the last 10 minutes of baking for a crustier finish.
- Cool: After baking, remove the bread from the pan and let it cool on a wire rack for at least 15 minutes before slicing. This cooling period allows the bread to set properly, which enhances its flavor and texture.
Extra Tips
When making Whole Wheat Pain De Mie, the quality of the flour can greatly affect the outcome. Opt for high-quality whole wheat flour and make sure your yeast is fresh for the best results.
Additionally, if you want to enhance the flavor, consider adding herbs or seeds to the dough. For a softer crust, cover the bread with a damp cloth as it cools. Finally, store any leftover bread in an airtight container to maintain its freshness. Enjoy your homemade rustic bread with your favorite spreads or as a side to your main dishes!
Garlic and Rosemary Bread
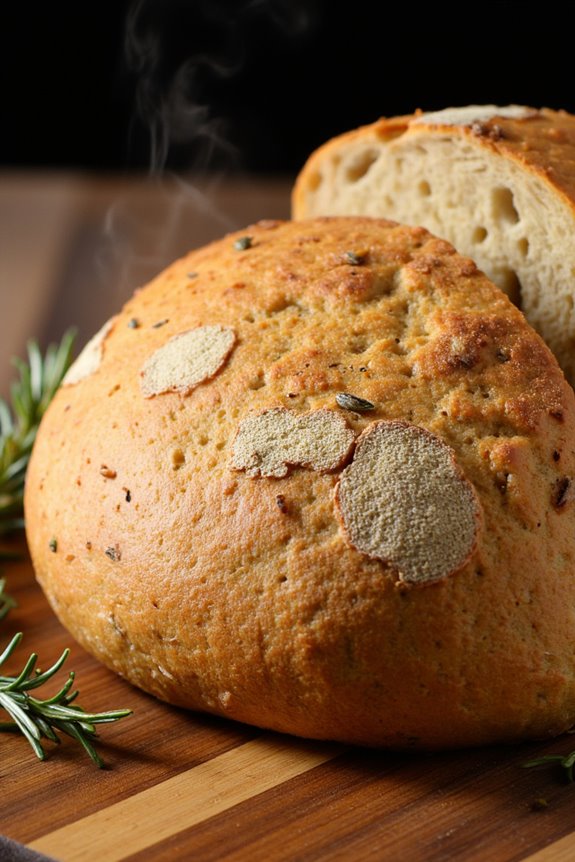
Garlic and Rosemary Bread is a rustic delight that embodies the essence of French cuisine. The combination of aromatic garlic and fragrant rosemary elevates this simple bread, making it the perfect accompaniment to any dinner.
Whether you’re serving it with a hearty stew or as an appetizer with a dip, this bread is bound to impress your guests with its warm, inviting aroma and delightful flavor.
Making Garlic and Rosemary Bread isn’t only easy but also a great way to fill your kitchen with a comforting scent that beckons everyone to the dining table. With a crispy crust and a soft, fluffy interior, this bread is best enjoyed fresh out of the oven.
By following this recipe, you’ll be able to create a loaf that’s perfect for sharing, guaranteeing that everyone will have a slice to enjoy.
Ingredients (Serves 4-6 people):
- 3 cups all-purpose flour
- 1 ½ teaspoons salt
- 2 teaspoons active dry yeast
- 1 tablespoon sugar
- 1 cup warm water (about 110°F)
- 3 tablespoons olive oil
- 4 cloves garlic, minced
- 2 tablespoons fresh rosemary, chopped
- 1 tablespoon butter, melted (for brushing)
- Extra rosemary and garlic for garnish (optional)
Cooking Instructions:
- Activate the Yeast: In a small bowl, combine the warm water, sugar, and active dry yeast. Let it sit for about 5-10 minutes, or until it becomes frothy. This step guarantees that the yeast is alive and will help the bread rise.
- Mix the Dry Ingredients: In a large mixing bowl, whisk together the all-purpose flour and salt. This step combines the ingredients evenly and guarantees that the salt doesn’t come into direct contact with the yeast, which can inhibit its action.
- Combine Wet and Dry Ingredients: Once the yeast mixture is frothy, pour it into the flour mixture along with the olive oil, minced garlic, and chopped rosemary. Mix everything together until a shaggy dough forms.
- Knead the Dough: Turn the dough out onto a lightly floured surface and knead it for about 8-10 minutes, or until it becomes smooth and elastic. This process develops the gluten in the flour, which gives the bread its structure.
- First Rise: Place the kneaded dough in a greased bowl, cover it with a damp cloth or plastic wrap, and let it rise in a warm place for about 1 hour, or until it has doubled in size.
- Shape the Bread: After the dough has risen, punch it down to release any air bubbles. Shape it into a loaf or divide it into smaller rolls, depending on your preference. Place the shaped dough onto a baking sheet lined with parchment paper.
- Second Rise: Cover the shaped dough with a cloth and let it rise again for about 30 minutes, until it puffs up slightly.
- Preheat the Oven: While the dough is rising, preheat your oven to 375°F (190°C). This guarantees that the bread will bake evenly and develop a nice crust.
- Brush and Bake: Once the dough has risen, brush the top with melted butter and sprinkle with additional rosemary and garlic if desired. Bake in the preheated oven for 25-30 minutes, or until the bread is golden brown and sounds hollow when tapped on the bottom.
- Cool and Serve: Remove the bread from the oven and let it cool on a wire rack for at least 10 minutes before slicing. This allows the steam to escape and improves the texture of the bread.
Extra Tips:
For an extra layer of flavor, consider incorporating roasted garlic into the dough instead of raw minced garlic. Roasted garlic has a sweeter, milder taste that complements the rosemary beautifully.
Additionally, you can experiment by adding different herbs such as thyme or oregano for a unique twist. Serve your Garlic and Rosemary Bread warm with a drizzle of olive oil or a side of balsamic vinegar for dipping to enhance the dining experience.
Olive Bread With Sun-Dried Tomatoes

Olive Bread with Sun-Dried Tomatoes is a delightful rustic French bread that infuses the classic bread-making technique with Mediterranean flavors. The combination of briny olives and the rich sweetness of sun-dried tomatoes creates a unique taste that elevates the humble loaf into something extraordinary.
Perfect for dinner parties, picnics, or as an accompaniment to a hearty soup, this bread is certain to impress your guests and satisfy your cravings.
The process of making Olive Bread with Sun-Dried Tomatoes is straightforward, yet the aroma and texture will make it seem like you’ve put in a lot of effort. With a crispy crust and a soft, chewy interior, this bread is both satisfying and versatile.
Serve it warm with a drizzle of olive oil, or use it to create delicious sandwiches. Let’s gather the ingredients and get started on this mouthwatering culinary adventure!
Ingredients (Serves 4-6):
- 3 cups all-purpose flour
- 1 ½ teaspoons salt
- 1 packet (2 ¼ teaspoons) active dry yeast
- 1 cup warm water (about 110°F)
- ½ cup pitted olives, chopped (black or green, or a mix)
- ½ cup sun-dried tomatoes, chopped (oil-packed for more flavor)
- 1 tablespoon fresh rosemary, chopped (optional)
- 1 tablespoon olive oil (for greasing)
Cooking Instructions:
- Prepare the Yeast Mixture: In a small bowl, combine the warm water and active dry yeast. Stir gently and let it sit for about 5-10 minutes until it becomes frothy. This indicates that the yeast is activated and ready to use.
- Mix the Dry Ingredients: In a large mixing bowl, whisk together the all-purpose flour and salt. Confirm the salt is evenly distributed throughout the flour, as it can inhibit yeast activity if in direct contact.
- Combine Wet and Dry Ingredients: Once the yeast mixture is frothy, pour it into the bowl with the flour and salt. Stir with a wooden spoon or your hands until the dough begins to come together.
- Incorporate Olives and Tomatoes: Add the chopped olives, sun-dried tomatoes, and rosemary (if using) to the dough. Mix until they’re evenly distributed throughout the mixture.
- Knead the Dough: Transfer the dough to a floured surface and knead it for about 8-10 minutes until it’s smooth and elastic. If the dough is too sticky, sprinkle a little more flour as needed.
- First Rise: Grease a large bowl with olive oil and place the kneaded dough inside, turning it to coat with oil. Cover the bowl with a clean kitchen towel or plastic wrap, and let it rise in a warm place for about 1-2 hours, or until it has doubled in size.
- Shape the Bread: After the dough has risen, gently punch it down to release the air. Transfer it back to the floured surface and shape it into a round or oval loaf, depending on your preference.
- Second Rise: Place the shaped loaf onto a baking sheet lined with parchment paper. Cover it again and let it rise for another 30-45 minutes until it has puffed up.
- Preheat the Oven: While the loaf is rising, preheat your oven to 425°F (220°C).
- Bake the Bread: Once the dough has risen, make a few shallow slashes on the top of the loaf with a sharp knife. Bake in the preheated oven for 25-30 minutes, or until the bread is golden brown and sounds hollow when tapped on the bottom.
- Cool and Serve: Remove the bread from the oven and let it cool on a wire rack for at least 15 minutes before slicing. Enjoy your Olive Bread with Sun-Dried Tomatoes warm or at room temperature.
Extra Tips:
For the best flavor, consider using a variety of olives, such as Kalamata and green olives, to create a more complex taste profile.
Additionally, if you have fresh herbs like thyme or basil, they can be excellent substitutes or complements to the rosemary.
Always be mindful of the salt content in olives and sun-dried tomatoes, as this can affect the overall flavor of your bread; adjust the added salt accordingly.
Enjoy experimenting with this recipe to make it your own!
Easy No-Knead Bread
If you’re searching for a simple yet delicious bread to accompany your rustic French dinner, search no more than this Easy No-Knead Bread recipe. This bread requires minimal effort and ingredients, making it perfect for both novice bakers and those who want to whip up a quick side without the hassle of traditional kneading. The end result is a crusty exterior with a soft and airy interior, ideal for sopping up sauces or enjoying with a pat of butter.
The beauty of this no-knead bread lies in its long fermentation process, which allows the dough to develop incredible flavor and texture without the need for extensive manual labor. Just mix your ingredients, let them rest, and then bake! In a few hours, you’ll have a fresh loaf that perfectly complements your rustic French dinner spread.
Ingredients (serving size of 4-6 people):
- 3 cups all-purpose flour
- 1 ½ teaspoons salt
- ½ teaspoon instant yeast
- 1 ½ cups warm water (about 110°F)
Cooking Instructions:
- Combine Dry Ingredients: In a large mixing bowl, whisk together the flour, salt, and instant yeast until well combined. This step guarantees that the yeast and salt are evenly distributed throughout the flour.
- Add Water: Pour in the warm water. Use a wooden spoon or spatula to mix until a shaggy dough forms. Make sure there are no dry pockets of flour; the mixture should be sticky and wet.
- First Rise: Cover the bowl with plastic wrap or a clean kitchen towel. Let the dough rise at room temperature for 12 to 18 hours. The longer the dough rises, the more flavor it will develop, so don’t rush this process.
- Shape the Dough: After the first rise, turn the dough out onto a well-floured surface. With floured hands, gently shape the dough into a ball without deflating it too much. This will help maintain its airy structure.
- Second Rise: Place the shaped dough onto a floured piece of parchment paper. Cover it with a kitchen towel and let it rise for another 1 to 2 hours, until it has puffed up considerably.
- Preheat the Oven: About 30 minutes before the bread is ready to bake, preheat your oven to 450°F (230°C). Place a Dutch oven (or heavy pot with a lid) inside the oven to heat up as well. This will create steam when the bread is placed inside, resulting in a crusty exterior.
- Bake the Bread: Carefully remove the hot pot from the oven. Using the parchment paper, lift the dough and place it into the pot. Cover with the lid and bake for 30 minutes. After 30 minutes, remove the lid and bake for an additional 15-20 minutes or until the bread is golden brown.
- Cool and Serve: Once baked, carefully remove the bread from the pot and let it cool on a wire rack for at least 30 minutes before slicing. This cooling time allows the bread to finish cooking and helps improve the texture.
Extra Tips:
For the best results, use a kitchen scale to measure your flour for accuracy. If you want to add extra flavor, consider incorporating herbs or spices into the dough during the mixing stage.
Additionally, if you enjoy a more rustic look, you can score the top of the dough with a sharp knife before baking to create beautiful patterns on the crust. Enjoy your homemade Easy No-Knead Bread with your favorite rustic French dishes!
Sweet Brioche Loaf
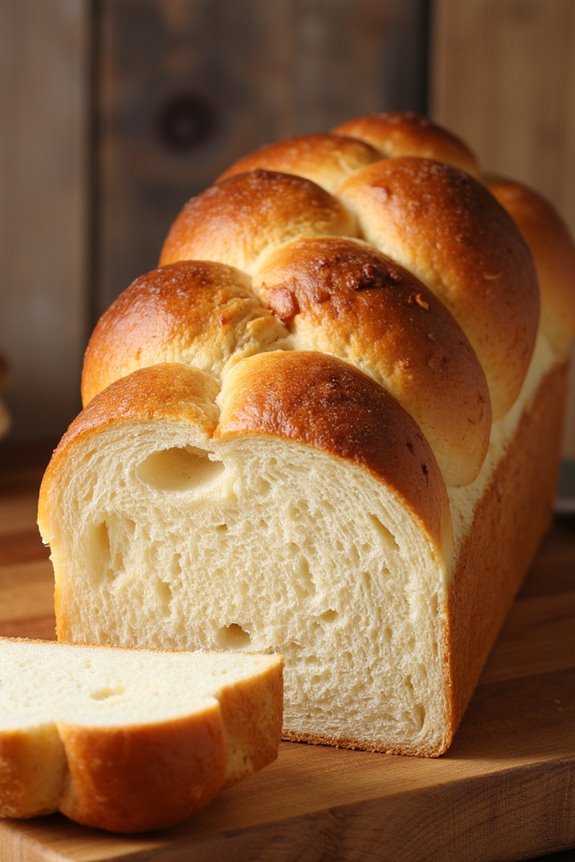
Sweet Brioche Loaf is a delightful French bread that’s rich, tender, and slightly sweet—perfect for breakfast, brunch, or even as a dessert. Its buttery flavor and soft texture make it a favorite among many, and it can be enjoyed on its own or with a variety of toppings. Whether you prefer it toasted with a smear of jam or as the base for French toast, this brioche loaf is sure to impress family and friends alike.
Making brioche at home may seem intimidating, but with a little patience and the right ingredients, you can create a loaf that rivals any bakery. The process involves kneading a rich dough and allowing it to rise, resulting in a beautifully airy bread that’s sure to be a hit at your dinner table. Follow this recipe to create your own Sweet Brioche Loaf that serves 4-6 people.
Ingredients:
- 4 cups all-purpose flour
- 1/2 cup granulated sugar
- 2 teaspoons salt
- 1 tablespoon instant yeast
- 4 large eggs, room temperature
- 1 cup unsalted butter, softened and cubed
- 1/2 cup whole milk, warmed
- 1 teaspoon vanilla extract
- 1 egg, beaten (for egg wash)
Cooking Instructions:
- Prepare the Dough: In a large mixing bowl, combine the flour, sugar, salt, and instant yeast. Whisk together to confirm the dry ingredients are well mixed. Make a well in the center and add the eggs, warmed milk, and vanilla extract. Using a spatula, stir the ingredients together until a shaggy dough forms.
- Knead the Dough: Transfer the dough to a floured surface and begin kneading. Incorporate the softened butter gradually, a few cubes at a time, until fully absorbed. Knead the dough for about 10-15 minutes until it becomes smooth and elastic. The dough should be slightly tacky but not overly sticky.
- First Rise: Shape the dough into a ball and place it in a lightly greased bowl. Cover with plastic wrap or a clean kitchen towel and let it rise in a warm place until doubled in size, approximately 1-2 hours.
- Shape the Loaf: Once the dough has risen, punch it down to release the air. Turn it out onto a lightly floured surface and divide it into three equal pieces. Roll each piece into a long strand, then braid the strands together to form a loaf. Pinch the ends to secure and tuck them underneath.
- Second Rise: Place the braided loaf into a greased 9×5-inch loaf pan. Cover with a kitchen towel and allow it to rise again until it has doubled in size, about 30-45 minutes.
- Preheat the Oven: While the loaf is rising, preheat your oven to 350°F (175°C).
- Egg Wash and Bake: Once the loaf has risen, gently brush the top with the beaten egg for a glossy finish. Bake in the preheated oven for 25-30 minutes or until the top is golden brown and the bread sounds hollow when tapped on the bottom.
- Cool and Serve: Remove the brioche from the oven and let it cool in the pan for about 10 minutes. Then, transfer it to a wire rack to cool completely before slicing.
Extra Tips: When making brioche, the temperature of your ingredients can greatly affect the outcome. Confirm your eggs and milk are at room temperature before mixing, as this helps the dough rise better.
If your kitchen is cool, consider placing the dough in an oven with the light on to create a warm environment for rising. Additionally, for added flavor, you can mix in some citrus zest, chocolate chips, or dried fruits into the dough before the first rise. Enjoy your homemade Sweet Brioche Loaf!
French Onion Soup Bread Bowls

French Onion Soup Bread Bowls are a delightful way to enjoy the classic flavors of this beloved soup while also incorporating the comforting texture of freshly baked bread. The combination of rich, caramelized onions, savory broth, and melty cheese served in a warm, crusty bread bowl creates an inviting dish that’s perfect for gatherings, cozy dinners, or a unique twist on a traditional soup. The rustic nature of the bread enhances the overall experience, allowing you to savor every last bite.
Making French Onion Soup Bread Bowls is easier than it may seem, and the effort is well worth it. Start by caramelizing the onions to develop their sweet flavor, then combine them with aromatic herbs and beef broth. As you prepare your bread bowls, you can use store-bought sourdough or artisan bread, which adds to the rustic feel of the dish. The final touch includes broiling the finished bowls until the cheese is melted and bubbly, creating an irresistible presentation that’s sure to impress.
Ingredients (Serves 4-6)
- 4 large yellow onions, thinly sliced
- 4 tablespoons unsalted butter
- 2 teaspoons salt
- 1 teaspoon sugar
- 4 cups beef broth (or vegetable broth for a vegetarian option)
- 1 teaspoon dried thyme
- 1 tablespoon balsamic vinegar
- 1 cup shredded Gruyère cheese
- 4-6 rounds of crusty sourdough or artisan bread
- Freshly ground black pepper, to taste
Cooking Instructions
- Caramelize the Onions: In a large pot or Dutch oven, melt the butter over medium heat. Add the sliced onions, salt, and sugar. Cook, stirring frequently, for about 30-40 minutes until the onions are soft, golden brown, and caramelized. This slow cooking is essential for developing the deep flavors of the onions.
- Add Broth and Seasonings: Once the onions are caramelized, stir in the dried thyme and balsamic vinegar. Pour in the beef broth and bring the mixture to a gentle simmer. Allow the soup to cook for an additional 15-20 minutes, allowing the flavors to meld together. Taste and adjust seasoning with freshly ground black pepper as necessary.
- Prepare the Bread Bowls: Preheat your oven to 400°F (200°C). While the soup simmers, prepare the bread. Cut the tops off the bread rounds and scoop out the insides, leaving about a 1-inch thick shell. You can save the insides for another use, like bread crumbs or a stuffing.
- Fill and Top the Bowls: Ladle the hot onion soup into each bread bowl, filling them generously. Top each bowl with a handful of shredded Gruyère cheese, ensuring it covers the soup completely.
- Broil the Cheese: Place the filled bread bowls on a baking sheet and transfer them to the oven. Broil on high for about 3-5 minutes, or until the cheese is bubbly and golden brown. Keep a close eye on them to prevent burning.
- Serve: Carefully remove the bread bowls from the oven. Allow them to cool slightly before serving. Garnish with additional thyme or chopped parsley if desired, and enjoy the comforting flavors of French Onion Soup served in a delicious bread bowl.
Extra Tips
For the best results, choose a high-quality broth, as it greatly affects the overall flavor of your soup. If you have time, consider making your own beef broth for an even richer taste.
Additionally, you can experiment with different cheeses, like Swiss or provolone, for a unique twist. If you have leftover soup, it can be stored in the refrigerator for a few days and reheated, but the bread bowls are best enjoyed fresh.
Serve with a side salad or a simple green for a complete meal that will warm your heart and satisfy your appetite.
Parmesan and Thyme Breadsticks
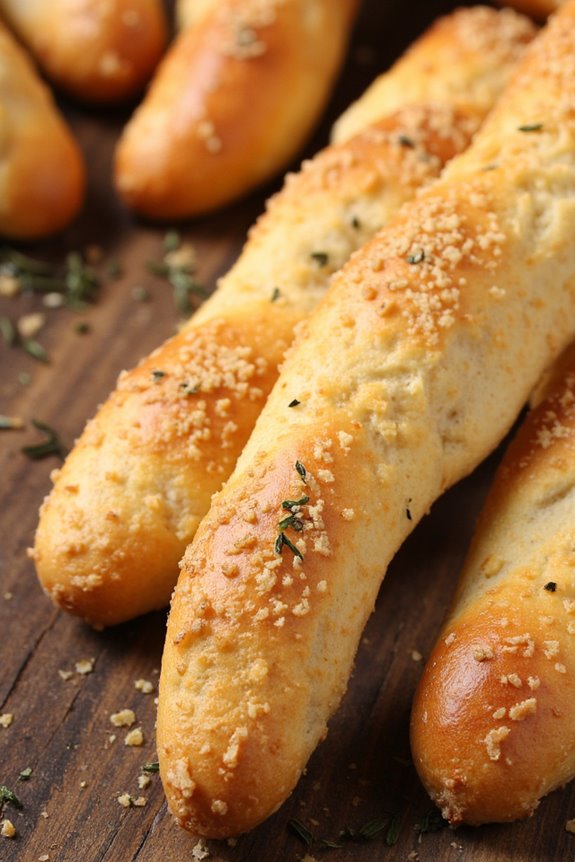
Parmesan and Thyme Breadsticks are the perfect accompaniment to any rustic French bread dinner. With their golden brown tops and aromatic flavors, these breadsticks are both easy to make and delightful to eat. Infused with the rich taste of parmesan cheese and the earthy notes of fresh thyme, they bring an elevated touch to your meal while being simple enough for any home cook to master.
These breadsticks not only add a crunchy texture to your dinner table but also serve as a fantastic appetizer or snack on their own. Serve them warm with your favorite dipping sauce or alongside a hearty soup or salad. Their versatility makes them a staple recipe that you’ll want to return to again and again.
Ingredients (Serves 4-6)
- 1 cup all-purpose flour
- 1 teaspoon baking powder
- 1/2 teaspoon salt
- 1/4 cup grated Parmesan cheese
- 1 tablespoon fresh thyme leaves, chopped (or 1 teaspoon dried thyme)
- 1/4 cup unsalted butter, melted
- 1/4 cup milk
- 1 egg, beaten (for egg wash)
- Extra Parmesan cheese for sprinkling on top
Cooking Instructions
- Preheat the Oven: Begin by preheating your oven to 400°F (200°C). This guarantees that your breadsticks will bake evenly and achieve a perfect golden color.
- Mix Dry Ingredients: In a mixing bowl, combine the all-purpose flour, baking powder, salt, grated Parmesan cheese, and thyme. Use a whisk or fork to blend these dry ingredients thoroughly, confirming that the baking powder and salt are evenly distributed throughout the flour.
- Add Wet Ingredients: Create a well in the center of the dry mixture and pour in the melted butter and milk. Stir gently with a spatula or wooden spoon until the dough begins to come together. Be careful not to over-mix, as this can lead to tough breadsticks.
- Shape the Dough: Transfer the dough onto a lightly floured surface. With your hands, gently knead the dough for a minute or two to bring it all together. Then, roll it out into a rectangle about 1/4 inch thick. Use a sharp knife or pizza cutter to cut the dough into strips, roughly 1 inch wide.
- Prepare for Baking: Place the cut strips onto a baking sheet lined with parchment paper. Brush the tops of the breadsticks with the beaten egg to give them a beautiful golden finish while baking. Sprinkle extra Parmesan cheese over the top of each strip for added flavor.
- Bake: Place the baking sheet in the preheated oven and bake for 12-15 minutes, or until the breadsticks are puffed and lightly browned. Keep an eye on them, as baking times can vary depending on your oven.
- Cool and Serve: Once baked, remove the breadsticks from the oven and let them cool slightly on a wire rack. Serve warm alongside your favorite meal or enjoy them as a snack on their own.
Extra Tips
For added flavor, consider experimenting with different herbs or spices in the dough or as a topping before baking. Rosemary, garlic powder, or even a touch of red pepper flakes can enhance these breadsticks even further.
If you have leftover breadsticks, store them in an airtight container at room temperature for up to two days. Reheat them in the oven for a few minutes to restore their crunchiness before serving.
Fluffy Dinner Rolls
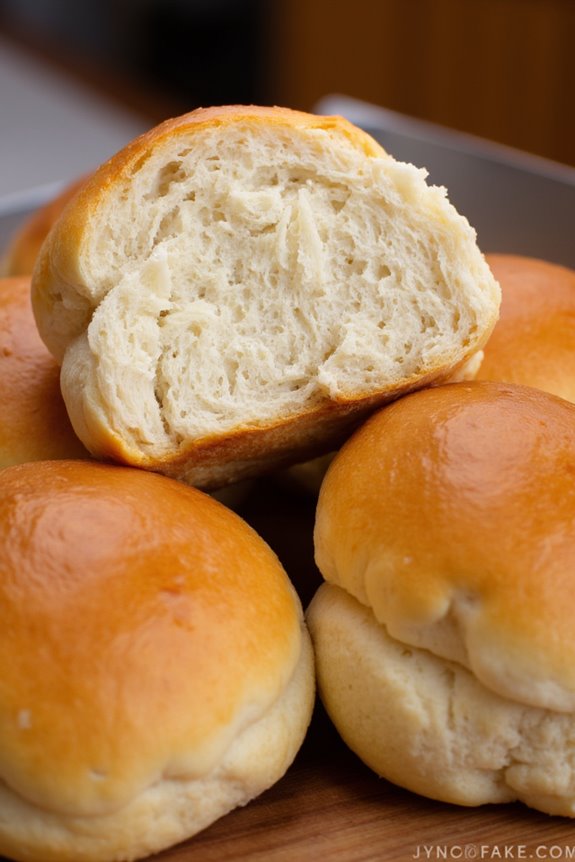
Fluffy Dinner Rolls are the epitome of comfort food, combining the rustic charm of French bread with a soft, pillowy texture that makes them irresistible. These rolls are perfect for soaking up savory sauces or serving alongside a hearty meal, adding a delightful touch to any dinner table.
With their golden-brown crust and tender crumb, they bring warmth and satisfaction to family gatherings or intimate dinners alike.
Making these dinner rolls from scratch is a rewarding experience that fills your kitchen with the warm, inviting aroma of freshly baked bread. The process may take some time, but the end result is well worth the effort.
With just a few simple ingredients and some patience, you can create a batch of fluffy rolls that will impress your family and friends.
Ingredients (Serves 4-6):
- 3 ½ cups all-purpose flour
- 1 packet (2 ¼ tsp) active dry yeast
- 1 cup warm water (about 110°F)
- 2 tbsp sugar
- 2 tsp salt
- 3 tbsp unsalted butter, melted
- 1 egg (for egg wash)
- Extra flour for dusting
Cooking Instructions:
- Activate the Yeast: In a small bowl, combine the warm water and sugar. Sprinkle the yeast over the top and let it sit for about 5-10 minutes until it becomes frothy. This step is essential as it activates the yeast, guaranteeing your rolls rise properly.
- Mix the Dough: In a large mixing bowl, combine the flour and salt. Once the yeast mixture is ready, pour it into the flour mixture along with the melted butter. Stir with a wooden spoon or spatula until the dough begins to come together.
- Knead the Dough: Transfer the dough onto a floured surface and knead it for about 8-10 minutes until it becomes smooth and elastic. If the dough is too sticky, sprinkle a little extra flour as needed. Kneading develops the gluten, which gives the rolls their structure.
- First Rise: Place the kneaded dough into a lightly greased bowl, cover it with a clean kitchen towel or plastic wrap, and let it rise in a warm place for about 1 hour or until it has doubled in size. This fermentation process enhances the flavor and texture of the rolls.
- Shape the Rolls: After the dough has risen, punch it down to release the air. Divide the dough into 12 equal pieces and shape each piece into a ball. Place the balls on a greased baking sheet, spacing them evenly apart.
- Second Rise: Cover the shaped rolls with a towel and let them rise again for about 30-45 minutes, or until they’ve puffed up considerably. This final rise will guarantee that the rolls are light and airy.
- Preheat the Oven: While the rolls are rising, preheat your oven to 375°F (190°C). This guarantees that the rolls will bake evenly and achieve a lovely golden color.
- Egg Wash: In a small bowl, beat the egg and brush it over the tops of the rolls. This step gives the rolls a beautiful, shiny finish when baked.
- Bake the Rolls: Place the baking sheet in the preheated oven and bake for 15-20 minutes or until the rolls are golden brown and sound hollow when tapped on the bottom.
- Cool and Serve: Once baked, remove the rolls from the oven and let them cool on a wire rack for a few minutes before serving. Enjoy them warm with butter or alongside your favorite dinner dishes.
Extra Tips: For the best results, make sure your water is at the right temperature when activating the yeast—too hot can kill it, while too cold can prevent it from activating.
Additionally, if you want to infuse more flavor, consider adding herbs or garlic to the dough before kneading. You can also prepare the dough in advance and refrigerate it overnight for a more intense flavor. Just remember to let it come to room temperature before shaping and baking!
Honey Walnut Bread
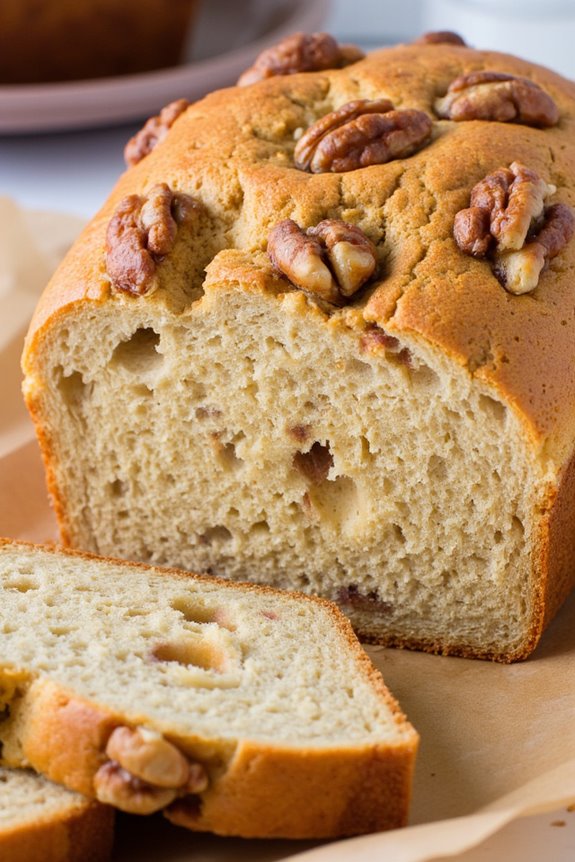
Honey Walnut Bread is a delightful rustic French bread that infuses the natural sweetness of honey with the rich, nutty flavor of walnuts. This bread is perfect for dinner gatherings, serving as a fantastic accompaniment to cheese boards, soups, or simply enjoyed with a pat of butter.
The combination of honey and walnuts not only elevates the flavor profile but also adds a beautiful texture, making it a standout dish on any dinner table.
Making Honey Walnut Bread is a simple yet rewarding process that involves a few basic ingredients and some patience while the dough rises. This recipe yields a loaf that’s crusty on the outside and soft on the inside, with the honey lending a subtle sweetness that balances well with the toasted walnuts.
Whether you’re an experienced baker or trying your hand at bread-making for the first time, this recipe is sure to impress your family and friends.
Ingredients (Serves 4-6 people):
- 3 cups all-purpose flour
- 1 packet (2 ¼ tsp) active dry yeast
- 1 cup warm water (110°F)
- 2 tablespoons honey
- 1 teaspoon salt
- 1 cup chopped walnuts
- 1 tablespoon olive oil (for greasing)
Cooking Instructions:
- Prepare the Yeast Mixture: In a small bowl, combine the warm water and honey. Sprinkle the active dry yeast over the top and let it sit for about 5-10 minutes until frothy. This indicates that the yeast is active and ready to be used.
- Mix Dry Ingredients: In a large mixing bowl, combine the all-purpose flour and salt. Mix well to ascertain the salt is evenly distributed throughout the flour.
- Combine Wet and Dry Ingredients: Once the yeast mixture is frothy, pour it into the bowl with the dry ingredients. Use a wooden spoon to mix until a shaggy dough forms.
- Knead the Dough: Transfer the dough onto a lightly floured surface. Knead the dough for about 8-10 minutes, adding the chopped walnuts halfway through. The dough should become smooth and elastic.
- First Rise: Grease a large bowl with olive oil and place the kneaded dough inside, turning it to coat with oil. Cover the bowl with a clean kitchen towel or plastic wrap, and let it rise in a warm place for about 1 hour, or until it doubles in size.
- Shape the Loaf: After the dough has risen, punch it down to release the air. Turn it out onto a floured surface and shape it into a loaf. You can either form a round or oblong shape based on your preference.
- Second Rise: Place the shaped loaf onto a baking sheet lined with parchment paper. Cover it again with a kitchen towel and let it rise for another 30-45 minutes until it puffs up.
- Preheat the Oven: While the dough is rising, preheat the oven to 375°F (190°C). This guarantees that the bread will bake evenly once it’s ready.
- Bake the Bread: Once the dough has risen, place it in the preheated oven and bake for 25-30 minutes or until the crust is golden brown and the loaf sounds hollow when tapped.
- Cool and Serve: Remove the bread from the oven and let it cool on a wire rack for at least 10 minutes before slicing. Enjoy it warm or at room temperature.
Extra Tips:
To enhance the flavor of your Honey Walnut Bread, consider toasting the walnuts lightly before adding them to the dough. This will bring out their natural oils and elevate their nutty flavor.
Additionally, if you prefer an even sweeter bread, you can drizzle some honey on top before serving or spread a little honey butter on each slice.
It’s also a great idea to store any leftovers in a bread bag to keep it fresh for longer. Happy baking!
Spinach and Feta Stuffed Bread
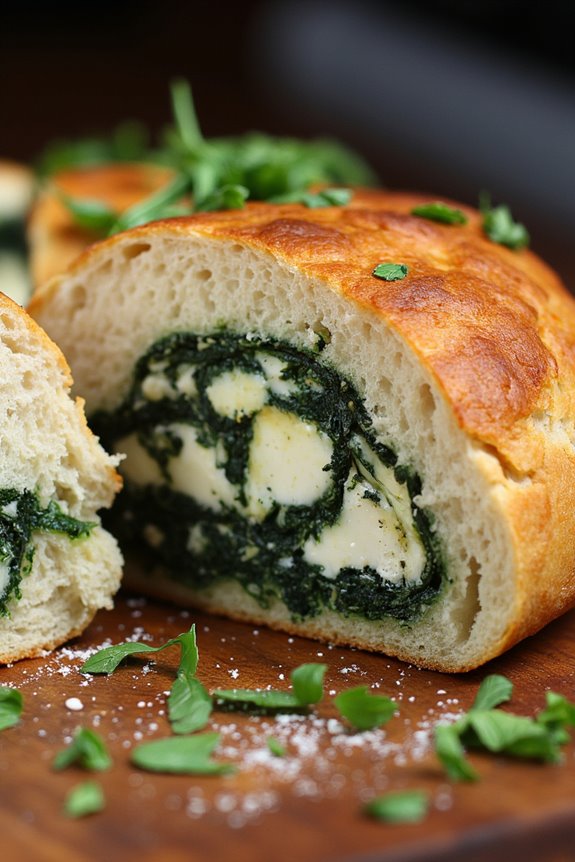
Spinach and Feta Stuffed Bread is a delightful culinary creation that merges the rustic charm of French bread with the vibrant flavors of Mediterranean ingredients. This dish serves as an impressive centerpiece for any dinner table, combining the earthy taste of fresh spinach with the creamy, tangy notes of feta cheese.
The bread isn’t just a vessel but a star player, providing a crunchy exterior that encases a savory filling, making each bite a perfect balance of textures and flavors. The preparation of this stuffed bread is straightforward, allowing even novice cooks to impress their guests.
By baking the bread until golden brown and perfectly crusty, you’ll create an inviting aroma that fills your kitchen. Serve this dish warm, and watch as your family and friends gather around to enjoy every last bite. Whether as an appetizer or a main course, Spinach and Feta Stuffed Bread is sure to become a cherished recipe in your collection.
Ingredients (serves 4-6):
- 1 large rustic French bread loaf
- 2 cups fresh spinach, chopped
- 1 cup feta cheese, crumbled
- 1 cup ricotta cheese
- 1/2 cup grated Parmesan cheese
- 2 cloves garlic, minced
- 1 tablespoon olive oil
- 1 teaspoon dried oregano
- 1/2 teaspoon black pepper
- 1/4 teaspoon salt
- 1 egg, beaten (for egg wash)
- Fresh parsley, chopped (for garnish)
Cooking Instructions:
- Preheat the Oven: Begin by preheating your oven to 375°F (190°C). This guarantees that the bread will bake evenly and achieve a perfect golden crust.
- Prepare the Bread: Carefully slice the top of the rustic French bread loaf off and hollow out the inside using your hands or a spoon, leaving about an inch of bread on the sides and bottom. Set the removed bread aside to use for the filling or for another purpose.
- Sauté the Spinach: In a large skillet, heat the olive oil over medium heat. Add the minced garlic and sauté for about 30 seconds until fragrant. Add the chopped spinach and cook until wilted, about 3-4 minutes. Remove from heat and let it cool slightly.
- Mix the Filling: In a mixing bowl, combine the sautéed spinach, crumbled feta cheese, ricotta cheese, grated Parmesan cheese, dried oregano, black pepper, and salt. Mix well until all ingredients are thoroughly combined.
- Stuff the Bread: Spoon the spinach and cheese mixture into the hollowed-out bread loaf, packing it in gently until it’s filled to the top. Replace the cut-off top of the bread to enclose the filling.
- Apply Egg Wash: Brush the outside of the stuffed bread with the beaten egg. This will give it a beautiful, glossy finish as it bakes.
- Bake the Bread: Place the stuffed bread on a baking sheet and bake in the preheated oven for 25-30 minutes, or until the bread is golden brown and crispy.
- Garnish and Serve: Once baked, remove the bread from the oven and let it cool for a few minutes. Garnish with freshly chopped parsley before slicing and serving warm.
Extra Tips:
When preparing Spinach and Feta Stuffed Bread, consider adding other ingredients such as sun-dried tomatoes or olives for extra flavor. Make certain to use fresh spinach for the best taste and texture.
Additionally, if you enjoy a bit of heat, a pinch of red pepper flakes can be mixed into the filling. To keep the bread from getting soggy, serve the stuffed bread immediately after baking, as it’s best enjoyed fresh. If you have leftovers, reheat them in the oven to restore the original crispiness.