

There’s something truly comforting about the smell of fresh bread baking at home. Transforming your kitchen into a cozy haven is as simple as trying your hand at French bread. From crusty baguettes to soft dinner rolls, each recipe brings its own charm. You might be surprised at just how easy these delightful loaves are to make. Let’s explore some recipes that could become your new favorites.
Classic French Baguette
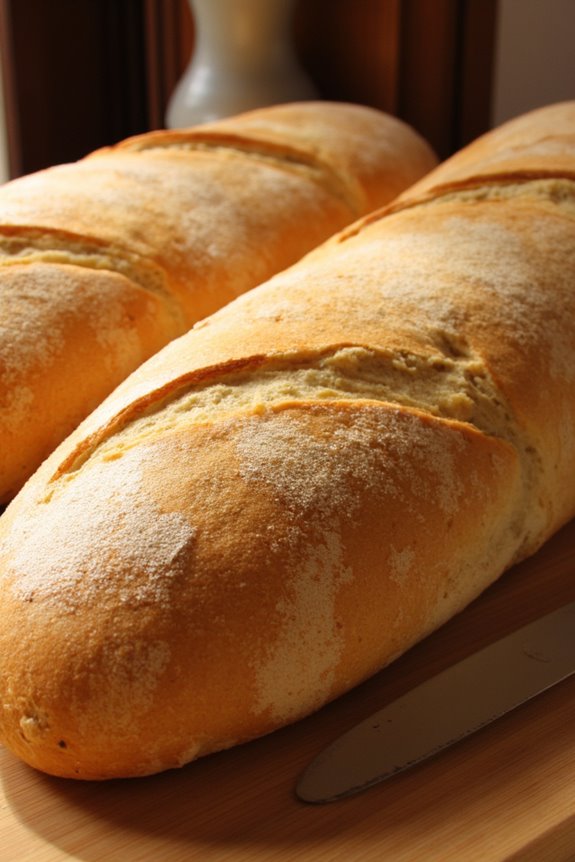
The Classic French Baguette is a timeless staple of French cuisine, known for its crispy crust and soft, airy interior. This long, thin loaf of bread is perfect for accompanying meals, making sandwiches, or simply enjoying with a pat of butter.
Making a traditional baguette at home can be a rewarding and enjoyable experience, as you’ll witness the transformation of simple ingredients into a beautiful loaf that reflects the artistry of French baking.
To achieve the perfect French baguette, it’s crucial to use high-quality ingredients, maintain proper fermentation, and shape the dough correctly. This recipe will guide you through the steps to create 4-6 delicious baguettes that will impress your family and friends. With some patience and practice, you’ll be able to achieve that authentic French taste right in your own kitchen.
Ingredients (serving size: 4-6 people):
- 500g all-purpose flour
- 350ml warm water (around 25-30°C)
- 10g salt
- 7g active dry yeast
- 1 teaspoon sugar
Cooking Instructions:
- Activate the Yeast: In a small bowl, combine the warm water, sugar, and active dry yeast. Stir gently and let it sit for about 5-10 minutes, or until it becomes frothy. This indicates that the yeast is alive and ready to work.
- Mix the Dough: In a large mixing bowl, combine the flour and salt. Make a well in the center and pour in the yeast mixture. Using a wooden spoon or your hands, mix the ingredients until they form a shaggy dough.
- Knead the Dough: Transfer the dough to a lightly floured surface and knead it for about 10-15 minutes until it becomes smooth and elastic. You can perform the windowpane test by stretching a small piece of dough; it should be thin enough to let light pass through without tearing.
- First Rise: Place the kneaded dough into a lightly greased bowl, cover it with a damp kitchen towel or plastic wrap, and let it rise in a warm place for about 1-2 hours, or until it has doubled in size.
- Shape the Baguettes: Once the dough has risen, gently punch it down to release the gas. Divide the dough into 4-6 equal pieces. Shape each piece into a long baguette by flattening it into a rectangle, folding the sides in, and rolling it up tightly. Pinch the seams to seal.
- Second Rise: Place the shaped baguettes seam-side down on a floured baking tray or a baguette pan. Cover them with a damp towel and let them rise for another 30-40 minutes, or until they’ve puffed up.
- Preheat the Oven: While the baguettes are rising, preheat your oven to 240°C (475°F). Place a shallow pan at the bottom of the oven to create steam for a crispy crust.
- Score and Bake: Just before baking, use a sharp razor or bread lame to make several diagonal slashes on the surface of each baguette. This allows steam to escape and helps the bread expand. Place the tray in the oven, and pour a cup of hot water into the shallow pan to create steam. Bake for about 20-25 minutes, or until the baguettes are golden brown and sound hollow when tapped on the bottom.
- Cool: Remove the baguettes from the oven and let them cool on a wire rack for at least 30 minutes before slicing. This allows the interior to set properly.
Extra Tips:
For the best results, verify that your ingredients are at the right temperature and that you allow adequate rising time.
If your kitchen is cool, consider placing the dough in a slightly warmer area to encourage fermentation. Additionally, using a baking stone can help achieve a better crust, and remember to create steam in the oven for that authentic baguette texture.
Enjoy your freshly baked baguettes with an assortment of cheeses, meats, or simply with butter!
Soft French Dinner Rolls
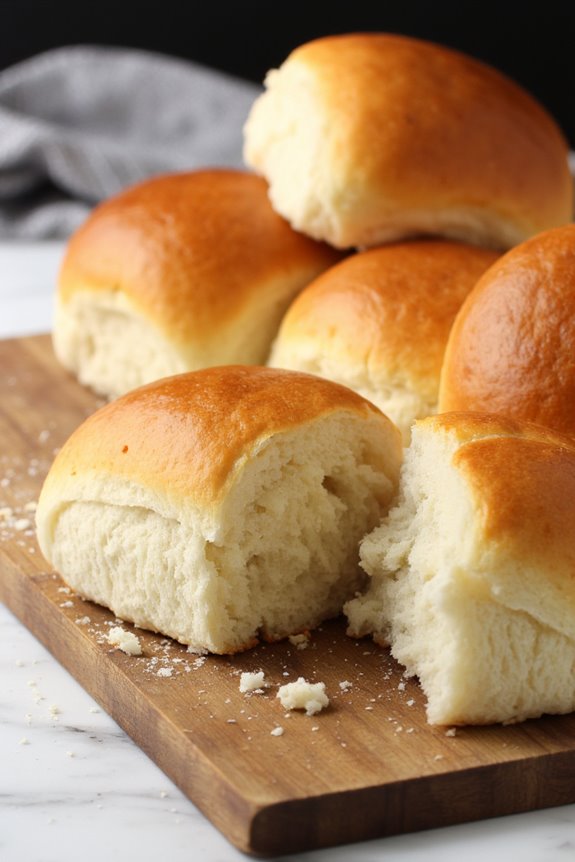
Soft French Dinner Rolls are a delightful addition to any meal, providing a warm and fluffy texture that perfectly complements a variety of dishes. These rolls are characterized by their golden crust and soft interior, making them ideal for soaking up sauces or enjoying with butter. With a simple list of ingredients and straightforward instructions, you can easily whip up a batch of these rolls to impress your family and friends at dinner.
The beauty of Soft French Dinner Rolls lies not only in their taste but also in their versatility. They can be served alongside a hearty stew, as a base for sliders, or even enjoyed plain. The process involves basic bread-making techniques, making it approachable for both beginners and seasoned bakers alike.
So, roll up your sleeves and get ready to indulge in the comforting aroma of homemade bread wafting through your kitchen.
Ingredients (Serves 4-6):
- 3 ½ cups all-purpose flour
- 2 teaspoons instant yeast
- 2 tablespoons sugar
- 1 teaspoon salt
- 1 cup warm milk (about 110°F or 43°C)
- ¼ cup unsalted butter, melted
- 1 large egg
- Extra flour for dusting
Cooking Instructions:
- Prepare the Dough: In a large mixing bowl, combine the flour, yeast, sugar, and salt. Whisk them together until evenly mixed. In a separate bowl, mix the warm milk, melted butter, and egg until thoroughly combined. Gradually add the wet ingredients to the dry ingredients, stirring with a wooden spoon or spatula until a shaggy dough forms.
- Knead the Dough: Transfer the dough onto a lightly floured surface. Knead the dough for about 8-10 minutes until it becomes smooth and elastic. If the dough is sticky, sprinkle a little extra flour as needed, but be careful not to add too much. You should be able to stretch it without tearing.
- First Rise: Lightly grease a large bowl with oil and place the kneaded dough inside, turning it to coat. Cover the bowl with a clean kitchen towel or plastic wrap, and let it rise in a warm place for about 1 to 1.5 hours, or until it has doubled in size.
- Shape the Rolls: Once the dough has risen, punch it down to release the air. Divide the dough into 12 equal pieces. Shape each piece into a ball by tucking the edges under to create a smooth surface. Place the shaped rolls on a baking sheet lined with parchment paper, leaving some space between each roll.
- Second Rise: Cover the rolls with the kitchen towel or plastic wrap again, and let them rise for another 30-45 minutes, until they’re puffed and touching each other.
- Preheat the Oven: While the rolls are rising, preheat your oven to 375°F (190°C).
- Bake the Rolls: Once the rolls have risen, place them in the preheated oven and bake for 15-20 minutes until they’re golden brown on top. For an extra glossy finish, you can brush them with melted butter right after they come out of the oven.
- Cool and Serve: Allow the rolls to cool on the baking sheet for a few minutes before transferring them to a wire rack. Serve warm or at room temperature.
Extra Tips:
To enhance the flavor of your Soft French Dinner Rolls, consider adding a pinch of garlic powder or herbs like rosemary or thyme into the dough.
Additionally, ensuring that your ingredients are at the right temperature is essential; using warm milk helps activate the yeast effectively. If you plan to make these rolls in advance, you can freeze them after baking. Just reheat them in the oven for a few minutes before serving to bring back that fresh-baked aroma and texture.
Enjoy your baking adventure!
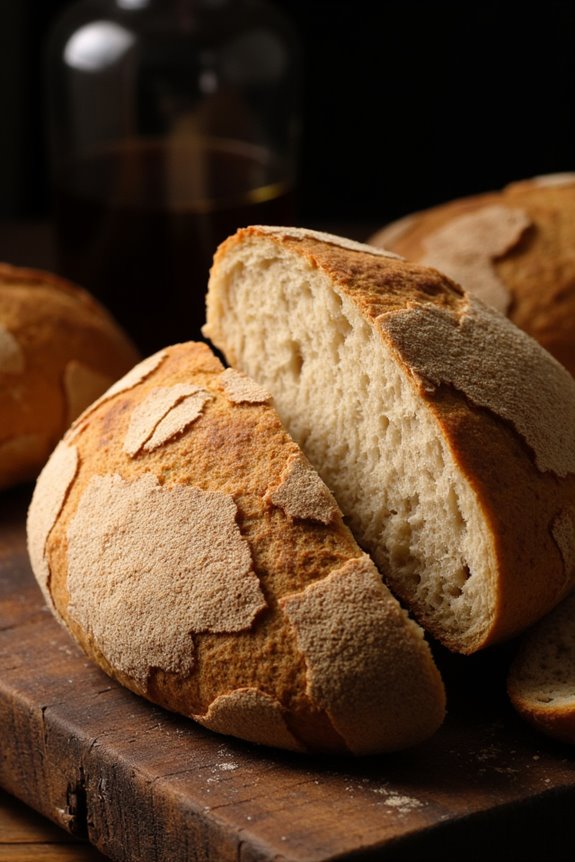
Easy No-Knead French Bread
If you’ve ever dreamed of baking your own French bread at home but have been intimidated by the process, this easy no-knead French bread recipe is just what you need. With minimal effort and no need for extensive kneading, you can achieve a crusty, golden loaf that’s perfect for sandwiches, toasting, or simply enjoying with a pat of butter.
The beauty of this recipe lies in its simplicity and the long fermentation time, which develops incredible flavor without the need for a lot of work.
This recipe calls for just a few basic ingredients that you probably already have in your pantry. By mixing them together and letting the dough rise, you’ll create a delicious loaf that has the perfect crumb and crust. The no-knead method allows for a more relaxed baking experience, making it perfect for beginners or anyone looking to add a homemade touch to their meals.
Ingredients (serving size: 4-6 people)
- 3 cups all-purpose flour
- 1 ½ teaspoons salt
- ½ teaspoon instant yeast
- 1 ½ cups warm water (about 110°F)
Cooking Instructions
- Mix the Dry Ingredients: In a large mixing bowl, combine the flour, salt, and instant yeast. Stir them together until they’re well mixed. This guarantees an even distribution of the yeast and salt throughout the flour, which is important for proper fermentation and flavor.
- Add Water: Pour the warm water into the bowl with the dry ingredients. Using a wooden spoon or spatula, mix until a shaggy, sticky dough forms. Make sure there are no dry flour spots left. The dough should be wet and sticky, which is what makes it easy to work with later on.
- Let the Dough Rise: Cover the bowl with plastic wrap or a clean kitchen towel and let it rise at room temperature for 12 to 18 hours. This long fermentation period is essential for developing flavor and creating the characteristic texture of French bread. The dough will rise and become bubbly.
- Shape the Dough: After the dough has risen, flour a clean work surface and gently scrape the dough out of the bowl without deflating it too much. Dust the top with a little more flour, then fold the dough over itself a couple of times to form a rough ball.
- Second Rise: Place the shaped dough on a piece of parchment paper and cover it with a kitchen towel. Let it rise for another 1 to 2 hours, until it has puffed up noticeably.
- Preheat the Oven: About 30 minutes before baking, preheat your oven to 450°F (232°C). Place a Dutch oven (with the lid on) inside the oven to heat up as well. This will create steam when you bake the bread, giving it a crispy crust.
- Bake the Bread: Once the oven has reached temperature, carefully remove the hot Dutch oven. Using the parchment paper, lift the dough and place it inside the pot. Cover with the lid and bake for 30 minutes. After 30 minutes, remove the lid and bake for an additional 15 to 20 minutes until the bread is golden brown and has a hollow sound when tapped.
- Cool and Serve: Once baked, remove the bread from the Dutch oven and let it cool on a wire rack for at least 30 minutes before slicing. This cooling period allows the interior crumb to set properly.
Extra Tips
For added flavor, consider incorporating herbs or garlic into the dough during the mixing step. Additionally, if you want to experiment with different flours, you can substitute a portion of the all-purpose flour with whole wheat or bread flour for a unique taste and texture.
Remember that the dough is meant to be sticky, so don’t be tempted to add too much extra flour while shaping. Enjoy your freshly baked French bread with a variety of toppings or as a side to your favorite soups and salads!
Garlic Herb French Loaf
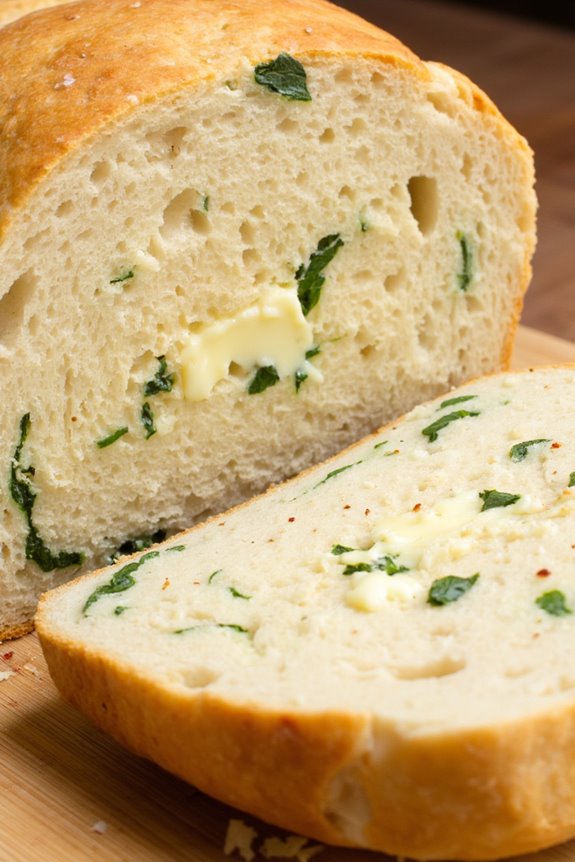
Garlic Herb French Loaf is a delectable side dish that brings the aromatic flavors of garlic and fresh herbs to the classic French bread experience. This recipe is perfect for those who love a fragrant and flavorful addition to their meals.
Whether served alongside pasta, grilled meats, or simply enjoyed on its own, this garlic herb loaf is bound to impress your family and friends. The combination of butter, garlic, and herbs creates a mouthwatering aroma that fills your kitchen, making it a delightful addition to any dining occasion.
Preparing Garlic Herb French Loaf is straightforward and requires only a few simple ingredients. With a crispy crust and soft, flavorful interior, this loaf isn’t only a feast for the palate but also a visual delight.
Once you master this recipe, it can easily become a staple in your culinary repertoire. Gather your ingredients and prepare to create a loaf that will elevate any meal.
Ingredients (Serves 4-6):
- 1 large French baguette
- 1/2 cup unsalted butter, softened
- 4 cloves garlic, minced
- 2 tablespoons fresh parsley, chopped
- 1 tablespoon fresh basil, chopped
- 1 teaspoon dried oregano
- 1/2 teaspoon salt
- 1/4 teaspoon black pepper
- 1/4 teaspoon red pepper flakes (optional)
- 1/4 cup grated Parmesan cheese (optional)
Cooking Instructions:
- Preheat the Oven: Begin by preheating your oven to 375°F (190°C). This will guarantee that your bread bakes evenly and achieves a perfect golden crust.
- Prepare the Garlic Herb Mixture: In a medium bowl, combine the softened butter, minced garlic, chopped parsley, chopped basil, dried oregano, salt, black pepper, and red pepper flakes (if using). Mix well until all ingredients are thoroughly combined. This mixture will be spread onto the bread to infuse it with flavor.
- Slice the Baguette: Take the large French baguette and slice it in half lengthwise. This allows for easy spreading of the garlic herb mixture and helps the loaf cook evenly.
- Spread the Mixture: Using a spatula or a butter knife, generously spread the garlic herb mixture over the cut sides of the baguette. Attain an even layer for maximum flavor. If you’re using Parmesan cheese, sprinkle it evenly on top of the butter mixture at this stage.
- Wrap in Foil: Once the baguette is coated with the garlic herb mixture, place the two halves back together and wrap them tightly in aluminum foil. This will help to keep the moisture in and allow the flavors to meld during baking.
- Bake the Loaf: Place the wrapped loaf in the preheated oven and bake for about 15-20 minutes. If you prefer a crispier crust, you can unwrap the aluminum foil for the last 5 minutes of baking to allow the top to brown.
- Serve: After baking, carefully remove the loaf from the oven and let it cool for a minute. Unwrap the foil and cut the loaf into slices. Serve warm and enjoy the delicious garlic herb flavor!
Extra Tips:
For an even more robust flavor, consider adding a splash of olive oil to the garlic herb mixture.
You can also experiment with different herbs such as thyme or rosemary for a unique twist. If you want to make the loaf ahead of time, you can prepare the garlic herb mixture and spread it on the bread, then wrap it and store it in the refrigerator for up to a day before baking.
This will save you time and still guarantee a wonderful taste when you’re ready to serve!
Rustic French Country Bread
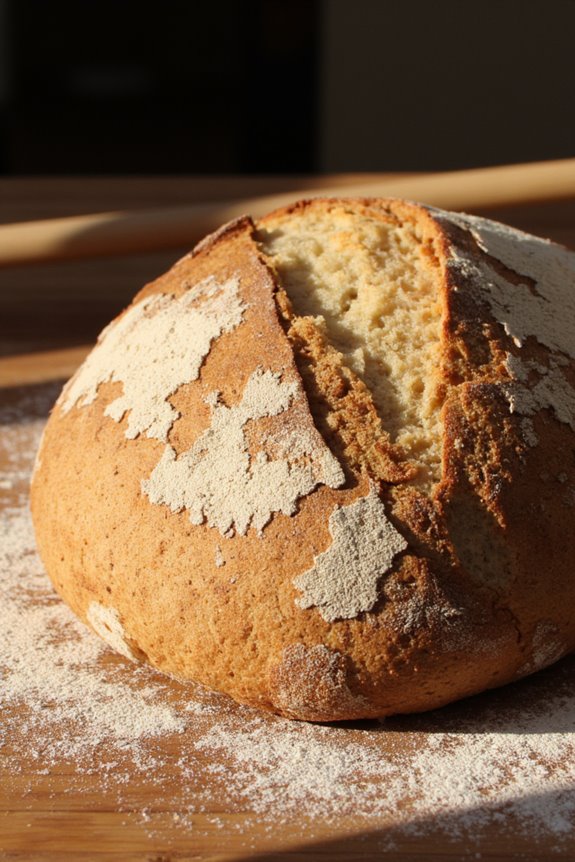
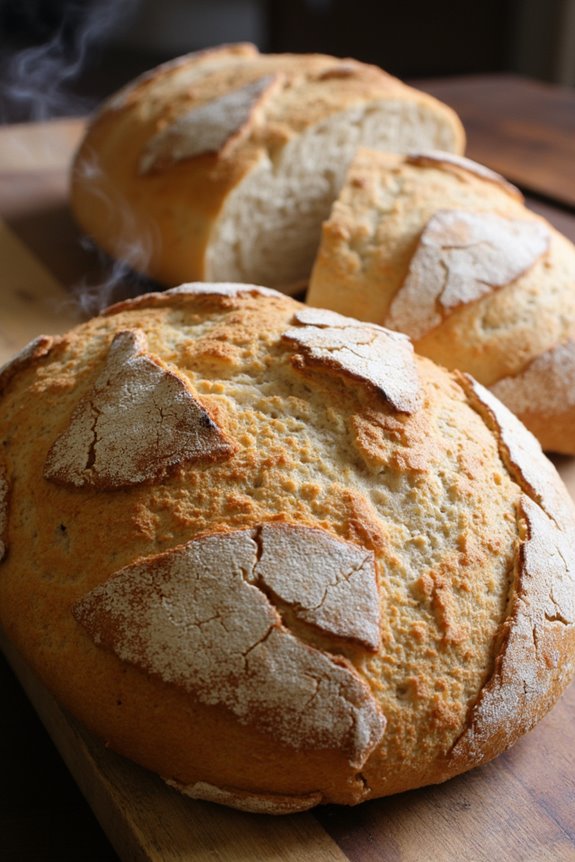
Rustic French Country Bread is a delightful and hearty loaf that captures the essence of traditional French baking. With its thick, crusty exterior and soft, chewy interior, this bread is perfect for pairing with a variety of meals or enjoying on its own with a bit of butter. The recipe highlights the beauty of simple ingredients and the art of slow fermentation, resulting in a loaf that not only looks impressive but also boasts a depth of flavor that’s hard to resist.
This bread is perfect for gatherings, picnics, or simply enjoying at home with family. Although it requires some time for the dough to rise and develop flavor, the actual hands-on time is minimal. The key to attaining that signature rustic look is to embrace the imperfections; each loaf will have its own unique character. So roll up your sleeves and prepare to enjoy the rewarding experience of making your own Rustic French Country Bread.
Ingredients (Serves 4-6):
- 3 cups all-purpose flour
- 1 ½ teaspoons salt
- 1 teaspoon instant yeast
- 1 ¼ cups lukewarm water
- Extra flour for dusting
- Cornmeal for dusting (optional)
Cooking Instructions:
- Mix the Dry Ingredients: In a large mixing bowl, combine 3 cups of all-purpose flour, 1 ½ teaspoons of salt, and 1 teaspoon of instant yeast. Stir the dry ingredients together until they’re evenly mixed, making sure that the salt and yeast are well incorporated into the flour.
- Add Water: Gradually add 1 ¼ cups of lukewarm water to the dry mixture. Use a wooden spoon or your hands to combine the ingredients until a shaggy dough forms. It’s important to confirm that all the flour is moistened, but don’t knead the dough at this stage.
- First Rise: Cover the bowl with plastic wrap or a damp kitchen towel and let the dough rise at room temperature for 12 to 18 hours. During this time, the dough will bubble and expand, developing flavor and texture. Aim for a warm spot in your kitchen to encourage fermentation.
- Shape the Dough: After the first rise, lightly flour a clean surface and turn the dough out onto it. With floured hands, gently stretch and fold the dough a few times to form a rough ball. Be careful not to deflate it too much, as you want to retain the air bubbles that have formed.
- Second Rise: Place the shaped dough seam-side down on a floured surface or a piece of parchment paper. Cover it with a cloth and let it rise again for about 1 to 2 hours, or until it has puffed up noticeably.
- Preheat the Oven: About 30 minutes before baking, preheat your oven to 450°F (230°C). If you have a Dutch oven or a baking stone, place it in the oven to preheat as well. This helps create a steamy environment for the bread, resulting in a crispy crust.
- Bake the Bread: Once the oven is hot, carefully remove the Dutch oven or baking stone. If using a Dutch oven, remove the lid and gently place the dough inside, seam-side up. If using a baking stone, carefully transfer the dough onto it. Optionally, you can dust the surface with cornmeal before placing the dough. Cover with the lid or a baking dome. Bake for 30 minutes covered, then remove the lid and bake for an additional 15-20 minutes, or until the bread is golden brown and sounds hollow when tapped on the bottom.
- Cool the Bread: Once baked, transfer the bread to a wire rack to cool completely before slicing. This step is vital, as cutting into the bread too soon can result in a gummy texture.
Extra Tips:
When making Rustic French Country Bread, patience is key. The long fermentation process not only enhances the flavor but also contributes to the bread’s texture.
If you want to experiment, feel free to incorporate herbs, garlic, or even olives into the dough during the mixing stage for added flavor. Additionally, storing the bread in a paper bag at room temperature will help maintain its crusty exterior while keeping the inside soft. Enjoy your baking adventure!
Honey Wheat French Bread
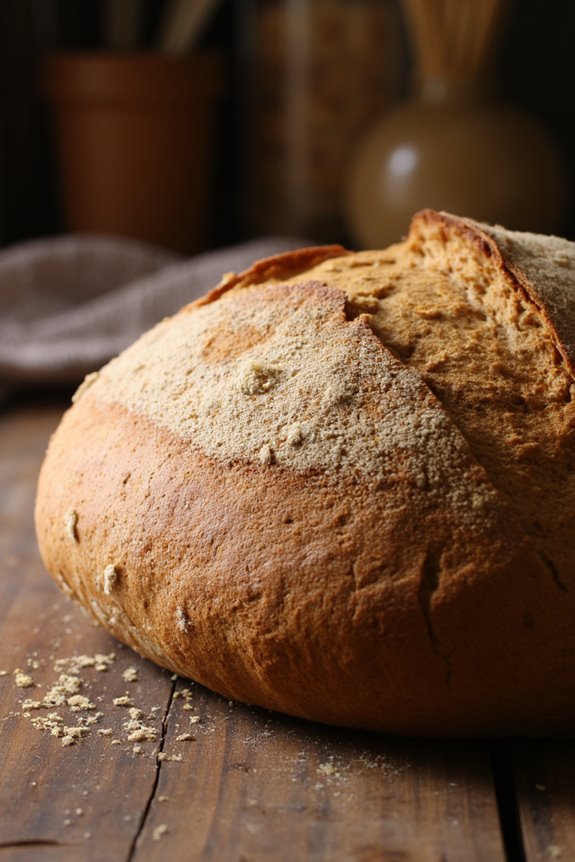
Honey Wheat French Bread is a delightful twist on traditional French bread, combining the rich flavors of whole wheat flour with the natural sweetness of honey. This bread is perfect for any meal, whether served alongside a hearty soup, used for sandwiches, or simply enjoyed with a pat of butter. The addition of honey not only enhances the flavor but also assists in creating a beautiful crust while keeping the inside tender and moist.
Making Honey Wheat French Bread at home is a rewarding experience. The aroma of freshly baked bread wafting through your kitchen is unmatched, and the satisfaction of slicing into a warm loaf is hard to beat. With just a few simple ingredients and some patience, you can impress your family and friends with this wholesome and delicious bread.
Ingredients (Serves 4-6)
- 2 cups whole wheat flour
- 1 cup all-purpose flour
- 1 tablespoon instant yeast
- 1 tablespoon salt
- 2 tablespoons honey
- 1 ½ cups warm water (about 110°F)
- 2 tablespoons olive oil
- Cornmeal (for dusting)
Cooking Instructions
- Prepare the Dough: In a large mixing bowl, combine the whole wheat flour, all-purpose flour, instant yeast, and salt. Mix the dry ingredients well to guarantee even distribution. In a separate bowl, combine the warm water and honey, stirring until the honey is dissolved. Slowly add the honey-water mixture and olive oil to the dry ingredients, mixing until a shaggy dough forms.
- Knead the Dough: Transfer the dough onto a lightly floured surface. Knead the dough for about 8-10 minutes, adding a little extra all-purpose flour as needed to prevent sticking. The dough should become smooth and elastic. Alternatively, you can use a stand mixer with a dough hook attachment on medium speed for about 5-7 minutes.
- First Rise: Shape the kneaded dough into a ball and place it in a lightly greased bowl, turning it to coat with oil. Cover the bowl with a clean kitchen towel or plastic wrap. Let the dough rise in a warm, draft-free location for about 1 to 1.5 hours, or until it has doubled in size.
- Shape the Loaf: After the dough has risen, gently punch it down to release any air. Turn it out onto a floured surface and shape it into a rectangle. Roll the dough tightly into a loaf shape, pinching the seams to seal. Place the shaped loaf seam-side down onto a baking sheet lined with parchment paper, dusted with cornmeal.
- Second Rise: Cover the shaped loaf with a towel and let it rise again for about 30-45 minutes, or until it has puffed up noticeably. Preheat your oven to 375°F (190°C) during this time.
- Bake the Bread: Once the loaf has risen, make a few slashes on top of the dough with a sharp knife to allow steam to escape while baking. Place the baking sheet in the preheated oven and bake for 25-30 minutes, or until the bread is golden brown and sounds hollow when tapped on the bottom.
- Cool and Serve: Remove the bread from the oven and let it cool on a wire rack for at least 15 minutes before slicing. This cooling period helps set the texture of the bread.
Extra Tips
For the best results, verify that your water is at the right temperature when activating the yeast—too hot can kill the yeast, while too cold can hinder its growth.
If you want a crustier loaf, place a pan with water in the oven while the bread bakes to create steam. This technique will help develop a beautiful crust.
Additionally, you can experiment with adding seeds or herbs to the dough for extra flavor and texture. Enjoy your freshly baked Honey Wheat French Bread, and don’t hesitate to share it with friends and family!
Fluffy French Brioche
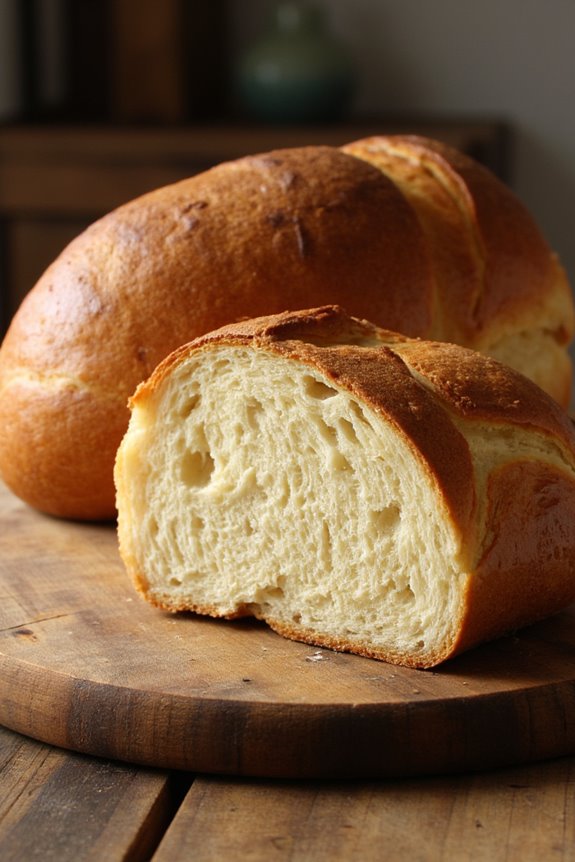
Fluffy French Brioche is a delightful and rich bread that’s perfect for breakfast, brunch, or as a sweet treat any time of the day. This soft, buttery bread is characterized by its airy texture and slightly sweet flavor, making it a hit among both adults and children. The dough is enriched with eggs and butter, resulting in a tender crumb that can be enjoyed plain or dressed up with jams, chocolate spreads, or as the base for delicious French toast.
Making Fluffy French Brioche might seem intimidating, but with a little patience and attention, anyone can master this classic French recipe. The process involves creating a dough that requires minimal kneading, allowing it to rise properly to achieve that fluffy texture. While it may take some time to prepare due to the rising periods, the end result is well worth the wait, providing a warm, fragrant loaf that can elevate any meal.
Ingredients (Serves 4-6 people)
- 4 cups all-purpose flour
- 1/2 cup granulated sugar
- 1 teaspoon salt
- 1 packet (2 1/4 teaspoons) active dry yeast
- 1/2 cup whole milk, warmed
- 4 large eggs, at room temperature
- 1 cup unsalted butter, softened
- 1 egg (for egg wash)
Cooking Instructions
- Activate the Yeast: In a small bowl, combine the warm milk and the active dry yeast. Stir gently and let it sit for about 5-10 minutes until it becomes frothy. This indicates that the yeast is active and ready to be used in the dough.
- Mix Dry Ingredients: In a large mixing bowl, whisk together the flour, sugar, and salt. Make sure these dry ingredients are well combined before adding the wet ones, as this helps distribute the salt and sugar evenly throughout the dough.
- Combine Ingredients: Create a well in the center of the dry ingredients and add the frothy yeast mixture along with the eggs. Using a wooden spoon or a spatula, mix the ingredients together until a shaggy dough forms.
- Knead the Dough: Transfer the dough onto a lightly floured surface and knead for about 10 minutes until it becomes smooth and elastic. If the dough is too sticky, add a little more flour as needed, but be careful not to overdo it.
- Incorporate Butter: Gradually add the softened butter, a few tablespoons at a time, kneading well after each addition until fully incorporated. This step can be a bit messy, but it’s essential for achieving that rich brioche texture.
- First Rise: Place the dough in a greased bowl, cover it with a clean kitchen towel or plastic wrap, and let it rise in a warm place for about 1-2 hours or until it has doubled in size.
- Shape the Brioche: Once the dough has risen, punch it down to release any air bubbles. Turn it out onto a floured surface and divide it into 3 equal pieces. Roll each piece into a log and braid them together, or shape them into individual rolls for a more rustic presentation.
- Second Rise: Arrange the shaped dough in a greased loaf pan or on a baking sheet, cover it again, and let it rise for another hour until puffy.
- Preheat the Oven: While the dough is rising, preheat your oven to 375°F (190°C).
- Egg Wash: Beat the single egg for the egg wash and gently brush it over the top of the brioche for a beautiful golden finish.
- Bake: Bake the brioche in the preheated oven for about 25-30 minutes or until it’s golden brown and sounds hollow when tapped on the bottom.
- Cool and Serve: Remove the brioche from the oven and let it cool in the pan for about 10 minutes before transferring it to a wire rack to cool completely. Slice and enjoy!
Extra Tips
For the best results, use high-quality ingredients, especially butter and eggs, as they greatly impact the flavor. Additionally, allowing the brioche to cool completely before slicing will help maintain its structure.
If you want to infuse additional flavors, consider adding orange zest or vanilla extract to the dough. Brioche can also be frozen for later use; wrap it tightly in plastic wrap and then in aluminum foil to prevent freezer burn. When ready to enjoy, simply thaw it at room temperature or warm it in the oven.
French Pain De Mie
French Pain De Mie is a classic bread known for its soft, tender interior and delicate crust. This type of bread is often used for making sandwiches or served alongside soups and salads. Its fine crumb and even texture come from the use of a Pullman loaf pan, which gives the bread its characteristic shape and guarantees uniform baking. Pain De Mie has roots in French baking traditions and is loved for its versatility and delicious flavor.
Making this delightful bread takes some time, but the results are well worth the effort. The dough is enriched with butter and milk, which adds richness and flavor to the bread. Once baked, you’ll be greeted with the aroma of freshly baked bread wafting through your kitchen. Slice it thinly for perfect sandwiches or enjoy it toasted with a bit of butter for breakfast.
Ingredients (Serves 4-6)
- 3 cups all-purpose flour
- 1 tablespoon sugar
- 2 teaspoons salt
- 2 teaspoons instant yeast
- 1 cup whole milk, warmed to about 110°F
- 1 large egg
- 4 tablespoons unsalted butter, melted and cooled
- Additional butter for greasing the pan
Cooking Instructions
- Prepare the Dough: In a large mixing bowl, combine the flour, sugar, salt, and instant yeast. Mix the dry ingredients together until well combined. Make a well in the center and add the warmed milk, egg, and melted butter. Using a wooden spoon, mix the ingredients until they form a rough dough.
- Knead the Dough: Transfer the dough to a lightly floured surface and knead for about 8-10 minutes until it becomes smooth and elastic. If the dough is sticky, sprinkle a little more flour as needed, but be cautious not to add too much.
- First Rise: Shape the kneaded dough into a ball and place it in a lightly greased bowl. Cover the bowl with a damp cloth or plastic wrap. Let the dough rise in a warm place until it has doubled in size, which usually takes about 1-1.5 hours.
- Shape the Dough: Once the dough has risen, punch it down to release the air. Transfer it to a floured surface and gently shape it into a rectangle that fits the dimensions of your Pullman loaf pan. Make sure the dough is even, and then roll it tightly into a log.
- Second Rise: Place the shaped dough seam-side down into the greased Pullman loaf pan. Cover it again with a damp cloth and let it rise until it reaches the edges of the pan, about 30-45 minutes.
- Preheat the Oven: While the dough is rising, preheat your oven to 375°F (190°C).
- Bake: After the second rise, place the lid on the Pullman pan, if using one, and bake in the preheated oven for 30-35 minutes until the bread is golden brown and sounds hollow when tapped. If you’re not using a lid, bake until the top is golden and the internal temperature reaches 190°F (88°C).
- Cool: Once baked, remove the bread from the oven and let it cool in the pan for about 10 minutes before transferring it to a wire rack to cool completely. This will help maintain the bread’s moisture.
Extra Tips
When making Pain De Mie, it’s important to measure your ingredients accurately for the best results. Using a kitchen scale can help promote precision.
If you want to add a twist to your bread, consider incorporating herbs or spices into the dough. Additionally, storing the bread wrapped in plastic will help retain its softness for longer. If you have leftovers, Pain De Mie freezes well, so you can enjoy it later without sacrificing freshness.
Cheese-Stuffed French Bread

Cheese-Stuffed French Bread is a delectable and satisfying dish that combines the crispy, airy texture of freshly baked French bread with the rich, gooey goodness of melted cheese. This recipe is perfect for gatherings, parties, or just a cozy night in when you’re craving something indulgent.
The blend of cheeses creates a delightful taste that pairs wonderfully with a variety of dips, soups, or salads, making it a versatile addition to your meal plan.
To prepare this dish, you can use store-bought French bread or make your own if you’re feeling adventurous. The best part about Cheese-Stuffed French Bread is that you can customize the cheese filling to suit your taste—try mixing different types of cheese like mozzarella, cheddar, or cream cheese.
With this recipe, you’ll have a warm, cheesy treat that everyone will love, ready to serve in just under an hour.
Ingredients (serving size: 4-6 people):
- 1 large loaf of French bread
- 1 cup shredded mozzarella cheese
- 1 cup shredded cheddar cheese
- 1/2 cup cream cheese, softened
- 1/4 cup grated Parmesan cheese
- 2 tablespoons fresh parsley, chopped (optional)
- 1 teaspoon garlic powder
- 1 teaspoon onion powder
- Salt and pepper to taste
- 2 tablespoons butter, melted
Cooking Instructions:
- Preheat the Oven: Start by preheating your oven to 375°F (190°C). This guarantees that your bread will bake evenly and achieve a crispy crust.
- Prepare the Bread: Take the loaf of French bread and slice it in half lengthwise. Carefully hollow out some of the inner bread from both halves, leaving about 1/2 inch of bread on the crust to hold the filling. This will give you more space for the cheesy goodness.
- Make the Cheese Filling: In a mixing bowl, combine the mozzarella, cheddar, cream cheese, Parmesan, chopped parsley, garlic powder, onion powder, and season with salt and pepper. Mix everything together until well combined. The mixture should be creamy and thick.
- Stuff the Bread: Evenly distribute the cheese filling into the hollowed-out sections of the French bread. Use a spatula or spoon to press down gently and ascertain the filling is packed in well.
- Brush with Butter: Once the bread is filled, brush the tops with melted butter. This will help the bread brown beautifully in the oven and add an extra layer of flavor.
- Bake the Bread: Place the stuffed bread halves on a baking sheet and bake in the preheated oven for about 20-25 minutes, or until the cheese is melted and bubbly, and the bread is golden brown.
- Slice and Serve: Remove the bread from the oven and let it cool for a few minutes. Slice the stuffed bread into manageable pieces and serve warm, allowing your guests to enjoy the ooey-gooey cheese filling.
Extra Tips:
For an even more flavorful experience, consider adding sautéed vegetables like bell peppers, mushrooms, or spinach to the cheese mixture.
You can also experiment with different types of cheese or add spices like red pepper flakes for a kick. If you want to make it ahead of time, prepare the stuffed bread and wrap it tightly in plastic wrap before baking; just bake it fresh when you’re ready to serve!
Sweet French Challah
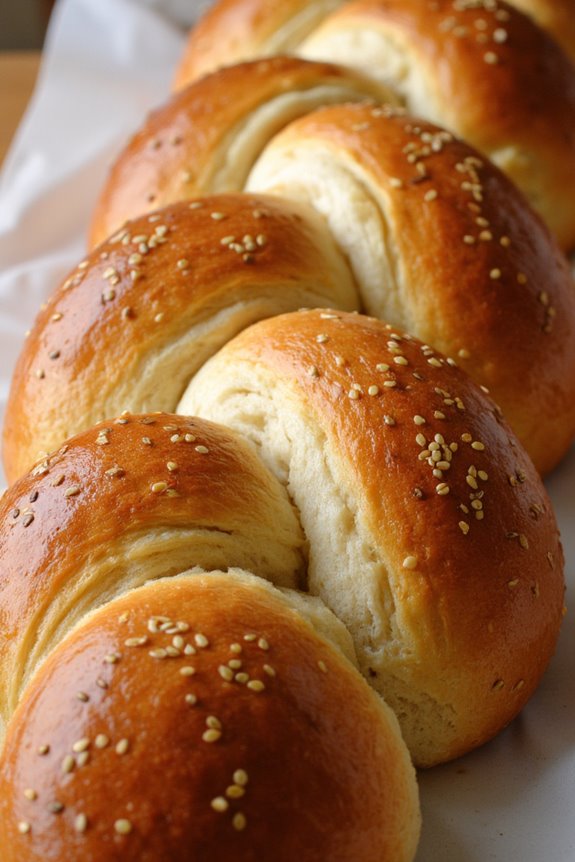
Sweet French Challah is a delightful and rich bread that originates from Jewish tradition but has been embraced worldwide for its sweet, soft, and airy texture. This braided bread is often enjoyed during special occasions, such as Shabbat or Jewish holidays, but it can be made year-round for breakfast, brunch, or as a treat for any gathering.
The beautiful golden crust, combined with a slightly sweet interior, makes it a perfect candidate for toasting, slathering with butter, or pairing with jams and spreads.
Making Sweet French Challah at home might seem intimidating, but with a few simple ingredients and some patience, you can achieve a stunning and delicious loaf. This recipe yields a beautiful braid that can be enjoyed fresh from the oven or stored for later use. Whether you’re serving it to guests or treating yourself and your family, this Sweet French Challah is sure to impress.
Ingredients (serves 4-6 people):
- 4 cups all-purpose flour
- 1/4 cup granulated sugar
- 1 packet (2 1/4 teaspoons) active dry yeast
- 1 teaspoon salt
- 1 cup warm water (about 110°F or 43°C)
- 1/4 cup vegetable oil
- 3 large eggs (2 for the dough, 1 for egg wash)
- 1 teaspoon vanilla extract
- Optional: sesame seeds or poppy seeds for topping
Cooking Instructions:
- Activate the Yeast: In a small bowl, combine the warm water and sugar. Sprinkle the yeast over the top and let it sit for about 5-10 minutes until it becomes frothy. This indicates that the yeast is active and ready to use.
- Mix Dry Ingredients: In a large mixing bowl, whisk together the flour and salt. This guarantees that the salt is evenly distributed throughout the flour, which is vital for the bread’s flavor and texture.
- Combine Ingredients: Once the yeast is activated, add it to the flour mixture along with the vegetable oil, 2 eggs, and vanilla extract. Stir the mixture with a wooden spoon or spatula until it starts to come together into a dough.
- Knead the Dough: Transfer the dough onto a lightly floured surface and knead it for about 8-10 minutes until it becomes smooth and elastic. If the dough is too sticky, sprinkle a little more flour as needed. Kneading develops the gluten, which is essential for achieving the right texture.
- First Rise: Place the kneaded dough in a greased bowl, cover it with a clean kitchen towel, and let it rise in a warm place until it doubles in size, approximately 1-2 hours.
- Shape the Challah: Once the dough has risen, punch it down to release the air. Divide the dough into three equal pieces. Roll each piece into a long rope, about 12-15 inches long. Pinch the ends together and braid the three ropes together. Pinch the other ends to seal.
- Second Rise: Place the braided dough onto a greased baking sheet. Cover it with a kitchen towel and let it rise for another 30-45 minutes until it puffs up again.
- Preheat Oven: While the dough is rising, preheat your oven to 350°F (175°C).
- Egg Wash: In a small bowl, beat the remaining egg. Gently brush the egg wash over the top of the braided dough. This will give it a beautiful golden color when baked. Optionally, sprinkle sesame seeds or poppy seeds on top.
- Bake: Bake the Challah in the preheated oven for about 25-30 minutes, or until it’s golden brown and sounds hollow when tapped on the bottom.
- Cool: Remove the Challah from the oven and let it cool on a wire rack before slicing.
Extra Tips: When making Sweet French Challah, verify that your ingredients are at room temperature for better incorporation. If you want a richer flavor, you can substitute some of the water with milk. Additionally, feel free to experiment with flavors by adding spices like cinnamon or nutmeg to the dough.
If you have leftovers, it makes excellent French toast the next day!
French Focaccia Bread
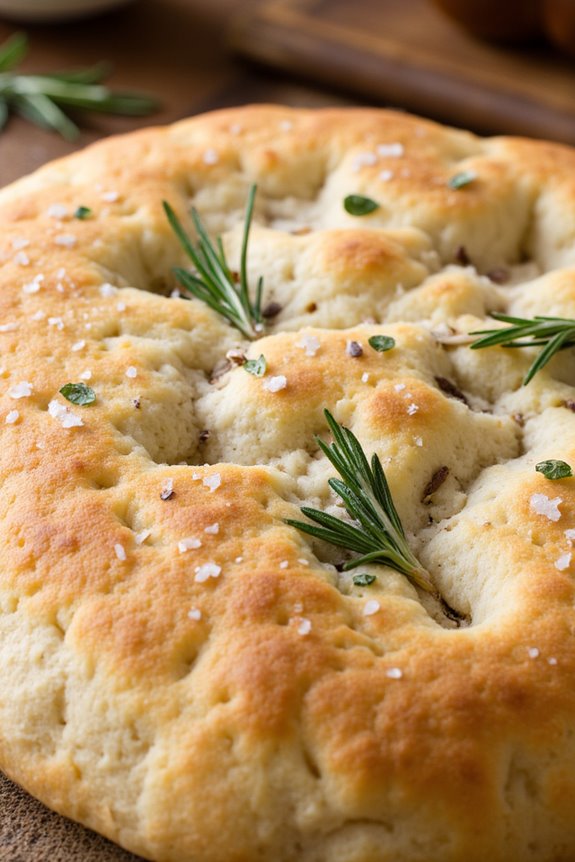
French Focaccia Bread is a delightful blend of traditional Italian focaccia and the elegance of French baking. This versatile and flavorful bread is characterized by its soft, airy texture and a golden, crispy crust. Infused with olive oil and adorned with fresh herbs, it makes an excellent accompaniment to soups, salads, or as a base for sandwiches.
Whether served warm or at room temperature, this focaccia is sure to impress your family and friends. Making French Focaccia Bread is a rewarding experience that will fill your kitchen with mouthwatering aromas. The process involves creating a simple dough, allowing it to rise, and then baking it to perfection.
With just a few ingredients and some patience, you can create a loaf that isn’t only delicious but also visually appealing. Let’s get started on this delightful bread recipe that serves 4-6 people!
Ingredients:
- 4 cups all-purpose flour
- 2 teaspoons active dry yeast
- 1 ½ cups warm water (about 110°F)
- 2 teaspoons salt
- 1/4 cup olive oil (plus extra for drizzling)
- 1 tablespoon fresh rosemary (chopped)
- 1 tablespoon fresh thyme (chopped)
- Coarse sea salt (for sprinkling)
Cooking Instructions:
- Activate the Yeast: In a small bowl, combine the warm water and active dry yeast. Allow it to sit for about 5-10 minutes, or until it becomes frothy. This step is essential as it guarantees that the yeast is active and ready to help the dough rise.
- Mix the Dough: In a large mixing bowl, combine the flour and salt. Make a well in the center and pour in the activated yeast mixture along with the olive oil. Use a wooden spoon or your hands to mix the ingredients until a shaggy dough forms.
- Knead the Dough: Transfer the dough onto a lightly floured surface. Knead the dough for about 8-10 minutes until it becomes smooth and elastic. You can add a little flour if the dough is too sticky, but be careful not to add too much.
- First Rising: Place the kneaded dough in a lightly oiled bowl, cover it with a clean kitchen towel, and let it rise in a warm place for about 1 to 1.5 hours, or until it has doubled in size. This step allows the dough to develop flavor and texture.
- Shape the Focaccia: Once the dough has risen, punch it down to release the air. Transfer it to a greased baking sheet or a pizza stone. Gently stretch and shape the dough into a rectangle or circle, about 1 inch thick. Use your fingers to create dimples all over the surface of the dough.
- Add Toppings: Drizzle the surface of the dough with olive oil, then sprinkle the chopped rosemary, thyme, and coarse sea salt over the top. Feel free to get creative with additional toppings like olives, sun-dried tomatoes, or cheese if desired.
- Second Rising: Cover the dough again with a kitchen towel and let it rise for another 30 minutes. This final rise allows the focaccia to become airy and light.
- Preheat the Oven: While the dough is rising, preheat your oven to 425°F (220°C). Verify it’s fully heated before placing the focaccia inside.
- Bake the Focaccia: Bake the focaccia in the preheated oven for about 20-25 minutes, or until it’s golden brown and sounds hollow when tapped on the bottom.
- Cool and Serve: Once baked, remove the focaccia from the oven and let it cool slightly on a wire rack. Cut it into squares or wedges, and serve warm or at room temperature.
Extra Tips:
For the best flavor and texture, consider using high-quality olive oil, as it greatly enhances the overall taste of the focaccia. Additionally, experimenting with different herbs and toppings can lead to unique variations—feel free to try garlic, sundried tomatoes, or even a sprinkle of grated cheese.
Finally, if you have time, let the dough rise slowly in the refrigerator overnight; this will develop even more complex flavors in your focaccia. Enjoy your baking!
Olive Oil French Bread
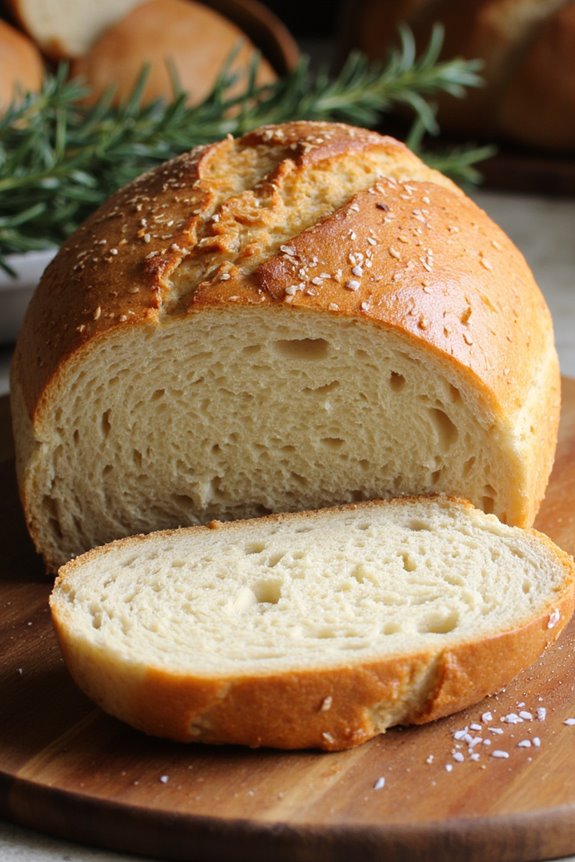
Olive Oil French Bread is a delightful twist on the traditional French bread, infusing rich flavors and a moist texture that elevates any meal or occasion. This recipe combines the simplicity of classic bread-making with the health benefits and robust flavor of olive oil. The result is a loaf that’s perfect for dipping, sandwiches, or simply enjoying with a pat of butter.
With its airy crumb and golden crust, this bread is sure to impress your family and friends. Making this Olive Oil French Bread is straightforward and requires only a few ingredients. The dough is easy to work with, making it an excellent choice for both novice and experienced bakers. Once you master this recipe, you can experiment by adding herbs or spices to create your own unique variations.
Let’s plunge into the ingredients and the step-by-step process to create your own loaf of Olive Oil French Bread.
Ingredients (Serves 4-6):
- 3 ½ cups all-purpose flour
- 1 packet (2 ¼ teaspoons) active dry yeast
- 1 ¼ cups warm water (about 110°F)
- 1 teaspoon sugar
- 2 teaspoons salt
- ¼ cup extra virgin olive oil
- Additional olive oil for brushing
- Sea salt for topping (optional)
Cooking Instructions:
- Activate the Yeast: In a small bowl, combine the warm water, sugar, and yeast. Stir gently and let it sit for about 5-10 minutes, or until it becomes frothy. This indicates that the yeast is active and ready to use.
- Mix the Dough: In a large mixing bowl, combine the all-purpose flour and salt. Make a well in the center and pour in the frothy yeast mixture along with the olive oil. Mix with a wooden spoon or spatula until a shaggy dough forms.
- Knead the Dough: Transfer the dough to a lightly floured surface. Knead it for about 8-10 minutes until it becomes smooth and elastic. If the dough is too sticky, you can sprinkle a little more flour, but be careful not to add too much.
- First Rise: Place the kneaded dough in a lightly greased bowl, cover it with a damp cloth or plastic wrap, and let it rise in a warm place for about 1-2 hours, or until it has doubled in size.
- Shape the Loaf: Once the dough has risen, punch it down to release the air. Turn it out onto a floured surface and shape it into a loaf by flattening it into a rectangle and rolling it tightly from one end to the other.
- Second Rise: Place the shaped loaf onto a greased baking sheet or a parchment-lined baking pan. Cover it loosely with a cloth and let it rise again for about 30-45 minutes, until it has puffed up.
- Preheat the Oven: While the dough is rising, preheat your oven to 425°F (220°C). This guarantees that the oven is hot enough to create a nice crust on the bread.
- Bake the Bread: Before baking, brush the top of the loaf with additional olive oil and sprinkle with sea salt if desired. Bake in the preheated oven for 20-25 minutes, or until the bread is golden brown and sounds hollow when tapped on the bottom.
- Cool and Serve: Remove the bread from the oven and let it cool on a wire rack for at least 10 minutes before slicing. This helps to set the crumb and makes it easier to cut.
Extra Tips:
For the best flavor and texture, use high-quality extra virgin olive oil, as it will greatly enhance the bread’s taste. You can also add herbs like rosemary or thyme to the dough for an aromatic touch.
If you want a crustier loaf, place a shallow pan filled with water in the oven while baking to create steam. This will help develop a beautiful crust on your Olive Oil French Bread. Enjoy your homemade loaf fresh or store it in an airtight container for a couple of days, or freeze it for longer preservation!
Whole Wheat French Bread
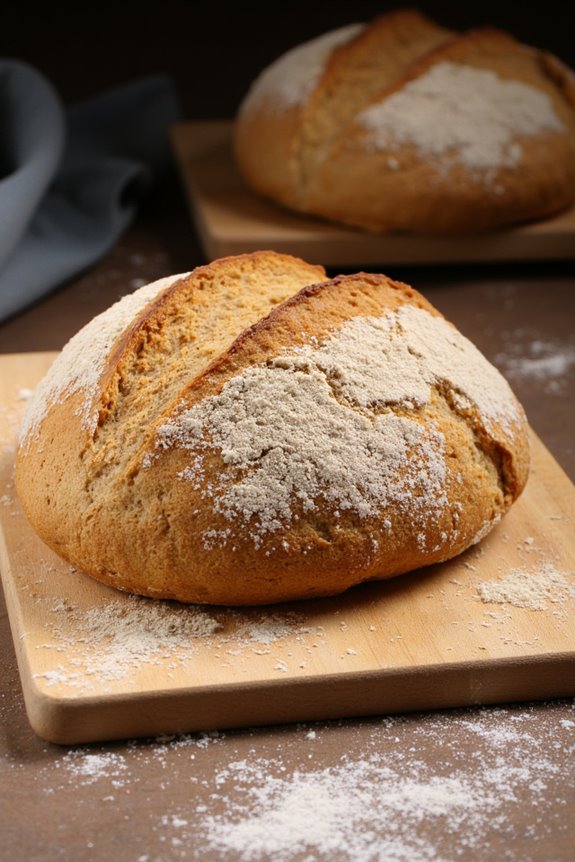
Whole Wheat French Bread is a delightful and healthier twist on the traditional French bread. By using whole wheat flour, you not only add a nutty flavor but also pack in more nutrients and fiber, making it a great option for those seeking a wholesome bread. This bread is perfect for sandwiches, toasting, or simply enjoying with a pat of butter. Its crusty outside and soft, chewy inside provide a satisfying texture that pairs well with a variety of meals.
Making Whole Wheat French Bread from scratch may seem intimidating, but with the right ingredients and method, it can be a rewarding experience. The process involves mixing, kneading, and allowing the dough to rise, which develops its flavor and texture. Once baked, this bread will fill your kitchen with an irresistible aroma and have your family asking for seconds.
Ingredients (Serves 4-6)
- 3 cups whole wheat flour
- 1 cup warm water (about 110°F)
- 2 tablespoons honey or sugar
- 1 tablespoon active dry yeast
- 1 teaspoon salt
- 1 tablespoon olive oil
- Cornmeal (for dusting)
- Optional: additional flour for dusting and shaping
Cooking Instructions
- Activate the Yeast: In a small bowl, combine the warm water, honey (or sugar), and yeast. Stir gently and let it sit for about 5-10 minutes until foamy. This step verifies that the yeast is alive and will help your bread rise.
- Mix the Dry Ingredients: In a large mixing bowl, whisk together the whole wheat flour and salt. Make sure the salt is evenly distributed, as it can inhibit the yeast’s action if it comes into direct contact.
- Combine Wet and Dry Ingredients: Once the yeast mixture is bubbly, add it to the bowl with the dry ingredients along with the olive oil. Stir the mixture with a wooden spoon or your hands until a shaggy dough forms.
- Knead the Dough: Transfer the dough to a lightly floured surface and knead for about 8-10 minutes. If the dough is too sticky, you can add a little more flour as needed. The goal is to achieve a smooth and elastic dough.
- First Rise: Place the kneaded dough in a lightly greased bowl, cover it with a damp cloth or plastic wrap, and let it rise in a warm place for about 1-2 hours, or until it has doubled in size.
- Shape the Dough: Once the dough has risen, punch it down gently to release the air. Turn it out onto a floured surface and shape it into a loaf by rolling it into a cylinder. Pinch the seams to seal.
- Second Rise: Place the shaped loaf onto a baking sheet lined with parchment paper (or dusted with cornmeal) and cover it with a cloth. Allow it to rise for another 30-45 minutes until it has puffed up again.
- Preheat the Oven: While the dough is rising, preheat your oven to 425°F (220°C). This step is essential as it guarantees that the bread will get a good rise once it goes in.
- Bake the Bread: Before placing the bread in the oven, make a few slashes on top with a sharp knife for aesthetic appeal and to allow steam to escape. Bake in the preheated oven for 25-30 minutes, or until the crust is golden brown and sounds hollow when tapped on the bottom.
- Cool the Bread: Once baked, remove the bread from the oven and let it cool on a wire rack. Allowing the bread to cool properly will help it set and make it easier to slice.
Extra Tips
For the best results, verify that your ingredients are at room temperature before starting, as this will help the dough rise more effectively. Additionally, if you want to enhance the flavor, consider adding herbs or seeds to the dough before baking.
Experimenting with different types of flour, like adding a portion of all-purpose flour, can also yield a different texture if you prefer a lighter bread. Finally, storing the bread in a paper bag at room temperature will keep it fresh for longer. Enjoy your Whole Wheat French Bread!