

Hosting a gathering and want to impress your guests without the stress?
French appetizers are your answer, combining elegance with simplicity.
From airy cheese and herb gougères to flavorful French onion soup bites, these recipes are both beautiful and easy to prepare.
Your guests will be raving about these 14 delightful options.
Let’s get cooking and make your event unforgettable!
Cheese and Herb Gougères

Gougères are delightful French pastries made from a choux pastry dough, which is then combined with cheese and fresh herbs. These light and airy bites are perfect as an appetizer, bringing a touch of elegance to any gathering. Their crispy exterior and soft, cheesy interior make them irresistible, while the flavor of the herbs adds a fresh twist that elevates the dish.
Whether served warm straight from the oven or at room temperature, cheese and herb gougères are bound to impress your guests.
Making gougères might seem intimidating at first, but with a few simple ingredients and careful attention to technique, you’ll be able to craft these delicious treats with ease. As you prepare, remember that the key to achieving that perfect puff is in the cooking of the choux pastry and the incorporation of air into the dough.
So preheat your oven, gather your ingredients, and get ready to enjoy a taste of France right in your own home!
Ingredients (Serves 4-6)
- 1 cup water
- 1/2 cup unsalted butter
- 1 teaspoon salt
- 1 teaspoon ground black pepper
- 1 cup all-purpose flour
- 4 large eggs
- 1 cup grated Gruyère cheese (or any cheese of your choice)
- 2 tablespoons fresh chives, finely chopped
- 2 tablespoons fresh parsley, finely chopped
- 1/2 teaspoon garlic powder (optional)
Cooking Instructions
- Preheat the Oven: Start by preheating your oven to 425°F (220°C). This high temperature is vital for achieving the puffiness of the gougères.
- Prepare the Choux Pastry: In a medium saucepan, combine the water, butter, salt, and black pepper. Heat over medium until the butter is melted and the mixture begins to boil. Once boiling, remove the pan from heat.
- Add the Flour: Quickly stir in the flour using a wooden spoon until the mixture forms a ball and pulls away from the sides of the pan. This step is key as it helps to cook the flour slightly, which will contribute to the final texture of the gougères.
- Cool the Dough: Allow the dough to cool for about 5 minutes. This step is important because adding eggs to a hot mixture can cook them, which will prevent the dough from rising properly.
- Incorporate the Eggs: One at a time, add the eggs to the dough, stirring vigorously after each addition until fully incorporated. The dough should be smooth and glossy when all eggs are mixed in.
- Add Cheese and Herbs: Fold in the grated cheese, chives, parsley, and garlic powder (if using) until evenly distributed throughout the dough.
- Pipe the Dough: Transfer the dough to a piping bag fitted with a large round tip. Pipe small mounds (about the size of a tablespoon) onto a baking sheet lined with parchment paper, leaving some space between each mound to allow for expansion.
- Bake the Gougères: Place the baking sheet in the preheated oven and bake for 20-25 minutes, or until the gougères are puffed and golden brown. Avoid opening the oven door during baking, as this can cause them to deflate.
- Cool and Serve: Once baked, remove the gougères from the oven and let them cool slightly on a wire rack. Serve warm or at room temperature.
Extra Tips
When making cheese and herb gougères, remember that the quality of your cheese will greatly impact the flavor of the final dish. Opt for a good quality cheese, and feel free to experiment with different types to find your preferred combination.
Additionally, for added flavor, you can sprinkle some extra cheese on top of each mound before baking. Finally, make sure to keep an eye on the oven during the last few minutes of baking, as they can turn from perfectly golden to overbaked quite quickly.
Enjoy your flavorful French appetizer!
Classic French Onion Soup Bites
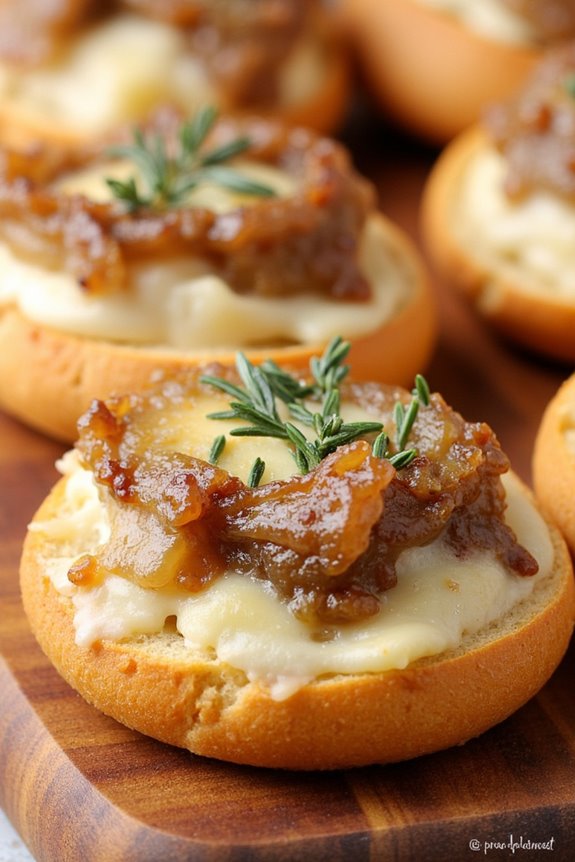
Classic French Onion Soup Bites combine the rich, savory flavors of traditional French onion soup into a delightful appetizer that’s perfect for any gathering. This dish features caramelized onions, melted cheese, and a crispy bread base, delivering all the comforting essence of the classic soup in a bite-sized form.
These bites are simple to prepare yet create an impressive presentation that will leave your guests craving more. The key to achieving the best flavor in these bites is to take your time with the caramelization of the onions. Slowly cooking them allows their natural sweetness to develop, resulting in a deep, rich flavor that pairs beautifully with the melted cheese and crunchy baguette.
The combination of Gruyère cheese and fresh thyme adds a touch of elegance, making these bites an ideal starter for dinner parties or holiday celebrations.
Ingredients (serving size of 4-6 people):
- 3 large yellow onions, thinly sliced
- 2 tablespoons unsalted butter
- 1 tablespoon olive oil
- 1 teaspoon sugar
- Salt and pepper to taste
- 1 teaspoon fresh thyme leaves, plus extra for garnish
- 1 cup beef or vegetable broth
- 1 baguette, sliced into 1/2 inch rounds
- 1 1/2 cups Gruyère cheese, grated
- 1/2 cup grated Parmesan cheese
Cooking Instructions:
- Caramelize the Onions: In a large skillet, heat the butter and olive oil over medium heat. Add the sliced onions, sugar, and a pinch of salt. Cook, stirring occasionally, for about 25-30 minutes, until the onions are golden brown and caramelized. Be patient during this process, as it’s key to developing the rich flavor.
- Add Broth and Seasoning: Once the onions are caramelized, add the fresh thyme and the broth to the skillet. Increase the heat to medium-high, and let the mixture simmer for about 5-10 minutes until the liquid has reduced slightly. Season with salt and pepper to taste.
- Prepare the Baguette Slices: Preheat your oven to 375°F (190°C). Arrange the baguette slices on a baking sheet. Lightly brush one side of each slice with olive oil and toast in the oven for about 5-7 minutes, or until golden brown.
- Assemble the Bites: Remove the toasted baguette slices from the oven and let them cool slightly. On each slice, spoon a generous amount of the caramelized onion mixture. Top with a sprinkle of Gruyère and Parmesan cheese.
- Melt the Cheese: Return the assembled bites to the oven and bake for an additional 5-10 minutes, or until the cheese is bubbly and melted. Keep an eye on them to avoid burning.
- Garnish and Serve: Remove the bites from the oven and let them cool for a minute. Garnish with additional fresh thyme leaves before serving warm.
Extra Tips: For an added depth of flavor, consider using a splash of white wine when cooking the onions. This will enhance the sweetness and complexity of the dish. Additionally, you can experiment with different cheese combinations; for example, a mix of Gruyère and mozzarella can add a delightful stretchiness.
If you want to prepare these bites ahead of time, assemble them and store them in the refrigerator until you’re ready to bake them just before serving.
Mini Quiche Lorraine

Mini Quiche Lorraine is a delightful French appetizer that’s perfect for any gathering or special occasion.
These little savory tarts are filled with a rich mixture of eggs, cream, cheese, and crispy bacon, all encased in a flaky pastry. Their bite-sized nature makes them ideal for serving as finger food, allowing guests to indulge without the need for cutlery. The combination of flavors and textures makes these mini quiches a crowd-pleaser, whether served warm or at room temperature.
Making Mini Quiche Lorraine can be a fun and rewarding cooking experience, even for novice chefs. The base can be prepared ahead of time, and the filling can be customized with various ingredients according to your taste.
Whether you’re hosting a brunch, a cocktail party, or a family gathering, these mini quiches will surely impress your guests and leave them asking for the recipe.
Ingredients (serves 4-6 people):
- 1 sheet of puff pastry (thawed)
- 6 large eggs
- 1 cup heavy cream
- 1 cup grated Gruyère cheese
- 6 strips of bacon, cooked and crumbled
- 1/2 cup diced onion
- Salt and pepper to taste
- Fresh parsley for garnish (optional)
Cooking Instructions:
- Preheat the Oven: Begin by preheating your oven to 375°F (190°C). This guarantees that the puff pastry will rise and become golden brown during baking.
- Prepare the Pastry Shells: Roll out the puff pastry sheet on a lightly floured surface to about 1/8 inch thick. Using a round cutter, cut out circles that are slightly larger than the cups of your muffin tin. Gently press each pastry circle into the muffin tin cups, making sure they cover the bottom and sides.
- Cook the Bacon and Onion: In a skillet over medium heat, cook the diced onion until it’s soft and translucent, about 4-5 minutes. Add the crumbled bacon to the skillet and cook for an additional 2-3 minutes until heated through. Remove from heat and allow to cool slightly.
- Prepare the Egg Mixture: In a large mixing bowl, whisk together the eggs and heavy cream until well combined. Then, add in the grated Gruyère cheese, cooked bacon, and onion mixture. Season with salt and pepper to taste.
- Fill the Pastry Shells: Carefully pour the egg mixture into each pastry-lined muffin cup, filling them about three-quarters full to allow space for the quiche to rise as it bakes.
- Bake: Place the muffin tin in the preheated oven and bake for 20-25 minutes, or until the quiches are puffed and golden brown on top. A toothpick inserted in the center should come out clean.
- Cool and Serve: Once baked, remove the mini quiches from the oven and allow them to cool in the muffin tin for about 5 minutes. Use a small knife to gently loosen the edges before transferring them to a serving plate. Garnish with fresh parsley if desired.
Extra Tips:
To elevate the flavor of your Mini Quiche Lorraine, consider adding other ingredients such as sautéed mushrooms, spinach, or different types of cheese like cheddar or feta.
You can also experiment with herbs like thyme or chives for added freshness. For a more decadent version, try incorporating a splash of white wine into the egg mixture.
These quiches can be made a day in advance and stored in the refrigerator; simply reheat them in the oven before serving to maintain their flaky texture.
Ratatouille Tartlets

Ratatouille Tartlets are a delightful French appetizer that encapsulates the vibrant flavors of Provence. These little pastry cups are filled with a colorful medley of vegetables, including zucchini, eggplant, bell peppers, and tomatoes, which are seasoned with fresh herbs and olive oil. Not only do they offer a burst of flavor, but they also bring a beautiful presentation to your dining table, making them perfect for entertaining guests or enjoying as a light snack.
Creating these tartlets is surprisingly easy, especially if you use pre-made pastry shells. The filling can be prepared in advance, allowing you to assemble and bake the tartlets just before serving. With their flaky crust and savory filling, Ratatouille Tartlets are sure to impress and satisfy your appetite for a taste of French cuisine.
Ingredients (Serves 4-6)
- 1 package of pre-made puff pastry shells (about 12)
- 1 medium zucchini, diced
- 1 small eggplant, diced
- 1 red bell pepper, diced
- 1 yellow bell pepper, diced
- 1 cup cherry tomatoes, halved
- 2 cloves garlic, minced
- 1 small onion, finely chopped
- 2 tablespoons olive oil
- 1 teaspoon dried thyme
- 1 teaspoon dried basil
- Salt and pepper to taste
- Fresh basil leaves for garnish (optional)
Cooking Instructions
- Preheat the Oven: Begin by preheating your oven to 400°F (200°C). This guarantees that the pastry shells will bake evenly and become crisp when they’re placed in the oven.
- Prepare the Vegetables: In a large skillet, heat the olive oil over medium heat. Add the chopped onion and minced garlic, sautéing them until they’re translucent and fragrant, about 3-4 minutes. This will create a flavorful base for your ratatouille filling.
- Cook the Ratatouille: Add the diced zucchini, eggplant, and bell peppers to the skillet. Sauté for an additional 5-7 minutes until the vegetables are tender. Then, incorporate the halved cherry tomatoes, dried thyme, dried basil, salt, and pepper. Stir everything together and let it cook for another 5 minutes, allowing the flavors to meld together.
- Assemble the Tartlets: Remove the mixture from the heat and let it cool slightly. Meanwhile, place the pre-made puff pastry shells on a baking sheet. Using a spoon, fill each pastry shell generously with the ratatouille vegetable mixture.
- Bake: Place the baking sheet in the preheated oven and bake the tartlets for 15-20 minutes, or until the pastry is golden brown and flaky. Keep an eye on them to prevent burning.
- Serve: Once baked, remove the tartlets from the oven and let them cool for a few minutes. Garnish with fresh basil leaves if desired, then serve warm or at room temperature.
Extra Tips
For a richer flavor, consider adding a sprinkle of grated Parmesan cheese on top of the filling before baking. This adds a delightful nuttiness and depth to the tartlets.
Additionally, you can experiment with different vegetables based on seasonal availability or personal preference, such as adding mushrooms or spinach for extra variety.
To make the preparation even easier, chop the vegetables ahead of time and store them in the fridge until you’re ready to cook.
Enjoy your culinary journey into French cuisine with these charming Ratatouille Tartlets!
Shrimp Provençal

Shrimp Provençal is a classic French appetizer that captures the essence of Mediterranean flavors with its vibrant ingredients and aromatic herbs. This dish features succulent shrimp sautéed in olive oil, garlic, and a medley of fresh herbs, bringing forth a taste that’s both bright and savory.
It’s perfect for gatherings or as a delightful start to a French-inspired meal, showcasing the beautiful simplicity of coastal cuisine. This dish isn’t only quick to prepare but also allows the natural flavors of the shrimp to shine through, complemented by the freshness of tomatoes, parsley, and a hint of white wine.
Whether served on its own or alongside a crusty baguette for dipping, Shrimp Provençal is sure to impress and tantalize the taste buds of your guests.
Ingredients (Serves 4-6)
- 1 pound large shrimp, peeled and deveined
- 3 tablespoons olive oil
- 4 cloves garlic, minced
- 1 cup ripe tomatoes, diced (or canned diced tomatoes)
- 1/2 cup dry white wine
- 1/4 cup fresh parsley, chopped
- 1 teaspoon dried thyme
- 1 tablespoon lemon juice
- Salt and pepper, to taste
- Fresh baguette, for serving (optional)
Cooking Instructions
- Prepare the Shrimp: Begin by rinsing the shrimp under cold water and pat them dry with a paper towel. This step is essential to guarantee that the shrimp sear nicely in the pan, achieving that perfect golden-brown color.
- Sauté the Garlic: In a large skillet, heat the olive oil over medium heat. Add the minced garlic and sauté for about 1-2 minutes until it becomes fragrant but not browned. Browning the garlic can lead to a bitter taste, so keep a close eye on it.
- Cook the Shrimp: Increase the heat to medium-high and add the shrimp to the skillet. Season them with salt and pepper. Cook for about 2-3 minutes on each side, or until the shrimp turn pink and opaque. Avoid overcrowding the pan to guarantee even cooking.
- Add Tomatoes and Wine: Once the shrimp are cooked, stir in the diced tomatoes and pour in the white wine. Allow the mixture to simmer for about 5 minutes, letting the flavors meld together and the sauce reduce slightly.
- Finish with Herbs and Lemon: Remove the skillet from heat and stir in the chopped parsley, dried thyme, and lemon juice. This final step infuses the dish with fresh, aromatic notes that elevate the overall flavor.
- Serve: Transfer the Shrimp Provençal to a serving dish and enjoy it warm. If desired, serve with slices of fresh baguette to soak up the flavorful sauce.
Extra Tips
For an even more authentic flavor, consider adding a pinch of red pepper flakes for a bit of heat or a dash of fish stock for depth. You can also customize the dish by adding other vegetables, such as bell peppers or olives, to enhance the Mediterranean flair.
Be sure to serve the dish immediately for the best taste and presentation, and don’t forget that crusty bread is perfect for sopping up the delicious sauce!
Smoked Salmon Blinis

Smoked salmon blinis are a delightful French appetizer that brings together the rich, smoky flavor of salmon and the light, fluffy texture of traditional Russian blinis.
These small pancakes made from buckwheat or wheat flour create a perfect base for the luxurious topping of smoked salmon. Often served at gatherings, they aren’t only easy to make but also visually impressive, making them an ideal choice for entertaining guests.
The combination of flavors and textures creates an irresistible bite that’s sure to be a hit at any occasion. To elevate your blinis, consider incorporating a dollop of crème fraîche and a sprinkle of fresh herbs, such as dill or chives, for added freshness and flavor.
Whether you’re hosting a formal dinner or a casual get-together, smoked salmon blinis are a sophisticated yet simple appetizer that showcases the elegance of French cuisine. Prepare to impress your guests with this exquisite dish that balances taste and presentation.
Ingredients (Serves 4-6):
- 1 cup all-purpose flour
- ½ cup buckwheat flour
- 1 teaspoon baking powder
- ½ teaspoon salt
- 1 cup milk
- 2 large eggs
- 3 tablespoons unsalted butter, melted
- 8 ounces smoked salmon, thinly sliced
- ½ cup crème fraîche
- Fresh dill or chives, for garnish
- Lemon wedges, for serving
Cooking Instructions:
1. Prepare the Batter: In a large mixing bowl, combine the all-purpose flour, buckwheat flour, baking powder, and salt. In a separate bowl, whisk together the milk and eggs until smooth.
Gradually add the wet ingredients to the dry ingredients while stirring gently. Finally, fold in the melted butter until the batter is well combined and smooth. Allow the batter to rest for about 10-15 minutes to enhance its fluffiness.
2. Cook the Blinis: Heat a non-stick skillet or griddle over medium heat. Lightly grease with a bit of butter. Once hot, pour small spoonfuls of batter (about 2 tablespoons for each blini) onto the skillet.
Cook for about 2-3 minutes or until small bubbles form on the surface and the edges look set. Flip the blinis and cook for another 1-2 minutes until golden brown. Remove and keep warm while you repeat with the remaining batter.
3. Assemble the Blinis: Once all blinis are cooked, it’s time to assemble. Place each blini on a serving platter. Top each blini with a generous dollop of crème fraîche followed by a slice of smoked salmon.
4. Garnish and Serve: Finish the presentation by garnishing with fresh dill or chives on top of the smoked salmon. Serve with lemon wedges on the side for an extra zing.
Extra Tips: For a more flavorful batter, you can add a pinch of black pepper or herbs like dill to the mixture before cooking the blinis.
Additionally, make sure not to overcrowd the skillet when cooking; it’s better to work in batches to achieve perfectly cooked blinis. You can also prepare the blinis ahead of time and reheat them gently in the oven before serving to save time during your event. Enjoy your elegant appetizer!
Pâté En Croûte
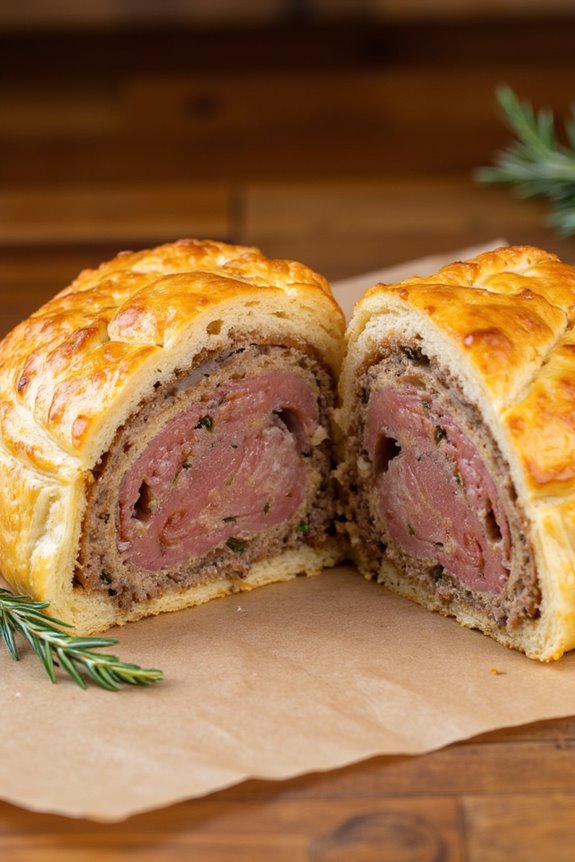
Pâté En Croûte is a classic French appetizer that combines the rich flavors of meat pâté encased in a flaky, golden pastry. This dish is often served at celebrations and special occasions, making it a perfect addition to any festive gathering or dinner party.
The combination of textures and flavors in Pâté En Croûte is truly delightful, with the buttery crust providing a contrast to the savory filling, which can be made from a variety of meats, herbs, and spices.
Making Pâté En Croûte may seem intimidating at first, but with a little preparation and attention to detail, you can create this impressive dish that will wow your guests. The key is to guarantee that the pastry is crisp while the filling remains juicy and flavorful. You can customize the filling with your preferred combination of meats and seasonings, allowing you to add a personal touch to this traditional recipe.
Ingredients (Serves 4-6)
- 1 lb (450g) ground pork
- 1/2 lb (225g) chicken liver, cleaned and trimmed
- 1/4 lb (113g) bacon, chopped
- 1 small onion, finely chopped
- 2 cloves garlic, minced
- 1/4 cup (60ml) brandy or cognac
- 1 teaspoon fresh thyme, chopped
- 1 teaspoon fresh parsley, chopped
- 1/2 teaspoon salt
- 1/4 teaspoon black pepper
- 1/4 teaspoon nutmeg
- 1/2 cup (120ml) heavy cream
- 1 package (14 oz) puff pastry, thawed
- 1 egg, beaten (for egg wash)
- 1 tablespoon Dijon mustard
Instructions
1. Prepare the Filling: In a skillet over medium heat, cook the chopped bacon until crispy. Add the chopped onion and garlic, and sauté until the onion is translucent. Remove from heat and let cool slightly.
In a food processor, combine the cooked bacon mixture, ground pork, chicken liver, brandy, thyme, parsley, salt, pepper, nutmeg, and heavy cream. Pulse until well combined but still slightly chunky.
2. Preheat the Oven: Preheat your oven to 375°F (190°C). This guarantees that your pastry will bake evenly and become wonderfully golden.
3. Roll Out the Pastry: On a lightly floured surface, roll out the puff pastry to a rectangle about 1/8 inch thick. You’ll need enough pastry to line a loaf pan or terrine mold, with some overhanging to fold over the top.
4. Assemble the Pâté: Line the loaf pan with the rolled-out pastry, leaving enough overhang on the sides. Spread a thin layer of Dijon mustard on the bottom of the pastry. Carefully fill the pastry with the meat mixture, pressing it down gently to remove any air pockets.
5. Seal the Pâté: Fold the overhanging pastry over the filling to create a sealed package. Trim any excess pastry if necessary, and use the beaten egg to brush the seams to help seal.
6. Bake: Brush the top of the pastry with the remaining beaten egg for a golden finish. Place the pâté in the preheated oven and bake for about 45-50 minutes, or until the pastry is golden brown and the filling reaches an internal temperature of 160°F (70°C).
7. Cool and Serve: Once baked, remove from the oven and allow the pâté to cool in the pan for at least 15 minutes before removing. Serve warm or at room temperature, sliced into pieces.
Extra Tips
For the best results, consider making the pâté a day in advance, as this allows the flavors to meld and enhances the overall taste.
You can also experiment with different spices and herbs in the filling to tailor the flavor profile to your liking. To serve, pair with a tangy chutney or pickles for a delightful contrast to the richness of the pâté.
Escargots De Bourgogne
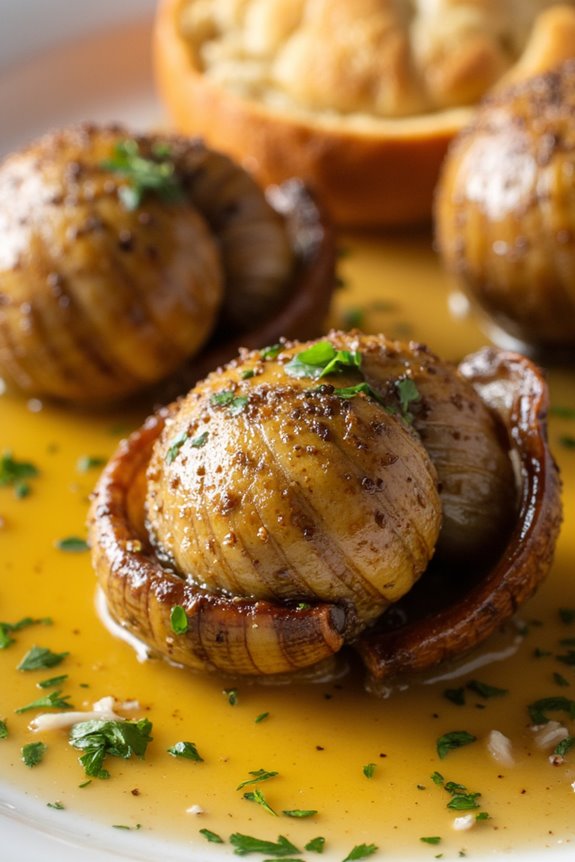
Escargots de Bourgogne, or Burgundy snails, is a classic French appetizer that showcases the rich culinary heritage of France. This dish features snails cooked in a flavorful garlic and parsley butter, allowing the tender mollusks to absorb the aromatic combination perfectly.
While escargots may seem intimidating to prepare, they’re surprisingly simple and elegant. This dish is often served in their shells, offering a delightful and sophisticated presentation that’s sure to impress your guests.
To prepare Escargots de Bourgogne, it’s crucial to source high-quality escargots. Fresh or canned snails can be used, depending on your availability and preference. The key to a great escargot dish is the garlic butter, which is made with a perfect balance of garlic, parsley, and butter, creating a delectable sauce that complements the snails beautifully.
Serve these snails warm, paired with crusty French bread to soak up the delicious garlic butter.
Ingredients (Serves 4-6):
- 24 escargots (canned or fresh)
- ½ cup unsalted butter, softened
- 4 cloves garlic, minced
- ¼ cup fresh parsley, finely chopped
- 1 tablespoon shallots, minced
- 2 tablespoons white wine (optional)
- Salt and pepper, to taste
- 1 tablespoon lemon juice
- Baguette, for serving (optional)
Cooking Instructions:
- Preheat the Oven: Preheat your oven to 375°F (190°C). This guarantees that the escargots will cook evenly and the butter will melt properly during baking.
- Prepare the Garlic Butter: In a medium bowl, combine the softened butter, minced garlic, chopped parsley, minced shallots, white wine (if using), salt, pepper, and lemon juice. Mix well until all ingredients are thoroughly combined. This mixture is key to infusing the escargots with flavor.
- Fill the Escargot Shells: If using shells, place one escargot in each shell and fill the shell with a generous amount of the garlic butter mixture. If using a baking dish instead, simply arrange the escargots in the dish and spoon the garlic butter over them, ensuring they’re well-coated.
- Bake the Escargots: Place the filled escargot shells or baking dish in the preheated oven. Bake for about 12-15 minutes, or until the butter is bubbling and the tops are slightly golden. This will help to enhance the flavors and give the dish a delightful aroma.
- Serve: Remove the escargots from the oven and let them cool for a minute. Serve them hot, garnished with additional parsley if desired, alongside slices of baguette for dipping into the delicious garlic butter.
Extra Tips:
When preparing Escargots de Bourgogne, consider using fresh herbs for a brighter flavor profile; tarragon or chervil can be excellent substitutes for parsley.
Additionally, if you’re using canned escargots, be sure to rinse them well to remove any residual canning liquid. For a more intense flavor, you can let the garlic butter mixture sit at room temperature for a couple of hours before using, allowing the flavors to meld beautifully.
Enjoy your culinary adventure with this French delicacy!
Crostini With Goat Cheese and Fig
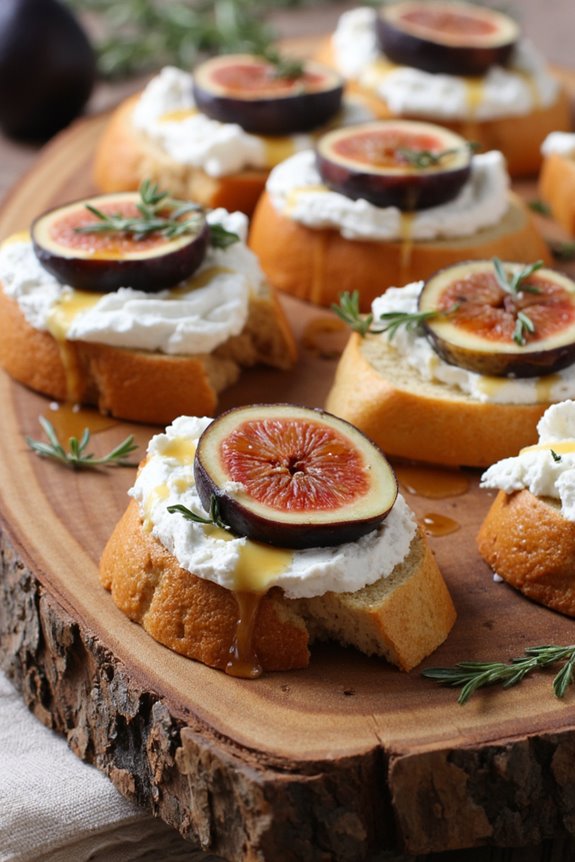
Crostini with goat cheese and fig is a delightful French appetizer that perfectly balances savory and sweet flavors, making it an ideal starter for a dinner party or a casual gathering. The crispy crostini provides a crunchy base that pairs beautifully with the creamy, tangy goat cheese and the luscious sweetness of figs. This elegant yet simple dish showcases the art of French cuisine, emphasizing fresh ingredients and rich flavors, making it a favorite among many.
This recipe isn’t only easy to prepare but also allows for creativity with presentation and ingredient variations. You can use different types of bread, cheeses, or even add herbs and nuts for added texture and flavor. With a preparation time of about 15 minutes and a cooking time of 10 minutes, you can have this delicious appetizer ready in no time, impressing your guests with your culinary skills.
Ingredients (Serves 4-6):
- 1 French baguette, sliced into 1/2-inch rounds
- 8 oz goat cheese, softened
- 6-8 fresh figs, sliced
- 2 tablespoons honey
- 1 tablespoon fresh thyme leaves (or other herbs, optional)
- Olive oil, for drizzling
- Salt and pepper, to taste
Cooking Instructions:
- Preheat the Oven: Begin by preheating your oven to 375°F (190°C). This will guarantee that your crostini are crispy and golden when they finish baking.
- Prepare the Crostini: Arrange the sliced baguette rounds on a baking sheet in a single layer. Drizzle them lightly with olive oil and season with a pinch of salt and pepper. This will enhance the flavor of the bread and help achieve a nice golden color.
- Bake the Crostini: Place the baking sheet in the preheated oven and bake for about 8-10 minutes, or until the slices are golden brown and crispy. Keep an eye on them to prevent burning, as they can go from crispy to burnt quickly.
- Spread the Goat Cheese: Once the crostini are out of the oven and have cooled slightly, spread a generous amount of softened goat cheese on each slice. The warmth of the crostini will help to soften the cheese further, making it easier to spread.
- Add the Figs: Layer a slice of fresh fig on top of each goat cheese spread crostini. The figs provide a wonderful sweetness that complements the tanginess of the goat cheese.
- Drizzle with Honey: Finish the crostini by drizzling a small amount of honey over the figs on each slice. This adds an extra layer of sweetness and a beautiful glaze.
- Garnish and Serve: Sprinkle fresh thyme leaves (or your chosen herbs) over the top of the crostini for added flavor and a touch of color. Serve the crostini immediately to enjoy their crispness and the delightful combination of flavors.
Extra Tips:
When making Crostini with Goat Cheese and Fig, feel free to experiment with different types of bread, such as ciabatta or sourdough, for unique flavor profiles. Additionally, if figs are out of season, you can substitute them with dried figs or even fresh pears for a similar taste experience.
To elevate the presentation, consider adding a sprinkle of crushed nuts, such as walnuts or pistachios, for crunch. Finally, serve these crostini with a light wine, such as a Sauvignon Blanc, to enhance the dining experience.
French Country Bread With Tapenade
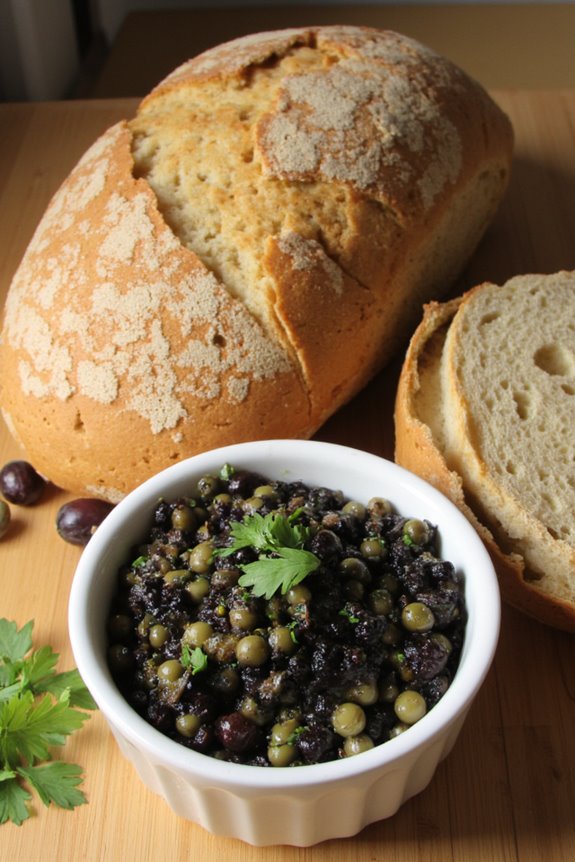
French Country Bread with Tapenade is a delightful and rustic appetizer that captures the essence of Mediterranean flavors. This dish combines the crusty texture of homemade country bread with a savory, olive-based tapenade, making it perfect for sharing at gatherings or enjoying as an elegant start to a meal. The contrast of the crunchy bread and the smooth, rich spread creates a harmony of tastes that will transport you straight to the sun-drenched streets of Provence.
Making French Country Bread from scratch might seem intimidating, but the process is quite straightforward and rewarding. The dough benefits from a long fermentation, which enhances its flavor and texture. Paired with the tapenade—a blend of olives, capers, garlic, and herbs—this dish isn’t only delicious but also a feast for the eyes. Your guests will be impressed by the artisanal bread and the vibrant colors of the tapenade, making it an unforgettable appetizer.
Ingredients (serving size: 4-6 people)
For the French Country Bread:
- 3 cups all-purpose flour
- 1 ½ teaspoons salt
- 1 teaspoon instant yeast
- 1 ¼ cups warm water
For the Tapenade:
- 1 cup pitted black olives
- 1/2 cup pitted green olives
- 2 tablespoons capers
- 2 cloves garlic
- 2 tablespoons fresh parsley, chopped
- 2 tablespoons olive oil
- 1 tablespoon lemon juice
- Salt and pepper, to taste
Cooking Instructions
- Prepare the Dough:
- In a large mixing bowl, combine the flour, salt, and instant yeast. Stir until well mixed. Gradually add the warm water to the dry ingredients while stirring with a wooden spoon until a shaggy dough forms. The mixture should be sticky but cohesive.
- Knead and Ferment:
- Transfer the dough onto a lightly floured surface and knead for about 8-10 minutes, until it becomes smooth and elastic. Place the dough back in the bowl and cover it with a damp cloth. Allow it to rise at room temperature for about 1-2 hours, or until it has doubled in size.
- Shape the Bread:
- After the dough has risen, gently punch it down to release the air. Turn it out onto a floured surface and shape it into a round loaf. Place the shaped dough onto a baking sheet lined with parchment paper. Cover it again with a cloth and let it rise for another 30-60 minutes.
- Preheat the Oven:
- While the dough is rising for the second time, preheat your oven to 450°F (230°C). This high temperature will create a beautiful crust on the bread.
- Bake the Bread:
- Once the dough has risen, use a sharp knife to make a few slashes on the top of the loaf. This allows steam to escape during baking. Place the baking sheet in the preheated oven and bake for 25-30 minutes, or until the bread is golden brown and sounds hollow when tapped on the bottom.
- Make the Tapenade:
- While the bread is baking, prepare the tapenade. In a food processor, combine the black olives, green olives, capers, garlic, and parsley. Pulse until coarsely chopped. With the processor running, drizzle in the olive oil and lemon juice until the mixture is well blended but still chunky. Season with salt and pepper to taste.
- Serve:
- Once the bread is baked, allow it to cool slightly on a wire rack before slicing. Serve the warm bread with the tapenade spread on top or as a dip on the side.
Extra Tips
To elevate the flavors of your tapenade, consider adding a splash of red wine vinegar or a pinch of red pepper flakes for a touch of heat. Additionally, you can experiment with different types of olives to create a unique flavor profile.
If time allows, prepare the tapenade a few hours in advance or even the day before, as it will allow the flavors to meld beautifully. Serve the bread and tapenade with fresh vegetables or cheese for a well-rounded appetizer experience.
Cucumber Cups With Tuna Rillettes
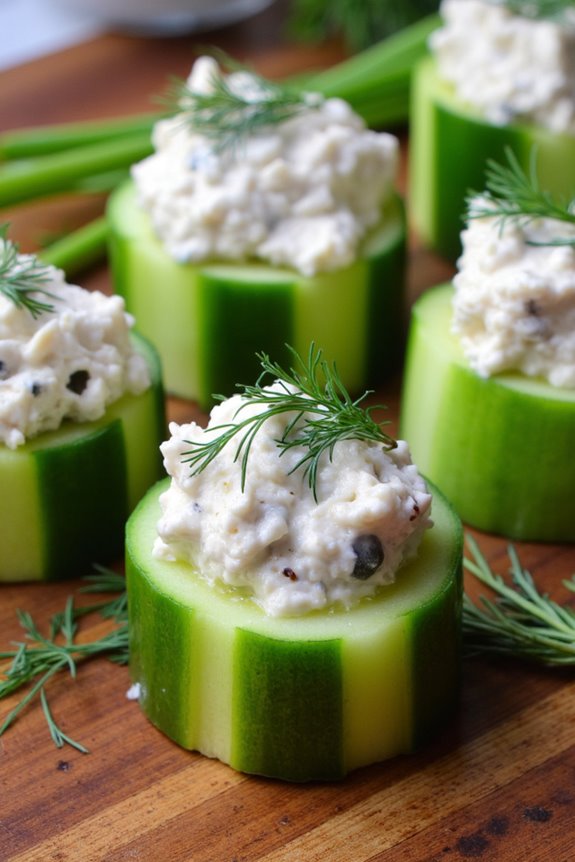
Cucumber Cups with Tuna Rillettes is a delightful French appetizer that combines the invigorating crunch of cucumber with the rich and savory flavors of tuna rillettes. This dish is perfect for entertaining guests at a dinner party or as a light starter for a casual gathering.
The combination of fresh herbs and creamy tuna creates a harmonious blend that’s both satisfying and elegant. Preparing these cucumber cups is simple and can be done in advance, making them an excellent choice for busy hosts.
The subtle taste of the cucumbers serves as the perfect vessel for the luscious tuna spread, allowing the flavors to shine through without overwhelming your palate. Serve these delightful bites chilled for a revitalizing treat that will impress your guests.
Ingredients (Serves 4-6)
- 2 large cucumbers
- 1 can (5 oz) good-quality tuna in olive oil, drained
- 2 tablespoons cream cheese
- 1 tablespoon mayonnaise
- 1 teaspoon Dijon mustard
- 1 tablespoon fresh lemon juice
- 2 tablespoons capers, rinsed and chopped
- 2 tablespoons fresh chives, finely chopped
- Salt and pepper to taste
- Fresh dill for garnish (optional)
Instructions
- Prepare the Cucumbers: Start by washing the cucumbers thoroughly. Cut the cucumbers into 2-inch pieces. Using a melon baller or a small spoon, carefully scoop out the center of each piece, creating a hollow cup. Make sure not to pierce through the bottom. Set the cucumber cups aside on a platter.
- Make the Tuna Rillettes: In a mixing bowl, combine the drained tuna, cream cheese, mayonnaise, Dijon mustard, and lemon juice. Mix well until the ingredients are fully blended and creamy.
- Add Flavor: Stir in the chopped capers and chives into the tuna mixture. This will enhance the flavor profile of the rillettes. Season the mixture with salt and pepper, adjusting to your taste preferences.
- Fill the Cucumber Cups: Using a spoon or a piping bag, fill each cucumber cup generously with the tuna rillettes mixture. Confirm each cup is well-filled to showcase the vibrant ingredients.
- Chill and Serve: Refrigerate the filled cucumber cups for at least 30 minutes before serving. This allows the flavors to meld together and guarantees they’re served cold. Before serving, garnish with fresh dill if desired.
Extra Tips
For the best flavor, use high-quality tuna packed in olive oil, as it will add richness to the dish. If you prefer a lighter option, you can substitute the cream cheese with Greek yogurt for a healthier twist.
Additionally, feel free to experiment with different herbs such as parsley or tarragon to customize the flavor of your tuna rillettes. These cucumber cups are best enjoyed fresh, so try to serve them within a few hours of preparing them for ideal texture and taste.
Mini Croque Monsieur

Mini Croque Monsieur is a delightful twist on the classic French sandwich that combines toasted bread, creamy béchamel sauce, and savory ham, topped with melted cheese. This bite-sized version is perfect for entertaining or as a fun appetizer for gatherings. The crispy exterior and gooey interior make these mini sandwiches irresistible, and they can be prepared quickly for any occasion.
Whether you’re hosting a cocktail party or simply enjoying a cozy evening at home, these mini delights will transport you straight to a Parisian café.
Making Mini Croque Monsieur isn’t only simple but also allows for plenty of customization. You can experiment with different types of cheese, such as Gruyère or Emmental, or even add a touch of truffle oil for an extra layer of flavor. With a few basic ingredients and a little time, you can impress your guests with this elegant yet comforting dish that captures the essence of French cuisine.
Ingredients (serves 4-6):
- 12 slices of white bread
- 6 slices of cooked ham
- 1 cup of shredded Gruyère cheese
- 2 tablespoons of unsalted butter
- 2 tablespoons of all-purpose flour
- 1 cup of whole milk
- 1/2 teaspoon of Dijon mustard
- Salt and pepper, to taste
- Additional Gruyère cheese for topping
- Fresh parsley, for garnish (optional)
Cooking Instructions:
1. Prepare the Béchamel Sauce: In a medium saucepan, melt the butter over medium heat. Once melted, whisk in the flour and cook for about 1-2 minutes until the mixture is golden and bubbly. Gradually whisk in the milk, ensuring there are no lumps.
Continue to stir until the mixture thickens and coats the back of a spoon, about 5-7 minutes. Stir in the Dijon mustard, and season with salt and pepper to taste. Remove from heat and set aside.
2. Assemble the Sandwiches: Preheat your oven to 400°F (200°C). Take six slices of bread and spread a generous layer of the béchamel sauce on one side of each slice. Place a slice of ham on top of the béchamel, followed by a sprinkle of shredded Gruyère cheese.
Top with the remaining six slices of bread, béchamel side down, to create sandwiches.
3. Cook the Sandwiches: In a large skillet over medium heat, melt a little butter. Once hot, add the assembled sandwiches and cook for about 3-4 minutes on each side, until golden brown and crispy. You may need to cook them in batches to avoid overcrowding the pan.
4. Finish in the Oven: Once the sandwiches are golden brown, transfer them to a baking sheet. Top each sandwich with additional Gruyère cheese. Bake in the preheated oven for about 5-7 minutes, or until the cheese is bubbly and golden.
5. Serve and Garnish: Remove the mini Croque Monsieur from the oven and let them cool slightly. Cut each sandwich into quarters for easy serving. Garnish with chopped fresh parsley if desired.
Extra Tips:
To enhance the flavor of your Mini Croque Monsieur, consider adding a layer of sautéed mushrooms or caramelized onions between the ham and cheese. These additions will bring depth and richness to the dish.
Additionally, for a crispy texture, you can use a panini press instead of a skillet for cooking. Be sure to keep an eye on them in the oven to prevent the cheese from burning, and serve them warm for the best experience. Enjoy your culinary adventure in French cuisine!
Tarte Flambée

Tarte Flambée, or Flammekueche, is a delectable Alsatian dish that combines a thin, crispy crust with a delightful topping of crème fraîche, onions, and lardons. Traditionally baked in a wood-fired oven, this savory tart is perfect for sharing with friends and family as an appetizer or a light meal. Its rich flavors and satisfying texture make it a favorite for gatherings and cozy dinners alike.
The beauty of Tarte Flambée lies in its simplicity—made with just a few quality ingredients, it captures the essence of French cuisine. Although it hails from the Alsace region, this dish can be enjoyed anywhere and is highly customizable. You can add toppings like mushrooms, cheese, or herbs to suit your taste, making it a versatile choice for any occasion.
Ingredients (Serves 4-6):
- 250g all-purpose flour
- 1 teaspoon salt
- 125ml water
- 1 tablespoon olive oil
- 200g crème fraîche
- 150g lardons (or bacon, diced)
- 1 large onion, thinly sliced
- Freshly ground black pepper to taste
- Optional: chopped fresh chives for garnish
Cooking Instructions:
- Prepare the Dough: In a mixing bowl, combine the flour and salt. Gradually add the water and olive oil while stirring until the mixture forms a rough dough. Knead the dough on a lightly floured surface for about 5 minutes until smooth and elastic. Wrap the dough in plastic wrap and let it rest for 30 minutes at room temperature.
- Preheat the Oven: While the dough is resting, preheat your oven to its highest setting (around 475°F/245°C) and place a baking stone or an inverted baking sheet inside to heat up. This helps achieve that crispy crust.
- Prepare the Topping: In a skillet over medium heat, cook the lardons until they’re crispy. Remove them from the pan and set aside. In the same skillet, sauté the sliced onions in the rendered fat until they’re soft and translucent, about 5-7 minutes. Set aside.
- Roll Out the Dough: After the dough has rested, roll it out on a floured surface into a thin rectangle or circle, about 1/8 inch thick. The thinner the dough, the crispier the tart will be.
- Assemble the Tarte Flambée: Transfer the rolled-out dough onto a piece of parchment paper for easy handling. Spread the crème fraîche evenly over the surface of the dough, leaving a small border around the edges. Distribute the sautéed onions and crispy lardons evenly on top. Season with freshly ground black pepper.
- Bake: Carefully slide the parchment paper with the assembled tart onto the preheated baking stone or inverted baking sheet. Bake for about 10-12 minutes or until the edges are golden brown and crisp.
- Garnish and Serve: Once baked, remove the Tarte Flambée from the oven and allow it to cool for a minute. Optionally, sprinkle chopped fresh chives on top before slicing into pieces and serving warm.
Extra Tips:
For an even better flavor, consider using high-quality lardons or artisanal bacon, which will enhance the dish’s richness. If you want a vegetarian version, simply omit the lardons and add some sautéed mushrooms or spinach instead.
This dish is best enjoyed fresh out of the oven, so try to serve it immediately for maximum crispiness and flavor. Enjoy your culinary journey into the heart of Alsace with this delightful Tarte Flambée!
Stuffed Mushrooms With Boursin

Stuffed mushrooms with Boursin are a delightful and elegant appetizer that can elevate any gathering. These savory bites are easy to prepare, making them perfect for dinner parties or family gatherings. The combination of earthy mushrooms and the creamy, herbed cheese filling is certain to impress your guests and tantalize their taste buds.
Whether served warm or at room temperature, these stuffed mushrooms are a classic French-inspired dish that brings a touch of sophistication to your appetizer spread.
Making stuffed mushrooms with Boursin isn’t only simple but also allows for creativity. You can customize the filling by adding different herbs or spices according to your preference. This recipe utilizes Boursin cheese, known for its rich flavor and creamy texture, which pairs beautifully with the mushrooms.
With a little preparation, you can have a stunning appetizer ready in no time, inviting everyone to savor each bite.
Ingredients (Serves 4-6):
- 12 large button mushrooms
- 8 ounces Boursin cheese (garlic & herb flavor)
- 1/4 cup breadcrumbs (preferably seasoned)
- 2 tablespoons fresh parsley, chopped
- 1 tablespoon olive oil
- 1 teaspoon garlic powder
- Salt and pepper to taste
- Optional: grated Parmesan cheese for topping
Cooking Instructions:
- Preheat the Oven: Begin by preheating your oven to 375°F (190°C). A properly heated oven guarantees that the stuffed mushrooms cook evenly and develop a nice golden color.
- Prepare the Mushrooms: Clean the mushrooms gently with a damp cloth to remove any dirt. Carefully remove the stems from the caps and finely chop the stems, as they’ll be used in the filling.
- Make the Filling: In a mixing bowl, combine the chopped mushroom stems, Boursin cheese, breadcrumbs, chopped parsley, olive oil, garlic powder, salt, and pepper. Mix thoroughly until all ingredients are well incorporated. The mixture should be creamy yet hold its shape.
- Stuff the Mushroom Caps: Using a small spoon or a piping bag, generously fill each mushroom cap with the cheese mixture. Make sure to mound the filling slightly above the edge of the cap for a visually appealing presentation.
- Arrange on Baking Sheet: Place the stuffed mushrooms on a baking sheet lined with parchment paper, spacing them apart to allow for even cooking.
- Bake the Mushrooms: Transfer the baking sheet to the preheated oven and bake for 20-25 minutes, or until the mushrooms are tender and the tops are golden brown. If desired, sprinkle grated Parmesan cheese on top during the last 5 minutes of baking for an added flavor boost.
- Serve: Once baked, remove the mushrooms from the oven and let them cool slightly before serving. Arrange them on a platter and garnish with additional chopped parsley if desired.
Extra Tips:
When preparing stuffed mushrooms with Boursin, consider using a variety of mushrooms for added flavor and texture. Shiitake or cremini mushrooms can provide a deeper taste than traditional button mushrooms.
Additionally, feel free to experiment by adding cooked sausage, spinach, or other vegetables to the filling for a heartier appetizer. These mushrooms can be made ahead of time and stored in the refrigerator before baking, making them a convenient option for busy hosts. Enjoy!