

French cuisine has a way of making any meal feel special and elegant. From the vibrant Ratatouille to the creamy Gratin Dauphinois, these side dishes are more than just tasty—they’re steeped in tradition. Each one brings its own flair to the table, making it tough to pick a favorite. Ready to find out which ones will shine at your next dinner? Let’s explore these delightful options together.
Ratatouille
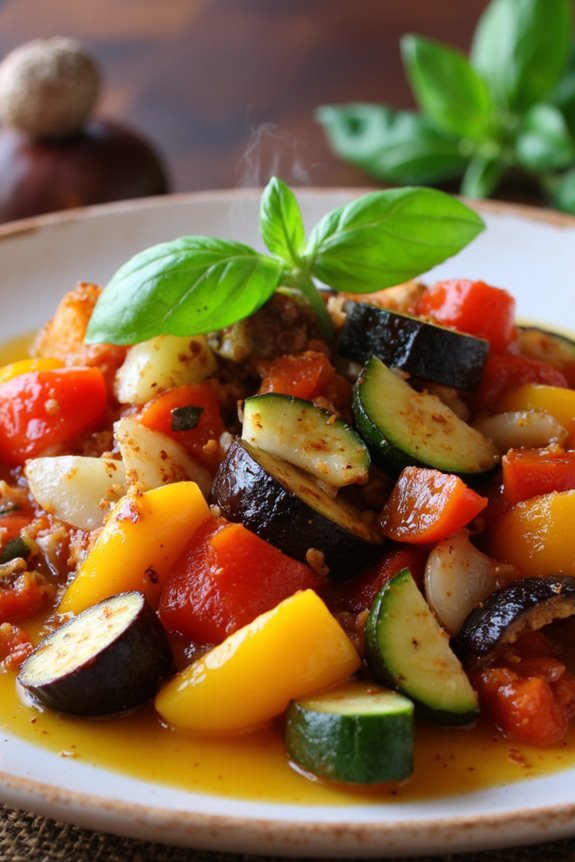
Ratatouille is a classic French Provençal dish that celebrates the vibrant flavors of summer vegetables. This delightful vegetable medley combines eggplant, zucchini, bell peppers, tomatoes, and onions, simmered together with aromatic herbs and spices. Traditionally served as a side dish, ratatouille can also be enjoyed on its own or as a topping for grilled meats and fish.
Whether served hot or cold, this dish embodies the essence of French country cooking, making it a perfect addition to any meal. The beauty of ratatouille lies in its versatility and simplicity. Each ingredient contributes to a symphony of flavors, while the cooking process allows the vegetables to meld beautifully.
With a handful of fresh ingredients and a little patience, you can whip up this delicious side dish that will impress your family and friends. Prepare to enjoy a dish that not only tastes good but is also visually stunning with its colorful presentation.
Ingredients (Serves 4-6)
- 1 medium eggplant, diced
- 2 medium zucchinis, sliced
- 1 large bell pepper (red or yellow), chopped
- 1 medium onion, chopped
- 3 cloves of garlic, minced
- 4 medium tomatoes, diced
- 1/4 cup olive oil
- 1 teaspoon dried thyme
- 1 teaspoon dried basil
- Salt and pepper to taste
- Fresh basil leaves for garnish (optional)
Cooking Instructions
- Prepare the Vegetables: Start by washing and chopping all the vegetables. Dice the eggplant, slice the zucchinis, chop the bell pepper and onion, and dice the tomatoes. Mince the garlic as well. This preparation guarantees that everything is ready to go, making the cooking process smoother.
- Sauté the Onions and Garlic: In a large skillet or pot, heat the olive oil over medium heat. Once hot, add the chopped onions and sauté until they become translucent, about 5 minutes. Add the minced garlic and cook for an additional minute until fragrant. This step builds the flavor base for your ratatouille.
- Cook the Eggplant: Add the diced eggplant to the skillet. Stir well and cook for about 5-7 minutes, allowing the eggplant to soften and absorb the flavors of the onions and garlic. If the eggplant starts to stick, you can add a splash more olive oil.
- Incorporate Other Vegetables: Next, add the chopped bell pepper and zucchini into the skillet. Stir everything together and cook for another 5 minutes, until the vegetables begin to soften.
- Add Tomatoes and Seasoning: Once the bell peppers and zucchini have softened, add the diced tomatoes, dried thyme, and dried basil. Season with salt and pepper to taste. Stir well to combine all the ingredients. Allow the mixture to simmer for about 20-25 minutes, stirring occasionally, until all the vegetables are tender and the flavors meld together beautifully.
- Final Touches: Once cooked, taste and adjust the seasoning if necessary. Remove from heat and let the ratatouille sit for about 5 minutes before serving. This resting time allows the flavors to deepen.
- Serve: Serve the ratatouille warm, garnished with fresh basil leaves if desired. It can be enjoyed on its own or alongside grilled meats, fish, or crusty bread.
Extra Tips
For a more robust flavor, consider adding a splash of balsamic vinegar or a pinch of red pepper flakes for a little kick. Feel free to customize the vegetables based on what you have on hand—zucchini can be substituted with other summer squashes, and you can add ingredients like mushrooms or carrots for added texture.
Ratatouille can also be made in advance and stored in the refrigerator for up to three days, allowing the flavors to develop even further!
Pommes Dauphine

Pommes Dauphine is a classic French side dish that combines the lightness of choux pastry with the comforting texture of potato. This delightful dish is a perfect accompaniment to a variety of main courses, providing a unique twist on traditional mashed or roasted potatoes. The airy, golden-brown dumplings aren’t only visually appealing but also offer a pleasing contrast of textures that will elevate any meal.
Whether served alongside roasted meats, poultry, or as part of a festive gathering, Pommes Dauphine is sure to impress your guests with its charming appearance and exquisite taste.
The preparation of Pommes Dauphine requires a bit of finesse, but the results are well worth the effort. The process begins with the creation of a choux pastry, which forms the base of the dish. By incorporating cooked and mashed potatoes into the choux, you achieve a light yet flavorful dumpling that’s perfect for frying.
Once you master this technique, you’ll find that Pommes Dauphine is a versatile dish that can be adapted for various occasions, making it a must-try for any home cook looking to explore French cuisine.
Ingredients (Serves 4-6):
- 1 cup (250 ml) water
- 1/2 cup (115 g) unsalted butter
- 1 teaspoon salt
- 1 cup (125 g) all-purpose flour
- 4 large eggs
- 1 cup (250 g) mashed potatoes (prepared in advance)
- Freshly ground black pepper (to taste)
- Vegetable oil (for frying)
- Chopped fresh herbs (optional, for garnish)
Cooking Instructions:
- Prepare the Mashed Potatoes: If you haven’t already, peel and chop your potatoes, then boil them in salted water until tender. Drain and mash well, ensuring there are no lumps. Allow to cool slightly before using.
- Make the Choux Pastry: In a medium saucepan, combine the water, butter, and salt. Bring to a gentle boil over medium heat. Once boiling, add the flour all at once, stirring vigorously with a wooden spoon until the mixture pulls away from the sides of the pan and forms a ball. Continue to cook for another minute to dry out the dough slightly.
- Incorporate the Eggs: Remove the saucepan from the heat and let the dough cool for a few minutes. Add the eggs one at a time, mixing well after each addition until fully incorporated. The mixture should be smooth and glossy. Stir in the prepared mashed potatoes, mixing until fully combined. Season with freshly ground black pepper to taste.
- Heat the Oil: In a deep frying pan or pot, heat vegetable oil to 350°F (175°C). You need enough oil to submerge the dumplings, usually about 2-3 inches deep.
- Fry the Dumplings: Using a small scoop or two spoons, carefully drop spoonfuls of the dough into the hot oil. Fry in batches, ensuring not to overcrowd the pan. Cook for about 4-5 minutes, or until the dumplings are puffed and golden brown, turning them occasionally for even cooking.
- Drain and Serve: Once cooked, use a slotted spoon to transfer the Pommes Dauphine to a plate lined with paper towels to drain excess oil. Serve hot, garnished with fresh herbs if desired.
Extra Tips:
For the best results, make sure your mashed potatoes are as smooth as possible, as this will contribute to the overall texture of the Pommes Dauphine.
Additionally, be mindful of the oil temperature while frying; if it’s too low, the dumplings will absorb excess oil, becoming greasy instead of light and crispy. To keep them warm while frying subsequent batches, place the cooked Pommes Dauphine in a warm oven.
Enjoy experimenting with different seasonings or herbs to customize the flavor to your liking!
Tarte Tatin

Tarte Tatin is a classic French dessert that offers a delightful twist on the traditional apple pie. Originating from the Loire Valley, this upside-down caramelized apple tart is a perfect balance of sweet and tart flavors. The story behind its creation is as charming as the dish itself; it was reportedly invented by the Tatin sisters who ran a hotel in the late 19th century.
The dessert captures the essence of French cooking—simple yet elegant, making it a delightful side dish for any meal.
The beauty of Tarte Tatin lies in its simplicity. With just a few basic ingredients, you can create a stunning dessert that will impress your family and guests alike. The key is to perfectly caramelize the apples before baking them under a flaky pastry crust. This recipe will guide you through the steps to make a delicious Tarte Tatin that serves 4-6 people, making it a perfect addition to your culinary repertoire.
Ingredients:
- 6 medium-sized apples (such as Granny Smith or Braeburn)
- 1 cup granulated sugar
- 1/2 cup unsalted butter
- 1 teaspoon vanilla extract
- 1/4 teaspoon salt
- 1 sheet of puff pastry (thawed if frozen)
- Flour for dusting
Cooking Instructions:
1. Prepare the Apples: Begin by peeling, coring, and quartering the apples. This will guarantee that they cook evenly and are easy to serve once the tart is finished.
2. Caramelize the Apples: In an oven-safe skillet or a cast-iron pan, melt the butter over medium heat. Once melted, add the sugar, salt, and vanilla extract. Stir until the mixture starts to bubble.
Carefully add the apple quarters to the skillet, arranging them tightly in a single layer. Cook for about 15-20 minutes, allowing the apples to caramelize and soften, turning occasionally to guarantee even coverage.
3. Preheat the Oven: While the apples are caramelizing, preheat your oven to 375°F (190°C). This will prepare your oven for baking the tart once the caramelization is complete.
4. Add the Puff Pastry: Once the apples are nicely caramelized, remove the skillet from the heat. On a lightly floured surface, roll out the puff pastry to fit over the skillet. Place the pastry over the apples, tucking the edges into the skillet to encase the apples.
5. Bake the Tarte Tatin: Transfer the skillet to the preheated oven and bake for about 25-30 minutes, or until the puff pastry is golden brown and crispy.
6. Cool and Serve: Once baked, remove the Tarte Tatin from the oven and let it cool for about 5-10 minutes. To serve, carefully invert the tart onto a serving plate. Be cautious, as the caramel may still be hot and liquid.
Extra Tips:
When making Tarte Tatin, feel free to experiment with different types of apples to find your preferred flavor profile. For a more complex taste, you can add spices like cinnamon or nutmeg to the caramel as it cooks.
Additionally, serving the tart with a scoop of vanilla ice cream or a dollop of whipped cream can elevate the dessert even further. Remember, patience is key while caramelizing the apples; rushing the process may lead to uneven cooking. Enjoy your homemade Tarte Tatin!
Gratin Dauphinois
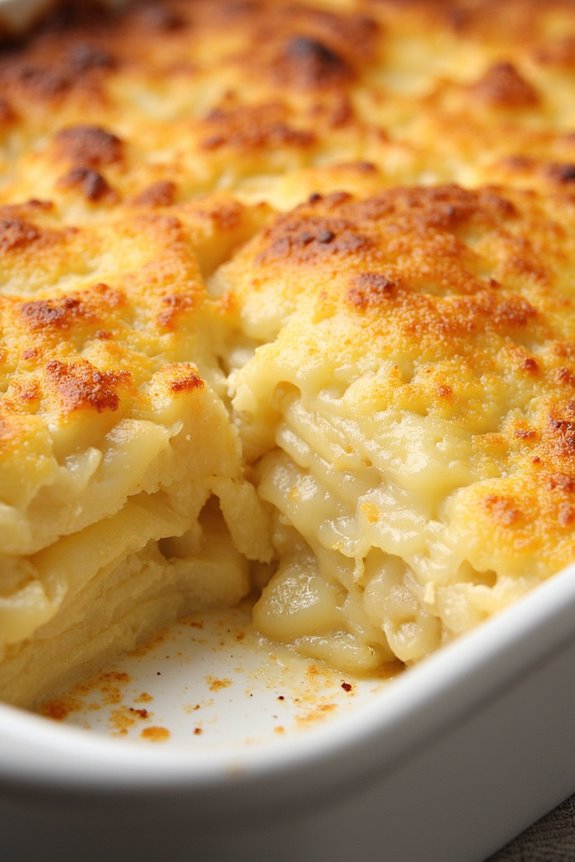
Gratin Dauphinois is a classic French side dish that combines thinly sliced potatoes, creamy milk, and aromatic garlic, all baked to golden perfection. This dish hails from the Dauphiné region of France and is celebrated for its rich, comforting flavors and luxurious texture. Traditionally, the key to a perfect Gratin Dauphinois is the use of starchy potatoes that hold their shape while absorbing the creamy sauce, creating a delightful balance of flavors.
This dish is ideal for serving alongside roasted meats, fish, or as part of a larger French-inspired meal. The creamy, cheesy goodness pairs well with a variety of main courses, making it a versatile addition to any dining table. Whether you’re preparing a family dinner or entertaining guests, Gratin Dauphinois is sure to captivate with its elegant presentation and mouthwatering taste.
Ingredients (Serves 4-6)
- 2 pounds of starchy potatoes (such as Russet or Yukon Gold)
- 2 cups heavy cream
- 1 cup whole milk
- 2 cloves garlic, minced
- 1 teaspoon salt
- 1/2 teaspoon black pepper
- 1/4 teaspoon nutmeg (freshly grated, if possible)
- 1 cup grated Gruyère cheese (or a mix of Gruyère and Parmesan)
- Butter (for greasing the baking dish)
Cooking Instructions
- Preheat the Oven: Start by preheating your oven to 350°F (175°C). This guarantees the oven is at the right temperature for even cooking once the dish is ready to go in.
- Prepare the Baking Dish: Take a medium-sized baking dish and generously butter the inside. This will prevent the gratin from sticking and add a touch of flavor to the dish.
- Slice the Potatoes: Peel the potatoes and slice them thinly, about 1/8-inch thick. A mandoline slicer works best for achieving uniform thickness, which allows for even cooking.
- Mix the Cream Mixture: In a large bowl, combine the heavy cream, whole milk, minced garlic, salt, black pepper, and nutmeg. Whisk everything together until well combined.
- Layer the Potatoes: Begin layering the sliced potatoes in the prepared baking dish. Pour a portion of the cream mixture over the first layer of potatoes, then sprinkle a handful of grated Gruyère cheese on top. Repeat the layering process until all the potatoes and cream mixture are used, finishing with a layer of cheese on top.
- Bake the Gratin: Cover the baking dish with aluminum foil and place it in the preheated oven. Bake for 45 minutes, then remove the foil and continue baking for an additional 30 minutes, or until the top is golden brown and the potatoes are tender when pierced with a knife.
- Cool and Serve: Once baked, remove the Gratin Dauphinois from the oven and let it cool for about 10 minutes before serving. This will help the dish set and make it easier to cut into portions.
Extra Tips
For an even richer flavor, consider adding a sprinkle of fresh herbs such as thyme or rosemary between the layers of potatoes. Additionally, you can experiment with different cheese combinations to find your perfect blend.
Remember to keep an eye on the baking time, as ovens can vary; the top should achieve a beautiful golden crust while guaranteeing the potatoes are fully cooked and creamy inside. Enjoy this delightful dish as part of your next meal!
Haricots Verts Almondine
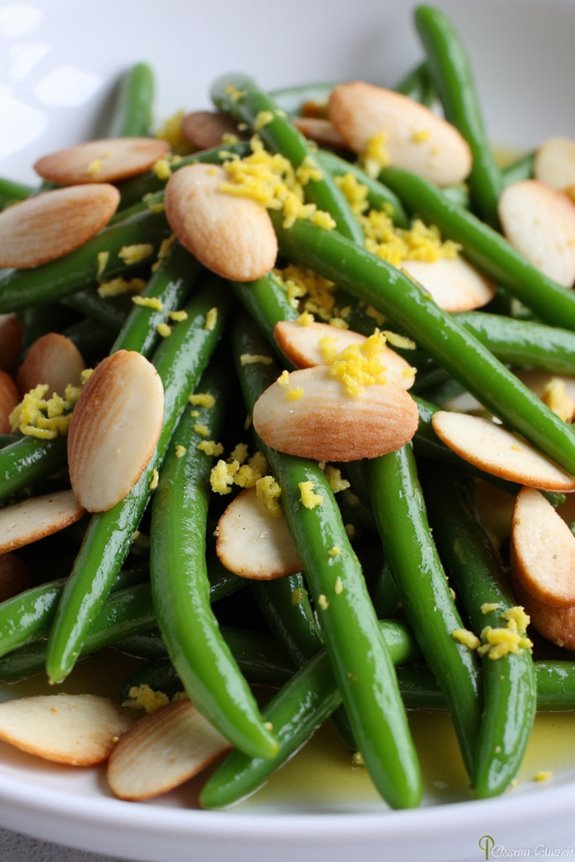
Haricots Verts Almondine is a classic French side dish that elevates the humble green bean to new heights with its rich, nutty flavor and delightful crunch. This dish combines tender haricots verts, which are thin French green beans, with toasted almonds and a hint of butter, creating a sublime accompaniment to any meal.
Whether served alongside roasted chicken, grilled fish, or a hearty vegetable tart, this recipe is sure to impress and is simple enough for even novice cooks to master.
The beauty of Haricots Verts Almondine lies in its simplicity, allowing the fresh ingredients to shine through. With just a few basic components, you can create a dish that looks and tastes like it came straight from a gourmet restaurant.
The key to achieving the perfect texture is to blanch the beans before sautéing them, guaranteeing they remain vibrant and crisp. Follow this easy recipe for a delightful side that will become a staple in your cooking repertoire.
Ingredients (Serves 4-6)
- 1 pound haricots verts (French green beans), trimmed
- 1/4 cup sliced almonds
- 3 tablespoons unsalted butter
- 1 tablespoon olive oil
- Salt, to taste
- Freshly ground black pepper, to taste
- 1 tablespoon lemon juice (optional)
- Zest of 1 lemon (optional)
Cooking Instructions
1. Prepare the Haricots Verts: Start by washing the haricots verts under cold water. Trim the ends by snapping them off or cutting them with a knife. This guarantees they’re ready to cook evenly and look appealing on the plate.
2. Blanch the Beans: Fill a large pot with water and bring it to a boil. Add a generous pinch of salt to the water, then carefully add the trimmed haricots verts. Blanch them for 2-3 minutes until they turn bright green and are just tender but still crisp.
Immediately transfer them to a bowl of ice water to stop the cooking process. This will help retain their vibrant color and crunch.
3. Toast the Almonds: In a large skillet over medium heat, add the sliced almonds. Toast them for 3-5 minutes, stirring frequently until they’re golden brown and fragrant.
Be careful not to burn them, as they can turn bitter quickly. Once toasted, remove the almonds from the skillet and set aside.
4. Sauté the Haricots Verts: In the same skillet, add the unsalted butter and olive oil. Once the butter has melted and is starting to bubble, add the blanched haricots verts.
Sauté for about 4-5 minutes, stirring occasionally, until they’re heated through and slightly tender.
5. Combine and Season: Once the haricots verts are cooked, add the toasted almonds back into the skillet. Season with salt, black pepper, and lemon juice (if using).
Toss everything together to combine the flavors, allowing the almonds to coat the beans evenly.
6. Serve: Transfer the Haricots Verts Almondine to a serving platter. For an extra touch of flavor, sprinkle with lemon zest before serving.
Extra Tips
To enhance the flavor of your Haricots Verts Almondine, consider adding a sprinkle of freshly chopped herbs such as parsley or thyme just before serving. This will add a burst of freshness and color to the dish.
Additionally, if you prefer a richer taste, you can substitute some of the butter with olive oil or even add a splash of white wine to the skillet during the sautéing process.
Remember to taste and adjust the seasoning as needed, guaranteeing the perfect balance of flavors. Enjoy your delightful French side dish!
Salade Niçoise
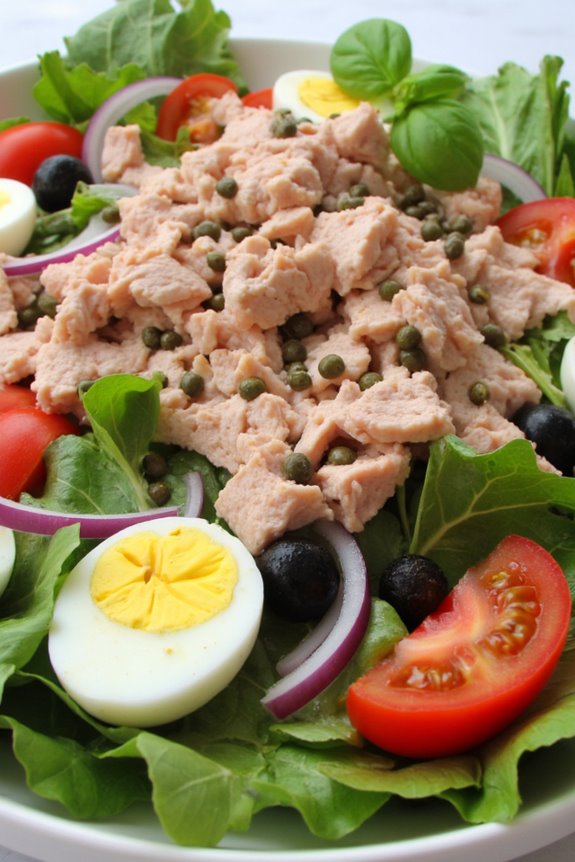
Salade Niçoise is a classic French salad hailing from the sunny region of Nice. This vibrant dish is a delightful mix of fresh vegetables, protein, and sometimes, even a hint of seafood, making it a perfect side dish for any meal or a light main course on its own.
Traditionally, the ingredients are assembled artfully, showcasing the colorful produce that’s abundant in the Mediterranean region. The combination of flavors and textures brings a revitalizing taste to the table, making it a favorite for summer gatherings or picnics.
To prepare Salade Niçoise, you can customize the ingredients based on your preferences, though some components are essential for maintaining its authenticity. The salad typically includes crisp greens, ripe tomatoes, green beans, and hard-boiled eggs, all drizzled with a simple yet flavorful vinaigrette.
Whether you’re serving it alongside grilled meats or enjoying it solo, this salad is an easy, nutritious, and satisfying dish that celebrates the essence of French cuisine.
Ingredients (Serves 4-6)
- 4 cups mixed salad greens (such as arugula, lettuce, or spinach)
- 2 ripe tomatoes, cut into wedges
- 1 cup green beans, trimmed and blanched
- 1 cup canned tuna, drained and flaked (or cooked chicken)
- 4 hard-boiled eggs, peeled and quartered
- 1/2 cup black olives (preferably Niçoise or Kalamata)
- 1/4 cup red onion, thinly sliced
- 2 tablespoons capers, rinsed
- 1/4 cup extra virgin olive oil
- 2 tablespoons red wine vinegar
- Salt and pepper, to taste
- Fresh basil leaves, for garnish (optional)
Cooking Instructions
1. Prepare the Ingredients: Begin by washing and drying the mixed salad greens thoroughly. Trim the ends off the green beans and blanch them in boiling water for about 3-4 minutes until they’re tender but still crisp.
Drain and place them in an ice bath to stop the cooking process. This will help retain their vibrant green color.
2. Make the Vinaigrette: In a small bowl, whisk together the extra virgin olive oil, red wine vinegar, salt, and pepper. Taste and adjust the seasoning as needed. This dressing will elevate the flavors of the salad ingredients, so make sure it’s well-balanced.
3. Assemble the Salad: In a large serving bowl or platter, start by laying down a bed of mixed salad greens. Arrange the tomato wedges, blanched green beans, flaked tuna, quartered hard-boiled eggs, black olives, sliced red onion, and capers in an aesthetically pleasing manner over the greens.
You can be creative with the arrangement to enhance the visual appeal.
4. Dress the Salad: Drizzle the prepared vinaigrette over the assembled ingredients. Toss gently to coat the salad without breaking apart the eggs or tuna. The dressing should lightly cover each component, enhancing the overall flavor without overpowering the fresh ingredients.
5. Garnish and Serve: If desired, sprinkle fresh basil leaves over the top for an aromatic touch. Serve immediately or let it rest for a few minutes to allow the flavors to meld together before serving.
Extra Tips
When making Salade Niçoise, feel free to customize it according to seasonal ingredients or personal preferences. You can substitute the tuna with grilled chicken or even add anchovies for a more traditional touch.
Additionally, for an extra layer of flavor, consider adding a squeeze of fresh lemon juice to the vinaigrette or garnishing with chopped parsley. Remember that freshness is key, so use the best-quality ingredients you can find for a truly authentic experience. Enjoy this revitalizing dish as a side or a light meal any time of the year!
Pommes Sarladaises
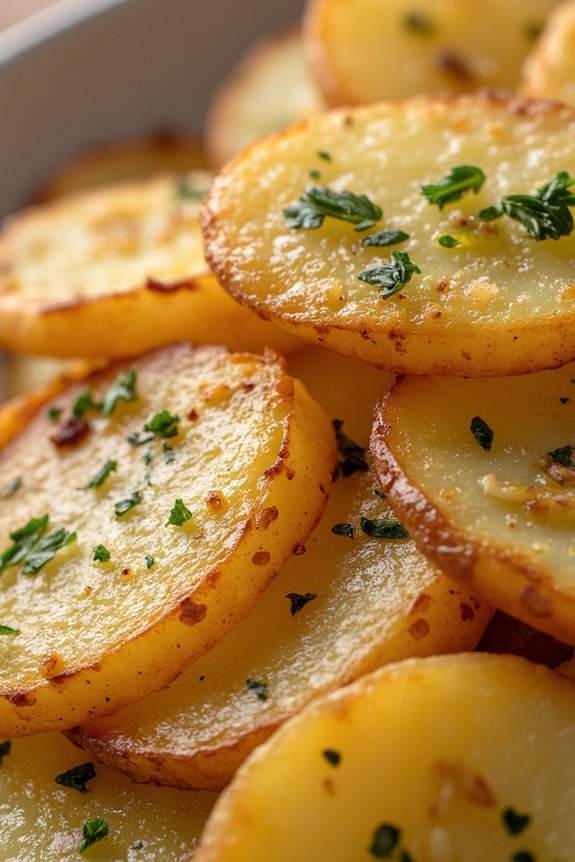
Pommes Sarladaises, a classic French dish from the Périgord region, is a delightful way to prepare potatoes. This dish is characterized by its simple yet rich flavors, achieved by cooking the potatoes in duck fat, which adds a luxurious depth to the dish. Traditionally, it’s made with thinly sliced potatoes that are sautéed until golden brown and crispy, then flavored with garlic and parsley.
It’s a fantastic side dish that pairs beautifully with roasted meats or can stand alone as a comforting vegetarian option. This recipe for Pommes Sarladaises is easy to follow and will impress your guests with its gourmet appeal. The key to accomplishing the perfect texture is to cook the potatoes at the right temperature while guaranteeing they’re evenly coated in the flavorful duck fat.
With just a handful of ingredients, you can create a dish that embodies French culinary tradition right in your own kitchen.
Ingredients (Serves 4-6)
- 1.5 kg (3 lbs) of waxy potatoes (such as Yukon Gold or red potatoes)
- 120 ml (½ cup) duck fat (or olive oil if preferred)
- 3 cloves of garlic, minced
- A handful of fresh parsley, chopped
- Salt, to taste
- Freshly ground black pepper, to taste
Cooking Instructions
- Prepare the Potatoes: Begin by peeling the potatoes and slicing them into thin rounds, about ¼ inch thick. This uniform thickness guarantees even cooking. Rinse the sliced potatoes in cold water to remove excess starch, then pat them dry with a clean kitchen towel to avoid excess moisture when cooking.
- Heat the Fat: In a large, heavy-bottomed skillet or sauté pan, heat the duck fat over medium heat until it’s sizzling but not smoking. If using olive oil, guarantee it’s hot but be cautious not to let it reach its smoking point.
- Cook the Potatoes: Carefully add the sliced potatoes to the hot fat in a single layer. Depending on the size of your pan, you may need to do this in batches. Cook for about 5-7 minutes without stirring until the bottoms are golden and crispy.
- Season and Flip: Once the bottoms are nicely browned, use a spatula to flip the potatoes. Season with salt and pepper at this stage. Cook for another 5-7 minutes, allowing the other side to become equally golden.
- Add Garlic and Parsley: When the potatoes are cooked through and golden brown on both sides, add the minced garlic to the pan. Stir gently to combine, being careful not to break the potatoes. Cook for an additional 1-2 minutes until the garlic is fragrant but not burnt.
- Finish and Serve: Remove the skillet from heat and sprinkle the chopped parsley over the potatoes. Give everything a gentle toss to distribute the parsley. Taste and adjust the seasoning if necessary. Serve hot as a side dish.
Extra Tips
For an extra layer of flavor, you can infuse the duck fat with fresh herbs such as thyme or rosemary before adding the potatoes. Simply heat the fat with the herbs for a few minutes, then strain them out before cooking the potatoes.
Additionally, make sure to keep an eye on the potatoes while they cook to prevent burning, and feel free to experiment with different types of potatoes for varying textures and tastes. Enjoy your Pommes Sarladaises!
Soupe À L’oignon
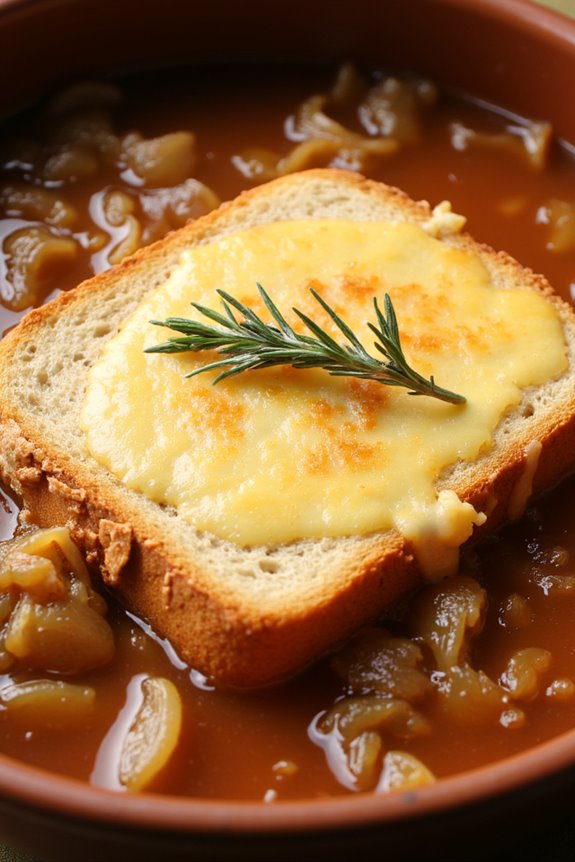
Soupe À L’oignon, or French onion soup, is a classic dish that beautifully showcases the flavors of caramelized onions, rich beef broth, and melted cheese. This comforting dish is often served as a starter in French cuisine, and it’s beloved for its warmth and heartiness. The key to a great French onion soup lies in the slow caramelization of the onions, which brings out their natural sweetness and depth of flavor.
Topped with crusty bread and melted cheese, Soupe À L’oignon is a delightful way to start any meal. Making Soupe À L’oignon is a labor of love but well worth the effort. The caramelized onions form the base of this dish, and they require patience to achieve that perfect golden-brown color. Once the onions are ready, the broth is added, and the soup is finished off with a generous layer of cheese melted to perfection.
Serve it hot, and enjoy this classic French side dish with your favorite bread or on its own for a cozy evening.
Ingredients (Serves 4-6)
- 4 large onions, thinly sliced
- 4 tablespoons unsalted butter
- 1 tablespoon olive oil
- 1 teaspoon sugar
- 4 cups beef broth (or vegetable broth for a vegetarian option)
- 1/2 cup dry white wine (optional)
- 1 tablespoon fresh thyme leaves (or 1 teaspoon dried thyme)
- Salt and pepper, to taste
- 6 slices of baguette or crusty bread
- 1 1/2 cups grated Gruyère cheese (or a mix of Gruyère and Parmesan)
Cooking Instructions
1. Caramelize the Onions: In a large heavy pot or Dutch oven, melt the butter and olive oil over medium heat. Add the sliced onions and a pinch of salt. Cook the onions slowly, stirring occasionally, until they’re soft and golden brown, about 30-40 minutes.
To enhance the caramelization, sprinkle the sugar over the onions after about 15 minutes of cooking, which will help them brown more evenly.
2. Deglaze the Pot: Once the onions are beautifully caramelized, add the white wine (if using) to the pot, scraping up any browned bits from the bottom. Allow the wine to simmer for about 2-3 minutes until it has reduced by half.
3. Add the Broth and Seasoning: Pour in the beef broth and add the thyme. Bring the mixture to a gentle simmer and let it cook for an additional 20-30 minutes. Taste and adjust the seasoning with salt and pepper as needed.
4. Prepare the Bread: While the soup is simmering, preheat your oven to 350°F (175°C). Place the slices of baguette on a baking sheet and toast them in the oven until they’re golden and crispy, about 10 minutes.
5. Assemble the Soup: Once the soup is ready, ladle it into oven-safe bowls. Place a slice of toasted bread on top of each bowl of soup, then generously sprinkle the grated Gruyère cheese over the bread.
6. Broil the Cheese: Place the bowls under the broiler in your oven for about 3-5 minutes, or until the cheese is bubbling and golden brown. Keep a close eye on them to prevent burning.
7. Serve: Carefully remove the bowls from the oven (they will be very hot) and let them cool slightly before serving. Garnish with additional thyme if desired.
Extra Tips
When making Soupe À L’oignon, using a good quality beef broth greatly enhances the flavor of the soup. If you’re looking for a vegetarian version, opt for vegetable broth and consider adding a splash of balsamic vinegar for depth.
For a richer taste, you can also add a sprinkle of Worcestershire sauce. Finally, the type of cheese you use can make a difference; while Gruyère is traditional, feel free to experiment with other cheeses like Emmental or even a sharp cheddar for a twist. Enjoy your delicious homemade French onion soup!
Pissaladière
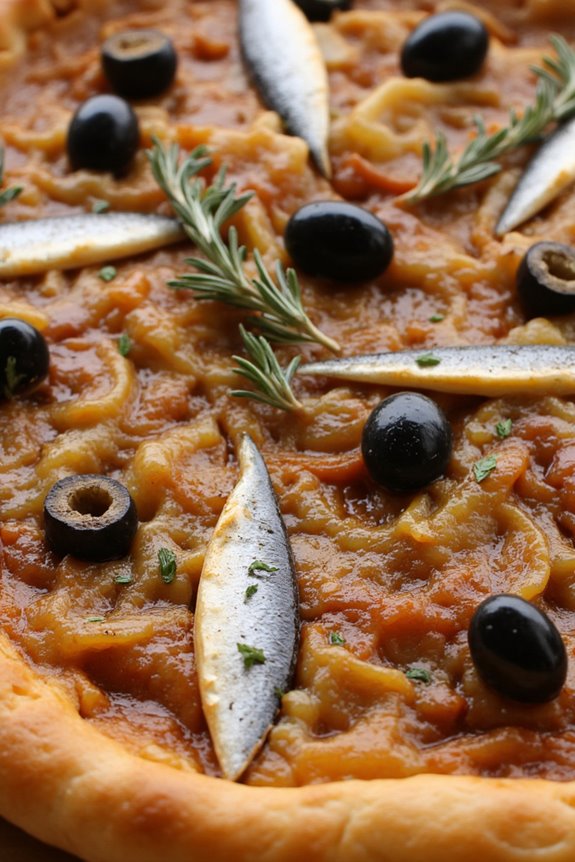
Pissaladière is a classic dish from the Provence region of France, particularly associated with Nice. It’s a savory tart that features a delicious topping of caramelized onions, anchovies, and black olives, all resting on a flaky pastry base. The combination of sweet and savory flavors makes it an irresistible side dish or appetizer that’s perfect for sharing.
Whether you’re hosting a dinner party or simply looking for a delightful addition to your meal, this easy French recipe will transport your taste buds to the sun-soaked shores of the Mediterranean.
This dish is traditionally made with a bread-like dough, but for convenience, many recipes opt for a store-bought pastry dough. The key to a great Pissaladière lies in the slow cooking of the onions, allowing them to develop a rich sweetness that perfectly balances the salty anchovies and olives.
Serve it warm or at room temperature, and watch as it becomes a favorite among your family and friends.
Ingredients (serving size: 4-6 people)
- 1 sheet of puff pastry (thawed if frozen)
- 4 large onions, thinly sliced
- 3 tablespoons olive oil
- 1 teaspoon sugar
- Salt and pepper, to taste
- 12 anchovy fillets, drained
- 20 black olives, pitted (preferably Niçoise or Kalamata)
- 2 teaspoons fresh thyme leaves (or 1 teaspoon dried thyme)
Cooking Instructions
- Preheat the Oven: Begin by preheating your oven to 400°F (200°C). This will guarantee that your Pissaladière bakes evenly and gets a nice golden color.
- Prepare the Onions: In a large skillet, heat the olive oil over medium heat. Add the thinly sliced onions and sprinkle with salt. Cook the onions slowly for about 20-25 minutes, stirring frequently. The goal here is to caramelize them until they’re soft, golden, and sweet. If the onions start to brown too quickly, lower the heat.
- Add Sugar and Seasoning: Once the onions are caramelized, sprinkle in the sugar and continue to cook for an additional 5 minutes. This step enhances the sweetness of the onions even further. Adjust the seasoning with salt and pepper to taste.
- Roll Out the Pastry: While the onions are finishing up, roll out the puff pastry on a lightly floured surface to fit a baking sheet or tart pan. Place the rolled-out pastry onto the prepared baking sheet, pressing down gently at the edges to form a border.
- Assemble the Tart: Spread the caramelized onions evenly over the puff pastry. Arrange the anchovy fillets in a decorative pattern on top of the onions, and scatter the black olives around. Finally, sprinkle the fresh or dried thyme evenly over the top.
- Bake the Pissaladière: Transfer the assembled tart to the preheated oven. Bake for about 20-25 minutes or until the pastry is puffed and golden brown. Keep an eye on it to avoid over-browning.
- Cool and Serve: Once baked, remove the Pissaladière from the oven and let it cool for a few minutes. Slice it into squares or wedges and serve warm or at room temperature.
Extra Tips
When making Pissaladière, feel free to experiment with the toppings! You can add roasted red peppers, capers, or even a sprinkle of cheese for a different flavor profile.
Additionally, if you prefer a milder taste, you can soak the anchovies in water for about 10 minutes to reduce their saltiness before using them. This dish is best enjoyed fresh but can also be made ahead of time and reheated, making it a versatile option for gatherings.
Celeri Remoulade
Celeri Remoulade is a classic French side dish that beautifully combines the crisp texture of celery root (celeriac) with a rich, tangy remoulade sauce. This dish isn’t only invigorating but also an excellent accompaniment to a variety of main courses, making it perfect for dinner parties or casual meals alike.
The creamy dressing, infused with mustard, lemon, and herbs, elevates the natural flavor of the celeriac, offering a delightful contrast that will entice your palate. This dish is typically served chilled, allowing the flavors to meld beautifully while the celeriac maintains its crunch.
Preparing Celeri Remoulade is quite straightforward, requiring minimal cooking skills while delivering impressive results. It’s a fantastic way to incorporate more vegetables into your diet while enjoying the vibrant tastes of French cuisine.
Ingredients (Serves 4-6):
- 1 medium celery root (celeriac), peeled and julienned
- 1 tablespoon Dijon mustard
- 1 tablespoon white wine vinegar
- 1 tablespoon lemon juice
- 1 cup mayonnaise
- 1 tablespoon capers, rinsed and chopped
- 2 tablespoons fresh parsley, chopped
- Salt and pepper to taste
Cooking Instructions:
1. Prepare the Celery Root: Begin by peeling the celery root with a vegetable peeler. Once peeled, cut the celeriac into julienne strips, resembling thin matchsticks. You can also use a mandoline for a more uniform cut.
Place the julienned celeriac in a bowl of cold water with a squeeze of lemon juice to prevent browning while you prepare the dressing.
2. Make the Remoulade Dressing: In a separate mixing bowl, combine the Dijon mustard, white wine vinegar, and lemon juice. Whisk these ingredients together until well-blended.
Gradually add the mayonnaise while continuing to whisk, creating a creamy, smooth dressing.
3. Add Flavor Enhancements: Once the dressing is smooth, fold in the chopped capers and fresh parsley. These ingredients will add depth and a burst of flavor to the remoulade.
Season the mixture with salt and pepper to taste, adjusting according to your preference.
4. Combine the Celeriac and Dressing: Drain the julienned celeriac from the water and gently pat it dry with a paper towel to remove excess moisture.
Add the celeriac to the bowl with the remoulade dressing and toss until the celeriac is evenly coated. Confirm every piece is well-dressed for maximum flavor.
5. Chill and Serve: Transfer the Celeri Remoulade to a serving dish or individual bowls. Cover and refrigerate for at least one hour to allow the flavors to meld.
This dish is best served chilled, making it a revitalizing side during warm months or alongside rich, hearty main dishes.
Extra Tips:
When making Celeri Remoulade, it’s crucial to choose a fresh, firm celery root for the best texture and flavor.
You can also customize the dressing by adding additional herbs like tarragon or chives for a unique twist. If you’re looking to reduce calories, you can substitute half of the mayonnaise with Greek yogurt.
Finally, for an extra crunch, consider adding chopped apples or nuts to the mix, which will complement the creamy dressing beautifully. Enjoy your culinary adventure with this delightful French side dish!
Champignons À La Grecque

Champignons À La Grecque is a delightful French side dish that showcases the earthy flavors of mushrooms combined with a zesty marinade. This dish isn’t only easy to prepare but also serves as a perfect accompaniment to various main courses, making it a versatile addition to any meal.
The mushrooms are infused with the aromatic essence of herbs and spices, creating a revitalizing and savory experience that can elevate your dining experience. Typically served at room temperature, Champignons À La Grecque is ideal for gatherings or family dinners.
The simplicity of the ingredients highlights the natural flavor of the mushrooms, while the marinade adds a tangy twist that makes this dish truly unique. Whether you’re serving it alongside grilled meats or as part of a vegetarian spread, this recipe is sure to impress your guests and family alike.
Ingredients (for 4-6 people):
- 1 pound fresh button mushrooms
- 1/4 cup olive oil
- 1/4 cup red wine vinegar
- 1 tablespoon Dijon mustard
- 1 teaspoon dried oregano
- 1 teaspoon dried thyme
- 2 cloves garlic, minced
- Salt and pepper, to taste
- Fresh parsley, chopped (for garnish)
Cooking Instructions:
- Prepare the Mushrooms: Begin by cleaning the mushrooms. Gently wipe them with a damp cloth or rinse them quickly under cold water, then pat dry. Trim the stems if needed, and leave the mushrooms whole for a more elegant presentation.
- Make the Marinade: In a mixing bowl, combine the olive oil, red wine vinegar, Dijon mustard, dried oregano, dried thyme, minced garlic, salt, and pepper. Whisk the ingredients together until well blended, creating a smooth marinade that will coat the mushrooms evenly.
- Marinate the Mushrooms: Place the cleaned mushrooms into a large mixing bowl or a resealable plastic bag. Pour the marinade over the mushrooms, guaranteeing they’re fully coated. Cover the bowl with plastic wrap or seal the bag, and let them marinate in the refrigerator for at least 1 hour, or up to 4 hours for a more robust flavor.
- Cook the Mushrooms: Preheat your oven to 375°F (190°C). Spread the marinated mushrooms on a baking sheet in a single layer. Roast them in the preheated oven for about 15-20 minutes, or until they’re tender and slightly browned. Be sure to stir them halfway through to guarantee even cooking.
- Serve: Remove the mushrooms from the oven and let them cool slightly. Arrange them on a serving platter and drizzle any remaining marinade over the top. Garnish with freshly chopped parsley before serving.
Extra Tips:
To enhance the flavors of Champignons À La Grecque, consider using a variety of mushrooms such as cremini or shiitake for a more diverse texture and taste.
If you prefer a spicier kick, add a pinch of red pepper flakes to the marinade. This dish can also be made a day in advance, as the flavors will continue to develop and intensify in the refrigerator, making it even more delicious when served. Enjoy this vibrant dish as part of your next meal!