

There’s something truly enchanting about French cuisine that always captivates me. Maybe it’s the rich aromas or the delicate flavors that take me back to my first visit to Paris, where I discovered my love for the culinary arts. From a comforting Coq Au Vin to a vibrant Ratatouille, these timeless recipes remind me of those charming streets. Curious about the secrets behind these classic dishes? Let’s embark on this delicious journey together.
Coq Au Vin
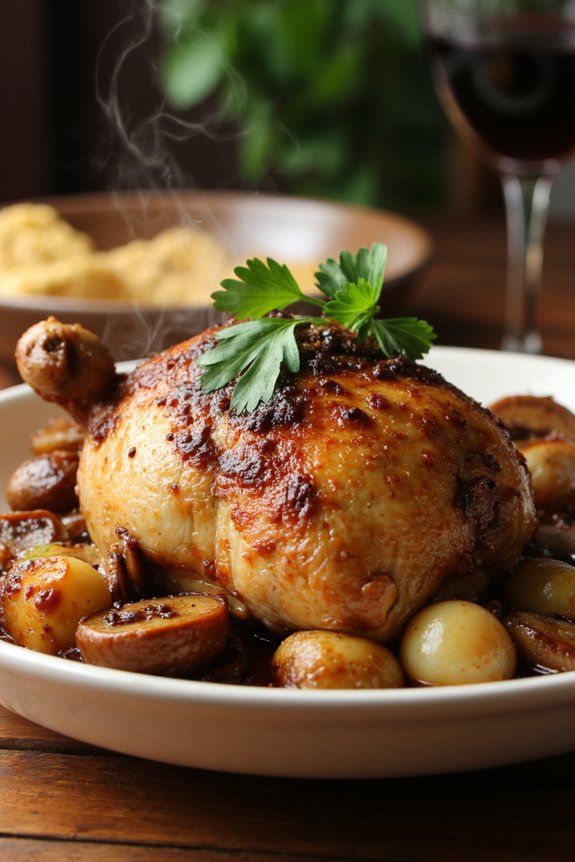
Coq Au Vin is a classic French dish that translates to “rooster in wine.” Traditionally, this dish was made using rooster, but nowadays, it’s typically prepared with chicken. The rich, savory flavors of Coq Au Vin are a result of slow-cooking chicken in red wine, often with mushrooms, onions, and lardons (small strips or cubes of pork fat). This dish is a reflection of the art of French cooking, transforming humble ingredients into a meal that’s both hearty and sophisticated.
Whether you’re serving it for a family dinner or a special occasion, Coq Au Vin is sure to impress.
The origins of Coq Au Vin are steeped in French culinary history, and its preparation varies from region to region. However, the essential elements remain the same: a good-quality wine, aromatic herbs, and slow cooking. Ideally, the dish should be prepared a day in advance to allow the flavors to meld together.
Although it requires time and patience, the end result is a tender, flavorful dish that warms the soul. For a serving size of 4-6 people, here’s how you can prepare this delectable French classic.
Ingredients:
- 1 whole chicken (about 3-4 lbs), cut into 8 pieces
- Salt and freshly ground black pepper
- 2 tablespoons olive oil
- 4 ounces lardons or thick-cut bacon, diced
- 1 onion, sliced
- 2 cloves garlic, minced
- 2 tablespoons all-purpose flour
- 2 cups red wine (preferably Burgundy or Pinot Noir)
- 1 cup chicken stock
- 2 tablespoons tomato paste
- 1 bouquet garni (thyme, parsley, bay leaf)
- 8 ounces button or cremini mushrooms, quartered
- 12 small pearl onions, peeled
- 2 tablespoons unsalted butter
- Fresh parsley, chopped (for garnish)
Instructions:
- Preparation of Chicken: Season the chicken pieces with salt and pepper. Heat olive oil in a large Dutch oven over medium-high heat. Add the lardons or bacon and cook until crisp. Remove and set aside.
- Browning the Chicken: In the same pot, add the chicken pieces, skin-side down, and brown them in batches until golden brown on all sides. This should take about 5 minutes per side. Remove the chicken and set aside.
- Sautéing Aromatics: In the same pot, add the sliced onion and garlic. Sauté until the onion is soft and translucent, about 5 minutes.
- Thickening the Base: Sprinkle the flour over the onions and garlic, stirring well to coat. Cook for about 2 minutes to eliminate the raw flour taste.
- Deglazing and Simmering: Slowly pour in the red wine, scraping up any brown bits from the bottom of the pot. Add the chicken stock, tomato paste, and bouquet garni. Stir to combine.
- Cooking the Chicken: Return the chicken and bacon to the pot. Bring to a simmer, cover, and cook on low heat for about 1.5 to 2 hours, or until the chicken is tender.
- Preparing Mushrooms and Onions: While the chicken simmers, melt the butter in a separate pan over medium heat. Add the mushrooms and pearl onions, sautéing until golden brown.
- Final Touches: Once the chicken is tender, add the sautéed mushrooms and onions to the pot. Simmer for an additional 20 minutes to meld the flavors together.
- Serving: Remove the bouquet garni and adjust seasoning with more salt and pepper if needed. Serve hot, garnished with chopped parsley.
Extra Tips:
For the best flavor, use a wine that you’d enjoy drinking, as it will greatly impact the taste of the dish. If you have time, marinate the chicken in wine, garlic, and herbs overnight for an even deeper flavor.
Coq Au Vin is traditionally served with crusty French bread, mashed potatoes, or buttered noodles, which are perfect for soaking up the rich sauce. Remember, patience is key with this dish – allowing it to slowly cook will yield the most tender and flavorful results.
Ratatouille
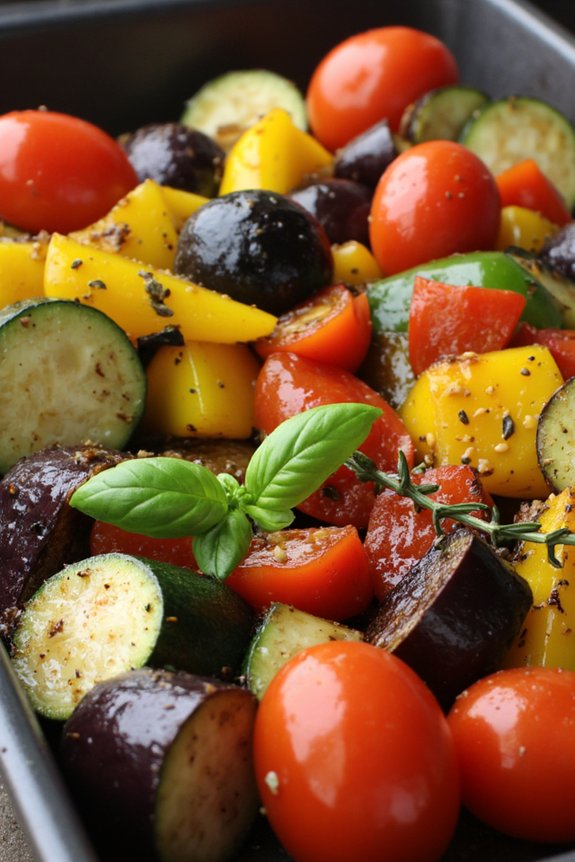
Ratatouille is a classic French Provençal stewed vegetable dish that’s as vibrant in flavor as it’s in color. Traditionally consisting of zucchini, eggplant, bell peppers, and tomatoes, it’s slow-cooked to perfection with herbs like thyme and basil, bringing out the natural sweetness and richness of these vegetables.
This dish isn’t only a favorite in French cuisine but also favored by many for its simple yet aromatic flavors, making it a versatile dish that can be served as a main course or as a side dish.
This Ratatouille recipe serves 4-6 people and is perfect for a cozy family dinner or a gathering with friends. It brings together the beautiful combination of fresh vegetables and herbs, creating a delightful and hearty dish that everyone will love.
Whether served warm or at room temperature, ratatouille is a comforting and wholesome addition to any meal spread, showcasing the best of rustic French cooking.
Ingredients
- 2 medium eggplants
- 3 medium zucchinis
- 2 red bell peppers
- 2 yellow bell peppers
- 4 medium tomatoes
- 1 large onion
- 4 cloves garlic
- 1/4 cup olive oil
- 1 teaspoon dried thyme
- 1 teaspoon dried basil
- Salt and pepper to taste
- Fresh basil leaves for garnish
Cooking Instructions
- Prepare the Vegetables: Start by washing all the vegetables thoroughly. Cut the eggplants, zucchinis, and bell peppers into 1/2-inch thick slices. Dice the tomatoes, and chop the onion and garlic finely.
- Cook the Onion and Garlic: In a large skillet or Dutch oven, heat the olive oil over medium heat. Add the chopped onion and garlic, sautéing them for about 3-4 minutes until they become soft and translucent.
- Add the Vegetables: Add the sliced eggplants, zucchinis, and bell peppers to the skillet. Stir well to combine the vegetables with the onion and garlic, ensuring they’re evenly coated with the olive oil.
- Incorporate the Tomatoes and Herbs: Add the diced tomatoes to the vegetable mixture. Then sprinkle in the dried thyme and basil, along with salt and pepper to taste. Stir the mixture to evenly distribute the herbs and seasoning.
- Simmer the Ratatouille: Reduce the heat to low and cover the skillet with a lid. Allow the ratatouille to simmer gently for about 30-40 minutes, stirring occasionally. The vegetables should become tender and the flavors should meld together beautifully.
- Final Touches: Once the vegetables are cooked to your liking, taste for seasoning and adjust if necessary. Remove from heat and let the dish rest for a few minutes before serving.
- Serve: Transfer the ratatouille to a serving dish and garnish with fresh basil leaves before serving. Enjoy it as a main dish or as a side to your favorite protein.
Extra Tips
For the best flavor, use fresh, ripe vegetables and high-quality olive oil. If possible, make the ratatouille a day ahead—this allows the flavors to deepen and meld together even more.
You can also roast the vegetables separately in the oven before combining them in the skillet for a slightly different texture and flavor. Remember, ratatouille is a highly adaptable dish, so feel free to adjust the herbs and seasoning to your taste preferences.
Bouillabaisse
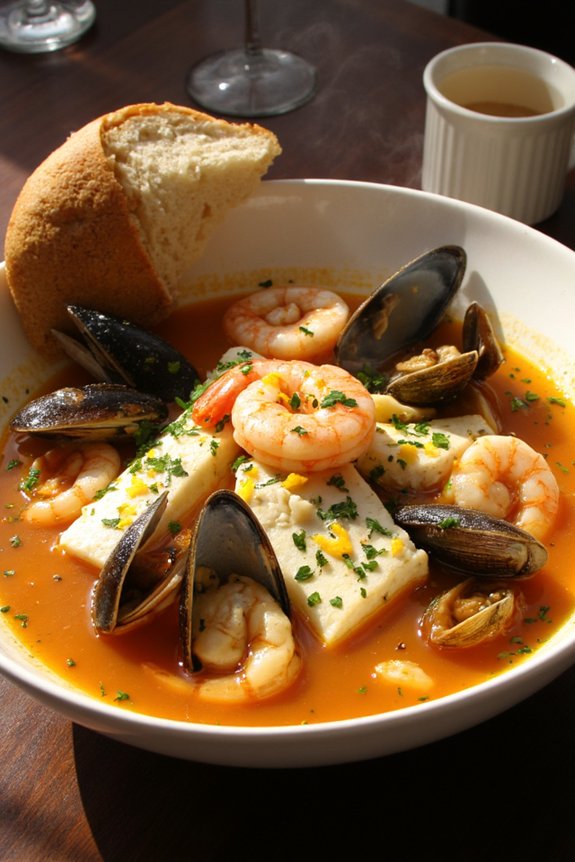
Bouillabaisse is a quintessential French seafood stew originating from the Provence region, specifically from the bustling port city of Marseille. This dish is a harmonious blend of the freshest seafood, aromatic herbs, and a rich broth that captures the essence of the Mediterranean Sea.
Traditionally, bouillabaisse was a humble fishermen’s dish, made with the seafood that couldn’t be sold at the market. Over time, it has evolved into a celebrated and sophisticated dish, enjoyed by seafood lovers worldwide. The key to an authentic bouillabaisse lies in the variety of fish used and the balance of flavors in the broth, making it a delightful and hearty meal.
Cooking bouillabaisse can be a rewarding experience, as it allows you to explore the vibrant tastes and textures of various seafood. The dish is typically served with a slice of crusty bread and a dollop of rouille, a garlic and saffron mayonnaise, to enhance the flavors.
Whether you’re a seasoned cook or a beginner in the kitchen, preparing this traditional French dish can be an enjoyable culinary adventure. The following recipe serves 4-6 people, ensuring that everyone at your table can savor the delightful taste of the sea.
Ingredients:
- 2 tablespoons olive oil
- 1 large onion, finely chopped
- 2 leeks, white part only, sliced
- 2 cloves garlic, minced
- 1 fennel bulb, thinly sliced
- 1 large tomato, chopped
- 2 strips orange zest
- 1 teaspoon saffron threads
- 1 teaspoon dried thyme
- 1 bay leaf
- 1/2 teaspoon cayenne pepper
- 1 cup dry white wine
- 4 cups fish stock
- 1 pound white fish fillets (such as snapper, cod, or haddock), cut into pieces
- 1 pound mussels, scrubbed and debearded
- 1 pound clams, scrubbed
- 1/2 pound shrimp, peeled and deveined
- Salt and pepper to taste
- Fresh parsley, chopped, for garnish
- Crusty bread, for serving
- Rouille sauce, for serving
Instructions:
- Prepare the Aromatics: Heat the olive oil in a large pot over medium heat. Add the chopped onion, leeks, and minced garlic. Sauté until the vegetables are soft and translucent, about 5 minutes.
- Add Vegetables and Spices: Stir in the sliced fennel, chopped tomato, orange zest, saffron threads, thyme, bay leaf, and cayenne pepper. Cook for another 3 minutes until the spices are fragrant and the vegetables are well-coated with the flavors.
- Deglaze with Wine: Pour in the dry white wine to deglaze the pot, scraping up any browned bits from the bottom. Allow the wine to reduce slightly, cooking for about 2 minutes.
- Simmer the Broth: Add the fish stock to the pot and bring it to a gentle simmer. Let the broth cook for 20 minutes to develop the flavors.
- Cook the Seafood: Add the white fish pieces to the pot and simmer for 5 minutes. Then add the mussels, clams, and shrimp. Cover the pot and cook until the mussels and clams open and the shrimp turn pink, about 5-7 minutes. Discard any mussels or clams that don’t open.
- Season and Serve: Taste the broth and adjust the seasoning with salt and pepper as needed. Ladle the bouillabaisse into bowls, garnish with fresh parsley, and serve with crusty bread and rouille sauce on the side.
Extra Tips:
For the best flavor, always use the freshest seafood you can find. If possible, visit a local fish market for your ingredients.
When cooking the seafood, be sure not to overcook it; once the mussels and clams open, they’re ready. Feel free to customize the seafood selection based on what’s available.
Additionally, preparing the rouille sauce in advance will save time and allow the flavors to meld. Finally, letting the broth sit for a few hours before reheating can deepen the flavors, making your bouillabaisse even more delightful.
Quiche Lorraine

Quiche Lorraine is a classic French dish that originated in the Lorraine region of France. This savory pie is renowned for its rich, creamy custard filling, which is traditionally made with eggs, cream, and a generous amount of bacon or lardons, all encased in a buttery, flaky pastry crust.
The simplicity of its ingredients highlights the quality and balance of flavors, making Quiche Lorraine a versatile dish suitable for breakfast, brunch, or lunch. Its popularity has spread far beyond its French roots, and it’s now enjoyed worldwide as a delightful comfort food.
This Quiche Lorraine recipe is designed to serve 4-6 people, offering a delightful combination of textures and flavors in every bite. The preparation involves making a homemade pastry crust, which forms the base for a luscious filling of eggs, cream, cheese, and bacon.
While variations exist, this recipe stays true to the traditional components, guaranteeing an authentic taste. With careful preparation and attention to detail, you can create a Quiche Lorraine that’s both delicious and visually appealing.
Ingredients for 4-6 servings:
- 1 1/4 cups all-purpose flour
- 1/2 cup unsalted butter, chilled and cubed
- 1/4 teaspoon salt
- 3 to 4 tablespoons ice water
- 6 slices of bacon, chopped
- 1 cup heavy cream
- 3 large eggs
- 1/4 teaspoon nutmeg
- 1/4 teaspoon black pepper
- 1/4 teaspoon salt
- 1 cup grated Gruyère cheese
Cooking Instructions:
- Prepare the Pastry Crust:
- In a large mixing bowl, combine the all-purpose flour and salt. Add the chilled, cubed butter and use a pastry cutter or your fingertips to blend until the mixture resembles coarse crumbs.
- Gradually add ice water, one tablespoon at a time, mixing until the dough just comes together. Be careful not to overwork the dough.
- Form the dough into a disk, wrap it in plastic, and refrigerate for at least 30 minutes.
- Preheat the Oven:
- Preheat your oven to 375°F (190°C).
- Roll Out the Dough:
- On a lightly floured surface, roll out the chilled dough into a circle large enough to fit a 9-inch pie pan. Transfer the dough to the pan, pressing it into the edges and trimming any excess. Prick the bottom with a fork.
- Blind Bake the Crust:
- Line the crust with parchment paper and fill with pie weights or dried beans. Bake in the preheated oven for 15 minutes. Remove the weights and parchment, and bake for an additional 5 minutes until the crust is lightly golden. Set aside to cool slightly.
- Cook the Bacon:
- In a skillet over medium heat, cook the chopped bacon until crispy. Remove with a slotted spoon and drain on paper towels.
- Prepare the Filling:
- In a mixing bowl, whisk together the heavy cream, eggs, nutmeg, black pepper, and salt until well combined. Stir in the grated Gruyère cheese and cooked bacon.
- Assemble the Quiche:
- Pour the filling mixture into the cooled pastry crust, spreading evenly.
- Bake the Quiche:
- Place the quiche in the preheated oven and bake for 30-35 minutes, or until the filling is set and the top is golden brown.
- Cool and Serve:
- Allow the quiche to cool slightly on a wire rack before slicing and serving.
Extra Tips:
For the best results, ascertain that all your ingredients, especially the butter and water for the crust, are well-chilled. This helps create a flaky texture.
If Gruyère cheese isn’t available, you can substitute with Swiss cheese or Emmental. Feel free to add a touch of herbs like thyme or chives to the filling for additional flavor.
To prevent a soggy bottom crust, make sure to blind bake it thoroughly. Finally, the quiche can be served warm or at room temperature, making it a perfect make-ahead dish for gatherings or picnics.
Beef Bourguignon
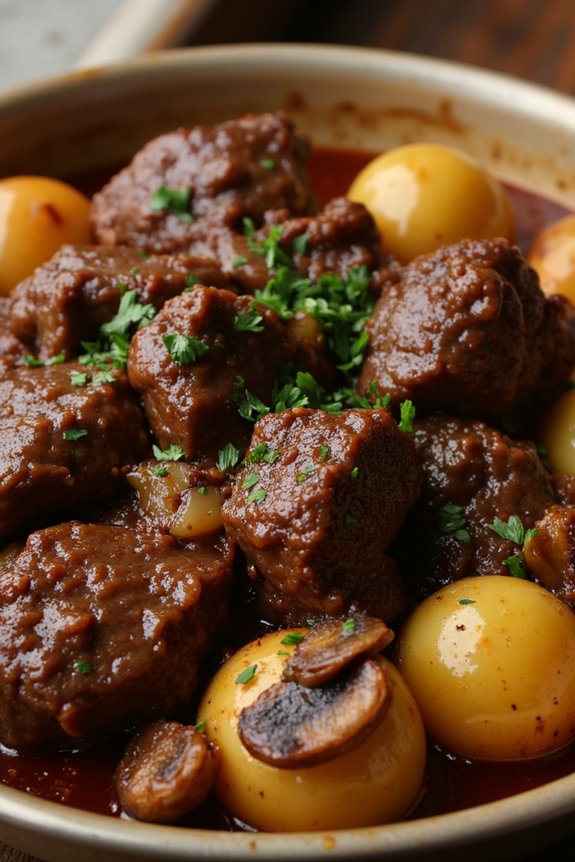
Beef Bourguignon is a classic French stew originating from the region of Burgundy. This dish is known for its rich, deep flavors, achieved by slowly simmering beef with red wine, mushrooms, onions, and bacon. Traditionally, it was considered a peasant dish, using affordable cuts of beef that benefit from long, slow cooking.
Over time, it has evolved into a refined dish that’s cherished worldwide for its comforting and hearty appeal. The key to a successful Beef Bourguignon is to give it the time to develop its flavors, ensuring the beef becomes tender and the sauce thickens to a luscious consistency.
Cooking Beef Bourguignon is a labor of love and requires some patience, but the reward is a meal that’s perfect for family gatherings or special occasions. The preparation begins with browning the beef to build depth of flavor, followed by an aromatic base of sautéed onions and garlic. The stew is then simmered with rich red wine and savory beef stock, creating a beautiful harmony of flavors.
This recipe serves 4-6 people, making it ideal for a cozy dinner party or a family meal.
Ingredients:
- 3 lbs beef chuck, cut into 2-inch cubes
- Salt and freshly ground black pepper
- 2 tablespoons olive oil
- 6 oz bacon, diced
- 1 large onion, chopped
- 2 cloves garlic, minced
- 2 tablespoons all-purpose flour
- 3 cups red wine (preferably Burgundy or Pinot Noir)
- 2-3 cups beef stock
- 1 tablespoon tomato paste
- 1 bouquet garni (thyme, bay leaf, and parsley tied together)
- 24 pearl onions, peeled
- 1 lb button mushrooms, quartered
- 2 tablespoons unsalted butter
- 2 tablespoons chopped fresh parsley, for garnish
Cooking Instructions:
- Prepare the Beef: Preheat your oven to 325°F (165°C). Season the beef cubes with salt and pepper. In a large Dutch oven, heat olive oil over medium-high heat. Brown the beef cubes in batches, ensuring all sides are seared. Remove and set aside.
- Cook the Bacon: In the same Dutch oven, add the diced bacon and cook until crispy. Remove the bacon with a slotted spoon and set aside, leaving the bacon fat in the pot.
- Sauté the Aromatics: Reduce the heat to medium, add the chopped onion to the pot, and cook until softened. Stir in the minced garlic and cook for another minute.
- Thicken with Flour: Sprinkle the flour over the onion mixture, stirring constantly for about 2 minutes until the flour is absorbed and slightly browned.
- Deglaze and Simmer: Gradually add the red wine, scraping up any browned bits from the bottom of the pot. Return the beef and bacon to the pot, add enough beef stock to just cover the meat, then stir in the tomato paste and bouquet garni.
- Cook in Oven: Bring the mixture to a simmer, cover the Dutch oven, and transfer to the preheated oven. Cook for 2 to 3 hours, or until the beef is tender and the sauce has thickened.
- Prepare Vegetables: While the stew is cooking, melt butter in a skillet over medium heat. Add pearl onions and cook until golden. Add mushrooms and sauté until tender.
- Combine and Finish: Once the beef is tender, add the sautéed onions and mushrooms to the stew. Stir well and cook for an additional 30 minutes.
- Serve: Remove the bouquet garni, taste, and adjust seasoning if necessary. Serve hot, garnished with fresh parsley.
Extra Tips:
When making Beef Bourguignon, the choice of wine is essential, as it greatly impacts the flavor of the dish. Opt for a wine that you’d enjoy drinking, such as a good quality Burgundy or Pinot Noir.
Additionally, the dish can benefit from being made a day ahead, allowing the flavors to meld together beautifully overnight. If possible, let the stew rest in the refrigerator and reheat gently before serving.
Finally, serve the Beef Bourguignon with crusty bread or mashed potatoes to soak up the delicious sauce.
Tarte Tatin

Tarte Tatin is a classic French dessert known for its delightful combination of caramelized apples and buttery pastry. The story behind this upside-down tart is as charming as its taste, originating from a happy accident at the Hotel Tatin in the late 19th century. The dish is traditionally made with apples, but variations with pears, peaches, or even vegetables can be found.
When made correctly, the Tarte Tatin offers a perfect balance of sweet, tart, and buttery flavors, making it a beloved treat both in France and around the world.
The Tarte Tatin is traditionally cooked in a heavy, ovenproof skillet or a dedicated Tatin dish to guarantee even caramelization of the sugar and fruit. The apples are the star of this dish, usually Golden Delicious or Granny Smith varieties, which hold their shape well during cooking. The pastry used is a classic puff pastry, which adds a flaky and buttery layer to the caramelized apples.
The tart is cooked on the stovetop before being transferred to the oven, and finally inverted onto a serving plate to reveal the beautifully caramelized top.
Ingredients (serves 4-6):
- 6 medium-sized apples (Golden Delicious or Granny Smith)
- 1 cup granulated sugar
- 1/2 cup unsalted butter
- 1 sheet of puff pastry
- 1 tablespoon lemon juice
- 1 teaspoon vanilla extract
- Pinch of salt
Cooking Instructions:
- Preheat and Prepare: Preheat your oven to 375°F (190°C). Peel, core, and quarter the apples. Toss them with lemon juice to prevent browning.
- Caramelize the Sugar: In an ovenproof skillet (about 10 inches), melt the butter over medium heat. Add the sugar and stir until it dissolves and turns a golden caramel color. This should take about 5-7 minutes; be careful not to burn the sugar.
- Arrange the Apples: Remove the skillet from the heat and carefully arrange the apple quarters, rounded side down, in a circle around the edge of the skillet. Fill in the center with the remaining apples. Sprinkle with a pinch of salt and add vanilla extract.
- Cook the Apples: Return the skillet to medium heat and cook the apples for about 15 minutes, until they begin to soften and the caramel bubbles around them.
- Prepare the Pastry: Roll out the puff pastry on a lightly floured surface, trimming it to fit just inside the skillet. You want the pastry to cover the apples without draping over the edge.
- Bake the Tarte: Drape the pastry over the apples and tuck the edges down around the fruit. Place the skillet in the preheated oven and bake for 25-30 minutes until the pastry is golden and puffed.
- Invert and Serve: Let the tart cool for about 5 minutes. Place a serving plate over the skillet and, using oven mitts, carefully invert the tart onto the plate. Serve warm, ideally with a scoop of vanilla ice cream or a dollop of crème fraîche.
Extra Tips:
When selecting apples, verify they’re firm and free of bruises to maintain their shape during cooking. If using store-bought puff pastry, allow it to thaw completely but keep it chilled before rolling out.
Be cautious when caramelizing sugar, as it can quickly go from golden to burnt. If you don’t have an ovenproof skillet, you can start the tart in a regular skillet and transfer it to a baking dish before adding the pastry.
Croque Monsieur

Croque Monsieur is a classic French bistro sandwich known for its rich, cheesy, and indulgent flavors. Originating in Paris in the early 20th century, this dish has become a beloved staple in cafes and homes alike.
The Croque Monsieur is fundamentally a ham and cheese sandwich, but with a sophisticated twist that involves creamy béchamel sauce and a generous topping of melted cheese. It’s perfect for brunch, lunch, or even a light dinner, offering a delightful taste of French cuisine with each bite.
This recipe for Croque Monsieur serves 4-6 people, making it ideal for a family meal or a gathering with friends. By following these instructions, you’ll be able to recreate this French classic at home with ease. The combination of crusty bread, savory ham, velvety béchamel, and golden melted cheese is sure to impress your guests and transport them to a quaint Parisian café.
Ingredients:
- 8-12 slices of white or sourdough bread
- 6 tablespoons unsalted butter
- 3 tablespoons all-purpose flour
- 2 cups whole milk
- 1 cup grated Gruyère cheese (plus extra for topping)
- 1/2 cup grated Parmesan cheese
- 1 tablespoon Dijon mustard
- 12 slices of good-quality ham
- Salt and freshly ground black pepper
- Nutmeg, to taste
Cooking Instructions:
1. Preheat the Oven: Preheat your oven to 400°F (200°C) and line a baking sheet with parchment paper.
2. Make the Béchamel Sauce: In a medium saucepan, melt 3 tablespoons of butter over medium heat. Add the flour and whisk continuously for about 1-2 minutes until the mixture is smooth and slightly golden. Gradually pour in the milk, whisking constantly to prevent lumps.
Continue to cook and whisk for about 5 minutes until the sauce thickens. Remove from heat and stir in the Dijon mustard, nutmeg, salt, pepper, and 1/2 cup each of Gruyère and Parmesan cheese. Mix until the cheese is melted and the sauce is smooth.
3. Assemble the Sandwiches: Spread a thin layer of béchamel sauce on one side of each slice of bread. Lay out 4-6 slices of bread (sauce side up) and top each with 2 slices of ham. Add another layer of béchamel sauce, then a handful of Gruyère cheese.
Top with the remaining bread slices, sauce side down.
4. Grill the Sandwiches: In a large skillet, melt the remaining butter over medium heat. Carefully place the sandwiches in the skillet and cook for about 3-4 minutes per side, until golden brown and crispy.
5. Bake and Broil: Transfer the sandwiches to the prepared baking sheet. Spread a generous amount of béchamel sauce on top of each sandwich and sprinkle with additional Gruyère cheese.
Bake in the oven for about 5 minutes, then switch to broil for 3-4 minutes, or until the cheese is bubbly and golden.
6. Serve: Remove from the oven and let cool slightly before serving. Cut each sandwich in half and serve warm.
Extra Tips: For an even more authentic experience, you can add a fried or poached egg on top to make it a Croque Madame. Confirm the béchamel sauce is smooth and lump-free for the best texture.
It’s also important to use good-quality ham and cheese for maximum flavor. If you prefer, you can substitute Gruyère with Emmental cheese. Finally, keep a close eye on the sandwiches while broiling, as they can quickly go from golden to burnt. Enjoy your homemade taste of France!
Soupe À L’oignon
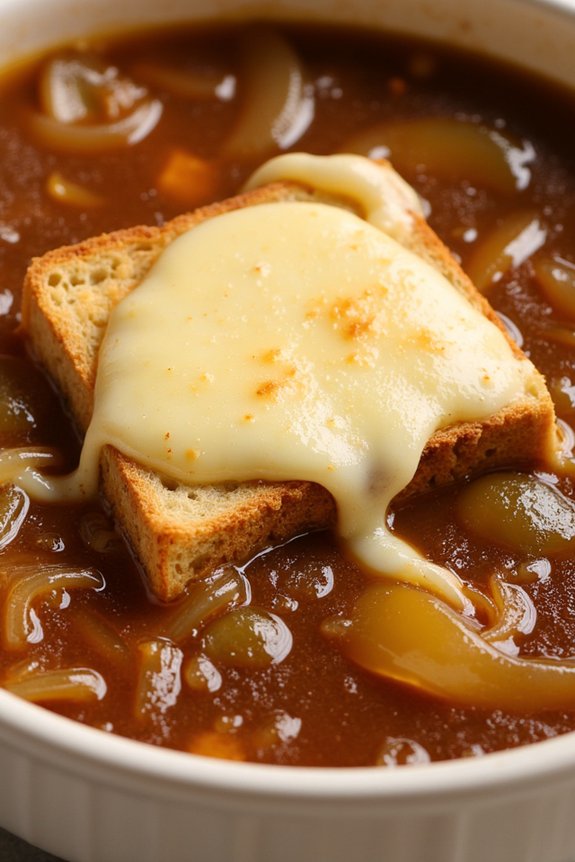
Soupe À L’oignon, or French Onion Soup, is a classic French dish that has delighted taste buds for centuries with its rich flavors and comforting warmth. This traditional recipe combines caramelized onions, a savory beef broth, and a touch of wine to create a soup that’s both hearty and exquisite. Typically served with a crusty bread topped with melted cheese, it’s an ideal choice for a cozy meal on a chilly day or as an elegant starter for a dinner party.
The origins of Soupe À L’oignon date back to the 18th century, where it became a popular dish among Parisians. The soup is traditionally made with simple, inexpensive ingredients, making it an accessible yet luxurious dish. The key to a perfect French Onion Soup lies in the slow caramelization of the onions, which brings out their natural sweetness and depth of flavor. Paired with a good-quality beef stock, and finished with a gratinéed layer of cheese, this soup is a timeless representation of the art of French cuisine.
Ingredients for 4-6 servings:
- 6 large onions, thinly sliced
- 2 tablespoons unsalted butter
- 2 tablespoons olive oil
- 1 teaspoon sugar
- 2 cloves garlic, minced
- 8 cups beef broth
- 1 cup dry white wine
- 2 bay leaves
- 1 tablespoon fresh thyme leaves (or 1 teaspoon dried thyme)
- Salt and freshly ground black pepper, to taste
- 1 baguette, sliced
- 2 cups grated Gruyère cheese
Cooking Instructions:
- Caramelize the Onions: In a large pot, melt the butter with the olive oil over medium heat. Add the sliced onions and sugar, stirring occasionally. Cook for about 25-30 minutes until the onions are golden brown and caramelized. Be patient, as this step is essential for developing the soup’s deep flavor.
- Add Garlic and Deglaze: Once the onions are caramelized, add the minced garlic and cook for another minute until fragrant. Pour in the white wine to deglaze the pot, scraping up any browned bits from the bottom. Let the wine simmer until reduced by half.
- Simmer the Soup: Add the beef broth, bay leaves, thyme, salt, and pepper. Bring the soup to a simmer and let it cook for 30-40 minutes, allowing the flavors to meld together. Remove the bay leaves before serving.
- Prepare the Bread and Cheese Topping: Preheat your oven’s broiler. Arrange the baguette slices on a baking sheet and toast them under the broiler until golden brown on both sides. Top each slice with a generous amount of grated Gruyère cheese.
- Serve and Garnish: Ladle the hot soup into oven-safe bowls. Place the cheese-topped baguette slices on top of the soup. Put the bowls under the broiler until the cheese is melted and bubbling, about 3-5 minutes. Serve immediately.
Extra Tips:
For a richer flavor, consider using a mixture of beef and chicken stock instead of just beef broth. If Gruyère isn’t available, Comté or Emmental can be excellent substitutes. Make sure to adjust the seasoning according to your taste, and for an extra depth of flavor, try adding a splash of brandy or cognac before serving. Finally, using stale bread for the topping can help soak up the soup without becoming too soggy. Enjoy your homemade Soupe À L’oignon!
Duck À L’orange
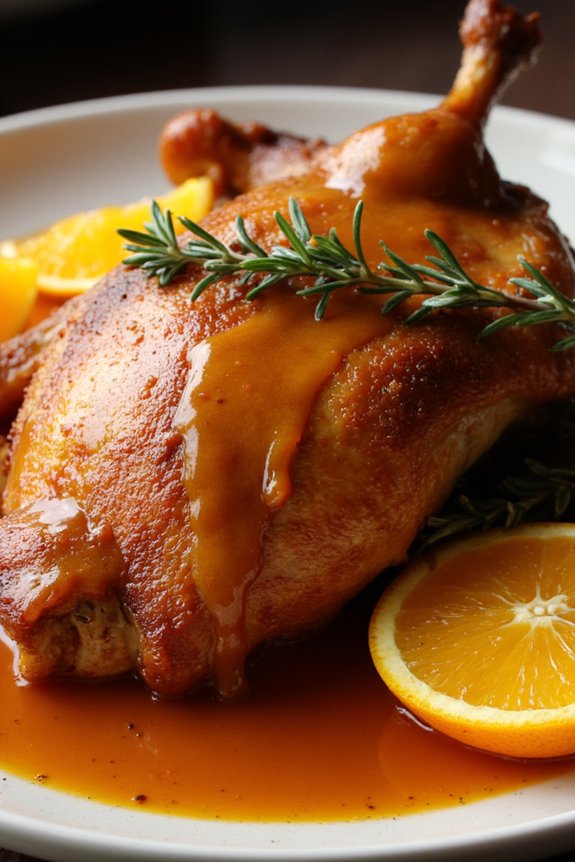
Duck À L’orange is a classic French dish that combines the rich, savory flavor of roasted duck with the bright, citrusy notes of orange. This elegant dish is perfect for special occasions and is sure to impress your guests with its balance of flavors and beautiful presentation.
The key to mastering Duck À L’orange lies in achieving perfectly crispy skin on the duck and a luscious orange sauce that complements the meat without overpowering it.
To prepare Duck À L’orange, you’ll need to start by selecting a high-quality duck, preferably fresh, as this will provide the best flavor and texture. The duck is typically roasted until the skin is golden and crispy, while the meat remains tender and juicy.
The orange sauce is made by caramelizing sugar and then adding orange juice, zest, and stock, which is then reduced to a glossy finish. This recipe serves 4-6 people, making it ideal for a small gathering or family dinner.
Ingredients:
- 1 whole duck (about 4-5 pounds)
- Salt and pepper
- 2 tablespoons unsalted butter
- 1 cup sugar
- 1 cup freshly squeezed orange juice
- Zest of 2 oranges
- 1 cup chicken stock
- 1/4 cup red wine vinegar
- 2 tablespoons Grand Marnier or other orange liqueur (optional)
- Orange segments for garnish
- Fresh thyme sprigs for garnish
Cooking Instructions:
- Prepare the Duck: Preheat your oven to 375°F (190°C). Pat the duck dry with paper towels and season the cavity and outside generously with salt and pepper. Prick the skin all over with a fork to help render the fat during roasting.
- Roast the Duck: Place the duck on a rack in a roasting pan, breast side up. Roast in the preheated oven for about 1.5 to 2 hours, or until the skin is crispy and the internal temperature reaches 165°F (74°C). Baste the duck occasionally with the rendered fat.
- Make the Caramel: While the duck is roasting, melt the sugar in a medium saucepan over medium heat, stirring constantly until it turns a deep amber color. Be careful not to burn it.
- Prepare the Orange Sauce: Once the caramel is ready, carefully add the orange juice, zest, and chicken stock to the saucepan. The mixture will bubble vigorously, so stir carefully. Add the red wine vinegar and let the sauce simmer until it thickens, about 15-20 minutes.
- Finish the Sauce: If using, stir in the Grand Marnier or orange liqueur. Season the sauce with salt and pepper to taste.
- Serve: Once the duck is done, let it rest for 10 minutes before carving. Arrange the duck pieces on a serving platter, drizzle with the orange sauce, and garnish with orange segments and fresh thyme sprigs.
Extra Tips: When preparing Duck À L’orange, it’s important to keep an eye on the caramel as it can quickly go from perfect to burnt. Additionally, you can prepare the orange sauce a day ahead of time to save on preparation time during your event.
If you find the sauce too sweet, balance it with a bit more vinegar or a pinch of salt. Finally, don’t forget to save any leftover duck fat; it’s excellent for roasting potatoes or vegetables.
Sole Meunière
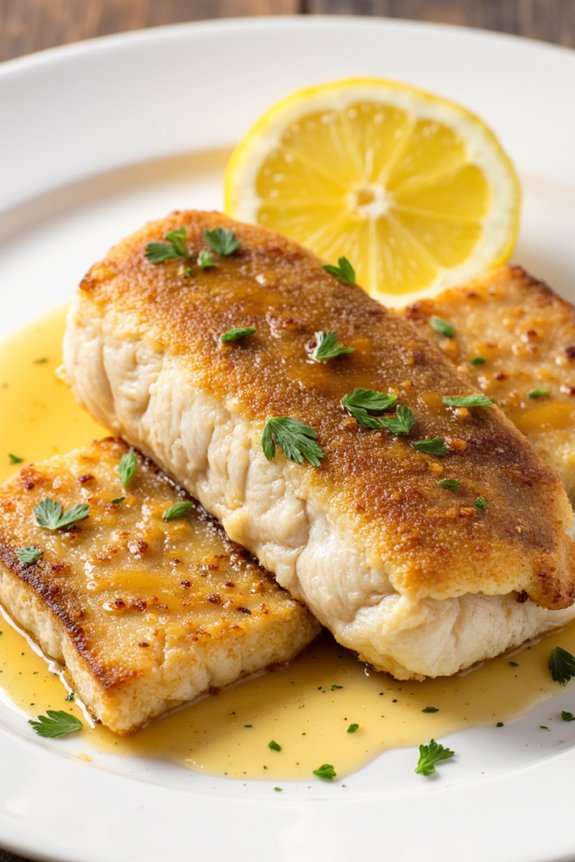
Sole Meunière is a classic French dish that epitomizes the simplicity and elegance of French cuisine. The dish features fresh sole fillets that are lightly dredged in flour, sautéed in butter, and finished with a sauce of brown butter, lemon, and parsley. The result is a delicate, flavorful dish that highlights the natural sweetness of the fish and the rich, nutty flavor of browned butter.
It’s a quick and delightful meal that’s perfect for a family dinner or a special occasion. While Sole Meunière is traditionally made with sole, you can substitute other white fish like flounder or tilapia if sole isn’t available. This dish pairs beautifully with a light salad, steamed vegetables, or a side of buttery potatoes to soak up the delicious sauce.
The key to mastering Sole Meunière is to guarantee that the butter is perfectly browned to achieve its characteristic nutty aroma and flavor without burning it.
Ingredients for 4-6 servings:
- 4-6 sole fillets (about 6 ounces each)
- Salt, to taste
- Freshly ground black pepper, to taste
- 1 cup all-purpose flour, for dredging
- 4 tablespoons unsalted butter
- 2 tablespoons olive oil
- Juice of 1 lemon
- 2 tablespoons chopped fresh parsley
- Lemon wedges, for serving
Cooking Instructions:
- Prepare the Fish: Pat the sole fillets dry with paper towels and season both sides with salt and freshly ground black pepper.
- Dredge the Fillets: Place the flour in a shallow dish and lightly dredge each fillet in the flour, shaking off any excess. This will help achieve a golden crust when sautéed.
- Heat the Pan: In a large skillet, heat 2 tablespoons of the butter and 1 tablespoon of olive oil over medium-high heat. The olive oil helps prevent the butter from burning.
- Cook the Fillets: Once the butter begins to bubble and foam, carefully add the fillets to the pan. Cook for 2-3 minutes on each side, or until the fish is golden brown and cooked through. Be gentle when flipping the fillets to prevent breaking them.
- Make the Sauce: Remove the fillets from the pan and set them aside on a warm plate. Add the remaining 2 tablespoons of butter to the skillet. Allow the butter to melt and turn a light brown color, watching closely to prevent burning.
- Add Lemon and Parsley: As soon as the butter is browned, remove the skillet from the heat and add the lemon juice and chopped parsley, stirring to combine. The lemon juice will sizzle and mix with the butter to create a fragrant sauce.
- Plate and Serve: Pour the sauce over the cooked fillets and garnish with additional parsley if desired. Serve immediately with lemon wedges on the side.
Extra Tips:
To guarantee the best results, use fresh sole fillets and cook them soon after purchase to preserve their delicate flavor. Pay close attention when browning the butter, as it can quickly go from browned to burnt.
If you notice the butter beginning to overcook, remove the pan from the heat immediately. For an extra layer of flavor, you can add a splash of white wine to the pan after cooking the fish and before making the sauce. This dish is best served immediately after cooking to maintain its fresh taste and texture.
Cassoulet
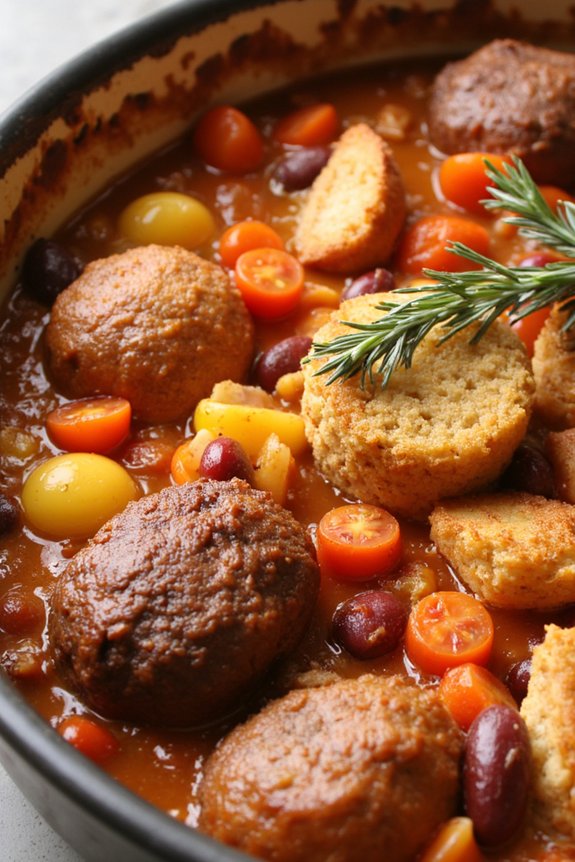
Cassoulet is a classic French dish that hails from the Languedoc region in the south of France. This hearty, slow-cooked casserole traditionally consists of white beans, various meats such as duck confit, sausage, and pork, and is flavored with aromatic herbs and spices.
Cassoulet is the epitome of comfort food, with its rich flavors and satisfying textures that develop over long hours of cooking. It’s often considered a celebratory dish, perfect for gatherings with family and friends, as it embodies the warmth and conviviality of French cuisine.
The origins of cassoulet are steeped in history, with each region claiming its own authentic version of the dish. Regardless of its variations, the essence of cassoulet remains the same: a robust and flavorful stew that showcases the art of slow cooking.
The beans absorb the flavors of the meats and seasonings, creating a deeply savory and complex dish. Whether you’re preparing it for a special occasion or indulging in a comforting meal, cassoulet is a reflection of the timeless appeal of traditional French cooking.
Ingredients for 4-6 people:
- 1 pound dried white beans (such as cannellini or Great Northern)
- 2 duck legs, confit
- 1 pound pork shoulder, cut into chunks
- 1/2 pound pork sausage, cut into pieces
- 1/2 pound slab bacon, cut into thick strips
- 1 large onion, chopped
- 2 carrots, peeled and chopped
- 4 cloves garlic, minced
- 1 bouquet garni (thyme, parsley, and bay leaf tied together)
- 4 cups chicken stock
- 1 can (14 ounces) diced tomatoes
- 1/2 cup breadcrumbs
- Salt and pepper to taste
- 2 tablespoons olive oil
Cooking Instructions:
- Prepare the Beans: Soak the dried beans in water overnight. Drain and rinse them. Place the beans in a large pot, cover with water, and bring to a boil. Reduce heat and simmer for about 1 hour, until the beans are tender but not mushy. Drain and set aside.
- Cook the Meats: In a large, heavy-bottomed casserole dish, heat olive oil over medium-high heat. Add the pork shoulder pieces and brown on all sides. Remove and set aside. In the same dish, add the sausage and bacon, cooking until browned. Remove and set aside with the pork.
- Sauté Aromatics: In the same dish, add the chopped onion and carrots. Sauté until the onion is translucent, about 5 minutes. Add the minced garlic and cook for an additional minute.
- Combine Ingredients: Return the pork shoulder, sausage, and bacon to the casserole dish. Add the drained beans, bouquet garni, and diced tomatoes. Pour in the chicken stock, making sure everything is submerged. Season with salt and pepper.
- Bake the Cassoulet: Preheat the oven to 325°F (163°C). Place the casserole dish in the oven and bake, uncovered, for about 2 hours. Occasionally check the liquid level, adding more stock if necessary.
- Add Duck Confit and Bread Crumbs: After 2 hours, place the duck confit on top of the beans and sprinkle with breadcrumbs. Return to the oven and bake for an additional 30-45 minutes, until the breadcrumbs are golden and the liquid has thickened.
- Rest and Serve: Remove the cassoulet from the oven and let it rest for at least 15 minutes before serving. This allows the flavors to meld together beautifully.
Extra Tips:
For the best results, make cassoulet a day in advance. This allows the flavors to develop and intensify overnight. When reheating, add a little more chicken stock to keep it moist.
Additionally, feel free to customize the meats according to your preference; lamb or goose can be interesting alternatives. Finally, a crusty baguette or a green salad makes a perfect accompaniment to this rich and hearty dish. Enjoy the process of creating this classic French masterpiece!
Croissant

The croissant is a quintessential French pastry known for its flaky, buttery layers and crescent shape. This delightful pastry is a breakfast staple in France and has gained popularity worldwide for its irresistible taste and texture.
Making croissants from scratch is a rewarding process that involves creating laminated dough, which requires patience and precision to achieve the perfect light and airy consistency. Whether you’re an experienced baker or a beginner, crafting homemade croissants will transport you to a French patisserie with every bite.
The process begins with preparing a rich, buttery dough that’s repeatedly folded and rolled to create multiple layers. This technique, known as laminating, is essential to achieving the distinct flaky texture of croissants. Once baked, the croissants should have a golden-brown exterior, a soft and tender interior, and an unmistakable buttery aroma.
While it may seem intimidating, following a step-by-step guide guarantees successful results that are well worth the effort. This recipe serves 4-6 people, making it perfect for a family breakfast or a small gathering.
Ingredients:
- 4 cups all-purpose flour
- 1/2 cup granulated sugar
- 1 tablespoon active dry yeast
- 1 teaspoon salt
- 1 1/4 cups whole milk, warm
- 1 cup unsalted butter, chilled
- 1 large egg (for egg wash)
- 2 tablespoons water (for egg wash)
Instructions:
1. Prepare the Dough: In a large mixing bowl, combine the flour, sugar, yeast, and salt. Add the warm milk gradually, mixing until a sticky dough forms. Knead the dough on a lightly floured surface for about 5-7 minutes until smooth and elastic. Shape it into a ball, cover with plastic wrap, and refrigerate for at least 1 hour.
2. Prepare the Butter Block: While the dough is chilling, place the chilled butter between two sheets of parchment paper. Using a rolling pin, pound and roll the butter into a square about 7 inches on each side. Keep the butter cool but pliable.
3. Laminate the Dough: Roll out the chilled dough into a rectangle about 10×20 inches. Place the butter block in the center of the dough. Fold the dough over the butter, like an envelope, confirming the butter is completely encased. Roll out the dough into a long rectangle, then fold it over itself into thirds, like a letter. Wrap the dough in plastic wrap and refrigerate for 30 minutes.
Repeat this rolling and folding process two more times, chilling the dough for 30 minutes between each fold.
4. Shape the Croissants: On a lightly floured surface, roll the laminated dough into a 10×20 inch rectangle. Cut the rectangle into triangles. Starting from the base of each triangle, roll it up towards the point, gently stretching the dough as you roll. Place the shaped croissants on a baking sheet lined with parchment paper.
5. Proof the Croissants: Cover the croissants loosely with plastic wrap and let them rise in a warm place for about 1-2 hours until doubled in size.
6. Prepare the Egg Wash: In a small bowl, beat the egg with water to make the egg wash. Brush the tops of the croissants lightly with the egg wash, being careful not to let it drip onto the layers.
7. Bake: Preheat your oven to 400°F (200°C). Bake the croissants for 15-20 minutes, or until they’re golden brown and crispy. Allow them to cool slightly before serving.
Extra Tips:
For best results, maintain a consistent temperature for both the butter and dough during laminating to prevent the butter from melting into the dough. This guarantees distinct layers.
If your kitchen is too warm, chill the dough and butter frequently to keep them cool. Additionally, when rolling out and folding the dough, work quickly yet gently to avoid tearing the layers. If you’re new to making laminated dough, don’t be discouraged if your first attempt isn’t perfect—practice makes perfect, and each try will bring you closer to mastering the art of croissant making.