

When I think of Provençal cuisine, I’m instantly taken to sunlit terraces and the comforting aroma of herbs like thyme and rosemary. Picture the vibrant colors of Ratatouille and the rich flavors of Bouillabaisse. These dishes are more than just meals; they capture the Mediterranean lifestyle. With each recipe, you’ll savor the essence of summer, no matter the season. Are you ready to explore these culinary treasures?
Classic Ratatouille
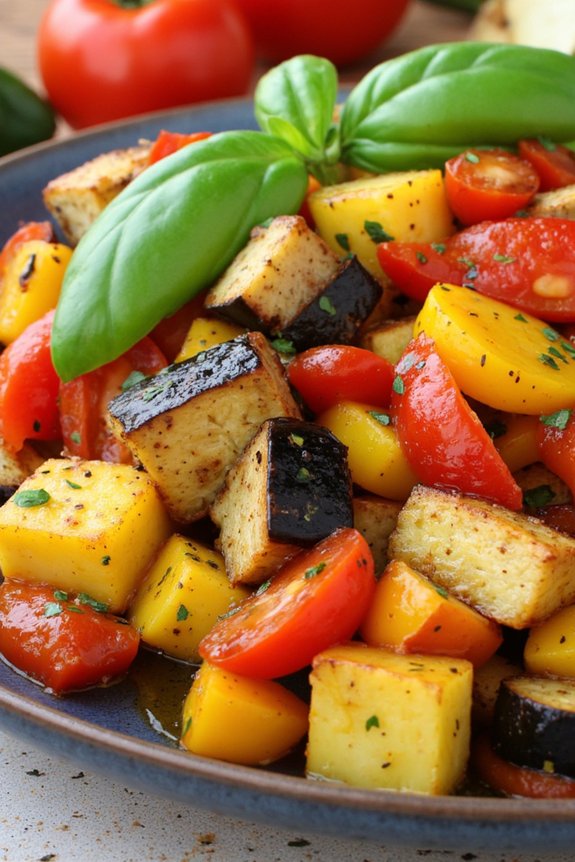
Ratatouille is a quintessential Provençal dish that showcases the bounty of summer vegetables, cooked slowly to meld their flavors into a deliciously harmonious blend. This rustic French recipe is perfect as a main course for vegetarians or as a hearty side dish to accompany grilled meats.
Originating from the region of Provence, ratatouille combines eggplant, zucchini, bell peppers, tomatoes, onions, and herbs, resulting in a vibrant and aromatic dish that captures the essence of Mediterranean cuisine.
The key to a successful ratatouille lies in the quality of the ingredients and the patience in allowing each vegetable to cook to perfection. Traditionally, each vegetable is cooked separately to maintain its texture and flavor before being combined at the end. This method guarantees that no single component overpowers the others, creating a balanced and flavorful dish that’s as pleasing to the eye as it’s to the palate.
For this recipe, we’ll make enough to serve 4-6 people, perfect for a family meal or small gathering.
Ingredients:
- 2 medium eggplants
- 2 medium zucchinis
- 2 red bell peppers
- 1 yellow bell pepper
- 4 ripe tomatoes
- 1 large onion
- 4 cloves garlic
- 1/4 cup olive oil
- 2 tablespoons tomato paste
- 1 teaspoon dried thyme
- 1 teaspoon dried oregano
- 1 bay leaf
- Salt and pepper to taste
- Fresh basil leaves for garnish
Cooking Instructions:
- Prepare the Vegetables: Start by washing all the vegetables thoroughly. Cut the eggplants and zucchinis into 1-inch cubes. Dice the bell peppers and tomatoes, and chop the onion and garlic finely.
- Sauté the Eggplant: In a large skillet or Dutch oven, heat 2 tablespoons of olive oil over medium heat. Add the eggplant cubes and sauté until they’re golden brown and tender, about 8-10 minutes. Remove the eggplant from the skillet and set aside.
- Cook the Zucchini: In the same skillet, add another tablespoon of olive oil. Sauté the zucchini cubes until they’re lightly browned and just tender, about 5-7 minutes. Remove from the skillet and set aside with the eggplant.
- Sauté the Bell Peppers and Onions: Add the remaining olive oil to the skillet. Sauté the onions until they’re translucent, about 5 minutes. Add the bell peppers and continue to cook until they’re soft, about 8 minutes.
- Add Tomatoes and Garlic: Stir in the garlic and cook for 1 minute until fragrant. Add the diced tomatoes and tomato paste, and stir well.
- Combine and Simmer: Return the eggplant and zucchini to the skillet. Add the thyme, oregano, bay leaf, salt, and pepper. Stir to combine all ingredients. Reduce the heat to low, cover, and let the ratatouille simmer for 30-40 minutes, stirring occasionally, until all the vegetables are tender and flavors are melded.
- Final Touches: Remove the bay leaf before serving. Taste and adjust the seasoning as needed. Garnish with fresh basil leaves.
Extra Tips:
For the best flavor, use the freshest vegetables you can find, preferably from a local farmers’ market. Ratatouille can be made in advance, as the flavors improve over time, making it an excellent dish for meal prep.
If you prefer a slightly thicker consistency, allow the ratatouille to simmer uncovered for the last 10 minutes. Serve it warm, at room temperature, or even chilled, making it a versatile dish for any occasion.
Additionally, consider serving ratatouille with a crusty baguette or over a bed of couscous for a complete meal.
Savory Pissaladière
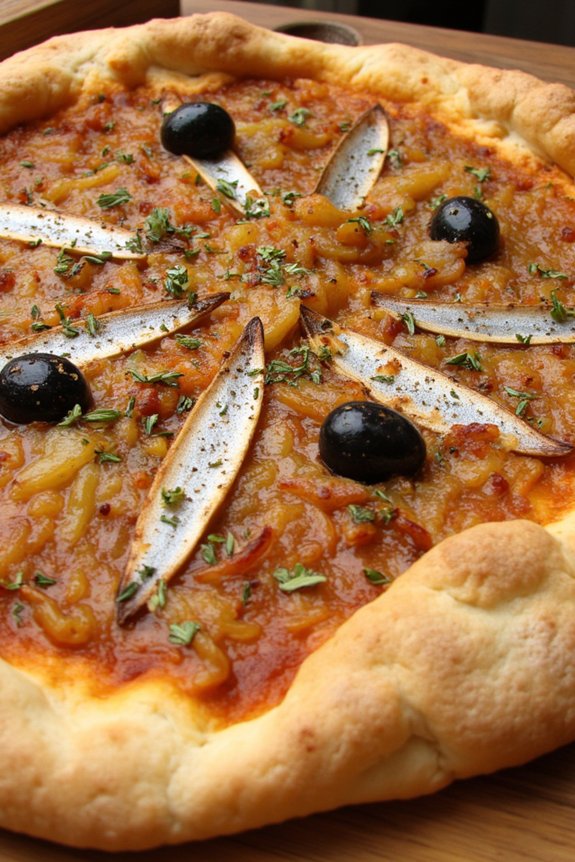
Pissaladière is a classic dish from the Provence region of France, boasting a rich history and a unique blend of flavors that reflect the Mediterranean influence. Often considered a cousin to pizza, this mouthwatering tart is traditionally topped with caramelized onions, anchovies, and olives. The base of a pissaladière is usually made with a bread-like dough, which is slightly thicker than a typical pizza crust, providing a sturdy foundation for the savory toppings.
This dish is perfect for a light lunch, an appetizer, or even as a standalone main course for those who appreciate the harmony of sweet, salty, and umami flavors.
The beauty of pissaladière lies in its simplicity and the high-quality ingredients that bring it to life. The slow caramelization of onions is the heart of the dish, infusing the tart with a deep, sweet flavor that complements the briny anchovies and the slightly bitter bite of the black olives.
Making pissaladière at home is a delightful culinary adventure that transports you to the sun-drenched landscapes of Provence, where food is celebrated for its freshness and vibrancy. This recipe serves 4-6 people and is sure to become a favorite in your recipe collection.
Ingredients (serves 4-6):
- 1 pound (450g) pizza dough
- 4 large onions, thinly sliced
- 2 tablespoons olive oil
- 2 teaspoons fresh thyme leaves
- Salt and freshly ground black pepper, to taste
- 12 anchovy fillets, rinsed
- 20 black olives, pitted and halved
- 1 tablespoon capers, drained (optional)
Instructions:
- Prepare the Dough: Start by allowing the pizza dough to come to room temperature if it’s been refrigerated. This makes it easier to roll out. Preheat your oven to 425°F (220°C).
- Caramelize the Onions: Heat the olive oil in a large skillet over medium heat. Add the sliced onions and a pinch of salt. Cook, stirring occasionally, until the onions are soft and golden brown, about 25-30 minutes. Add the thyme leaves and season with black pepper. Set aside to cool slightly.
- Roll Out the Dough: On a lightly floured surface, roll out the pizza dough into an even rectangle or circle, about 1/4 inch thick. Transfer the dough to a parchment-lined baking sheet.
- Assemble the Pissaladière: Spread the caramelized onions evenly over the dough, leaving a small border around the edges. Arrange the anchovy fillets in a crisscross pattern over the onions. Place an olive half in each diamond shape formed by the anchovies. Sprinkle with capers if using.
- Bake the Pissaladière: Bake in the preheated oven for 15-20 minutes, or until the edges are golden and the dough is cooked through. Remove from oven and let cool slightly before slicing.
- Serve: Slice into squares or wedges and serve warm or at room temperature. Enjoy this savory delight as a starter or a main course.
Extra Tips:
For a more robust flavor, consider using a mix of yellow and red onions. Be patient with the caramelization process; slow cooking the onions over medium heat is essential for developing their sweetness.
If you find the anchovies too salty, soaking them briefly in milk can help mellow their flavor. For a vegetarian version, omit the anchovies and add a sprinkle of grated parmesan or crumbled goat cheese for added depth.
Bouillabaisse

Bouillabaisse is a traditional Provençal fish stew originating from the port city of Marseille, France. Known for its rich, aromatic broth and diverse selection of seafood, this dish is a true reflection of the region’s coastal bounty and culinary heritage.
The key to an authentic bouillabaisse lies in the preparation of the broth, which is infused with saffron, fennel, and a variety of herbs, creating a complex and inviting flavor profile. The seafood is typically added just before serving to guarantee it remains tender and succulent.
This recipe serves 4-6 people and features a selection of fresh fish and shellfish, such as sea bass, red mullet, and mussels. A traditional rouille sauce is prepared alongside to accompany the dish, served with crusty bread. Whether enjoyed as a hearty main course or a celebratory meal, bouillabaisse is a delightful way to experience the flavors of Southern France.
Ingredients:
- 2 tablespoons olive oil
- 1 large onion, chopped
- 2 leeks (white part only), sliced
- 3 cloves garlic, minced
- 1 fennel bulb, thinly sliced
- 1 large tomato, peeled and chopped
- 1 teaspoon saffron threads
- 1 teaspoon dried thyme
- 2 bay leaves
- 1/2 teaspoon orange zest
- 3 cups fish stock
- 1 cup dry white wine
- 1 pound sea bass, cut into chunks
- 1 pound red mullet, cut into chunks
- 12 mussels, scrubbed and debearded
- 12 clams, scrubbed
- 12 shrimp, peeled and deveined
- Salt and pepper to taste
- Chopped fresh parsley for garnish
- French baguette, sliced
- Rouille sauce (optional)
Cooking Instructions:
- Prepare the Base: Heat the olive oil over medium heat in a large pot. Add the chopped onion, leeks, garlic, and fennel. Sauté until the vegetables are soft and fragrant, about 10 minutes.
- Develop the Flavor Base: Stir in the chopped tomato, saffron threads, thyme, bay leaves, and orange zest. Cook for an additional 5 minutes until the tomato breaks down and the spices are well incorporated.
- Create the Broth: Pour in the fish stock and white wine. Bring the mixture to a boil, then reduce the heat to a simmer. Allow the broth to cook for 20 minutes to let the flavors meld together.
- Add the Seafood: Increase the heat to medium and add the sea bass, red mullet, mussels, clams, and shrimp to the pot. Cover and cook for 5-7 minutes, or until the shellfish have opened and the fish is cooked through.
- Season and Serve: Taste the bouillabaisse and adjust with salt and pepper as needed. Remove the pot from heat and discard any unopened shellfish. Ladle the stew into bowls, garnishing with chopped parsley. Serve immediately with slices of French baguette and rouille sauce on the side.
Extra Tips:
For the best results, use the freshest seafood available, as this will greatly enhance the flavor of your bouillabaisse. If you’re unable to find certain fish, feel free to substitute with other firm white fish that holds up well during cooking.
When preparing the broth, allow it to simmer gently to fully extract the flavors of the ingredients. If you prefer a more intense saffron flavor, steep the saffron threads in a small amount of warm water before adding them to the pot.
Finally, confirm the seafood is added towards the end of cooking to prevent overcooking and guarantee a tender texture.
Provençal Roasted Chicken

Provençal Roasted Chicken is a delightful dish that beautifully captures the essence of the Mediterranean region with its aromatic herbs and robust flavors. This classic dish combines the simplicity and elegance of French cuisine with the rustic charm of Provençal cooking. The chicken is infused with a blend of herbs such as thyme, rosemary, and oregano, which are staples in Provençal cooking, and roasted to perfection, ensuring that the meat is tender and juicy while the skin is crispy and golden brown.
This recipe is perfect for a family dinner or a special occasion, serving 4-6 people. The use of fresh ingredients and the careful balance of flavors make this dish a standout. The addition of garlic and lemon not only enhances the taste but also adds a fragrant aroma that fills the kitchen with an irresistible scent. Whether you’re new to French cooking or a seasoned chef, this Provençal Roasted Chicken recipe is sure to impress and delight.
Ingredients:
- 1 whole chicken (about 4-5 pounds)
- 2 tablespoons olive oil
- 4 cloves garlic, minced
- 1 tablespoon fresh thyme leaves
- 1 tablespoon fresh rosemary, chopped
- 1 tablespoon fresh oregano, chopped
- 1 lemon, sliced
- Salt and freshly ground black pepper to taste
- 1 cup chicken broth
- 1/2 cup white wine (optional)
- 1 onion, quartered
- 2 carrots, peeled and cut into chunks
- 2 potatoes, cut into chunks
Cooking Instructions:
- Preheat the Oven: Preheat your oven to 425°F (220°C). This high initial temperature helps in achieving a crispy skin on the chicken.
- Prepare the Chicken: Rinse the chicken under cold water and pat dry with paper towels. Remove any giblets from the cavity if present.
- Season the Chicken: In a small bowl, mix together the olive oil, minced garlic, thyme, rosemary, oregano, salt, and pepper. Rub this herb mixture all over the chicken, making sure to get some under the skin for added flavor. Place the lemon slices inside the cavity of the chicken.
- Arrange the Vegetables: In a large roasting pan, arrange the onion, carrots, and potatoes. Place the seasoned chicken on top of the vegetables to allow the juices to flavor them as it roasts.
- Add Liquid: Pour the chicken broth and white wine (if using) into the bottom of the roasting pan. This will keep the chicken moist and create a flavorful base for the sauce.
- Roast the Chicken: Place the roasting pan in the oven. Roast the chicken for 20 minutes at 425°F, and then reduce the temperature to 375°F (190°C). Continue roasting for an additional 1 to 1.5 hours, or until the internal temperature of the chicken reaches 165°F (75°C).
- Rest the Chicken: Remove the chicken from the oven and let it rest for about 15 minutes before carving. This allows the juices to redistribute throughout the meat, keeping it moist.
Extra Tips:
For an even more flavorful dish, consider marinating the chicken in the herb mixture overnight. This allows the flavors to penetrate deeper into the meat.
Additionally, basting the chicken every 20 minutes with the pan juices will help to keep it moist and enhance the flavor. If you prefer a more intense lemon flavor, squeeze some lemon juice over the chicken before serving.
This dish pairs wonderfully with a light salad or a side of sautéed green beans for a complete meal.
Tapenade
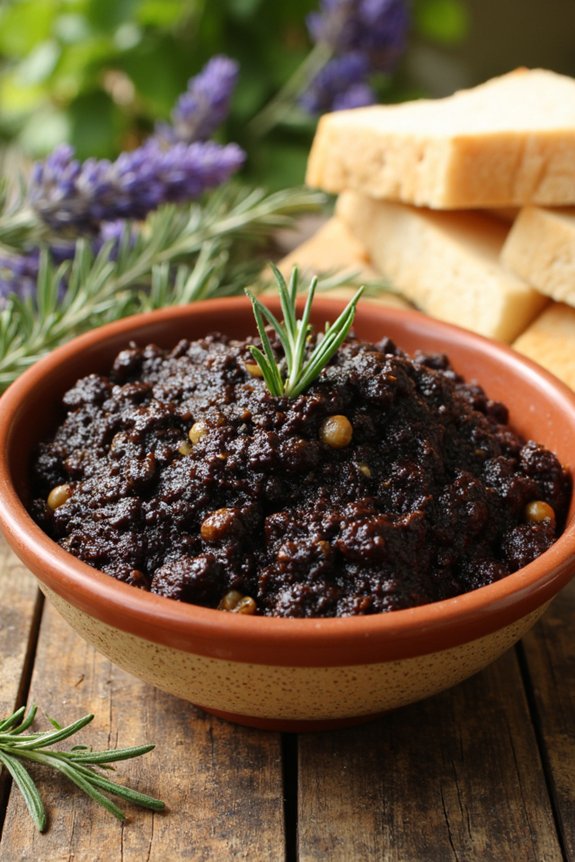
Tapenade is a classic Provençal dish that brings the rich flavors of the Mediterranean into a simple, yet sophisticated spread. Typically made with olives, capers, and anchovies, tapenade is a versatile dish that can be used as an appetizer on toast, a condiment for roasted vegetables, or a topping for grilled fish. The word itself derives from “tapenas,” the Provençal term for capers, which are a key ingredient in this savory spread.
The beauty of tapenade lies in its simplicity and the boldness of its flavors, making it a staple in French cuisine.
This recipe for Classic Provençal Tapenade serves 4-6 people, making it perfect for a small gathering or family meal. The combination of briny olives, salty anchovies, and tangy capers, blended with the richness of olive oil and the aromatic touch of garlic, creates a deliciously complex flavor profile.
Whether you’re a seasoned cook or a beginner, this tapenade is straightforward to prepare, requiring only a few high-quality ingredients and a food processor or blender.
Ingredients (serves 4-6):
- 1 1/2 cups pitted black olives (such as Kalamata or Niçoise)
- 2 tablespoons capers, drained
- 4 anchovy fillets, drained
- 2 cloves garlic, peeled
- 2 tablespoons fresh lemon juice
- 1/4 cup extra-virgin olive oil
- Freshly ground black pepper, to taste
Cooking Instructions:
- Prepare the Ingredients: Begin by gathering all your ingredients. Make sure the olives are pitted, the capers are drained, and the anchovies are free of excess oil. Peel the garlic cloves.
- Blend the Base: In a food processor or blender, combine the olives, capers, anchovy fillets, and garlic. Pulse the mixture until it starts to come together but remains chunky.
- Add Flavor: Add the fresh lemon juice to the mixture. This will provide a bright, tangy flavor that balances the saltiness of the olives and anchovies.
- Incorporate the Olive Oil: With the food processor running, slowly drizzle in the olive oil. Continue blending until the tapenade reaches your desired consistency. It should be well-combined but still have some texture.
- Season and Adjust: Taste the tapenade and add freshly ground black pepper to season. If necessary, adjust the flavors by adding more lemon juice or olive oil to suit your taste preferences.
- Serve: Transfer the tapenade to a serving bowl. It can be served immediately or covered and refrigerated for a few hours to allow the flavors to meld together. Serve with slices of crusty bread, crackers, or as a condiment.
Extra Tips:
For an even more authentic flavor, consider using a mortar and pestle to grind the ingredients by hand, which can enhance the texture and taste of the tapenade.
If you’re not a fan of anchovies, they can be omitted, although they do add a subtle depth to the dish. Additionally, tapenade can be stored in an airtight container in the refrigerator for up to a week, allowing you to enjoy its robust flavors over several meals.
For a twist, try adding a splash of brandy or a few sun-dried tomatoes to the mix for added complexity.
Niçoise Salad
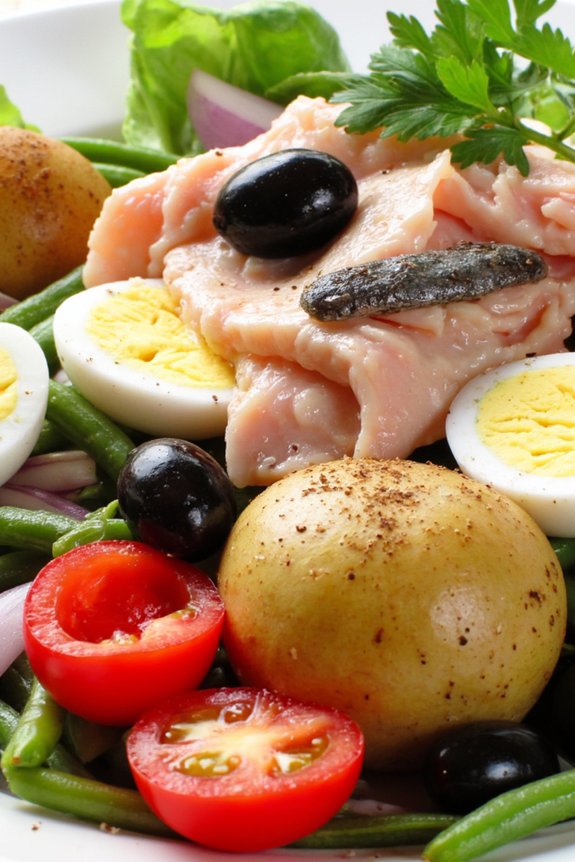
Niçoise Salad, a classic dish hailing from the Provence region of France, is a vibrant and fresh salad that embodies the flavors of the Mediterranean. Traditionally, it includes a mix of fresh vegetables, tuna, eggs, and olives, dressed with a simple vinaigrette. This salad isn’t only visually appealing but also a nutritious option that can serve as a main course or a hearty side dish. Perfect for a summer meal, Niçoise Salad is a reflection of the simplicity and elegance of Provençal cuisine.
While there are many variations of this dish, the traditional Niçoise Salad uses ingredients that are easily found in the local markets of Nice, such as tomatoes, green beans, and potatoes. The salad is often garnished with anchovies and capers, adding a briny depth to the dish. With its balance of flavors and textures, this salad is a delightful way to bring a taste of Southern France to your table. Below is a thorough recipe for preparing a Niçoise Salad for 4-6 people.
Ingredients for 4-6 servings:
- 1 pound small potatoes
- 1/2 pound green beans, trimmed
- 4 large eggs
- 2 cups cherry tomatoes, halved
- 1/2 cup Niçoise or Kalamata olives
- 2 tablespoons capers
- 1 small red onion, thinly sliced
- 1 can (5-6 ounces) tuna in olive oil, drained
- 8 anchovy fillets (optional)
- 1/4 cup fresh parsley, chopped
- 1/4 cup extra-virgin olive oil
- 2 tablespoons red wine vinegar
- 1 tablespoon Dijon mustard
- Salt and freshly ground black pepper to taste
Cooking Instructions:
- Cook the Potatoes: Begin by boiling the potatoes in a large pot of salted water until they’re tender, about 15-20 minutes. Once cooked, drain and let them cool slightly before cutting them into halves or quarters, depending on their size.
- Blanch the Green Beans: In the same pot, bring water to a boil and add the green beans. Cook them for about 3-4 minutes until they’re crisp-tender. Drain and immediately plunge them into a bowl of ice water to stop the cooking process. This will help preserve their bright green color. Drain again and set aside.
- Prepare the Eggs: Hard-boil the eggs by placing them in a pot of cold water. Bring to a boil, then remove from heat and let them sit for 9-10 minutes. Drain and cool under cold running water. Peel the eggs and cut them into quarters.
- Make the Dressing: In a small bowl, whisk together the olive oil, red wine vinegar, Dijon mustard, salt, and pepper until well combined. Adjust seasoning to taste.
- Assemble the Salad: On a large serving platter or salad bowl, arrange the potatoes, green beans, cherry tomatoes, olives, capers, and red onion. Flake the tuna over the top and add the anchovy fillets, if using. Scatter the chopped parsley over the salad.
- Dress the Salad: Drizzle the vinaigrette over the salad and gently toss to combine, ensuring all ingredients are coated evenly. Finally, add the egg quarters on top and season with additional salt and pepper if desired.
Extra Tips:
For the best flavor, use high-quality olive oil and fresh, ripe vegetables. If you have access to fresh tuna, lightly sear it instead of using canned for a gourmet touch. Be sure to taste and adjust the seasoning of the dressing before mixing it with the salad.
Niçoise Salad is highly customizable, so feel free to add or omit ingredients according to your preference. Ultimately, for a more authentic presentation, serve the salad components separately on a platter so diners can customize their own plates.
Fougasse

Fougasse is a delicious traditional bread from the Provence region of France. It’s known for its beautiful leaf-like shape and its crusty, golden exterior. This artisanal bread is often flavored with ingredients like olives, herbs, or cheese, making it a versatile and flavorful addition to any meal.
Originating as a baker’s test bread to gauge the temperature of the wood-fired oven, Fougasse has now become a beloved accompaniment to soups, salads, or simply enjoyed on its own with a drizzle of olive oil.
This recipe for Fougasse will guide you in creating this aromatic bread at home for a serving size of 4-6 people. The process involves preparing a simple dough, allowing it to rise, and then shaping it into its characteristic form. With a few basic ingredients and some patience, you’ll be rewarded with a delicious bread that captures the essence of Provençal cuisine.
Ingredients for Fougasse (Serves 4-6):
- 500g all-purpose flour
- 10g salt
- 10g active dry yeast
- 300ml warm water
- 2 tablespoons olive oil
- 1 tablespoon fresh rosemary, chopped
- 1/2 cup black olives, pitted and sliced
- Coarse sea salt for sprinkling
Cooking Instructions:
- Prepare the Dough:
- In a large bowl, mix the flour and salt together. In a separate small bowl, dissolve the yeast in the warm water and let it sit for about 5 minutes until it becomes frothy. Pour the yeast mixture and olive oil into the flour mixture.
- Knead the Dough:
- Combine the ingredients until a dough forms. Transfer the dough onto a floured surface and knead it for about 10 minutes until it’s smooth and elastic. If the dough is sticky, add a bit more flour, but be careful not to overdo it.
- First Rise:
- Place the kneaded dough into a lightly oiled bowl, cover it with a damp cloth, and let it rise in a warm place for about 1 hour or until it has doubled in size.
- Shape the Dough:
- Once the dough has risen, punch it down to release the air. Divide it into two equal portions. Roll each portion into an oval shape about 1/4-inch thick. Transfer the shaped dough onto a baking sheet lined with parchment paper.
- Add Flavorings:
- Lightly brush the surface of each dough oval with olive oil, then sprinkle evenly with chopped rosemary, sliced olives, and a pinch of coarse sea salt.
- Create the Signature Shape:
- Using a sharp knife, make several cuts in the dough to mimic the veins of a leaf. Gently stretch the dough apart to emphasize the shape.
- Second Rise:
- Cover the shaped dough lightly with a cloth and let it rise for another 20-30 minutes.
- Bake the Fougasse:
- Preheat your oven to 220°C (430°F). Bake the Fougasse for 15-20 minutes or until it’s golden brown and makes a hollow sound when tapped on the bottom.
- Cool and Serve:
- Remove from the oven and let it cool slightly on a wire rack before serving. Enjoy with your favorite dipping oil or alongside a meal.
Extra Tips:
When making Fougasse, it’s important to verify that the dough is well-kneaded to develop the gluten, which gives the bread its structure.
Be patient during the rising times, as allowing the dough to rise properly will result in a light and airy texture. If you prefer a different flavor profile, feel free to experiment by adding sun-dried tomatoes, sautéed onions, or even cheese to the dough.
Remember that the oven needs to be hot before baking to achieve the perfect crust, so don’t skip the preheating step. Enjoy your homemade Fougasse fresh from the oven for the best experience!
Socca

Socca is a traditional dish from the Provence region in the south of France, particularly popular in Nice. This simple yet delicious chickpea flatbread is made with just a handful of ingredients, primarily chickpea flour, water, olive oil, and a pinch of salt. It’s known for its crispy edges and soft, slightly creamy interior.
Socca is typically served hot as a snack or appetizer, often with a sprinkle of black pepper or other seasonings on top. It’s a versatile dish that can be enjoyed on its own or paired with a variety of toppings, making it a favorite among locals and visitors alike.
This gluten-free and vegan dish isn’t only easy to prepare but also incredibly satisfying. The key to a perfect socca lies in the batter’s consistency and the cooking technique. Traditionally, socca is cooked in a wood-fired oven, but it can also be made in a home oven or on a stovetop using a cast-iron skillet.
This recipe serves 4-6 people and is ideal for sharing with friends and family as part of a Mediterranean-inspired meal.
Ingredients for Socca (serves 4-6):
- 1 cup chickpea flour
- 1 cup water
- 3 tablespoons olive oil, plus more for greasing
- 1 teaspoon salt
- Freshly ground black pepper, to taste
- Optional: rosemary or thyme, chopped (for garnishing)
Cooking Instructions:
- Prepare the Batter: In a mixing bowl, combine the chickpea flour and salt. Gradually whisk in the water and 3 tablespoons of olive oil until the mixture is smooth and free of lumps. Let the batter rest at room temperature for at least 30 minutes to allow the flour to fully hydrate.
- Preheat the Oven: Preheat your oven to 450°F (230°C). If you have a cast-iron skillet or a baking pan, place it in the oven to heat up as the oven preheats. This will help achieve the desired crispy texture.
- Oil the Pan: Once the oven and pan are hot, carefully remove the pan and coat it with a generous amount of olive oil to prevent sticking. Pour the rested batter into the pan, swirling it around to guarantee an even layer.
- Bake the Socca: Return the pan to the oven and bake for about 10-15 minutes, or until the socca is set and the edges are golden brown and crispy. If you prefer a more charred top, you can switch the oven to broil for the last 1-2 minutes, keeping a close eye to prevent burning.
- Season and Serve: Remove the socca from the oven and let it cool for a minute before slicing. Sprinkle with freshly ground black pepper and, if desired, garnish with chopped rosemary or thyme. Serve immediately while hot.
Extra Tips:
For the best results, make sure your batter is well-mixed and free of lumps before cooking. The consistency should be similar to that of a thin pancake batter. Adjust the water or flour slightly if needed.
If you’re using a stovetop instead of an oven, cook the socca over medium-high heat until the edges are crispy and the top is set, then finish under the broiler for a minute if desired. Experiment with different herbs and spices to customize the flavor to your liking, and enjoy this simple yet flavorful taste of Provence!
Provençal Stuffed Vegetables

Provençal Stuffed Vegetables, or Petits Farcis, is a delightful dish that hails from the sun-drenched region of Provence in the south of France. This flavorful recipe highlights the freshness of summer vegetables like zucchini, bell peppers, tomatoes, and eggplants, which are filled with a savory mixture of meat, herbs, and breadcrumbs. The dish isn’t only a feast for the eyes, with its vibrant colors, but also a treat for the palate, offering a harmonious blend of textures and tastes.
Typically served as a main course, Provençal Stuffed Vegetables can be prepared in advance, making it an excellent option for gatherings or family dinners. The stuffing, which is traditionally made with ground meat, can also be adjusted for vegetarian preferences by using grains or legumes as a substitute. With a touch of olive oil and a sprinkle of aromatic herbs, this recipe provides the essence of Provençal cuisine right to your dining table.
Ingredients (serves 4-6 people):
- 3 medium zucchinis
- 3 medium bell peppers (red, yellow, or green)
- 3 medium tomatoes
- 2 medium eggplants
- 1 large onion, finely chopped
- 3 cloves garlic, minced
- 500g ground beef or pork (or a combination)
- 1 cup breadcrumbs
- 1/2 cup grated Parmesan cheese
- 1/4 cup fresh parsley, chopped
- 2 tablespoons fresh thyme, chopped
- 2 tablespoons olive oil
- Salt and pepper to taste
Cooking Instructions:
- Prepare the Vegetables: Preheat your oven to 180°C (350°F). Cut the tops off the zucchinis, bell peppers, tomatoes, and eggplants. Scoop out the insides of the zucchinis, tomatoes, and eggplants, leaving about 1/4 inch of flesh all around. Remove the seeds from the bell peppers. Reserve the scooped-out flesh for the stuffing and chop it finely.
- Cook the Filling: In a large skillet, heat the olive oil over medium heat. Add the onion and garlic, sauté until translucent, about 5 minutes. Add the ground meat and cook until browned, breaking it up with a spoon. Stir in the reserved chopped vegetable flesh, breadcrumbs, Parmesan cheese, parsley, thyme, salt, and pepper. Cook for an additional 5 minutes, until the mixture is well combined and heated through.
- Stuff the Vegetables: Place the hollowed-out vegetables in a baking dish. Fill each vegetable generously with the meat mixture, pressing down lightly to pack the filling. Replace the vegetable tops if desired.
- Bake the Vegetables: Drizzle a little olive oil over the stuffed vegetables. Cover the baking dish with foil and bake in the preheated oven for 30 minutes. Remove the foil and bake for an additional 15-20 minutes, until the vegetables are tender and the tops are golden brown.
- Serve and Enjoy: Allow the stuffed vegetables to cool slightly before serving. They can be enjoyed warm or at room temperature. Pair them with a simple green salad for a complete meal.
Extra Tips:
When preparing Petits Farcis, it’s important to choose vegetables that are uniform in size to guarantee even cooking. Feel free to experiment with different herbs such as basil or oregano for a variation in flavor. If making a vegetarian version, consider using cooked quinoa or lentils as a substitute for the ground meat.
Additionally, these stuffed vegetables can be made ahead of time and reheated, making them a convenient and delicious option for meal prep.
Lavender Honey Madeleines
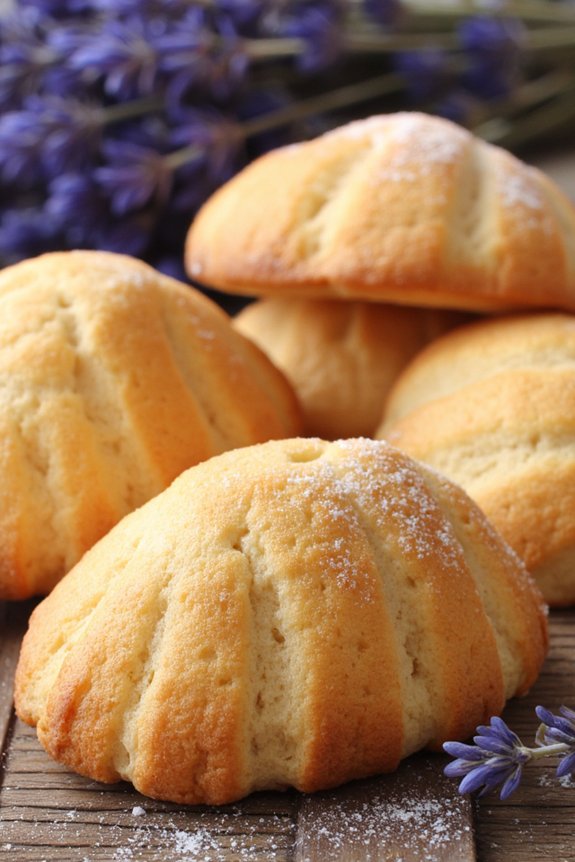
Lavender Honey Madeleines are a delightful twist on the classic French treat, infused with the fragrant essence of lavender and the sweetness of honey. These small, buttery cakes are traditionally baked in shell-shaped molds, resulting in their characteristic ridged appearance. Perfect for an afternoon tea or as a light dessert, Lavender Honey Madeleines offer a taste of Provence with every bite. The combination of floral lavender and rich honey creates a unique flavor profile that’s both sophisticated and comforting.
To achieve the perfect madeleines, it’s essential to balance the ingredients and follow the method closely. The batter must be chilled before baking to guarantee the madeleines rise properly and achieve their signature hump. The use of lavender should be subtle, providing just enough fragrance without overpowering the delicate flavor of the honey. With the right ingredients and a little patience, you’ll be able to create these elegant treats that are sure to impress family and friends.
Ingredients (Serves 4-6):
- 1/2 cup unsalted butter, melted and cooled
- 2/3 cup granulated sugar
- 1 tablespoon honey
- 2 large eggs
- 1 teaspoon vanilla extract
- 1 cup all-purpose flour
- 1 teaspoon baking powder
- 1/4 teaspoon salt
- 1 tablespoon dried culinary lavender, finely ground
- Confectioners’ sugar for dusting
Cooking Instructions:
- Prepare the Butter: Begin by melting the butter over low heat and then let it cool to room temperature. This step guarantees that the butter blends smoothly into the batter without cooking the eggs.
- Mix Sugar and Eggs: In a large mixing bowl, whisk together the sugar and eggs until the mixture is pale and slightly thickened. This should take about 3-4 minutes and will incorporate air into the batter, giving the madeleines their light texture.
- Add Honey and Vanilla: Stir in the honey and vanilla extract until well combined. The honey adds moisture and a natural sweetness to the cakes.
- Combine Dry Ingredients: In a separate bowl, sift together the flour, baking powder, salt, and ground lavender. Sifting guarantees that the ingredients are well combined and creates a lighter batter.
- Incorporate Dry Ingredients: Gradually fold the dry ingredients into the egg mixture using a spatula. Be gentle to maintain the airiness of the batter.
- Add Butter: Carefully fold in the cooled melted butter until just incorporated. Avoid over-mixing to prevent a dense texture.
- Chill the Batter: Cover the bowl with plastic wrap and refrigerate the batter for at least 1 hour, or overnight if possible. Chilling the batter is vital for developing the madeleines’ characteristic hump.
- Preheat Oven and Prepare Molds: Preheat the oven to 375°F (190°C). Butter the madeleine molds thoroughly to prevent sticking.
- Fill Molds: Spoon the chilled batter into the molds, filling each about three-quarters full. The batter will spread as it bakes.
- Bake: Place the molds in the oven and bake for 10-12 minutes, or until the madeleines are golden brown and spring back to the touch.
- Cool and Dust: Remove from the oven and let the madeleines cool in the molds for a few minutes before transferring to a wire rack. Dust with confectioners’ sugar before serving.
Extra Tips:
For the best results, use high-quality culinary lavender, as this will have the most refined flavor and aroma. Be cautious with the amount, as too much can make the madeleines taste soapy.
If you don’t have a madeleine mold, mini muffin tins can be used as an alternative, though the shape will differ. Finally, madeleines are best enjoyed fresh but can be stored in an airtight container for up to two days.
Tarte Tropézienne

Tarte Tropézienne is a classic Provençal dessert that originates from the picturesque town of Saint-Tropez. This delightful treat is a combination of a fluffy brioche bun filled with a luscious cream, making it a perfect indulgence for any occasion.
The dessert gained fame in the 1950s when it was created by a Polish pastry chef, Alexandre Micka, and became popularized by actress Brigitte Bardot during the filming of “And God Created Woman.” With its rich history and delicious flavor, Tarte Tropézienne is a must-try for anyone looking to explore the culinary delights of Provence.
The Tarte Tropézienne is known for its unique combination of textures—soft, buttery brioche meets a creamy, dreamy filling. The filling is typically a mix of custard or pastry cream, and sometimes whipped cream, giving it a light and airy consistency. The brioche is often sprinkled with pearl sugar for a delightful crunch in every bite.
This recipe will guide you through creating your own Tarte Tropézienne at home, serving 4-6 people, perfect for an elegant dinner party or a sweet treat to enjoy with family and friends.
Ingredients for Tarte Tropézienne (Serves 4-6)
For the Brioche:
- 250g all-purpose flour
- 10g fresh yeast
- 3 tablespoons lukewarm milk
- 2 eggs
- 70g unsalted butter, softened
- 40g granulated sugar
- 1/2 teaspoon salt
- Pearl sugar (for topping)
For the Filling:
- 250ml whole milk
- 1 vanilla bean, split and scraped
- 3 egg yolks
- 60g granulated sugar
- 30g cornstarch
- 200ml heavy cream
- 1 tablespoon orange blossom water
Cooking Instructions
- Prepare the Brioche Dough:
- In a small bowl, dissolve the fresh yeast in lukewarm milk and let it sit for about 10 minutes until frothy.
- In a large mixing bowl, combine the flour, sugar, and salt. Add the yeast mixture and the eggs. Mix until a dough forms.
- Knead the dough by hand or with a mixer fitted with a dough hook until smooth, about 10 minutes. Gradually incorporate the softened butter and knead until fully combined and the dough is elastic and shiny.
- Place the dough in a lightly greased bowl, cover with a damp cloth, and let it rise in a warm place until doubled in size, approximately 1 to 1.5 hours.
- Shape and Bake the Brioche:
- Preheat the oven to 180°C (350°F).
- Punch down the risen dough and shape it into a round disk about 1-inch thick. Place it on a baking sheet lined with parchment paper.
- Allow the dough to rise again for 30 minutes. Brush the top with a little milk and sprinkle generously with pearl sugar.
- Bake for 20-25 minutes or until golden brown. Let it cool completely on a wire rack.
- Prepare the Filling:
- In a saucepan, heat the milk and vanilla bean over medium heat until just boiling. Remove from heat and let it infuse for 10 minutes.
- In a bowl, whisk together the egg yolks, sugar, and cornstarch until pale and creamy. Gradually whisk in the warm milk mixture.
- Return the mixture to the saucepan and cook over medium heat, whisking constantly, until thickened and smooth. Remove from heat and stir in the orange blossom water.
- Transfer the pastry cream to a bowl, cover with plastic wrap touching the surface to prevent a skin from forming, and chill until cold.
- Whip the heavy cream to soft peaks and gently fold it into the chilled pastry cream until fully combined.
- Assemble the Tarte Tropézienne:
- Slice the brioche horizontally and spread the cream filling generously on the bottom half.
- Place the top half of the brioche over the filling, pressing down gently. Refrigerate for at least 1 hour before serving to allow the flavors to meld.
Extra Tips
When making the brioche dough, be patient with the kneading process as it guarantees a light and airy texture. If you find the dough too sticky, lightly flour your hands and work surface, but avoid adding too much flour as it can make the brioche dense.
For the filling, verify that the pastry cream is completely chilled before folding in the whipped cream to maintain its lightness. For an additional flavor twist, you can experiment with adding a hint of lemon zest to the cream filling.
This dessert is best enjoyed the day it’s assembled, but it can be stored in the refrigerator for up to two days.