

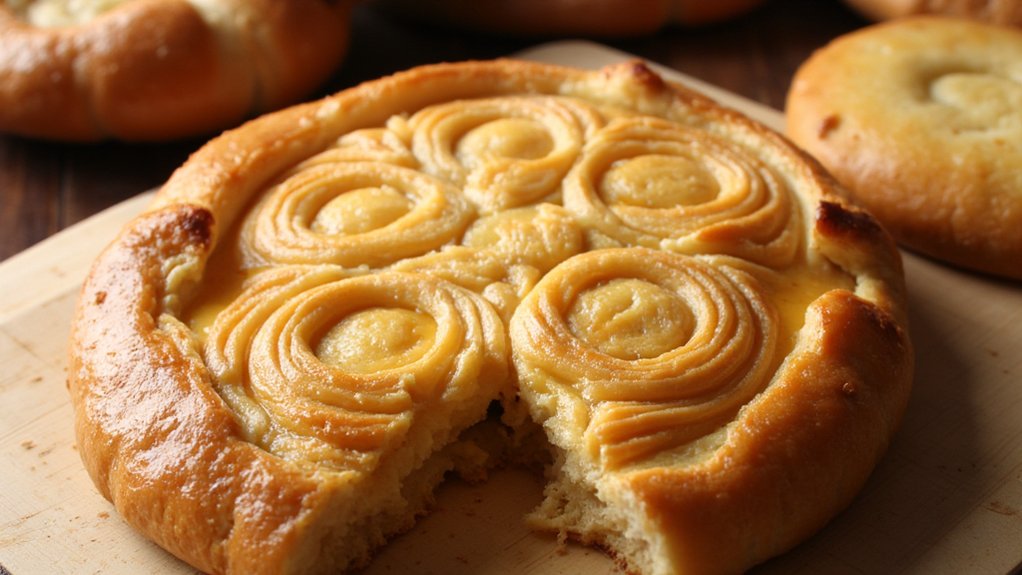
The aroma of buttery croissants filling your home is pure bliss. Visualize the glossy glaze of an éclair or the tender crumb of a madeleine. These French baking recipes will not only delight your taste buds but also transform your kitchen into a cozy, buttery retreat. With these 14 irresistible recipes, you’ll uncover the secrets behind these classic pastries. Ready to bring a touch of French patisserie magic to your home?
Classic Buttery Croissants
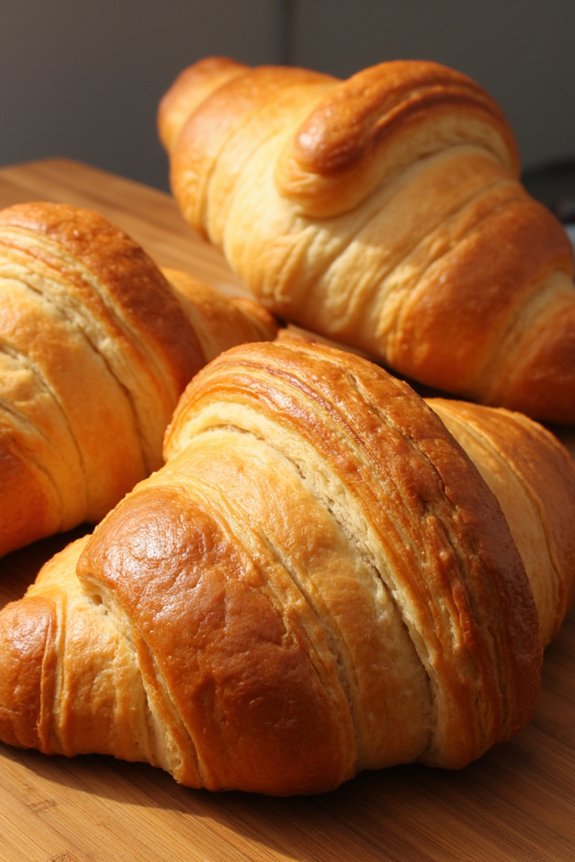
Nothing quite compares to the rich, flaky layers of a classic buttery croissant. This quintessential French pastry is a labor of love, requiring patience and precision to perfect its delicate texture. The process involves creating a laminated dough, which is the key to achieving that signature crisp exterior and soft, airy interior. While it may seem intimidating at first, mastering the art of croissant-making is a rewarding endeavor that yields delicious results.
To make croissants, you’ll need to devote time to both preparation and resting, allowing the dough to develop its distinctive layers. This recipe is designed to serve 4-6 people, providing ample opportunity to enjoy these delectable pastries fresh out of the oven. Follow the detailed instructions carefully, and soon you’ll be enjoying homemade croissants that rival those found in the finest French bakeries.
Ingredients (Serves 4-6 people):
- 4 cups all-purpose flour
- 1/2 cup granulated sugar
- 1 tablespoon salt
- 3 tablespoons unsalted butter, softened
- 1 cup whole milk
- 1 tablespoon active dry yeast
- 1 cup unsalted butter, chilled and cut into thin slices
- 1 egg, beaten (for egg wash)
Instructions:
- Prepare the Dough: In a large bowl, mix the flour, sugar, and salt. In a separate small bowl, dissolve the yeast in warm milk and let it sit until frothy, about 5-10 minutes. Combine the yeast mixture with the flour mixture, adding the softened butter. Knead the dough for about 5 minutes until smooth. Place the dough in a lightly greased bowl, cover with plastic wrap, and allow it to rise in a warm place for about 1-1.5 hours or until doubled in size.
- Prepare the Butter Block: While the dough is rising, arrange the chilled butter slices into a square on a piece of parchment paper. Cover with another sheet of parchment paper and pound it gently with a rolling pin to form an even sheet of butter, roughly 7 inches square. Chill in the refrigerator until firm but pliable.
- Laminate the Dough: Once the dough has risen, punch it down and roll it out on a floured surface into a 10×20 inch rectangle. Place the butter block in the center of the dough. Fold the dough over the butter, encasing it completely. Roll the dough out into a long rectangle, then fold it into thirds, like a letter. Wrap in plastic and refrigerate for 30 minutes.
- Roll and Fold: Repeat the rolling and folding process two more times, chilling the dough for 30 minutes between each turn. This creates the flaky layers that are characteristic of a croissant.
- Shape the Croissants: After the final chill, roll the dough out into a 12×24 inch rectangle. Cut the dough into triangles, about 5 inches wide at the base. Roll each triangle from the base to the tip, shaping into a crescent. Place on a baking sheet lined with parchment paper.
- Proof the Croissants: Cover the shaped croissants loosely with plastic wrap and let them rise at room temperature for 1-2 hours, or until puffy.
- Bake: Preheat the oven to 375°F (190°C). Brush the croissants with the beaten egg to give them a shiny, golden finish. Bake for 15-20 minutes, or until golden brown and crisp. Allow to cool slightly on a wire rack before serving.
Extra Tips: For best results, verify all ingredients are cold, especially the butter used in the lamination process. This prevents the butter from melting prematurely and guarantees proper layer formation.
Be patient with the rising and chilling times, as these steps are essential for developing the croissants’ texture. Finally, practice makes perfect; don’t be discouraged if your first attempt isn’t flawless. Each batch will improve as you become more familiar with the technique.
Flaky Pain Au Chocolat
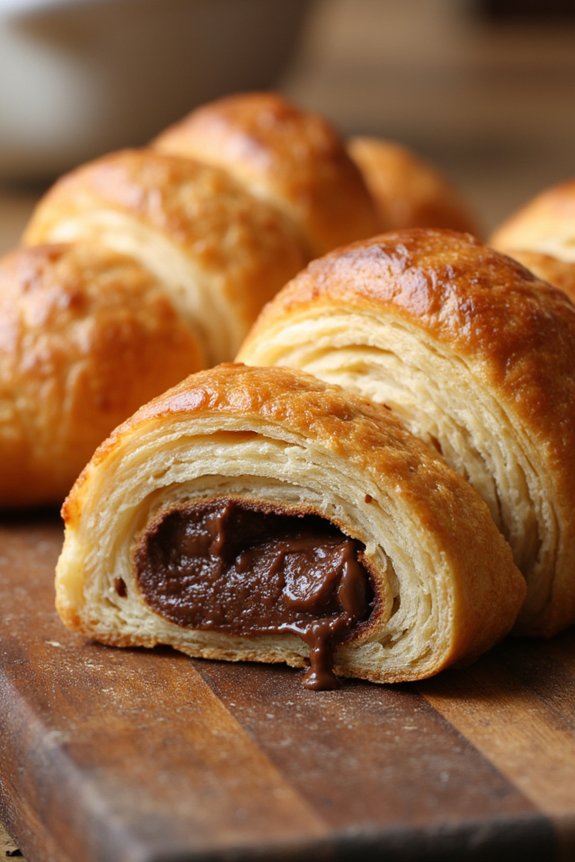
Flaky Pain Au Chocolat is a classic French pastry that combines the rich, buttery layers of a croissant with the decadent taste of chocolate. This delightful treat is often enjoyed as a breakfast pastry or an afternoon indulgence. The key to achieving the perfect flaky texture lies in the dough lamination process, which involves folding and rolling the dough multiple times to create layers.
When baked, the layers puff up beautifully, resulting in a light, crisp exterior that contrasts with the melted chocolate inside. To master the art of making Flaky Pain Au Chocolat, it’s important to start with high-quality ingredients and to follow each step with precision. The process might seem intricate, but with a little patience and practice, you can recreate this French bakery staple in your own kitchen.
The end result is a batch of warm, flaky pastries that are sure to impress your family and friends.
Ingredients for 4-6 servings:
- 2 1/4 cups all-purpose flour
- 1/4 cup granulated sugar
- 1 teaspoon salt
- 1 packet (2 1/4 teaspoons) active dry yeast
- 3/4 cup warm milk
- 1 cup unsalted butter, chilled
- 1 egg
- 1 tablespoon water
- 12 small chocolate bars or chocolate batons
Cooking Instructions:
- Prepare the Dough: In a large mixing bowl, combine the flour, sugar, and salt. Dissolve the yeast in the warm milk and let it sit for about 5 minutes until it becomes frothy. Add the yeast mixture to the dry ingredients and mix until a dough forms. Knead the dough for about 5 minutes until smooth. Cover with plastic wrap and let it rest in the refrigerator for at least 2 hours or overnight for best outcomes.
- Prepare the Butter Block: While the dough is chilling, take the chilled butter and place it between two sheets of parchment paper. Use a rolling pin to flatten the butter into a rectangle about 1/4 inch thick. Place it back in the refrigerator to keep it cold.
- Laminate the Dough: Roll the rested dough into a large rectangle, slightly larger than the butter block. Place the butter block in the center of the dough and fold the edges of the dough over the butter, sealing it completely. Roll the dough out gently into a large rectangle and fold it into thirds like a letter. Chill for 30 minutes. Repeat this rolling and folding process two more times, chilling the dough for 30 minutes between each fold.
- Shape the Pastries: Roll out the laminated dough into a large rectangle, about 1/4 inch thick. Cut the dough into smaller rectangles, each about 4×6 inches. Place a small chocolate bar or baton at one end of each rectangle and roll the dough around the chocolate, sealing the edges. Place the rolled pastries seam-side down on a baking sheet lined with parchment paper.
- Proof the Pastries: Cover the baking sheet with a clean kitchen towel and let the pastries proof at room temperature for about 1-2 hours until they’ve doubled in size.
- Bake the Pastries: Preheat your oven to 400°F (200°C). In a small bowl, beat the egg with a tablespoon of water to create an egg wash. Brush the tops of the proofed pastries with the egg wash. Bake in the preheated oven for 15-20 minutes or until golden brown and flaky.
Extra Tips: For ideal results, confirm all your ingredients are cold, especially the butter, to prevent it from melting into the dough during lamination.
Be patient with the resting and proofing times, as they’re vital for developing the flaky texture. If you’re planning to bake these pastries in advance, they can be frozen before the proofing stage and then thawed overnight in the refrigerator before baking. This way, you can enjoy freshly baked Pain Au Chocolat whenever you desire.
Elegant Tarte Tatin
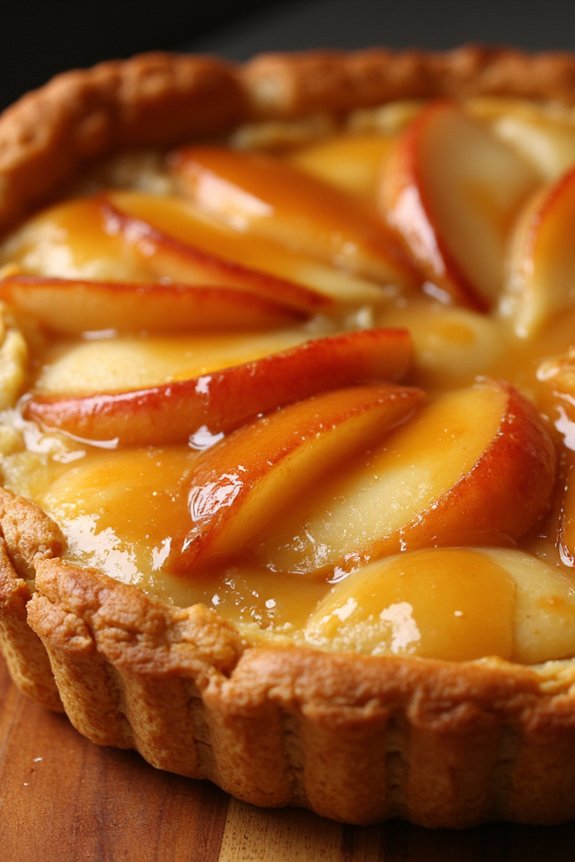
Tarte Tatin is a classic French dessert that offers a beautiful combination of caramelized apples and buttery pastry. Originating from the Loire Valley, this upside-down tart is both rustic and elegant, making it a perfect centerpiece for any gathering.
The magic of Tarte Tatin lies in its simplicity and the transformation of humble ingredients into a rich and flavorful dessert, where the apples are cooked in caramel before being topped with a flaky pastry crust and baked to perfection.
The key to a successful Tarte Tatin is choosing the right apples. Firm varieties like Granny Smith or Honeycrisp hold their shape well during cooking, providing the perfect texture and tartness to balance the sweet caramel.
Whether you’re serving it at a dinner party or enjoying a quiet night in, this delightful dish is sure to impress with its stunning presentation and delightful flavors.
Ingredients for Tarte Tatin (serves 4-6):
- 1 sheet of puff pastry, thawed
- 5-6 medium-sized apples (Granny Smith or Honeycrisp)
- 1 cup granulated sugar
- 1/2 cup unsalted butter
- 1 tablespoon fresh lemon juice
- 1 teaspoon vanilla extract
- 1/4 teaspoon ground cinnamon
- Pinch of salt
Cooking Instructions:
1. Prepare the apples: Peel, core, and quarter the apples. It’s important to have uniform pieces to guarantee even cooking. Set aside.
2. Make the caramel: In a 10-inch ovenproof skillet, melt the butter over medium heat. Add the sugar, stirring until it dissolves and begins to caramelize to a light amber color. This should take about 8-10 minutes.
Be cautious not to let the caramel burn. Add the lemon juice, vanilla extract, cinnamon, and a pinch of salt, stirring to combine.
3. Add the apples: Carefully arrange the apple quarters in the skillet, rounded side down, tightly packed in a circular pattern. Reduce the heat to low and cook for 15 minutes, occasionally spooning the caramel over the apples to guarantee they’re coated and begin to soften.
4. Preheat the oven: While the apples are cooking, preheat your oven to 375°F (190°C).
5. Prepare the pastry: Roll out the puff pastry to remove any creases and guarantee it fits over the skillet. Carefully place the pastry over the caramelized apples, tucking the edges down around the apples inside the skillet.
6. Bake the tarte: Transfer the skillet to the preheated oven and bake for 25-30 minutes or until the pastry is golden brown and puffed.
7. Cool and invert: Remove the skillet from the oven and let it cool for about 5 minutes. Carefully invert the tart onto a serving plate, ensuring the caramel-coated apples are on top.
Extra Tips:
When making Tarte Tatin, patience is key. Allow the caramel to reach the right color for depth of flavor, but be vigilant to prevent burning.
If you prefer a more intense apple flavor, consider using a mix of different apple varieties. For an additional touch of elegance, serve the Tarte Tatin warm with a dollop of crème fraîche or a scoop of vanilla ice cream.
Deliciously Simple Madeleines
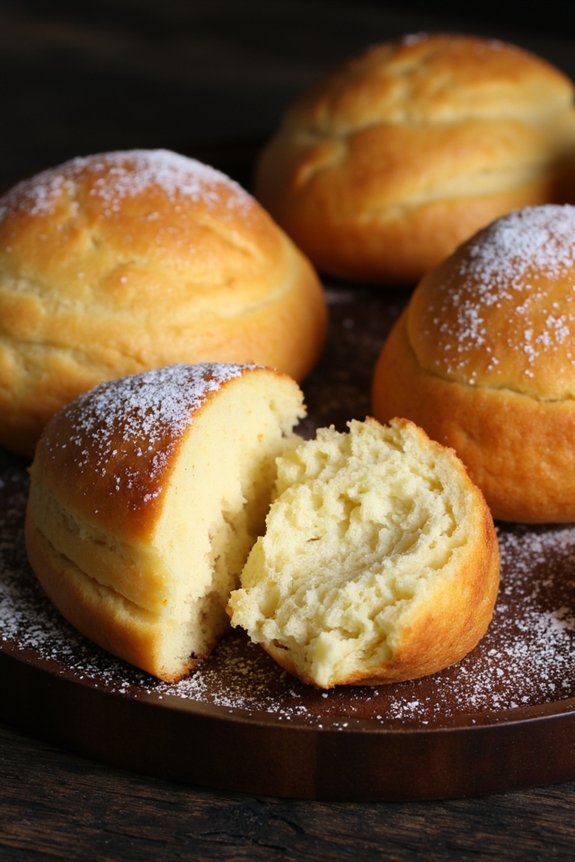
Madeleines are a classic French pastry known for their distinctive shell-like shape and delicate, buttery flavor. These small sponge cakes are traditionally baked in special pans that give them their unique appearance. Madeleines are perfect for tea time, dessert, or as a delightful treat any time of the day.
Despite their elegant appearance, madeleines are surprisingly easy to make and require just a few basic ingredients that you might already have in your pantry. This recipe will guide you through the process of making madeleines that are light and fluffy with a slight crisp on the edges.
Whether you’re a seasoned baker or a beginner, you’ll find these instructions straightforward and rewarding. Once you’ve mastered the basic recipe, you can experiment by adding flavors such as lemon zest, vanilla, or chocolate. This recipe serves 4-6 people, making it perfect for a small gathering or family treat.
Ingredients for Madeleines (Serves 4-6):
- 2/3 cup all-purpose flour
- 3/4 teaspoon baking powder
- 1/4 teaspoon salt
- 1/2 cup unsalted butter, melted and cooled
- 2/3 cup granulated sugar
- 2 large eggs, room temperature
- 1 teaspoon vanilla extract
- 1 tablespoon lemon zest (optional)
- Powdered sugar for dusting
Cooking Instructions:
- Prepare the Pan: Preheat your oven to 375°F (190°C). Grease your madeleine pan with butter or non-stick spray to prevent sticking. If you don’t have a madeleine pan, mini-muffin pans can be used as an alternative.
- Mix Dry Ingredients: In a medium bowl, sift together the flour, baking powder, and salt. This step guarantees that the dry ingredients are well combined and free of lumps.
- Whisk Eggs and Sugar: In a large mixing bowl, beat the eggs and granulated sugar together using an electric mixer on medium-high speed until the mixture becomes thick, pale, and fluffy, which should take about 3-5 minutes.
- Add Flavorings: Gently fold in the vanilla extract and lemon zest (if using) into the egg mixture. Be careful not to deflate the batter while mixing.
- Combine Wet and Dry Ingredients: Gradually add the dry ingredients to the egg mixture, folding gently until just combined. Avoid over-mixing to maintain the batter’s lightness.
- Incorporate Butter: Add the melted and cooled butter into the batter in two additions, folding gently each time until fully incorporated. The batter should be smooth and glossy.
- Chill the Batter: Cover the bowl with plastic wrap and chill the batter in the refrigerator for at least 1 hour. This step is essential for achieving the characteristic madeleine hump.
- Fill the Molds: Once chilled, spoon or pipe the batter into the prepared madeleine pan, filling each mold about three-quarters full.
- Bake: Place the pan in the preheated oven and bake for 10-12 minutes, or until the madeleines are golden brown and spring back lightly when touched.
- Cool and Serve: Remove the madeleines from the pan and cool on a wire rack. Once cooled, dust with powdered sugar before serving.
Extra Tips:
To enhance the flavor of your madeleines, consider browning the butter before incorporating it into the batter. This will give your pastries a nutty aroma and a deeper flavor profile.
Additionally, make sure the eggs are at room temperature before starting, as this helps them whip to a greater volume. Finally, don’t skip the chilling step, as it plays a significant role in creating the iconic hump on top of the madeleine, which is a signature feature of this delightful French treat.
Decadent Opera Cake
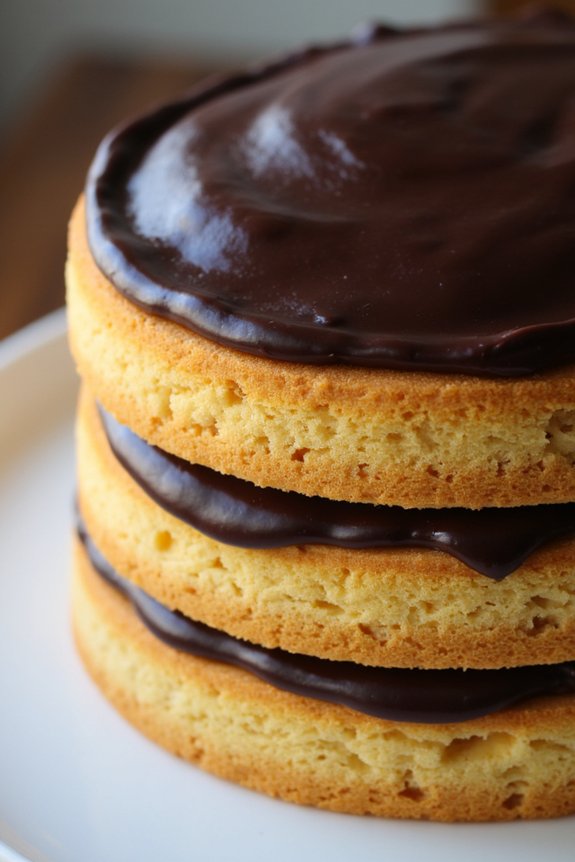
Opera Cake, a classic French dessert, is a symphony of layers that combines the rich flavors of coffee and chocolate with airy almond sponge cake. This elegant cake is named after the Paris Opera, as its layered structure is reminiscent of the opera house’s tiers. Perfect for special occasions or simply when you want to treat yourself to a culinary masterpiece, Opera Cake requires precision and patience to assemble each layer seamlessly.
The combination of textures and flavors makes this cake a favorite among dessert connoisseurs. The preparation of Opera Cake involves creating multiple components: a moist almond sponge cake known as Joconde, a coffee buttercream, a rich chocolate ganache, and a coffee syrup that moistens the layers. Each component is carefully stacked to form a beautiful and delicious cake that isn’t only a delight to the palate but also a feast for the eyes.
This recipe will guide you through the process of making a sumptuous Opera Cake that serves 4-6 people, guaranteeing each bite is a harmonious blend of flavors and textures.
Ingredients for 4-6 Servings:
- 6 large eggs
- 180g almond flour
- 200g granulated sugar
- 100g all-purpose flour
- 60g unsalted butter, melted
- 200ml brewed espresso, divided
- 200g unsalted butter, softened (for buttercream)
- 100g powdered sugar
- 150g dark chocolate, chopped
- 150ml heavy cream
- 1 tbsp instant coffee powder
- 1 tsp vanilla extract
- Pinch of salt
Cooking Instructions:
1. Prepare the Joconde (Almond Sponge Cake): Preheat your oven to 180°C (350°F). Line a baking sheet with parchment paper. In a mixing bowl, beat 4 eggs with 150g granulated sugar until pale and frothy. Gently fold in the almond flour and all-purpose flour. Stir in the melted butter.
In a separate bowl, whisk the remaining 2 egg whites with a pinch of salt until soft peaks form. Gradually add the remaining 50g sugar and whisk until stiff peaks form. Fold the egg whites into the batter gently. Spread the batter evenly on the prepared baking sheet and bake for 10-12 minutes or until lightly golden. Let it cool completely.
2. Make the Coffee Syrup: In a saucepan, combine 150ml of brewed espresso and 50g granulated sugar over medium heat. Stir until the sugar dissolves completely. Remove from heat and set aside to cool.
3. Prepare the Coffee Buttercream: Beat the softened butter and powdered sugar until light and fluffy. Dissolve the instant coffee powder in 1 tablespoon of hot water and add it to the mixture along with vanilla extract. Beat until smooth and creamy.
4. Create the Chocolate Ganache: Heat the heavy cream in a small saucepan until it just begins to simmer. Pour it over the chopped dark chocolate in a heatproof bowl. Let it sit for a minute, then stir until smooth and glossy. Allow it to cool slightly until it thickens to a spreadable consistency.
5. Assemble the Cake: Cut the cooled almond sponge into three equal rectangles. Place one layer on a serving platter and brush generously with the coffee syrup. Spread a layer of coffee buttercream evenly over the top.
Place the second layer of sponge on top, brush with syrup, and spread a layer of chocolate ganache. Repeat the process with the third layer, adding a final brush of syrup and a layer of buttercream. Finish with a smooth layer of ganache on the top.
6. Chill and Serve: Refrigerate the assembled cake for at least 2 hours to set the layers. Before serving, trim the edges to reveal the layers. Slice and enjoy your homemade Opera Cake.
Extra Tips:
To achieve a smooth and even finish on your Opera Cake, use an offset spatula for spreading the buttercream and ganache. This tool provides better control and precision.
Additionally, verify that each layer is completely cool before assembly to prevent the buttercream and ganache from melting. For a more intense coffee flavor, you can adjust the amount of coffee powder used in the buttercream. Finally, be patient and allow the cake to chill properly before serving; this helps the flavors meld and the layers set beautifully.
Traditional Baguette
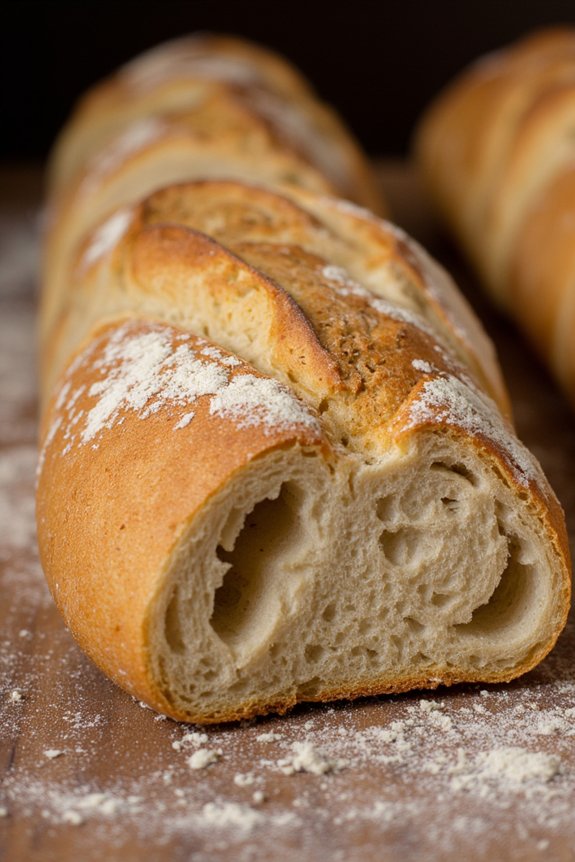
The Traditional Baguette is a staple of French baking, known for its crisp golden crust and soft, chewy interior. This classic bread is perfect for any meal, whether it’s accompanying a bowl of soup or served with cheese and charcuterie.
While making a baguette at home may seem intimidating, with the right technique and a bit of patience, you can achieve bakery-quality results in your own kitchen. This recipe yields two baguettes, enough to serve 4-6 people. It involves a straightforward mix of ingredients, and the secret lies in the process of kneading and shaping the dough, as well as allowing sufficient time for rising and baking.
Follow these instructions for a taste of authentic French cuisine right at home.
Ingredients:
- 500g all-purpose flour
- 350ml warm water
- 10g salt
- 10g instant yeast
Instructions:
- Prepare the Dough: In a large mixing bowl, combine the flour, salt, and yeast. Gradually add the warm water while mixing with a wooden spoon or your hands until a sticky dough forms.
- Knead the Dough: Turn the dough onto a lightly floured surface. Knead the dough for about 10 minutes until it becomes smooth and elastic. You may need to add a little more flour if the dough is too sticky.
- First Rise: Place the kneaded dough in a lightly oiled bowl, covering it with a damp cloth. Let it rise in a warm place for about 1 hour, or until it doubles in size.
- Shape the Baguettes: Once risen, turn the dough onto a floured surface and gently deflate it. Divide it into two equal portions. Shape each portion into a long baguette shape by flattening the dough slightly and rolling it tightly into a cylinder.
- Second Rise: Place the shaped baguettes onto a baguette baking tray or a baking sheet lined with parchment paper. Cover them with a damp cloth again and let them rise for another 45 minutes.
- Preheat the Oven: Preheat your oven to 220°C (428°F) and place a shallow baking pan on the bottom rack.
- Score and Bake: Once the baguettes have risen, use a sharp knife to make three diagonal slashes on each loaf. Place the baguettes in the oven and pour a cup of water into the shallow baking pan to create steam. Bake for 20-25 minutes until the crust is golden brown and crisp.
- Cool the Baguettes: Remove the baguettes from the oven and let them cool on a wire rack before slicing.
Extra Tips:
For the best results, verify your water is warm, but not hot, to activate the yeast without killing it. If you find the crust is browning too quickly, you can tent the baguettes with aluminum foil.
Additionally, using a baking stone can enhance the crispiness of the crust. Finally, practice makes perfect; don’t be discouraged if your first attempt isn’t perfect. Each try will improve your technique and the quality of your baguette.
Authentic Brioche Loaf
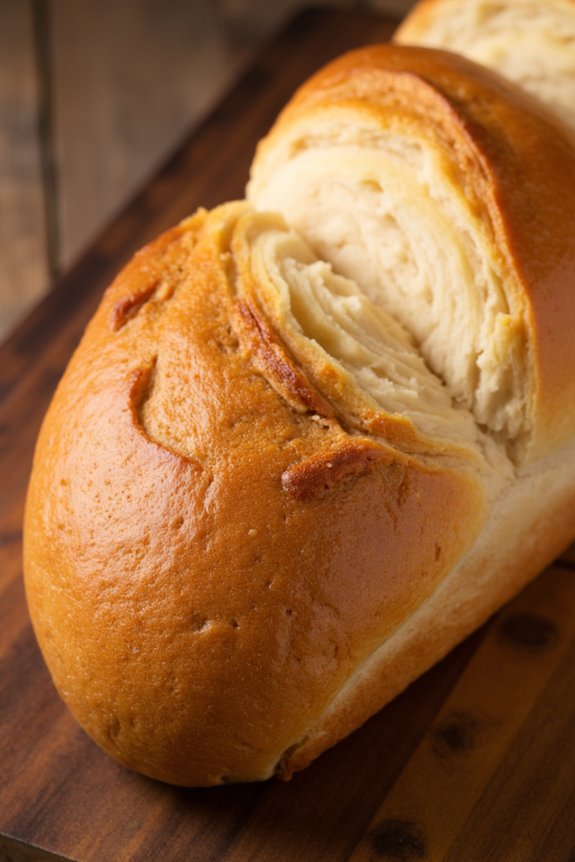
Brioche is a classic French bread known for its rich, tender crumb and buttery flavor. Originating from the Normandy region, this bread is often enjoyed as a breakfast treat or as a component of gourmet sandwiches.
Making an authentic brioche loaf requires patience and precision, as the dough is enriched with eggs and butter, which give it its signature light and airy texture. The process can be somewhat time-consuming due to the need for multiple rises, but the result is a golden, fluffy loaf that’s well worth the effort.
To make an authentic brioche loaf, you’ll use ingredients that are staples in French baking, such as all-purpose flour, unsalted butter, and eggs. The key is to create a dough that’s smooth and elastic, which will require kneading and careful attention to the dough’s texture.
Once the dough is prepared and has risen sufficiently, it’s shaped into a loaf and baked until golden brown. This recipe will yield a delicious loaf that serves 4-6 people, perfect for a family breakfast or brunch gathering.
Ingredients:
- 4 cups all-purpose flour
- 1/4 cup granulated sugar
- 2 teaspoons salt
- 1 tablespoon active dry yeast
- 1/2 cup warm milk (110°F/43°C)
- 5 large eggs, at room temperature
- 1 cup unsalted butter, softened
- 1 egg, beaten (for egg wash)
Cooking Instructions:
- Activate the Yeast: In a small bowl, combine the warm milk and active dry yeast. Stir gently and let it sit for about 5-10 minutes, until it becomes frothy. This means the yeast is active and ready to use.
- Prepare the Dough: In a large mixing bowl, combine the flour, sugar, and salt. Add the yeast mixture and the eggs. Using a stand mixer fitted with the dough hook, mix on low speed until the ingredients are just combined.
- Incorporate the Butter: Gradually add the softened butter to the dough, a few tablespoons at a time, mixing on medium speed. Continue kneading the dough for about 10 minutes, until it’s smooth and elastic. The dough will be sticky, but it should pull away from the sides of the bowl.
- First Rise: Transfer the dough to a lightly greased bowl, cover it with plastic wrap, and let it rise in a warm place for 1 1/2 to 2 hours, or until doubled in size.
- Shape the Loaf: Once risen, gently deflate the dough and turn it out onto a lightly floured surface. Shape it into a loaf by folding the edges in and rolling it tightly.
- Second Rise: Place the shaped loaf into a greased loaf pan. Cover it loosely with plastic wrap and let it rise again for about 1 hour, or until it has doubled in size.
- Preheat and Prepare for Baking: Preheat your oven to 375°F (190°C). Brush the top of the loaf with the beaten egg to give it a shiny, golden crust.
- Bake: Bake the loaf in the preheated oven for 30-35 minutes, or until the top is golden brown and the loaf sounds hollow when tapped on the bottom.
- Cool: Remove the loaf from the oven and let it cool in the pan for 10 minutes. Then, transfer it to a wire rack to cool completely before slicing.
Extra Tips:
When making brioche, it’s important to confirm all your ingredients, especially the eggs and butter, are at room temperature. This allows them to incorporate more smoothly into the dough.
If your kitchen is particularly warm, don’t let the dough rise too long during the first proofing, as over-proofing can lead to a dense loaf.
Finally, if you find the top of the loaf browning too quickly in the oven, you can cover it loosely with aluminum foil to prevent burning while the inside continues to bake. Enjoy your homemade brioche with jam, butter, or as part of a savory sandwich!
Savory Quiche Lorraine
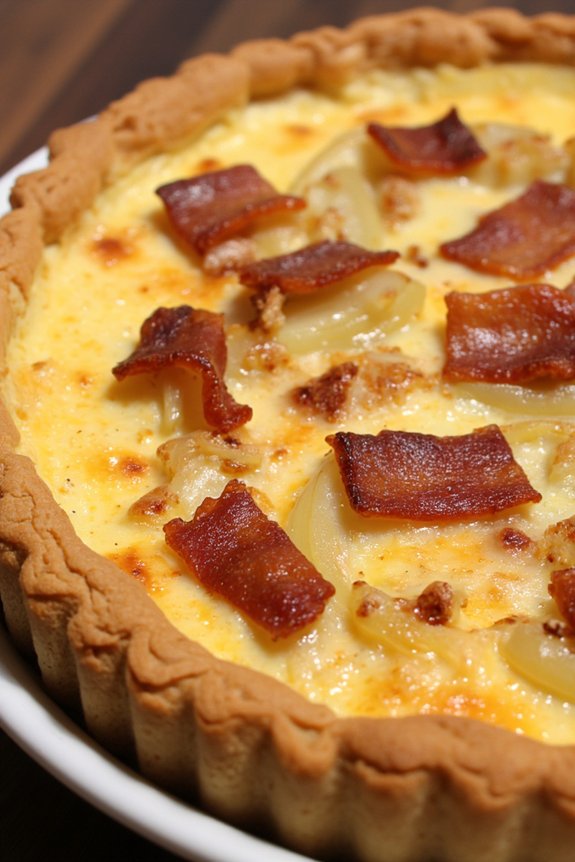
Savory Quiche Lorraine is a classic French dish that combines a rich, creamy custard with a savory filling of bacon, cheese, and onions, all encased in a buttery, flaky pastry crust. Originating from the Lorraine region of France, this quiche has become a beloved staple in French cuisine and around the world for its versatility and delectable flavor.
Perfect for brunch, lunch, or dinner, Quiche Lorraine can be served warm or at room temperature, making it a delightful dish for any occasion.
The key to a perfect Quiche Lorraine lies in achieving the right balance of flavors and textures. The crust should be crisp and golden, providing a sturdy base that contrasts beautifully with the smooth, velvety filling.
The combination of smoky bacon, sharp cheese, and tender onions creates a savory depth that’s both comforting and satisfying. With a few simple ingredients and careful preparation, you can create a Quiche Lorraine that captures the essence of French baking.
Ingredients (Serves 4-6)
- 1 pie crust (store-bought or homemade)
- 6 slices of bacon
- 1 cup Gruyère cheese, grated
- 1 small onion, finely chopped
- 3 large eggs
- 1 1/2 cups heavy cream
- 1/2 teaspoon salt
- 1/4 teaspoon freshly ground black pepper
- 1/4 teaspoon ground nutmeg
Cooking Instructions
- Prepare the Crust: Preheat your oven to 375°F (190°C). Roll out the pie crust and fit it into a 9-inch quiche or pie pan. Trim the excess dough and prick the bottom with a fork. Line the crust with parchment paper and fill with pie weights or dried beans. Bake for 10 minutes, then remove the weights and parchment. Bake for an additional 5 minutes until the crust is lightly golden. Remove from the oven and set aside.
- Cook the Bacon: In a skillet over medium heat, cook the bacon until crispy. Transfer to a paper towel-lined plate to drain. Once cooled, crumble the bacon into small pieces.
- Sauté the Onions: In the same skillet, remove excess bacon fat, leaving about 1 tablespoon. Add the chopped onions and sauté over medium heat until they’re soft and translucent, about 5 minutes. Remove from heat.
- Make the Custard: In a mixing bowl, whisk together the eggs, heavy cream, salt, pepper, and nutmeg until smooth and well combined.
- Assemble the Quiche: Sprinkle the cooked bacon, sautéed onions, and grated Gruyère cheese evenly over the pre-baked crust. Pour the egg and cream mixture over the filling, guaranteeing it’s evenly distributed.
- Bake the Quiche: Place the quiche in the oven and bake for 30-35 minutes, or until the filling is set and the top is golden brown. A knife inserted into the center should come out clean.
- Cool and Serve: Remove the quiche from the oven and let it cool for at least 10 minutes before slicing. Serve warm or at room temperature.
Extra Tips
For a more robust flavor, consider adding a teaspoon of Dijon mustard to the custard mixture or a handful of fresh herbs like chives or parsley.
If you prefer a lighter quiche, substitute half of the heavy cream with milk. To prevent the crust from becoming soggy, verify the bacon and onions are well-drained before adding them to the crust.
Enjoy your homemade Savory Quiche Lorraine as a delightful meal that brings a touch of French elegance to your table.
Sweet and Crispy Palmier Cookies
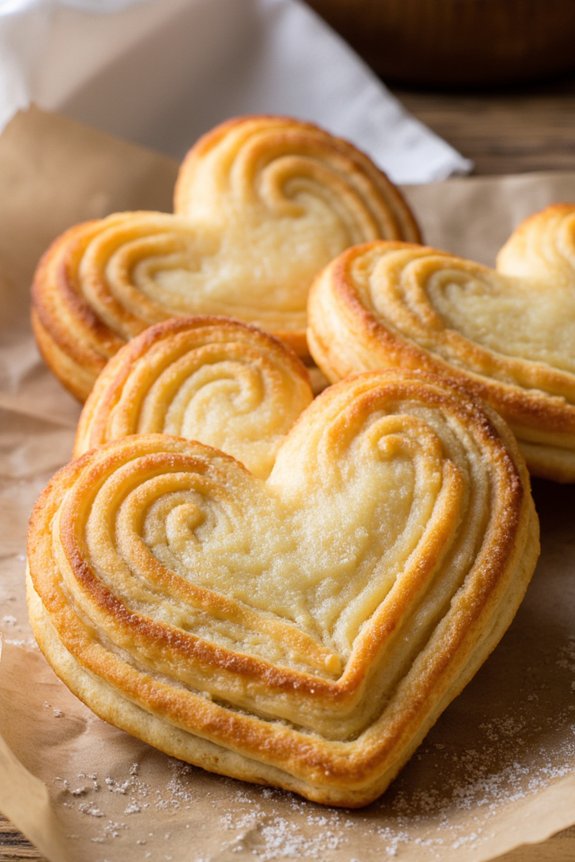
Palmier cookies, also known as “elephant ears” or “butterfly cookies,” are a classic French pastry that’s both sweet and crispy, making them a delightful treat for any occasion.
Originating from France, these cookies are made with puff pastry and sugar, resulting in a caramelized, flaky texture that’s truly irresistible. Despite their sophisticated appearance, palmiers are surprisingly easy to make and require only a few ingredients. They’re perfect for serving at a tea party, as a snack, or even as a sweet accompaniment to coffee.
The secret to achieving the perfect palmier lies in the use of high-quality puff pastry and the careful rolling and folding technique that creates its signature shape. As the sugar caramelizes during baking, it provides a wonderful contrast to the buttery layers of pastry. This recipe will guide you through the process of making palmiers for 4-6 people, guaranteeing that you achieve the perfect balance of sweetness and crunch with each bite.
Ingredients (Serving Size: 4-6 People)
- 1 sheet of puff pastry (store-bought or homemade)
- 1 cup granulated sugar
- 1/4 cup unsalted butter, melted
- A pinch of salt (optional)
- 1 teaspoon ground cinnamon (optional)
Cooking Instructions
- Prepare the Puff Pastry: Thaw the puff pastry sheet according to the package instructions if using store-bought. Once thawed, lay it flat on a clean work surface dusted with a little sugar to prevent sticking.
- Add the Sugar Layer: Spread half of the granulated sugar evenly over the surface of the puff pastry. If using, sprinkle a pinch of salt and ground cinnamon over the sugar.
- Roll the Pastry: Starting from one end, tightly roll the pastry towards the center. Repeat on the opposite side until both rolls meet in the middle. Use a pastry brush to lightly coat the pastry with melted butter to help the sugar adhere.
- Chill the Rolled Pastry: Wrap the rolled pastry in plastic wrap and refrigerate for about 30 minutes to an hour. This helps the dough firm up, making it easier to slice.
- Slice the Pastry: Preheat your oven to 400°F (200°C). Once chilled, slice the pastry into 1/4-inch thick slices using a sharp knife. Arrange the slices cut side up on a baking sheet lined with parchment paper, leaving enough space between each for expansion.
- Bake the Palmiers: Sprinkle the remaining sugar over the slices, then bake in the preheated oven for 12-15 minutes. Flip the cookies halfway through baking to guarantee even caramelization. They’re done when both sides are golden brown and crispy.
- Cool and Serve: Remove the palmiers from the oven and let them cool on a wire rack. Serve them warm or at room temperature. Enjoy your sweet and crispy palmier cookies!
Extra Tips
For an extra layer of flavor, you can experiment with different spices or zests such as orange or lemon zest mixed into the sugar.
If you prefer a less sweet version, reduce the amount of sugar sprinkled on the pastry. Additionally, if making homemade puff pastry, verify it’s rolled out evenly to achieve consistent layers.
Store any leftover cookies in an airtight container to maintain their crispiness.
Luxurious Mille-Feuille
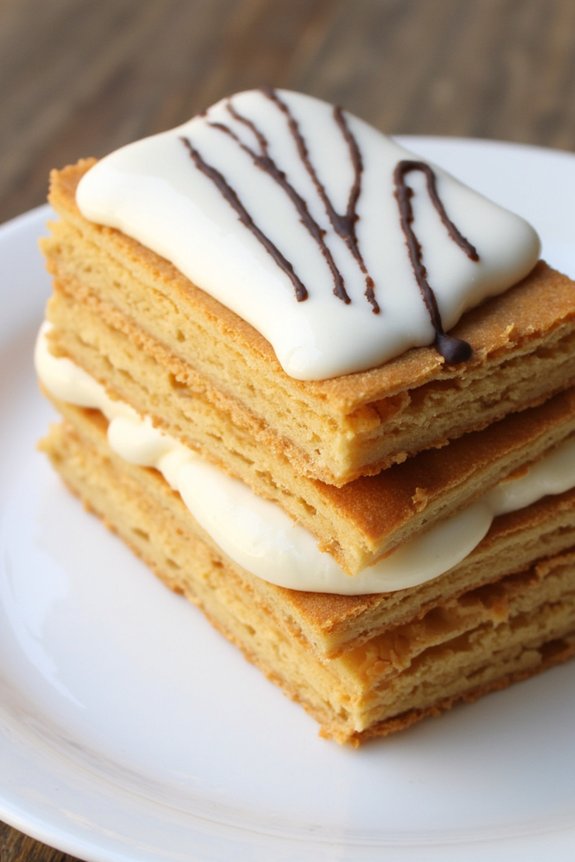
Mille-Feuille, also known as Napoleon, is a classic French pastry that consists of layers of delicate puff pastry interspersed with rich pastry cream, and topped with a sweet glaze. This luxurious dessert is a true showcase of French baking, requiring patience and precision to achieve the perfect balance of flaky pastry and creamy filling.
While it may seem intimidating, breaking down the process into manageable steps makes it approachable for any home baker looking to impress guests with a stunning dessert.
For this recipe, we’ll be creating a Mille-Feuille that serves 4-6 people. Starting with homemade puff pastry, we’ll then prepare a silky pastry cream, and finish with a glossy icing. The result is a dessert that not only looks impressive but delights the palate with its combination of textures and flavors.
Be prepared to dedicate a bit of time to this recipe, but rest assured, the final product will be worth every minute spent.
Ingredients (Serves 4-6):
- 500 grams puff pastry
- 500 ml whole milk
- 1 vanilla bean, split and scraped (or 1 teaspoon vanilla extract)
- 6 large egg yolks
- 150 grams granulated sugar
- 50 grams all-purpose flour
- 30 grams cornstarch
- 200 grams icing sugar
- 2 tablespoons water
- 50 grams dark chocolate
Cooking Instructions:
- Prepare the Puff Pastry:
- Preheat the oven to 200°C (400°F). Roll out the puff pastry on a floured surface into a thin sheet, about 3 mm thick. Cut into three equal rectangles.
- Place the rectangles on a baking sheet lined with parchment paper. Prick all over with a fork to prevent excessive puffing. Cover with another sheet of parchment paper and a second baking sheet to keep them flat.
- Bake in the preheated oven for 20-25 minutes, or until golden brown and crisp. Remove the top baking sheet and parchment paper for the last 5 minutes to guarantee even browning. Let cool completely on a wire rack.
- Make the Pastry Cream:
- In a medium saucepan, heat the milk and vanilla bean (or extract) over medium heat until just boiling. Remove from heat and let infuse for 10 minutes.
- In a separate bowl, whisk together egg yolks and granulated sugar until pale. Add flour and cornstarch, mixing until smooth.
- Gradually pour the hot milk mixture into the egg mixture, whisking constantly. Return the mixture to the saucepan and cook over medium heat, stirring constantly, until it thickens and comes to a boil.
- Remove from heat, pour into a bowl, and cover with plastic wrap directly on the surface to prevent a skin from forming. Refrigerate until chilled.
- Assemble the Mille-Feuille:
- Once the pastry cream is chilled, remove from the refrigerator and whisk until smooth. Spread half of the pastry cream over one puff pastry rectangle, place a second rectangle on top, and spread the remaining cream.
- Top with the final puff pastry rectangle. Refrigerate for at least 1 hour to set.
- Prepare the Icing:
- Mix icing sugar with water until smooth. Melt the dark chocolate in a heatproof bowl over simmering water or in the microwave.
- Spread the icing over the top layer of puff pastry. Drizzle lines of melted chocolate across the icing. Use a toothpick to drag lines through the chocolate for a feathered effect.
- Return the assembled Mille-Feuille to the refrigerator for 30 minutes to set the icing.
Extra Tips:
When making Mille-Feuille, it’s essential to keep the puff pastry cold before baking to guarantee it rises properly and achieves the desired flaky texture.
Also, make sure the pastry cream is completely chilled before assembling to prevent it from becoming runny. If you’re short on time, store-bought puff pastry can be used, but homemade will yield the best results regarding flavor and texture.
Finally, when cutting the Mille-Feuille, use a sharp serrated knife to avoid crushing the delicate layers.
Nutty Frangipane Tart
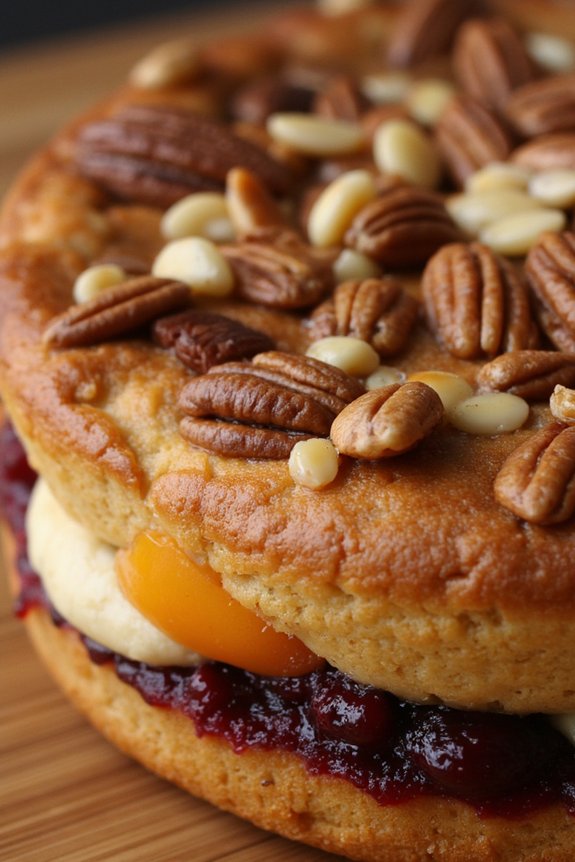
Nutty Frangipane Tart is a classic French dessert that combines a buttery, flaky pastry crust with a rich almond filling, known as frangipane. This elegant tart is often adorned with a variety of nuts such as almonds, pistachios, or hazelnuts, and sometimes a layer of fruit preserves or fresh fruit for added flavor and texture.
The combination of the creamy frangipane with the crisp crust and nutty topping makes for a delightful treat that’s perfect for any special occasion or as a luxurious afternoon snack.
Making a Nutty Frangipane Tart may seem intimidating, but with a little patience and attention to detail, you can create a dessert that’s bound to impress. The key to a successful tart lies in the quality of the ingredients and the precision of each step. From preparing the pastry dough to guaranteeing the frangipane is smooth and well-flavored, each component plays a vital role in the final product.
This recipe is designed to serve 4-6 people, making it ideal for a small gathering or family dessert.
Ingredients (serves 4-6 people):
- 1 1/4 cups all-purpose flour
- 1/2 cup unsalted butter, chilled and diced
- 1/4 cup granulated sugar
- 1/4 teaspoon salt
- 1 egg yolk
- 2 tablespoons cold water
- 1 cup almond meal (ground almonds)
- 1/2 cup granulated sugar
- 1/2 cup unsalted butter, softened
- 2 large eggs
- 1 teaspoon almond extract
- 1/2 cup mixed nuts (almonds, pistachios, hazelnuts), roughly chopped
- 2 tablespoons fruit preserves (optional)
Instructions:
1. Prepare the Pastry Dough: In a large mixing bowl, combine the all-purpose flour, sugar, and salt. Add the chilled, diced butter and use a pastry cutter or your fingertips to blend until the mixture resembles coarse crumbs.
Add the egg yolk and cold water, mixing until the dough just comes together. Shape into a disc, wrap in plastic wrap, and refrigerate for at least 30 minutes.
2. Preheat the Oven: While the dough chills, preheat your oven to 350°F (175°C).
3. Roll Out the Dough: Once chilled, Roll Out the Dough on a lightly floured surface to fit a 9-inch tart pan. Press the dough into the pan, trimming any excess. Prick the bottom with a fork to prevent bubbling.
4. Bake the Crust: Line the pastry with parchment paper and fill with pie weights or dried beans. Bake the Crust for 10-12 minutes, then remove the weights and parchment. Bake for an additional 5 minutes until lightly golden. Allow to cool.
5. Make the Frangipane Filling: In a medium bowl, cream together the softened butter and sugar until light and fluffy. Beat in the eggs, one at a time, followed by the almond extract.
Gently fold in the almond meal until well combined.
6. Assemble the Tart: Spread a thin layer of fruit preserves over the cooled crust, if using. Pour the frangipane filling over the preserves, smoothing the top with a spatula. Sprinkle the chopped mixed nuts evenly over the frangipane.
7. Bake the Tart: Bake the Tart in the preheated oven for 25-30 minutes, or until the frangipane is set and the nuts are golden brown. Remove from the oven and allow to cool completely before serving.
Extra Tips: To enhance the flavor of your Nutty Frangipane Tart, consider toasting the nuts before chopping them. This will bring out their natural oils and deepen their flavor.
Additionally, if you choose to add fruit preserves, select a flavor that complements the nutty filling, such as apricot or raspberry. Finally, when rolling out the dough, make sure it remains cold to prevent it from becoming too sticky and difficult to work with.
Creamy Éclairs
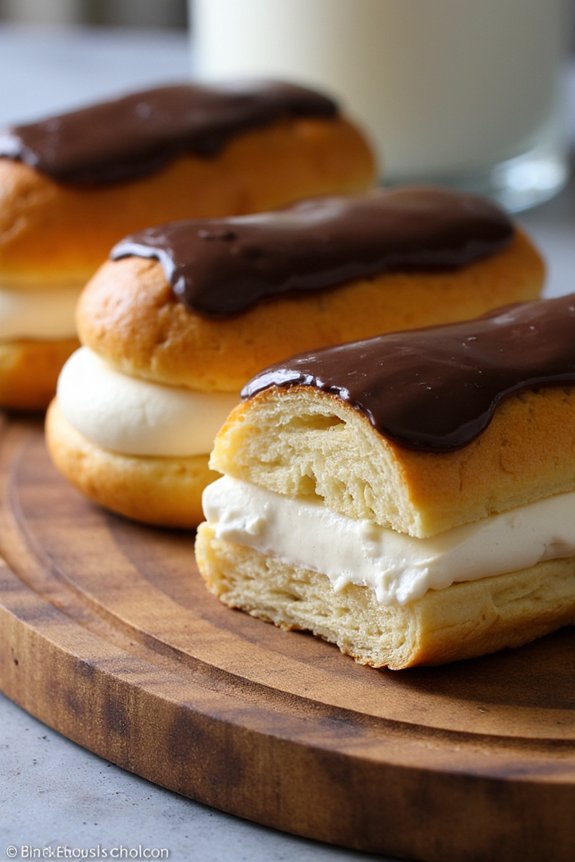
Creamy Éclairs are a quintessential French pastry that perfectly balances a crisp choux pastry shell with a luscious creamy filling and a rich chocolate glaze. This classic dessert is a favorite in patisseries around the world and can be recreated in your own kitchen with a bit of attention to detail and patience.
Whether you’re hosting a sophisticated dinner party or simply indulging in a sweet treat, these éclairs are sure to impress with their elegant appearance and delightful flavors.
The art of making éclairs involves mastering the choux pastry, which serves as the foundation for this dessert. The light and airy pastry is filled with a vanilla-infused pastry cream, creating a delightful contrast of textures and flavors.
Once filled, the éclairs are dipped in a smooth chocolate glaze, adding a decadent finish to this exquisite treat. With a little preparation and practice, you can enjoy these Creamy Éclairs, serving 4-6 people, in the comfort of your home.
Ingredients:
For the Choux Pastry:
- 1 cup water
- 1/2 cup unsalted butter
- 1 cup all-purpose flour
- 4 large eggs
- 1/4 teaspoon salt
For the Pastry Cream Filling:
- 2 cups whole milk
- 1/2 cup granulated sugar
- 1/4 cup cornstarch
- 4 large egg yolks
- 2 teaspoons vanilla extract
- 2 tablespoons unsalted butter
For the Chocolate Glaze:
- 1/2 cup heavy cream
- 4 ounces semisweet chocolate, chopped
Cooking Instructions:
- Prepare the Choux Pastry: In a medium saucepan, bring the water, butter, and salt to a boil over medium heat. Remove from heat and quickly stir in the flour until the mixture forms a ball.
- Return to heat and stir continuously for about 2 minutes until the dough pulls away from the sides of the pan and a film forms on the bottom.
- Incorporate the Eggs: Transfer the dough to a mixing bowl. Using a hand mixer, add the eggs one at a time, beating well after each addition until the dough is smooth and glossy.
- Shape and Bake the Éclairs: Preheat your oven to 400°F (200°C). Line a baking sheet with parchment paper. Transfer the dough to a piping bag fitted with a large round tip and pipe 4-inch long strips onto the baking sheet.
- Bake for 20-25 minutes until puffed and golden. Allow to cool completely.
- Make the Pastry Cream: In a saucepan, heat the milk until it just begins to simmer. In a separate bowl, whisk together sugar, cornstarch, and egg yolks.
- Slowly pour the hot milk into the egg mixture, whisking constantly. Return to the saucepan and cook over medium heat, stirring constantly, until thickened.
- Remove from heat, stir in vanilla and butter, and cool completely.
- Fill the Éclairs: Once cooled, cut the éclairs in half horizontally. Fill a piping bag with the pastry cream and pipe it into the bottom half of each éclair.
- Place the tops back on.
- Prepare the Chocolate Glaze: Heat the heavy cream in a small saucepan until it just begins to simmer. Remove from heat and pour over the chopped chocolate.
- Let sit for a few minutes, then stir until smooth.
- Glaze the Éclairs: Dip the top of each filled éclair into the chocolate glaze, allowing any excess to drip off. Place on a wire rack to set.
Extra Tips:
When making Creamy Éclairs, verify that your choux pastry is thoroughly dried out during cooking to prevent the éclairs from collapsing.
It’s important to cool the pastry cream completely before filling the éclairs to ensure it holds its shape. If you don’t have a piping bag, you can use a plastic sandwich bag with a corner snipped off.
Finally, for an added flavor twist, consider infusing the pastry cream with different flavors such as coffee or almond extract. Enjoy your homemade French delicacies!
Light and Airy Soufflé
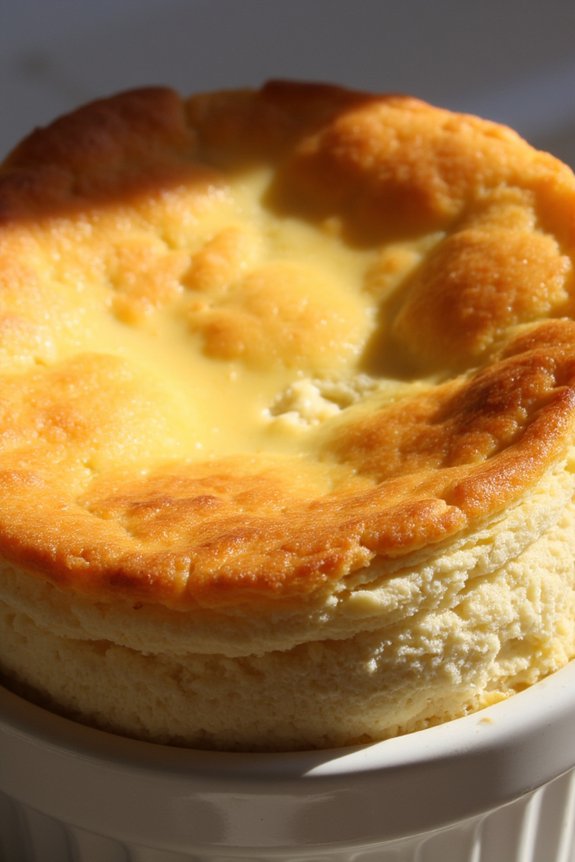
Soufflé is a classic French dish that’s renowned for its light, airy texture and rich flavor. This elegant dish, typically served as a savory side or a sweet dessert, is a demonstration of the magic of French baking techniques. The soufflé‘s name comes from the French verb “souffler,” which means “to blow” or “to puff,” perfectly describing the soufflé’s signature rise and delicate structure.
The key to a perfect soufflé lies in the careful preparation and folding of egg whites, which provide the dish with its remarkable lift and ethereal feel. When making a soufflé, it’s essential to maintain the right balance between ingredients and to handle the dish with care. A successful soufflé requires precision, timing, and a bit of patience, but the end result is well worth the effort.
Whether you’re making a cheese soufflé for a savory appetizer or a chocolate soufflé for a decadent dessert, the process remains largely the same, with slight variations in flavoring and seasoning. Here, we’ll guide you through the steps to make a classic cheese soufflé that serves 4-6 people, perfect for impressing guests or treating your family to a taste of France.
Ingredients for Cheese Soufflé (Serves 4-6):
- 1 cup whole milk
- 2 tablespoons unsalted butter
- 3 tablespoons all-purpose flour
- 1/2 teaspoon salt
- 1/4 teaspoon ground white pepper
- A pinch of nutmeg
- 4 large egg yolks
- 5 large egg whites
- 1 cup grated Gruyère cheese
- Butter, for greasing
- Grated Parmesan cheese, for dusting
Instructions:
- Prepare the Ramekins: Preheat your oven to 375°F (190°C). Generously butter the inside of six 1-cup ramekins and dust them with grated Parmesan cheese. This helps the soufflé climb the sides and achieve a good rise.
- Make the Base: In a medium saucepan, heat the milk over low heat until warm but not boiling. In another saucepan, melt the butter over medium heat, then stir in the flour to form a paste. Cook for about 2 minutes, stirring constantly, to remove the raw flour taste. Gradually whisk in the warm milk, continuing to stir until the mixture thickens and comes to a gentle boil. Remove from heat and season with salt, white pepper, and nutmeg.
- Incorporate the Yolks: Allow the sauce to cool slightly, then whisk in the egg yolks one at a time until fully incorporated. Stir in the grated Gruyère cheese until smooth and set aside.
- Beat the Egg Whites: In a clean, dry bowl, beat the egg whites with an electric mixer until they form stiff peaks. This means the peaks should stand straight up when the beaters are lifted from the mixture.
- Fold the Whites: Gently fold a third of the beaten egg whites into the cheese base to lighten it. Carefully fold in the remaining egg whites, taking care not to deflate the mixture. Use a rubber spatula and a gentle folding motion.
- Fill and Bake: Divide the soufflé mixture evenly among the prepared ramekins, filling each about three-quarters full. Run your thumb around the inside edge of each ramekin to help the soufflé rise evenly. Place the ramekins on a baking sheet and bake in the preheated oven for 18-22 minutes, until the soufflés are puffed and golden brown on top. Don’t open the oven door during baking to prevent them from collapsing.
- Serve Immediately: Once baked, serve the soufflés immediately as they’ll begin to deflate after being removed from the oven.
Extra Tips:
For the best results, make sure all your ingredients are at room temperature before you begin. Egg whites will whip more easily and achieve better volume if they aren’t cold.
When folding the egg whites into the base, use a light hand to avoid knocking out the air. Additionally, confirm your ramekins are thoroughly greased and dusted to help the soufflé rise properly.
Finally, timing is everything with soufflés—plan to serve them as soon as they come out of the oven for maximum impact and enjoyment.
Heavenly Galette Des Rois
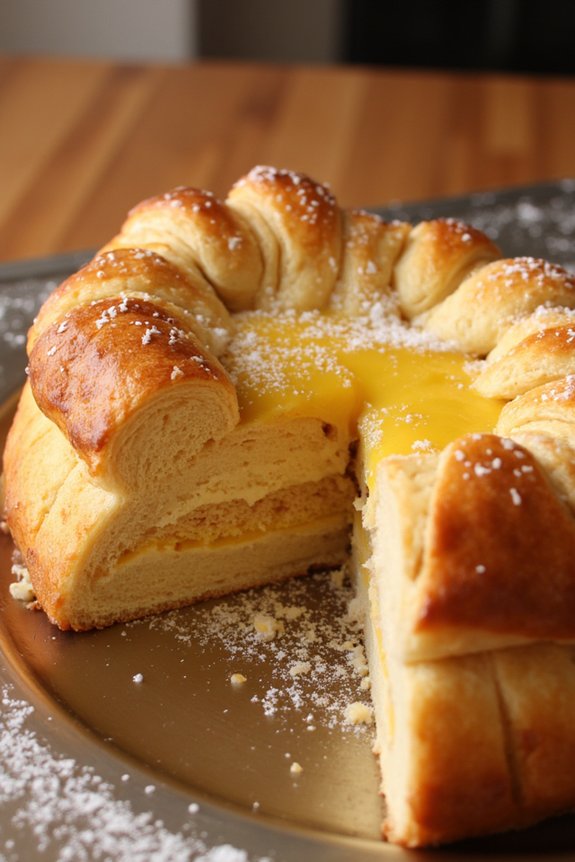
Galette Des Rois, or King’s Cake, is a traditional French pastry that’s typically enjoyed during the Epiphany festival. This delectable cake is celebrated for its flaky puff pastry filled with a rich almond cream, known as frangipane. Its golden exterior and luxurious filling make it a dessert fit for royalty. The tradition involves hiding a small trinket, known as a “fève,” inside the cake. Whoever finds it in their slice is crowned king or queen for the day, adding a fun and festive element to this delicious treat.
Creating a Galette Des Rois is a beautiful way to bring a little bit of French culture into your home. The process involves making a delicate frangipane filling, enveloped in buttery puff pastry. Though it might sound complex, the steps are straightforward, and the results are absolutely worth it. This recipe serves 4-6 people, perfect for a small gathering or family celebration.
Ingredients:
- 2 sheets of puff pastry
- 100g unsalted butter, softened
- 100g granulated sugar
- 100g almond meal
- 2 eggs
- 1 teaspoon vanilla extract
- 1 tablespoon all-purpose flour
- 1 fève (optional)
- 1 egg yolk (for egg wash)
- 1 tablespoon milk (for egg wash)
Instructions:
- Prepare the Frangipane: In a medium mixing bowl, cream together the softened butter and sugar until light and fluffy. Add the almond meal and mix until well combined. Beat in the eggs one at a time, making sure each is fully incorporated before adding the next. Stir in the vanilla extract and flour until the mixture is smooth.
- Roll Out the Pastry: Preheat your oven to 200°C (400°F). Roll out the puff pastry sheets on a lightly floured surface. Cut two circles, approximately 9 inches in diameter, from the sheets. Place one circle on a baking sheet lined with parchment paper.
- Assemble the Galette: Spread the frangipane mixture evenly over the pastry circle on the baking sheet, leaving a 1-inch border. If using, place the fève somewhere in the frangipane. Brush a little water on the border, then place the second pastry circle on top. Press the edges gently to seal.
- Decorate and Chill: Use a knife to create a decorative pattern on the top of the pastry, being careful not to cut through. Chill the assembled galette in the refrigerator for 30 minutes to help it hold its shape during baking.
- Apply Egg Wash and Bake: Mix the egg yolk and milk to create an egg wash. Remove the galette from the fridge and brush the top with the egg wash, avoiding the edges to prevent them from browning too quickly. Bake in the preheated oven for 25-30 minutes, or until the pastry is golden brown and puffed.
- Cool and Serve: Allow the galette to cool slightly before serving. Slice and enjoy, keeping an eye out for the fève if you’ve included it.
Extra Tips:
To guarantee your Galette Des Rois is perfect, make sure the puff pastry is very cold when you start working with it. This helps achieve a flaky result.
If you don’t have almond meal, you can make your own by finely grinding blanched almonds in a food processor. Remember to not over-process, as this can turn them into almond butter.
Finally, the fève should be placed subtly but securely within the frangipane to prevent it from shifting during baking. Enjoy your slice of French tradition!
