

Picture a sunlit afternoon with the aroma of freshly baked baguettes wafting through the air. A French picnic is all about romance and enjoying the outdoors. Rich cheeses, savory tarts, and sweet treats like Tarte Tatin are the stars of the show. Each bite takes you to a quaint Parisian park. Ready to explore these 14 delightful recipes?
Classic French Baguette Sandwiches
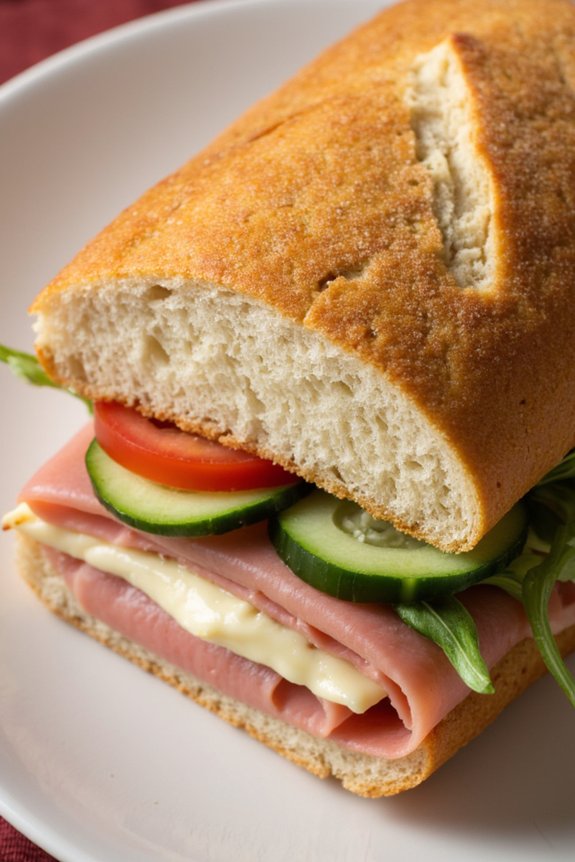
A classic French baguette sandwich is a staple in any French picnic. Known for its simplicity and rich flavors, this sandwich brings together a crunchy, freshly baked baguette with a variety of fillings that are quintessentially French. The combination of textures and flavors makes it a perfect choice for a light yet satisfying meal.
Whether you prefer a traditional jambon-beurre or a vegetarian option, the classic French baguette sandwich offers versatility and elegance in every bite.
When preparing a French baguette sandwich, the quality of the ingredients is key. Opt for a freshly baked baguette that has a crispy crust and a soft interior. For fillings, choose from a variety of French cheeses like brie or camembert, classic charcuterie such as ham or saucisson, and complement with fresh vegetables or a tangy mustard spread.
This recipe serves 4-6 people, making it ideal for a small gathering or family picnic.
Ingredients:
- 2 large French baguettes
- 200g of sliced ham or saucisson
- 200g of brie or camembert cheese
- 1 medium cucumber, thinly sliced
- 1 medium tomato, thinly sliced
- 4 tablespoons of Dijon mustard
- 50g of butter, softened
- Fresh arugula or lettuce leaves
- Salt and pepper to taste
Cooking Instructions:
- Prepare the Baguette: Begin by slicing each baguette in half lengthwise. Use a serrated knife to guarantee a clean cut without crushing the bread. Once sliced, lightly toast the insides of the baguettes to add a bit of warmth and extra crunch.
- Spread the Butter and Mustard: Evenly spread a thin layer of softened butter on one side of each baguette half. On the other side, spread a generous amount of Dijon mustard. These spreads will add a creamy texture and enhance the flavors of the fillings.
- Layer the Ingredients: Start by placing a layer of sliced ham or saucisson on the bottom half of the baguette. Next, add slices of brie or camembert cheese. Follow with a layer of fresh cucumber and tomato slices. Add a handful of arugula or lettuce leaves on top for a fresh crunch.
- Season and Assemble: Sprinkle a pinch of salt and pepper over the fillings for added flavor. Carefully place the top half of the baguette over the fillings, pressing gently to hold everything together.
- Slice and Serve: Using a sharp knife, cut the baguette sandwiches into smaller, manageable portions suitable for serving 4-6 people. Arrange on a platter and serve immediately, or wrap in parchment paper for easy transport to your picnic.
Extra Tips:
For the best results, use a high-quality baguette from a local bakery; this will make a significant difference in the overall taste and texture of the sandwich.
Experiment with different types of mustard or add a drizzle of olive oil for a unique twist. If preparing ahead of time, wrap the sandwiches tightly in parchment paper to keep the ingredients fresh and prevent the bread from becoming soggy.
Enjoy this classic French delight with a side of fresh fruit or a light salad for a complete picnic experience.
Quiche Lorraine

Quiche Lorraine is a classic French dish that embodies the richness and simplicity of French cooking, making it perfect for a picnic. This savory pie features a buttery, flaky pastry crust filled with a creamy custard blend of eggs, cream, and milk, complemented by the smoky flavor of bacon and the subtle taste of Gruyère cheese.
Quiche Lorraine not only makes for a delightful picnic treat but also serves as a versatile dish that can be enjoyed warm or at room temperature, making it an ideal addition to any outdoor gathering.
The origins of Quiche Lorraine trace back to the Lorraine region in northeastern France. Traditionally, it was a humble dish made with simple ingredients readily available in rural households. Over time, it has evolved into a beloved French classic that’s enjoyed worldwide.
Its popularity can be attributed to its delightful combination of textures and flavors, where the crispy crust meets the soft, savory custard. Whether you’re planning a leisurely picnic in the park or a cozy afternoon gathering in your backyard, Quiche Lorraine is sure to be a crowd-pleaser.
Ingredients for 4-6 servings:
- 1 ready-made pie crust or homemade pastry crust
- 6 slices of bacon
- 1 cup grated Gruyère cheese
- 3 large eggs
- 1 cup heavy cream
- 1/2 cup whole milk
- Salt and freshly ground black pepper to taste
- A pinch of nutmeg (optional)
Cooking Instructions:
- Preheat the oven: Begin by preheating your oven to 375°F (190°C).
- Prepare the crust: Roll out the pie crust and fit it into a 9-inch tart pan or pie dish. Trim the excess dough and prick the base with a fork to prevent bubbling. Place the crust in the refrigerator to chill while you prepare the filling.
- Cook the bacon: In a skillet over medium heat, cook the bacon until crispy. Once cooked, transfer the bacon to a paper towel-lined plate to drain the excess fat. Once cooled, crumble the bacon into small pieces.
- Prepare the custard: In a mixing bowl, whisk together the eggs, heavy cream, and milk until well combined. Season the mixture with salt, freshly ground black pepper, and a pinch of nutmeg if desired.
- Assemble the quiche: Take the chilled crust from the refrigerator. Sprinkle the grated Gruyère cheese evenly over the base of the crust, followed by the crumbled bacon. Pour the custard mixture over the cheese and bacon, ensuring it’s evenly distributed.
- Bake the quiche: Place the quiche in the preheated oven and bake for 35-40 minutes, or until the filling is set and the top is golden brown. The quiche should have a slight wobble in the center when done.
- Cool and serve: Allow the quiche to cool for at least 10 minutes before slicing. Serve warm or at room temperature, making it an excellent choice for a picnic.
Extra Tips:
To guarantee the best results, use high-quality ingredients, such as fresh eggs and Gruyère cheese, which will enhance the flavor of your Quiche Lorraine. If you prefer a lighter version, substitute half-and-half for the heavy cream.
Additionally, feel free to customize your quiche by adding sautéed onions, leeks, or spinach for added flavor and texture. When transporting your quiche for a picnic, allow it to cool completely and store it in an airtight container to preserve its freshness.
Enjoy your delicious Quiche Lorraine with a side salad and a glass of chilled white wine for a perfect French picnic experience.
Ratatouille Tart

A Ratatouille Tart combines the vibrant, vegetable-rich flavors of traditional ratatouille with the buttery, flaky texture of pastry, making it a perfect choice for a French-inspired picnic. This recipe emphasizes the importance of fresh, seasonal vegetables and a well-prepared pastry base, ensuring that each bite is both satisfying and delicious. The tart can be served warm or at room temperature, making it a versatile addition to any picnic spread.
This Ratatouille Tart is designed to serve 4-6 people, making it an ideal dish for sharing. The recipe involves preparing a simple pastry crust and layering it with a medley of colorful vegetables including zucchini, eggplant, bell peppers, and tomatoes. With a touch of aromatic herbs and a sprinkle of cheese, this tart offers a delightful fusion of textures and flavors that are sure to impress your picnic guests.
Ingredients:
- 1 sheet of puff pastry
- 1 small eggplant, thinly sliced
- 1 zucchini, thinly sliced
- 1 red bell pepper, thinly sliced
- 1 yellow bell pepper, thinly sliced
- 2 medium tomatoes, sliced
- 2 cloves garlic, minced
- 2 tablespoons olive oil
- 1 teaspoon dried thyme
- 1 teaspoon dried oregano
- Salt and pepper, to taste
- 1 cup grated Gruyère cheese
- 1 egg, beaten (for egg wash)
- Fresh basil leaves, for garnish
Cooking Instructions:
- Prepare the Pastry: Preheat your oven to 400°F (200°C). Roll out the puff pastry on a lightly floured surface to fit your tart pan, allowing some overhang. Gently press the pastry into the pan and trim any excess. Prick the base with a fork to prevent it from puffing up during baking. Place the tart shell in the refrigerator to chill while you prepare the filling.
- Cook the Vegetables: Heat olive oil in a large skillet over medium heat. Add the garlic and sauté for about 1 minute until fragrant. Add the eggplant, zucchini, and bell peppers to the skillet. Season with salt, pepper, thyme, and oregano. Cook the vegetables, stirring occasionally, until they’re tender but not mushy, about 10-12 minutes.
- Assemble the Tart: Remove the tart shell from the refrigerator and sprinkle the base with half of the grated Gruyère cheese. Arrange the cooked vegetables evenly over the cheese layer. Top with tomato slices and sprinkle the remaining cheese over the vegetables.
- Bake the Tart: Brush the edges of the pastry with the beaten egg to give it a golden finish. Bake the tart in the preheated oven for 25-30 minutes, or until the pastry is golden brown and crisp, and the cheese is melted and bubbly.
- Garnish and Serve: Allow the tart to cool for a few minutes before removing it from the tart pan. Garnish with fresh basil leaves before slicing and serving. The tart can be enjoyed warm or at room temperature.
Extra Tips:
When selecting vegetables for your Ratatouille Tart, aim for ones that are firm and vibrant in color, as they’ll provide the best flavor and texture. If you prefer a deeper flavor, you can roast the vegetables in the oven instead of sautéing them, making sure to drizzle with olive oil and season well.
For a gluten-free version, substitute the puff pastry with a gluten-free pastry option. Remember to let the tart cool slightly before slicing to help it hold its shape better.
Niçoise Salad

Niçoise Salad is a classic French dish that hails from the sunny region of Nice. This vibrant salad is a beautiful medley of fresh, colorful ingredients that come together to create a rejuvenating and satisfying meal, perfect for a picnic. The dish traditionally incorporates a variety of textures and flavors, including crisp vegetables, tender potatoes, briny olives, and rich, flavorful tuna.
It’s a versatile salad that can be adapted to suit different tastes, but the core ingredients remain a tribute to its Mediterranean roots. Making a Niçoise Salad is a delightful way to showcase the best of summer produce. It’s a dish that can be prepared in advance and served at room temperature, making it ideal for outdoor gatherings.
The key to a great Niçoise Salad is using high-quality, fresh ingredients, and balancing the flavors with a simple yet delicious dressing. When assembled, the salad becomes a feast for the eyes and the palate, perfect for sharing with friends and family.
Ingredients (Serves 4-6):
- 4 medium-sized potatoes
- 200g green beans
- 4 eggs
- 200g cherry tomatoes
- 1 small red onion
- 1 small cucumber
- 1 can (approximately 200g) of tuna in olive oil
- 100g black olives (preferably Niçoise olives)
- 6 anchovy fillets (optional)
- A handful of fresh basil leaves
- 4 tablespoons extra virgin olive oil
- 2 tablespoons red wine vinegar
- 1 teaspoon Dijon mustard
- Salt and freshly ground black pepper to taste
Cooking Instructions:
- Prepare the Potatoes: Start by boiling the potatoes in salted water until they’re tender, about 15-20 minutes. Once cooked, drain them and let them cool. When cool enough to handle, cut them into bite-sized pieces.
- Cook the Green Beans: In a separate pot, bring water to a boil and add a pinch of salt. Add the green beans and cook for about 3-4 minutes until tender-crisp. Drain and immediately plunge them into ice water to stop the cooking process and preserve their vibrant color.
- Boil the Eggs: Place the eggs in a saucepan and cover with cold water. Bring to a boil, then reduce the heat and simmer for 8-10 minutes. Once done, transfer the eggs to a bowl of ice water to cool. Peel and quarter them when they’re cool enough to handle.
- Prepare the Vegetables: Halve the cherry tomatoes, thinly slice the red onion, and slice the cucumber. Set these aside along with the black olives and anchovy fillets, if using.
- Make the Dressing: In a small bowl, whisk together the olive oil, red wine vinegar, Dijon mustard, salt, and pepper until well combined.
- Assemble the Salad: In a large serving platter, arrange the potatoes, green beans, cherry tomatoes, red onion, cucumber, and olives. Flake the tuna over the top and garnish with the quartered eggs, anchovy fillets, and fresh basil leaves.
- Dress the Salad: Drizzle the dressing over the assembled salad, ensuring even coverage. Toss gently to combine or leave it as a composed salad for a more traditional presentation.
Extra Tips:
For the best flavor, use high-quality canned tuna packed in olive oil, as it adds richness to the salad. If you prefer a more traditional touch, include the anchovy fillets; they provide a pleasant salty contrast.
Feel free to adjust the quantities of vegetables to your liking or add other seasonal produce. Finally, to save time, you can prepare the components of the salad in advance and store them separately in the fridge, assembling them just before serving.
French Onion Tart
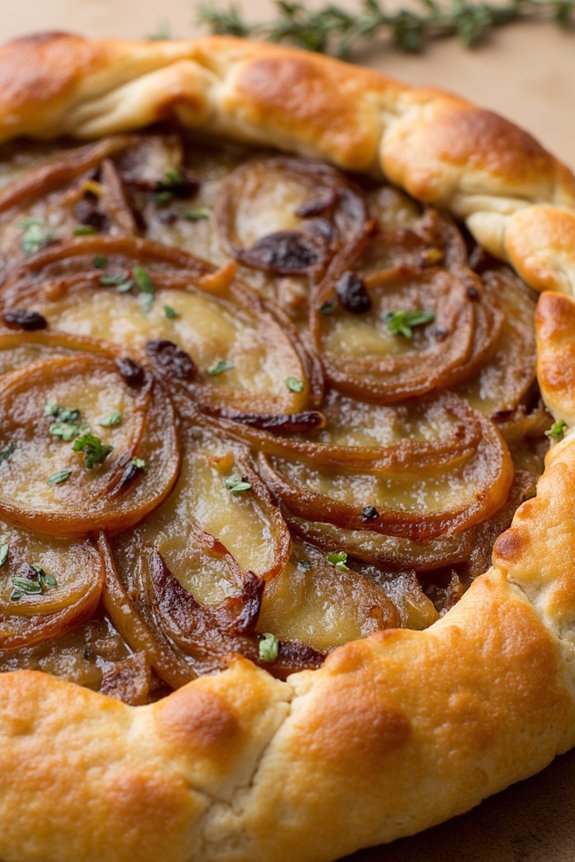
French Onion Tart is a classic French dish that embodies the rich, savory flavors of caramelized onions combined with a delightful buttery pastry. This tart is perfect for a picnic, as its robust taste and easy portability make it an ideal choice for outdoor dining.
The dish isn’t only visually appealing with its golden crust and caramelized onion topping, but it also offers a satisfying depth of flavor that showcases the simplicity and elegance of French cuisine.
The key to a perfect French Onion Tart lies in the slow caramelization of the onions, which brings out their natural sweetness and creates a rich, umami flavor profile. When paired with a flaky pastry crust and a hint of herbs, this tart becomes a delightful centerpiece for any picnic spread.
Designed to serve 4-6 people, this recipe guarantees that everyone gets a generous slice of this savory delight.
Ingredients (Serves 4-6):
- 1 pre-made pie crust (or homemade shortcrust pastry)
- 4 large onions, thinly sliced
- 2 tablespoons unsalted butter
- 1 tablespoon olive oil
- 1 tablespoon sugar
- 2 teaspoons salt
- 1 teaspoon black pepper
- 1 teaspoon fresh thyme leaves
- 3 large eggs
- 1 cup heavy cream
- 1 cup grated Gruyère cheese
Cooking Instructions:
1. Preheat the Oven: Start by preheating your oven to 375°F (190°C). This will make sure that the oven is at the right temperature when you’re ready to bake the tart.
2. Prepare the Pastry: Roll out the pie crust and line a 9-inch tart pan with it. Trim any excess dough and prick the base with a fork to prevent it from puffing up. Chill the crust in the refrigerator while you prepare the filling.
3. Caramelize the Onions: In a large skillet, melt the butter with the olive oil over medium heat. Add the sliced onions, sugar, and salt. Cook the onions slowly, stirring occasionally, for about 30-40 minutes until they’re golden brown and caramelized.
This slow cooking process is essential for developing the sweet, rich flavor of the onions.
4. Season the Onions: Once caramelized, add the black pepper and fresh thyme leaves to the onions. Stir to combine and remove the skillet from heat. Allow the onion mixture to cool slightly.
5. Prepare the Filling: In a mixing bowl, whisk together the eggs and heavy cream until well blended. Stir in the grated Gruyère cheese, then fold in the cooled onion mixture.
6. Assemble the Tart: Pour the onion and cheese filling into the prepared pastry shell, spreading it evenly.
7. Bake the Tart: Place the tart in the preheated oven and bake for 30-35 minutes, or until the filling is set and the top is lightly browned.
8. Cool and Serve: Allow the tart to cool for at least 10 minutes before slicing. This will help the filling to set further and make it easier to cut.
Extra Tips:
When caramelizing the onions, patience is key. Avoid turning up the heat to speed up the process, as this can lead to uneven cooking and a bitter taste.
Make sure to stir the onions occasionally to prevent them from sticking to the pan and burning. Additionally, using a combination of butter and olive oil helps to prevent the butter from burning and enhances the flavor of the onions.
For a variation, you can add a splash of balsamic vinegar or a handful of cooked bacon to the onion mixture for an extra layer of flavor.
Provençal Vegetable Galette
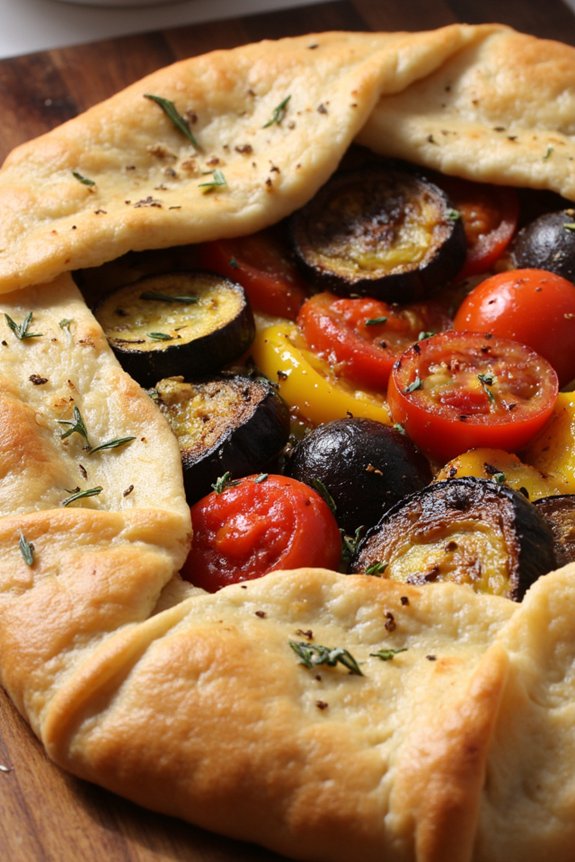
Transport yourself to the picturesque landscapes of Provence with this delightful Provençal Vegetable Galette. A savory masterpiece that combines a flaky, buttery crust with a vibrant medley of seasonal vegetables, this dish is perfect for a leisurely French picnic. The galette boasts a rustic charm, with its free-form crust enveloping a colorful array of vegetables such as zucchini, tomatoes, and bell peppers, all enhanced by aromatic herbs like thyme and rosemary.
Whether served warm or at room temperature, this Provençal Vegetable Galette offers a taste of the French countryside in every bite, making it a perfect centerpiece for any outdoor gathering.
The beauty of this galette lies in its simplicity and versatility, allowing you to customize the ingredients based on what’s available and in season. To make the perfect galette, you’ll start with a homemade pastry dough that balances richness with a tender crumb, providing the ideal canvas for the flavorful vegetable filling.
As the vegetables roast in the oven, their flavors intensify, resulting in a deliciously savory and slightly sweet filling that pairs perfectly with the buttery crust. Pair this galette with a crisp glass of white wine for a truly French picnic experience.
Ingredients (Serves 4-6)
- 1 1/4 cups all-purpose flour
- 1/2 cup unsalted butter, chilled and cubed
- 1/4 cup ice water
- 1 medium zucchini, thinly sliced
- 1 medium eggplant, thinly sliced
- 1 red bell pepper, thinly sliced
- 1 yellow bell pepper, thinly sliced
- 2 medium tomatoes, sliced
- 1 small red onion, thinly sliced
- 2 tablespoons olive oil
- 1 teaspoon salt
- 1/2 teaspoon black pepper
- 1 teaspoon dried thyme
- 1 teaspoon dried rosemary
- 1 egg, beaten (for egg wash)
Cooking Instructions
- Prepare the Dough: In a large bowl, mix the all-purpose flour and a pinch of salt. Add the chilled, cubed butter and use a pastry cutter or your fingers to blend until the mixture resembles coarse crumbs. Gradually add the ice water, mixing just until the dough comes together. Form the dough into a disk, wrap it in plastic wrap, and refrigerate for at least 30 minutes.
- Preheat the Oven: While the dough chills, preheat your oven to 400°F (200°C).
- Prepare the Vegetables: In a large bowl, combine the zucchini, eggplant, red and yellow bell peppers, tomatoes, and red onion. Drizzle with olive oil, and season with salt, pepper, thyme, and rosemary. Toss until the vegetables are evenly coated.
- Roll Out the Dough: On a lightly floured surface, roll out the chilled dough into a roughly 12-inch circle. Transfer the rolled-out dough to a parchment-lined baking sheet.
- Assemble the Galette: Arrange the seasoned vegetables in the center of the dough, leaving a 2-inch border around the edges. Fold the edges of the dough over the vegetables, pleating as necessary to create a rustic edge.
- Add the Finishing Touches: Brush the exposed edges of the dough with the beaten egg to create a golden crust.
- Bake the Galette: Place the baking sheet in the preheated oven and bake for 35-40 minutes, or until the crust is golden brown and the vegetables are tender.
- Cool and Serve: Allow the galette to cool for about 10 minutes before slicing and serving.
Extra Tips
For a richer flavor, consider adding a sprinkle of grated Parmesan cheese over the vegetables before folding the edges of the dough. You can also experiment with different herbs such as basil or oregano for a fresh twist.
If you prefer a more substantial filling, add some goat cheese or ricotta as a base layer before arranging the vegetables. When rolling out the dough, verify it’s not too thin to prevent tearing but thin enough for a crisp crust.
Enjoy your Provençal Vegetable Galette as a standalone dish or pair it with a simple green salad for a complete meal.
Brie and Apple Crostini
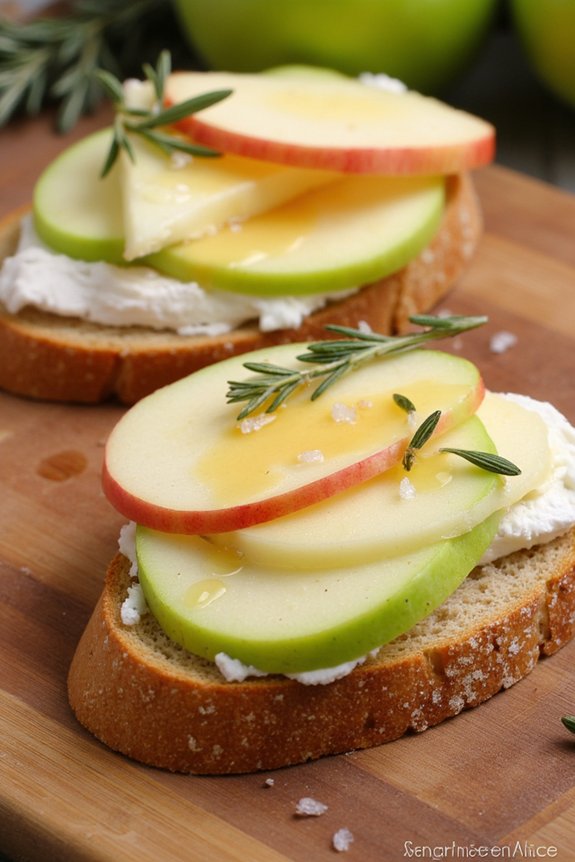
Brie and Apple Crostini is a delightful French-inspired appetizer perfect for a picnic. This dish combines the creamy richness of brie cheese with the sweet and crisp flavors of fresh apples, all served on a toasted baguette slice. The combination of textures and flavors makes this crostini an irresistible treat that’s both easy to prepare and a sophisticated addition to any outdoor meal.
To make Brie and Apple Crostini, you’ll start by slicing a baguette and toasting it until golden brown. The toasted bread provides a sturdy base for the creamy brie, which is gently melted over the top. Thin slices of apple add a revitalizing crunch, and a drizzle of honey ties all the flavors together with a touch of sweetness. This recipe serves 4-6 people, making it an ideal choice for sharing with friends and family at your next picnic.
Ingredients:
- 1 baguette
- 8 oz. brie cheese
- 2 medium-sized apples (Granny Smith or Honeycrisp recommended)
- 2 tablespoons honey
- 1 tablespoon olive oil
- A pinch of sea salt
- Fresh thyme leaves (optional)
Instructions:
- Preheat the Oven: Preheat your oven to 375°F (190°C). This will guarantee the baguette slices toast evenly and the brie melts perfectly.
- Prepare the Baguette: Slice the baguette into 1/2-inch thick slices. Arrange them on a baking sheet and brush each slice lightly with olive oil to help them toast to a golden brown.
- Toast the Baguette: Place the baking sheet in the preheated oven and toast the baguette slices for about 5-7 minutes, or until they’re golden brown and crisp. Remove from the oven and set aside.
- Slice the Brie and Apples: While the baguette is toasting, slice the brie into thin pieces that will fit on the baguette slices. Core and thinly slice the apples, keeping the skin on for added color and nutrition.
- Assemble the Crostini: Place a slice of brie on each toasted baguette slice. Top with one or two slices of apple, depending on the size. Drizzle a small amount of honey over the top of each crostini.
- Melt the Brie: Return the assembled crostini to the oven for an additional 3-5 minutes, or until the brie begins to melt. Keep a close eye to prevent over-melting.
- Finish and Serve: Remove from the oven and sprinkle with a pinch of sea salt and fresh thyme leaves if using. Serve warm or at room temperature.
Extra Tips: When selecting your apples, choose varieties that are crisp and slightly tart, such as Granny Smith or Honeycrisp, to balance the creaminess of the brie. If you prefer a bit more sweetness, try using a Red Delicious or Fuji apple.
Additionally, for a savory twist, consider adding a sprinkle of cracked black pepper or a few crushed walnuts before serving. These crostini are best enjoyed fresh but can be prepared an hour in advance and stored at room temperature until ready to serve.
Herbes De Provence Chicken Skewers

Herbes De Provence Chicken Skewers are a delicious and aromatic addition to any French picnic. This dish combines the savory flavors of Herbes de Provence, a classic French herb mix, with tender chicken to create a meal that’s both flavorful and easy to prepare. The herbs, typically a blend of thyme, rosemary, basil, marjoram, and savory, infuse the chicken with a fragrant aroma that’s sure to delight your taste buds.
Perfect for a sunny day outdoors, these skewers can be grilled or broiled, making them versatile enough for any cooking setup. They’re excellent served alongside a fresh salad, crusty French bread, or even a simple rice dish. The recipe is designed to serve 4-6 people, making it ideal for a family gathering or a small gathering with friends.
Ingredients (serving size: 4-6 people):
- 2 pounds boneless, skinless chicken breasts
- 3 tablespoons olive oil
- 3 tablespoons lemon juice
- 2 tablespoons Herbes de Provence
- 2 garlic cloves, minced
- Salt and pepper to taste
- Wooden or metal skewers
Cooking Instructions:
- Prepare the Marinade: In a large bowl, combine the olive oil, lemon juice, Herbes de Provence, minced garlic, salt, and pepper. Mix well to guarantee that the herbs and garlic are evenly distributed throughout the mixture.
- Cut the Chicken: Slice the chicken breasts into bite-sized cubes, approximately 1 to 1.5 inches in size. This will guarantee they cook evenly on the skewers.
- Marinate the Chicken: Add the chicken cubes to the bowl with the marinade. Toss the chicken to guarantee each piece is well-coated with the marinade. Cover the bowl with plastic wrap and refrigerate for at least 30 minutes, or up to 2 hours for more flavor infusion.
- Preheat the Grill: If using a grill, preheat it to medium-high heat. If broiling in the oven, preheat the broiler and prepare a baking sheet by lining it with aluminum foil.
- Assemble the Skewers: Thread the marinated chicken cubes onto the skewers, leaving a small gap between each piece for even cooking. If using wooden skewers, soak them in water for at least 30 minutes before use to prevent burning.
- Cook the Skewers: Place the skewers on the grill or under the broiler. Cook for about 10-12 minutes, turning occasionally, until the chicken is cooked through and has a nice char. Confirm the internal temperature of the chicken reaches 165°F (74°C).
- Serve and Enjoy: Once cooked, remove the skewers from the grill or oven. Allow them to rest for a few minutes before serving. Pair with your desired sides and enjoy!
Extra Tips: To enhance the flavor, you can add a touch of honey or Dijon mustard to the marinade for a subtle sweetness. For an extra burst of freshness, consider garnishing the cooked skewers with freshly chopped parsley before serving.
If you have time, marinating the chicken overnight will deepen the herb flavors even more. Always remember to monitor the chicken closely while cooking to prevent it from drying out or overcooking.
French Lentil Salad With Goat Cheese
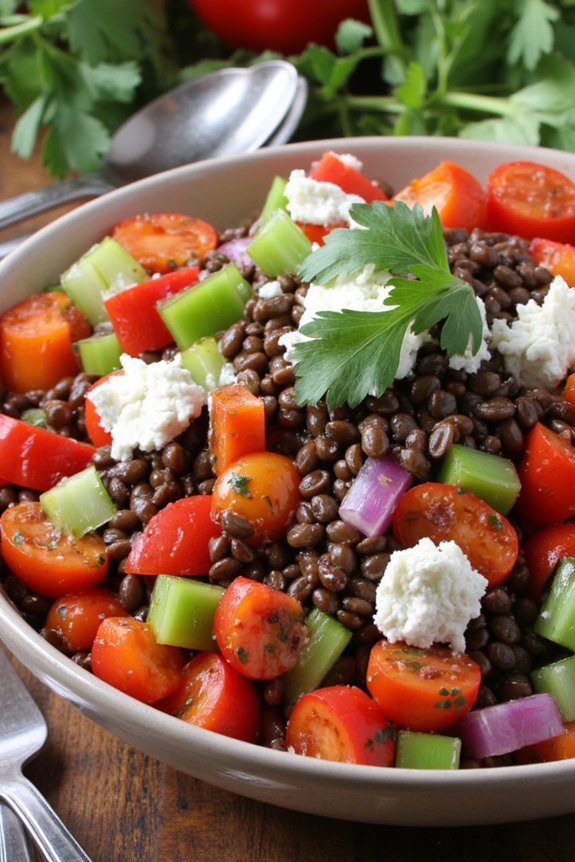
French Lentil Salad With Goat Cheese is a delightful and nutritious dish that brings together the earthy flavors of lentils and the creamy richness of goat cheese. This salad is perfect for a picnic, offering a rejuvenating and healthy option that can be prepared in advance. The French green lentils, known for their peppery taste and firm texture, are complemented by a tangy vinaigrette and fresh vegetables, making it a satisfying meal on its own or a delicious side dish.
The goat cheese adds a velvety texture and a hint of tang, enhancing the flavors of the lentils and vegetables. This dish not only provides a balance of flavors but also offers a nutritious profile, packed with protein, fiber, and essential nutrients. It’s an ideal recipe for those looking to enjoy a taste of France in a simple yet elegant salad that’s perfect for sharing with friends and family during a picnic.
Ingredients for 4-6 servings:
- 1 cup French green lentils
- 4 cups water
- 1 bay leaf
- 1 small red onion, finely chopped
- 1 carrot, finely diced
- 1 celery stalk, finely diced
- 1 red bell pepper, diced
- 1/4 cup fresh parsley, chopped
- 4 oz goat cheese, crumbled
- 1/4 cup olive oil
- 2 tablespoons red wine vinegar
- 1 tablespoon Dijon mustard
- Salt and pepper to taste
Cooking Instructions:
- Prepare the Lentils: Rinse the lentils under cold water. In a medium saucepan, combine the lentils, water, and bay leaf. Bring to a boil, then reduce the heat and let simmer for about 20-25 minutes, or until the lentils are tender but still firm. Drain any excess water and discard the bay leaf. Set the lentils aside to cool slightly.
- Prepare the Vegetables: While the lentils are cooking, finely chop the red onion, carrot, celery, and red bell pepper. These vegetables will add a wonderful crunch and flavor to the salad.
- Mix the Vinaigrette: In a small bowl, whisk together the olive oil, red wine vinegar, Dijon mustard, salt, and pepper until well combined.
- Combine the Salad: In a large mixing bowl, combine the cooked lentils, chopped vegetables, and parsley. Pour the vinaigrette over the lentils and vegetables, tossing gently to make sure everything is evenly coated.
- Add the Goat Cheese: Gently fold in the crumbled goat cheese, making sure it’s distributed throughout the salad.
- Chill and Serve: Cover the salad and refrigerate for at least 30 minutes to allow the flavors to meld. Serve chilled or at room temperature.
Extra Tips:
For an added depth of flavor, consider roasting the red bell pepper before dicing it. This can enhance the overall taste of the salad. If you prefer a creamier texture, mix some of the goat cheese directly into the vinaigrette before tossing it with the lentils.
Additionally, this salad can be made a day in advance and stored in the fridge, making it an excellent option for a stress-free picnic preparation.
Croque Monsieur Bites

Croque Monsieur Bites are a delightful miniaturized version of the classic French bistro sandwich, making them perfect for a picnic setting. These bite-sized treats are made with layers of ham, creamy béchamel sauce, and melting Gruyère cheese, all nestled between slices of golden, toasted bread.
They’re a fantastic way to bring a touch of French cuisine to any outdoor gathering, offering a savory and rich flavor profile that’s both comforting and indulgent.
The beauty of Croque Monsieur Bites lies in their simplicity and versatility. They can be prepared ahead of time and are just as delicious served warm or at room temperature, making them ideal for a picnic spread.
Whether you’re an experienced cook or a beginner, these bites are easy to assemble and will definitely impress your friends and family with their delectable taste and elegant presentation.
Ingredients for Croque Monsieur Bites (serving size: 4-6 people):
- 12 slices of white sandwich bread, crusts removed
- 200g thinly sliced ham
- 200g Gruyère cheese, grated
- 2 tablespoons unsalted butter
- 2 tablespoons all-purpose flour
- 1 cup whole milk
- 1 teaspoon Dijon mustard
- Salt and pepper to taste
- 1/4 teaspoon nutmeg
- 2 tablespoons melted butter for brushing
- Chopped fresh parsley for garnish (optional)
Cooking Instructions:
1. Prepare the Béchamel Sauce: In a small saucepan over medium heat, melt the 2 tablespoons of unsalted butter. Once melted, add the flour and whisk continuously for about 1 minute until it forms a paste.
Gradually whisk in the milk, making certain there are no lumps. Continue to cook the mixture, stirring constantly, until it thickens to a creamy consistency, about 3-5 minutes. Stir in the Dijon mustard, nutmeg, and season with salt and pepper. Remove from heat and let it cool slightly.
2. Assemble the Bites: Preheat your oven to 375°F (190°C). On a clean work surface, lay out the bread slices. Spread a thin layer of the béchamel sauce on each slice of bread.
Top half of the slices with a layer of ham and a generous sprinkle of grated Gruyère cheese. Place another slice of bread on top to form a sandwich.
3. Cut and Prepare for Baking: Carefully cut each sandwich into four smaller squares to create bite-sized pieces. Place these pieces on a baking sheet lined with parchment paper.
Brush the tops with the melted butter to guarantee a golden finish.
4. Bake the Bites: Transfer the baking sheet to the preheated oven and bake for 10-12 minutes or until the tops are golden brown and the cheese is melted and bubbly.
5. Garnish and Serve: Once baked, remove from the oven and let them cool slightly. Garnish with chopped fresh parsley if desired for an added touch of color.
Serve warm or at room temperature.
Extra Tips:
For a crispier texture, consider toasting the bread slices lightly before assembling the bites. This will give your Croque Monsieur Bites an extra crunch.
Additionally, you can experiment with different types of cheese or add a hint of garlic to the béchamel sauce for an extra layer of flavor.
These bites can also be made a day in advance. Simply store them in an airtight container in the refrigerator and reheat them briefly in the oven before serving.
Enjoy your French picnic with these tasty and elegant bites!
Cherry Tomato and Basil Tartlets

Cherry Tomato and Basil Tartlets are a delightful addition to any French picnic, combining the fresh, juicy flavors of cherry tomatoes with the aromatic presence of basil, all nestled in a flaky tartlet crust. These tartlets aren’t only visually appealing but also offer a burst of flavor with every bite. Perfect for a sunny day outdoors, they’re easy to prepare and pack for a picnic, guaranteeing that you can enjoy a taste of France wherever you choose to dine.
Creating Cherry Tomato and Basil Tartlets involves a few simple steps, and the result is a light, savory dish that can be enjoyed as an appetizer or a snack. The use of fresh ingredients like ripe cherry tomatoes and fragrant basil leaves is key to achieving the authentic taste of this French classic. The tartlets are best served warm or at room temperature, making them an ideal candidate for a picnic where refrigeration mightn’t be available.
Ingredients (Serves 4-6):
- 1 sheet of puff pastry
- 20-25 cherry tomatoes, halved
- 1 cup of grated Gruyère cheese
- 1/4 cup of fresh basil leaves, chopped
- 1 tablespoon of olive oil
- Salt and pepper to taste
- 1 egg, beaten (for egg wash)
Cooking Instructions:
- Preheat the Oven: Start by preheating your oven to 375°F (190°C).
- Prepare the Puff Pastry: Roll out the puff pastry sheet on a lightly floured surface. Cut the pastry into 4-6 equal square or circular pieces, depending on your preferred tartlet shape. Place each piece on a baking tray lined with parchment paper.
- Create the Base: Using a fork, prick the center of each pastry piece to prevent it from puffing up too much during baking. Leave about a half-inch border around the edges.
- Add the Filling: Sprinkle a layer of grated Gruyère cheese over the center of each pastry piece. Arrange the halved cherry tomatoes on top of the cheese, cut side up. Season with salt and pepper to taste.
- Add Basil and Olive Oil: Scatter the chopped basil leaves over the tomatoes. Drizzle a small amount of olive oil over each tartlet to enhance the flavor.
- Apply the Egg Wash: Brush the edges of the pastry with the beaten egg to give it a golden finish once baked.
- Bake the Tartlets: Place the baking tray in the preheated oven and bake for 20-25 minutes, or until the pastry is golden brown and the cheese is bubbly.
- Cool and Serve: Once baked, remove the tartlets from the oven and let them cool slightly before serving. They can be served warm or at room temperature.
Extra Tips:
For the best results, use fresh, high-quality ingredients. The freshness of the cherry tomatoes and basil is vital for the authentic flavor of these tartlets.
If you prefer a more intense cheese flavor, you can substitute Gruyère with another strong cheese like Comté or Emmental. Additionally, make sure the puff pastry is well chilled before you start working with it; this will make it easier to handle and guarantee it puffs up nicely in the oven.
Enjoy these tartlets with a glass of chilled rosé for a complete French picnic experience.
Tarte Tatin

The origin of Tarte Tatin is equally charming, with the story dating back to the 1880s at the Hotel Tatin in Lamotte-Beuvron, France.
It’s said to have been created by accident by the Tatin sisters, who, in a rush to prepare a dessert, inadvertently made this inverted tart.
Whether enjoyed with a dollop of crème fraîche or simply on its own, Tarte Tatin remains a beloved staple in French cuisine and a must-try for those looking to bring a touch of France to their picnic.
Ingredients (serving size: 4-6 people):
- 6 to 8 medium-sized apples (such as Granny Smith or Golden Delicious)
- 1 cup granulated sugar
- 1/2 cup unsalted butter (1 stick)
- 1 sheet puff pastry (thawed if frozen)
- 1/2 teaspoon vanilla extract
- Juice of 1/2 lemon
- Pinch of salt
Cooking Instructions:
- Prepare the Apples: Peel the apples, core them, and cut them into halves. If the apples are particularly large, you can quarter them. Toss the apple pieces with lemon juice to prevent browning.
- Make the Caramel: In a large ovenproof skillet or a heavy-bottomed saucepan, melt the butter over medium heat. Once melted, add the sugar and stir continuously until the mixture turns a deep golden brown. This should take about 5-7 minutes. Be careful not to burn the caramel.
- Arrange the Apples: Carefully place the apple halves into the caramel, cut side up. Arrange them tightly in a circular pattern, filling any gaps with smaller apple pieces. Cook for about 10 minutes, allowing the apples to soften and absorb some of the caramel.
- Add Vanilla and Salt: Stir in the vanilla extract and a pinch of salt into the caramel-apple mixture for added depth of flavor.
- Prepare the Puff Pastry: Roll out the puff pastry on a lightly floured surface to guarantee it covers the skillet with some overhang. Drape the pastry over the apples, tucking the edges down between the apples and the side of the skillet.
- Bake the Tart: Preheat the oven to 375°F (190°C). Place the skillet in the oven and bake for 25-30 minutes, or until the pastry is golden brown and puffed.
- Cool and Invert: Allow the tart to cool in the skillet for 5-10 minutes. Carefully place a large plate over the skillet and invert the tart onto the plate. Be cautious of hot caramel that may spill.
- Serve: Slice the Tarte Tatin and serve warm or at room temperature. Optionally, accompany with crème fraîche or vanilla ice cream.
Extra Tips****: When making the caramel, confirm you maintain a steady temperature to avoid burning, as caramel can quickly go from perfect to burnt.
If you notice the caramel darkening too fast, you can lower the heat slightly. Additionally, when inverting the tart, it’s vital to use a plate larger than the skillet to catch any excess caramel.
If your apples are particularly juicy, draining a bit of the liquid before adding the pastry can prevent the tart from becoming soggy. Finally, if puff pastry is unavailable, homemade shortcrust pastry can serve as a delicious alternative.
Madeleines
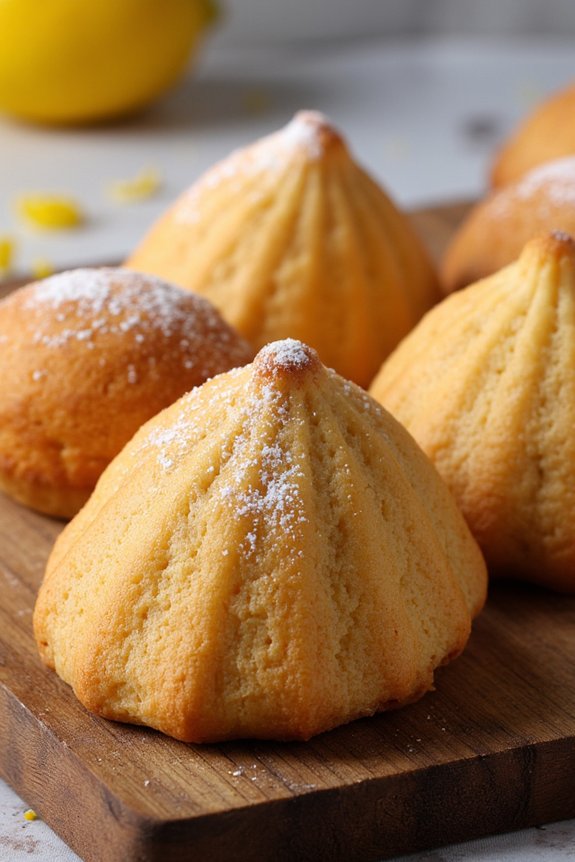
Madeleines are delightful little French sponge cakes baked in shell-shaped molds, known for their distinctive shape and rich buttery flavor. These dainty treats are perfect for a French picnic, offering a touch of elegance and sweetness that pairs beautifully with afternoon tea or coffee.
Originating from the Lorraine region of France, madeleines have become a beloved classic worldwide. Their light, airy texture and delicate crumb make them an irresistible addition to any outdoor gathering.
Ideal for serving 4-6 people, these madeleines are easy to prepare and require just a few simple ingredients. The key to achieving their signature hump and light texture lies in the careful preparation and resting of the batter. By following this classic recipe, you can create these charming little cakes that are sure to impress your guests with their taste and presentation.
Ingredients for 4-6 servings:
- 2/3 cup (85g) all-purpose flour
- 3/4 teaspoon baking powder
- 1/2 cup (115g) unsalted butter, melted and cooled
- 2 large eggs
- 1/2 cup (100g) granulated sugar
- 1 teaspoon vanilla extract
- Zest of one lemon
- A pinch of salt
- Powdered sugar, for dusting (optional)
Instructions:
- Prepare the Dry Ingredients: In a small bowl, whisk together the flour, baking powder, and salt. This guarantees that the baking powder is evenly distributed throughout the flour, which is vital for the madeleines to rise properly.
- Mix the Wet Ingredients: In a separate large bowl, beat the eggs and granulated sugar together using an electric mixer on high speed until the mixture is pale, thick, and slightly increased in volume, about 5 minutes. This step incorporates air into the batter, contributing to the light texture of the madeleines.
- Flavor the Batter: Add the vanilla extract and lemon zest to the egg mixture and gently fold in the dry ingredients using a spatula. Stir until just combined, being careful not to deflate the batter.
- Incorporate the Butter: Gradually fold the melted and cooled butter into the batter, making sure it’s fully incorporated. The butter adds richness and helps create the classic hump of the madeleines.
- Rest the Batter: Cover the batter with plastic wrap and refrigerate for at least 1 hour or up to overnight. This resting period is essential as it allows the batter to thicken and develop flavor, resulting in a better rise during baking.
- Preheat and Prepare the Molds: Preheat your oven to 375°F (190°C) and generously grease the madeleine molds with butter. Lightly dust the molds with flour, tapping out any excess to prevent sticking.
- Fill the Molds: Spoon the batter into the prepared molds, filling each about three-quarters full. Avoid overfilling, as the madeleines will expand during baking.
- Bake the Madeleines: Bake in the preheated oven for 10-12 minutes, or until the edges are golden brown and the centers have risen to form a hump. The madeleines should spring back lightly when touched.
- Cool and Serve: Remove the madeleines from the oven and let them cool in the molds for a few minutes before transferring them to a wire rack. Once cooled, dust with powdered sugar if desired before serving.
Extra Tips:
For the best results, make sure that all ingredients are at room temperature before you begin. This helps the batter mix more evenly.
Be careful not to overmix once you’ve added the flour, as this can lead to tough madeleines. If you don’t have madeleine molds, mini muffin tins can be a substitute, though the traditional shell shape will be lost.
Enjoy these delightful treats fresh, as they’re best eaten on the day they’re made. However, they can be stored in an airtight container for up to two days if necessary.
Chocolate-Dipped Strawberries

Chocolate-dipped strawberries are a classic, elegant treat that perfectly blend the sweetness of fresh strawberries with the rich, creamy goodness of chocolate.
They’re an ideal addition to any French picnic, offering a touch of sophistication while being incredibly easy to prepare. Whether you’re planning a romantic outdoor meal or a casual gathering, these delightful treats are sure to be a hit with everyone.
Not only are chocolate-dipped strawberries simple to make, but they also provide a beautiful pop of color to your picnic spread. The combination of ripe, juicy strawberries and smooth, melted chocolate creates a luxurious texture that’s both satisfying and indulgent.
This recipe serves 4-6 people, making it perfect for sharing with friends and family during your leisurely alfresco dining experience.
Ingredients for 4-6 Servings:
- 1 pound (about 450 grams) fresh strawberries
- 8 ounces (about 225 grams) semisweet chocolate chips or chunks
- 2 tablespoons coconut oil or vegetable shortening
- Optional toppings: chopped nuts, shredded coconut, or sprinkles
Cooking Instructions:
1. Prepare the Strawberries: Begin by washing the strawberries thoroughly under cold water. Gently pat them dry with paper towels, guaranteeing they’re completely dry to help the chocolate adhere better. Leave the green stems on for easier handling.
2. Melt the Chocolate: In a heatproof bowl, combine the chocolate chips and coconut oil. Set the bowl over a pot of simmering water, creating a double boiler. Stir the mixture continuously until the chocolate is completely melted and smooth.
Alternatively, you can melt the chocolate in the microwave in 30-second intervals, stirring after each interval until silky and lump-free.
3. Dip the Strawberries: Hold each strawberry by the stem and dip it into the melted chocolate, swirling to coat it evenly. Allow any excess chocolate to drip off before placing the strawberry onto a baking sheet lined with parchment paper.
4. Add Optional Toppings: If desired, while the chocolate is still wet, sprinkle your choice of toppings over the strawberries. This could include chopped nuts, shredded coconut, or sprinkles for added texture and flavor.
5. Chill the Strawberries: Transfer the baking sheet to the refrigerator and chill the strawberries for about 20-30 minutes, or until the chocolate has hardened completely.
Extra Tips:
When selecting strawberries, look for ones that are ripe but still firm to the touch, as overly ripe strawberries may become mushy when dipped in chocolate.
For a variation in flavors, you can experiment with different types of chocolate, such as dark, milk, or white chocolate. Additionally, if you want to add a personal touch, consider drizzling a contrasting chocolate over the dipped strawberries for an elegant finish.
Always verify your work area and tools are dry, as any moisture can cause the chocolate to seize. Enjoy your chocolate-dipped strawberries on the same day for the best taste and texture!