

Butter and garlic are a magical duo in French cuisine, creating flavors that are simply irresistible. The aroma of garlic sizzling in butter fills the kitchen with a delightful, mouth-watering scent. These 11 bold French garlic recipes are perfect for anyone who loves rich and aromatic meals. Join me on this culinary adventure to explore the essence of garlic in these amazing dishes. Let’s get cooking and savor each moment together.
Classic Garlic Butter Escargots
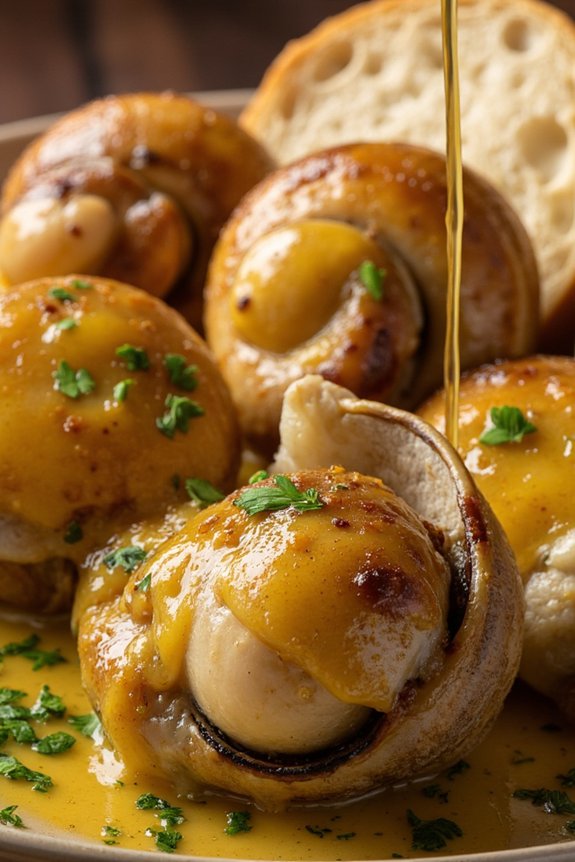
Classic Garlic Butter Escargots are a quintessential French delicacy known for their rich, savory flavors and aromatic allure. This dish showcases tender snails nestled in shells or small dishes, smothered in a vibrant garlic butter sauce. The escargots are traditionally served as an appetizer, offering a unique taste experience that’s both luxurious and comforting.
The key to perfecting this recipe lies in the balance of robust garlic, fresh parsley, and creamy butter, which meld together to create a sauce that elevates the delicate flavor of the snails.
In this recipe, you’ll learn how to prepare Classic Garlic Butter Escargots for a serving size of 4-6 people. The dish requires minimal preparation but delivers maximum flavor, making it an impressive option for an elegant dinner party or a special occasion. By following these steps, you’ll be able to recreate this timeless French classic in your own kitchen, offering your guests a taste of authentic French cuisine.
Ingredients:
- 24 canned or fresh escargots
- 1 cup unsalted butter, softened
- 4 cloves garlic, minced
- 1/4 cup finely chopped fresh parsley
- 1 tablespoon shallots, finely chopped
- 1 teaspoon lemon juice
- Salt and freshly ground black pepper, to taste
- Baguette slices, for serving
Cooking Instructions:
- Prepare the Garlic Butter: In a mixing bowl, combine the softened unsalted butter with minced garlic, chopped parsley, chopped shallots, and lemon juice. Mix well until all the ingredients are thoroughly incorporated. Season the mixture with salt and freshly ground black pepper to taste.
- Prepare the Escargots: If using canned escargots, drain and rinse them under cold water. Pat them dry with paper towels. If using fresh escargots, verify they’re cleaned and pre-cooked according to package instructions or your preferred method.
- Assemble the Escargots: Preheat your oven to 375°F (190°C). Place each escargot into a shell or small ovenproof dish. Top each snail with a generous amount of the prepared garlic butter, making certain it fully covers the escargot. If using shells, pack the butter firmly on top to seal the opening.
- Bake the Escargots: Arrange the filled shells or dishes on a baking tray. Bake in the preheated oven for about 10-12 minutes, or until the butter is bubbling and golden brown on top.
- Serve: Once baked, carefully remove the escargots from the oven. Serve immediately with slices of baguette to soak up the flavorful garlic butter. Optionally, garnish with additional chopped parsley for a fresh touch.
Extra Tips: For the best results, use high-quality butter and fresh garlic to guarantee the garlic butter has a rich and aromatic taste. It’s also important to keep an eye on the escargots while baking to prevent the butter from burning.
If you prefer a spicier kick, consider adding a pinch of red pepper flakes to the garlic butter mixture. Finally, always serve the escargots hot for the most enjoyable experience, as the warmth enhances the flavors and aroma.
Creamy Garlic Soup
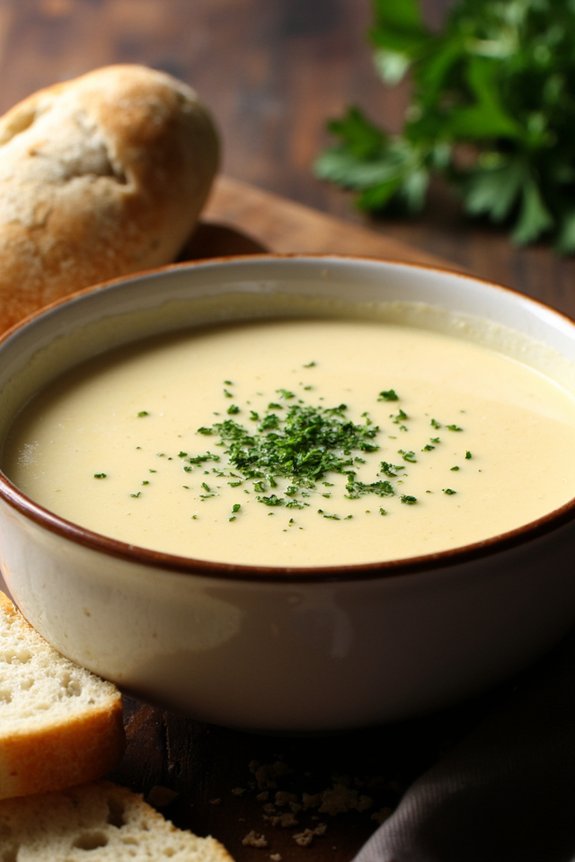
Indulge your senses with a bowl of velvety Creamy Garlic Soup, a French-inspired dish that elevates the humble garlic to gourmet status. This bold and flavorful soup, perfect for a chilly evening, combines the robust essence of garlic with a creamy, rich base, resulting in a comforting and aromatic experience.
The soup is simple yet elegant, making it an ideal choice for both family dinners and dinner parties alike. Its silky texture and mellow garlic flavor are complemented by a hint of fresh herbs, creating a harmonious blend that’s irresistible to garlic lovers.
Crafting this culinary delight involves simmering garlic cloves to bring out their natural sweetness, then blending them into a smooth puree with a base of chicken or vegetable broth. The addition of cream lends the soup its luscious texture, while a sprinkle of fresh parsley or thyme adds a touch of brightness.
Serve this Creamy Garlic Soup with a loaf of crusty bread to soak up every last drop, and watch it become a favorite in your repertoire of bold French garlic recipes.
Ingredients (Serves 4-6):
- 2 heads of garlic
- 2 tablespoons olive oil
- 1 large onion, chopped
- 4 cups chicken or vegetable broth
- 1 cup heavy cream
- 2 tablespoons unsalted butter
- Salt and pepper to taste
- 2 tablespoons fresh parsley or thyme, chopped
- 1/4 cup grated Parmesan cheese (optional)
- Crusty bread for serving
Cooking Instructions:
- Prepare the Garlic: Preheat your oven to 375°F (190°C). Slice the tops off the garlic heads to expose the cloves. Drizzle with olive oil, wrap in aluminum foil, and roast in the oven for 30-35 minutes or until the garlic is soft and caramelized. Allow to cool, then squeeze the cloves out of their skins.
- Sauté the Onion: In a large pot, melt the butter over medium heat. Add the chopped onion and cook until soft and translucent, about 5 minutes. Be careful not to let it brown.
- Simmer the Soup: Add the roasted garlic cloves to the pot and pour in the broth. Bring to a boil, then reduce the heat and simmer for 20 minutes, allowing the flavors to meld.
- Blend the Soup: Using an immersion blender, puree the soup until smooth. If you don’t have an immersion blender, carefully transfer the soup in batches to a countertop blender, then return it to the pot.
- Add the Cream: Stir in the heavy cream and heat the soup gently over low heat. Season with salt and pepper to taste. If desired, stir in the grated Parmesan cheese for an extra layer of flavor.
- Garnish and Serve: Ladle the soup into bowls and sprinkle with fresh parsley or thyme. Serve hot with slices of crusty bread on the side.
Extra Tips:
When making Creamy Garlic Soup, it’s important to roast the garlic until it’s soft and golden to guarantee a sweet, mellow flavor rather than a sharp bite.
If you prefer a thicker soup, reduce the amount of broth slightly or add a tablespoon of flour while sautéing the onions. For a lighter version, substitute half of the heavy cream with milk.
Garlic and Herb Roasted Chicken
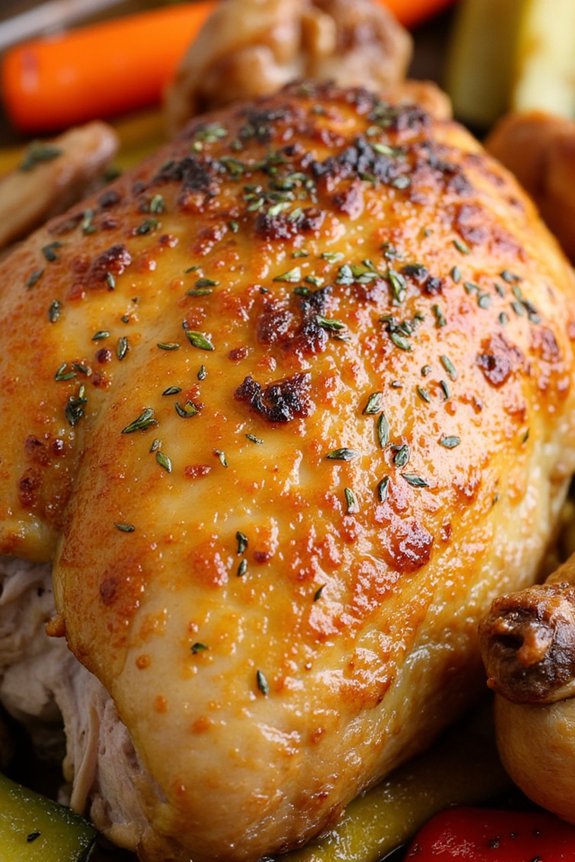
Garlic and Herb Roasted Chicken is a classic dish that brings bold, aromatic flavors to your dining table. This recipe highlights the rich, pungent aroma of garlic complemented by a medley of fresh herbs, creating a succulent, juicy chicken with a perfectly crisp skin.
Whether it’s for a family gathering or a special occasion, this dish is bound to impress with its simplicity and depth of flavor. The preparation involves marinating the chicken with a robust garlic and herb blend, allowing the flavors to infuse deeply into the meat.
The roasting process guarantees that the chicken remains tender and moist, while the skin turns golden brown and crispy. Serve this aromatic delight with roasted vegetables or a side salad for a complete meal that will have everyone coming back for seconds.
Ingredients (Serves 4-6 people):
- 1 whole chicken (about 4-5 pounds)
- 8 cloves of garlic, minced
- 2 tablespoons of olive oil
- 2 tablespoons of unsalted butter, melted
- 2 tablespoons of fresh rosemary, chopped
- 2 tablespoons of fresh thyme, chopped
- 1 tablespoon of fresh parsley, chopped
- 1 lemon, halved
- Salt and freshly ground black pepper, to taste
Cooking Instructions:
- Prepare the Marinade: In a small bowl, combine the minced garlic, olive oil, melted butter, rosemary, thyme, and parsley. Mix well to form a paste-like consistency.
- Prepare the Chicken: Preheat your oven to 425°F (220°C). Pat the chicken dry with paper towels. Season the inside and outside of the chicken generously with salt and pepper.
- Marinate the Chicken: Carefully loosen the skin over the chicken breast by gently sliding your fingers between the skin and the meat. Spread about half of the garlic and herb mixture under the skin, making sure it’s evenly distributed. Rub the remaining mixture all over the outside of the chicken.
- Stuff the Chicken: Place the lemon halves inside the cavity of the chicken. This will add a subtle citrus flavor that complements the garlic and herbs.
- Roast the Chicken: Place the chicken on a rack in a roasting pan, breast side up. Roast in the preheated oven for about 1.5 hours, or until the internal temperature reaches 165°F (74°C) at the thickest part of the thigh. Baste the chicken with the pan juices every 30 minutes for extra flavor and moisture.
- Rest and Serve: Once cooked, remove the chicken from the oven and let it rest for about 10 minutes before carving. This allows the juices to redistribute, guaranteeing a moist result. Carve and serve with your choice of sides.
Extra Tips:
- For an extra crispy skin, make sure the chicken is very dry before applying the marinade. You can pat it with paper towels or leave it uncovered in the fridge for a few hours.
- If you prefer a stronger garlic flavor, increase the number of garlic cloves used in the marinade.
- Use a meat thermometer to guarantee your chicken is perfectly cooked without overcooking it. The internal temperature should reach 165°F (74°C) for safe consumption.
- If you have leftover chicken, it makes excellent sandwiches or salads the next day.
Garlic Butter Baked Mussels
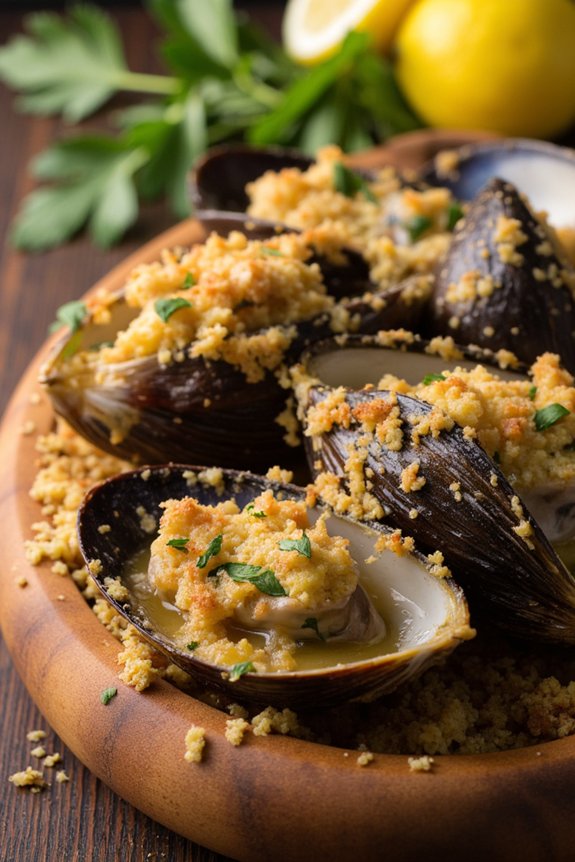
Garlic Butter Baked Mussels are a delightful seafood dish that combines the briny sweetness of mussels with the rich, savory flavors of garlic and butter. This dish is perfect for a cozy dinner or a special gathering, and it’s surprisingly easy to prepare, making it a great choice for both novice and experienced cooks.
The aroma of garlic mingling with butter as it bakes with the mussels is sure to whet the appetite of anyone lucky enough to be nearby.
The key to this dish is the freshness of the mussels and the quality of the garlic and butter. Choose mussels that are tightly closed and free of any unpleasant odor. The garlic should be fresh and robust, while the butter should be of high quality, preferably unsalted so you can control the seasoning.
This recipe serves 4 to 6 people, making it a wonderful option for a family meal or a small dinner party.
Ingredients:
- 2 pounds fresh mussels
- 6 tablespoons unsalted butter
- 6 cloves garlic, minced
- 1/4 cup finely chopped parsley
- 1 tablespoon lemon juice
- 1/4 teaspoon ground black pepper
- 1/4 cup grated Parmesan cheese
- 1/4 cup breadcrumbs
- Lemon wedges, for serving
Cooking Instructions:
- Prepare the Mussels: Begin by cleaning the mussels under cold running water. Remove the beards by pulling them towards the hinge of the shell, and discard any mussels that don’t close when tapped.
- Preheat the Oven: Set your oven to 375°F (190°C) to preheat while you prepare the other ingredients.
- Prepare the Garlic Butter: In a small saucepan over low heat, melt the butter. Add the minced garlic and sauté until it becomes fragrant, about 1-2 minutes. Remove from heat and stir in the chopped parsley, lemon juice, and black pepper.
- Arrange the Mussels: Place the cleaned mussels on a baking sheet or in a large baking dish. Spoon the garlic butter mixture over each mussel, making sure they’re evenly coated.
- Top with Cheese and Breadcrumbs: Sprinkle the Parmesan cheese and breadcrumbs evenly over the mussels, providing a nice crust when baked.
- Bake the Mussels: Place the baking sheet in the preheated oven and bake for 10-15 minutes, or until the mussels have opened and the tops are golden brown.
- Serve: Remove the mussels from the oven and transfer them to a serving platter. Serve immediately with lemon wedges on the side for squeezing over the mussels.
Extra Tips:
When cooking Garlic Butter Baked Mussels, it’s essential to use fresh mussels to guarantee the best flavor and safety. Discard any mussels that don’t open during cooking, as they may not be safe to eat.
Additionally, you can adjust the amount of garlic based on your personal preference; more or less can be used to suit your taste. This dish pairs beautifully with a crisp white wine or a light, invigorating salad for a complete meal.
Enjoy the simplicity and elegance of this classic French-inspired dish!
French Garlic Mashed Potatoes
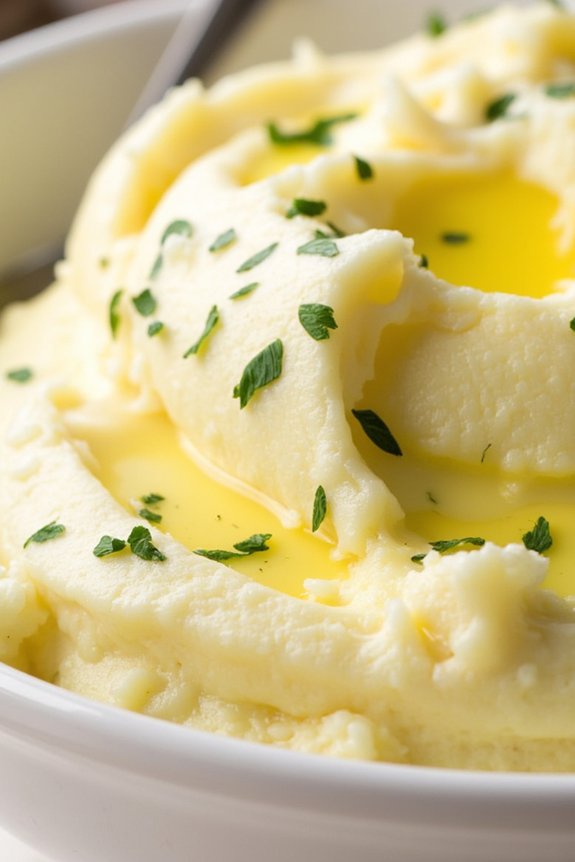
French Garlic Mashed Potatoes are a delicious twist on the classic comfort food, bringing a bold flavor to your table with the addition of garlic and French-inspired seasonings. This dish is perfect for anyone who loves the creamy texture of mashed potatoes but desires an extra layer of flavor. The garlic is gently sautéed until it’s sweet and mellow, perfectly complementing the rich, buttery mashed potatoes.
Whether served as a side dish with a roast or as a standalone treat, these mashed potatoes are sure to impress.
When preparing French Garlic Mashed Potatoes, the type of potato you choose is key to achieving the perfect consistency. Yukon Gold potatoes are ideal because of their naturally buttery flavor and smooth texture. By incorporating a touch of cream and butter, you’ll create a luscious base that’s enhanced by the aromatic garlic and a hint of herbs. This recipe serves 4-6 people, making it a great choice for family dinners or small gatherings.
Ingredients (Serves 4-6):
- 2 pounds Yukon Gold potatoes, peeled and quartered
- 4 cloves garlic, minced
- 1/2 cup heavy cream
- 1/4 cup unsalted butter
- Salt and freshly ground black pepper to taste
- 1 tablespoon chopped fresh parsley
- 1 teaspoon chopped fresh thyme
- 1/4 cup grated Parmesan cheese (optional)
Cooking Instructions:
- Boil the Potatoes: Place the quartered potatoes in a large pot and cover them with cold water. Add a pinch of salt and bring to a boil over medium-high heat. Once boiling, reduce the heat to medium and cook the potatoes for 15-20 minutes, or until they’re fork-tender.
- Prepare the Garlic: While the potatoes are boiling, melt the butter in a small saucepan over low heat. Add the minced garlic and sauté for about 2-3 minutes, or until the garlic is soft and fragrant but not browned. Remove from heat and set aside.
- Drain and Mash: Drain the cooked potatoes and return them to the pot. Begin mashing the potatoes with a potato masher or a ricer for a smoother texture.
- Incorporate Ingredients: Gradually add the sautéed garlic and butter mixture, heavy cream, and Parmesan cheese (if using) to the mashed potatoes. Continue to mash and mix until the mixture is smooth and creamy. Season generously with salt and freshly ground black pepper to taste.
- Add Herbs: Stir in the chopped parsley and thyme, ensuring they’re evenly distributed throughout the mashed potatoes.
- Serve: Transfer the mashed potatoes to a serving dish. Garnish with extra parsley or a sprinkle of Parmesan cheese if desired. Serve hot and enjoy!
Extra Tips:
For a lighter version, you can substitute half of the heavy cream with milk or use a lower-fat milk alternative. If you prefer a chunkier texture, mash the potatoes less or use a fork instead of a masher.
To infuse even more flavor, consider roasting the garlic before adding it to the potatoes. Simply wrap the garlic cloves in foil with a little olive oil and roast in a preheated oven at 400°F (200°C) for 20-25 minutes until soft. The roasted garlic will add a sweet and nutty flavor to the dish.
Provencal Garlic Shrimp
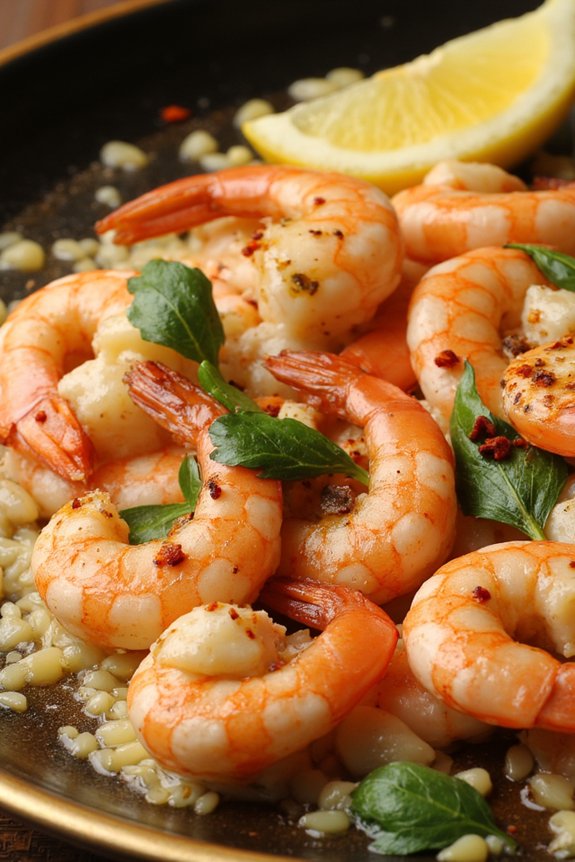
Provencal Garlic Shrimp is a classic French dish that combines the rich flavors of garlic, herbs, and succulent shrimp to create a mouthwatering experience. This dish is inspired by the traditional Provencal cuisine of the South of France, where fresh ingredients and aromatic herbs are the stars of the culinary show.
The key to this dish lies in its simplicity, allowing the natural flavors of the shrimp and garlic to shine through, making it a delightful addition to any meal or the perfect centerpiece for a light dinner.
This recipe serves 4-6 people, making it perfect for a family gathering or an intimate dinner party. The beauty of Provencal Garlic Shrimp is in its versatility; it can be served as an appetizer, a main course with some crusty bread, or even tossed with pasta for a heartier meal.
The preparation is straightforward, requiring only a few ingredients to create a dish that’s bursting with flavor and sure to impress your guests.
Ingredients:
- 2 pounds large shrimp, peeled and deveined
- 6 tablespoons olive oil
- 10-12 cloves garlic, minced
- 1/2 teaspoon red pepper flakes
- 1/2 cup dry white wine
- 1 tablespoon lemon juice
- Salt and freshly ground black pepper, to taste
- 2 tablespoons fresh parsley, chopped
- 1 teaspoon fresh thyme leaves
- Lemon wedges for serving
Instructions:
- Prepare the Shrimp: Start by rinsing the shrimp under cold water. Pat them dry with paper towels to remove excess moisture. This helps them cook evenly and develop a nice sear.
- Heat the Oil: In a large, heavy skillet, heat the olive oil over medium heat. The oil should be hot but not smoking.
- Cook the Garlic: Add the minced garlic to the skillet and sauté for about 30 seconds until it’s fragrant. Be careful not to burn the garlic, as it will become bitter.
- Add the Shrimp: Increase the heat to medium-high and add the shrimp to the skillet. Cook for 2-3 minutes on one side until they start to turn pink.
- Flip and Season: Flip the shrimp over and sprinkle with red pepper flakes, salt, and black pepper. Cook for another 2-3 minutes until the shrimp are fully cooked and opaque.
- Deglaze the Pan: Pour in the white wine and lemon juice, scraping up any browned bits from the bottom of the pan. Let it simmer for 1-2 minutes to allow the alcohol to cook off.
- Finish with Herbs: Stir in the chopped parsley and thyme, and toss the shrimp to coat them in the sauce. Cook for an additional minute to meld the flavors.
- Serve: Transfer the shrimp to a serving dish and garnish with lemon wedges. Serve immediately with crusty bread or over pasta, if desired.
Extra Tips:
For the best results, use fresh shrimp, as they’ve a superior texture and flavor compared to frozen ones. If you only have frozen shrimp, make sure to thaw them completely and pat them dry before cooking.
Adjust the amount of garlic and red pepper flakes to suit your taste preferences. If you prefer a milder dish, reduce the red pepper flakes or omit them altogether.
Additionally, using a good quality olive oil and fresh herbs will elevate the flavor profile of the dish, making it even more delicious.
Garlic and Wine Braised Short Ribs
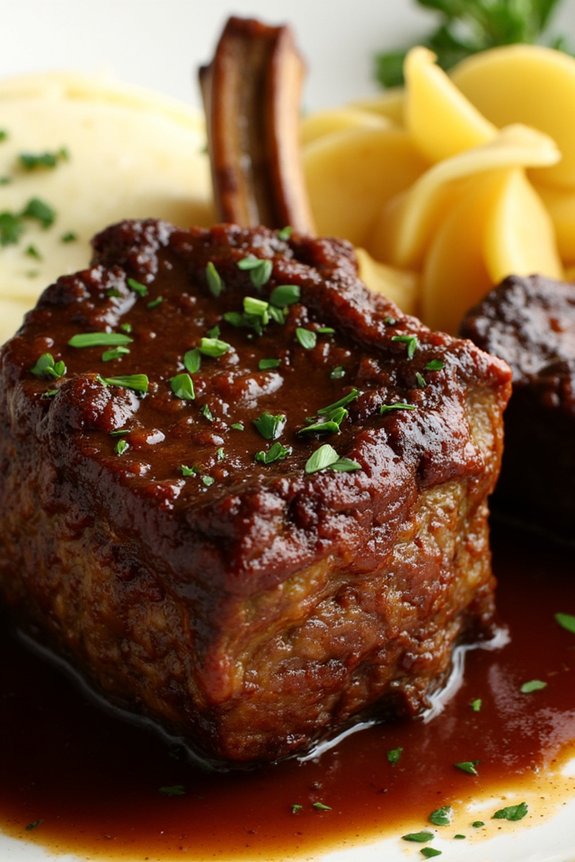
Indulge in a rich and comforting meal with these Garlic and Wine Braised Short Ribs. This dish is perfect for those colder days when you crave something hearty and full of flavor. The short ribs are first seared to lock in their juices, then slowly braised in a robust garlic and wine sauce that infuses them with deep, savory flavors. The garlic adds a bold taste that complements the richness of the beef, while the wine and aromatic herbs round out the dish, creating a symphony of flavors that will surely please your taste buds.
This recipe is ideal for serving 4-6 people, making it perfect for a family dinner or a small gathering with friends. The slow-cooking process guarantees that the meat becomes tender and falls off the bone, while the sauce thickens into a luscious gravy. Serve these short ribs over a bed of creamy mashed potatoes or buttery egg noodles to soak up all the delicious sauce. Pair it with a glass of red wine for an unforgettable dining experience.
Ingredients:
- 4-6 beef short ribs (about 3-4 pounds total)
- Salt and freshly ground black pepper
- 2 tablespoons olive oil
- 1 large onion, diced
- 8 cloves garlic, minced
- 2 cups red wine (such as Cabernet Sauvignon or Merlot)
- 2 cups beef broth
- 2 tablespoons tomato paste
- 2 teaspoons fresh thyme leaves (or 1 teaspoon dried thyme)
- 2 bay leaves
- 2 tablespoons all-purpose flour
- 2 tablespoons unsalted butter
- Fresh parsley, chopped (for garnish)
Instructions:
- Season and Sear: Begin by generously seasoning the short ribs with salt and freshly ground black pepper. Heat the olive oil in a large, heavy-bottomed pot or Dutch oven over medium-high heat. Add the short ribs in batches, searing them on all sides until they’re browned, about 2-3 minutes per side. Once browned, transfer the short ribs to a plate and set aside.
- Sauté Aromatics: In the same pot, reduce the heat to medium and add the diced onion. Sauté until the onion is soft and translucent, about 5 minutes. Add the minced garlic and continue to cook for another 1-2 minutes until fragrant.
- Deglaze and Simmer: Pour in the red wine, scraping up any browned bits from the bottom of the pot with a wooden spoon. Bring the wine to a simmer and let it reduce by half, which should take about 10 minutes.
- Braise: Stir in the beef broth, tomato paste, thyme, and bay leaves. Return the browned short ribs to the pot, making sure they’re submerged in the liquid. Cover the pot and reduce the heat to low. Allow the short ribs to braise for 2.5 to 3 hours, or until the meat is tender and falling off the bone.
- Thicken the Sauce: Once the short ribs are cooked, remove them from the pot and set aside. Discard the bay leaves. In a small bowl, mix together the flour and butter to form a paste (beurre manié). Stir this mixture into the pot and bring to a simmer, allowing the sauce to thicken for about 5 minutes.
- Serve: Taste the sauce and adjust the seasoning with more salt and pepper if necessary. Return the short ribs to the pot to reheat briefly. Serve the short ribs with the sauce spooned over them, garnished with fresh parsley.
Extra Tips:
When selecting short ribs, look for ones with a good amount of marbling, as this will guarantee a tender and flavorful result. If possible, prepare this dish a day in advance. Letting the ribs and sauce sit overnight in the refrigerator allows the flavors to meld even more, and the fat can be easily skimmed off the top before reheating.
Additionally, make sure that the wine you use is something you’d enjoy drinking, as its flavor will be prominent in the final dish.
French Garlic Bread With Herbs
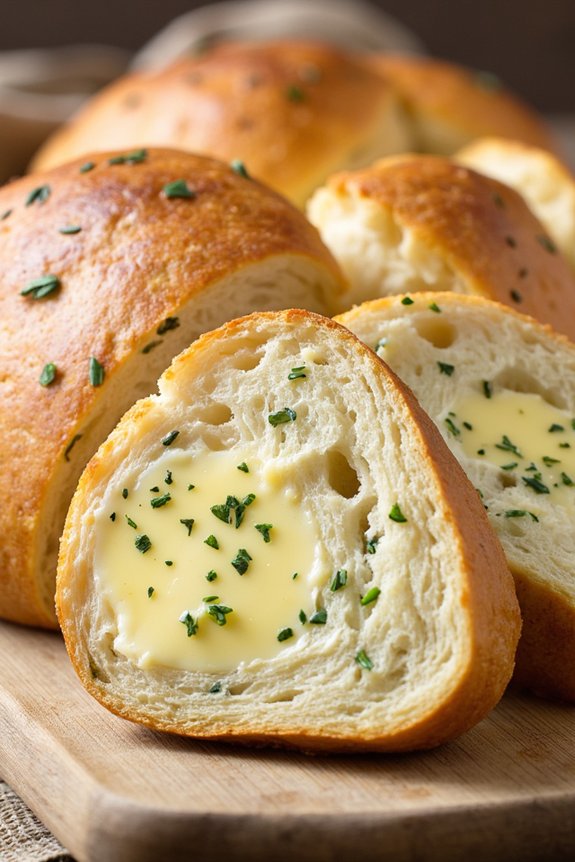
French Garlic Bread with Herbs is a deliciously aromatic and flavorful take on the traditional garlic bread. This version incorporates fragrant herbs that complement the robust taste of garlic, making it the perfect accompaniment to any meal, or a delightful snack on its own. The bread is crispy on the outside, soft on the inside, and infused with the irresistible aroma of fresh herbs and garlic.
Whether you’re hosting a dinner party or simply enjoying a quiet meal at home, this bread is guaranteed to be a hit. The key to this dish is using fresh ingredients and high-quality bread. A French baguette works best due to its crusty exterior and soft, airy interior, which absorbs the garlic herb butter beautifully.
The herbs add an extra layer of flavor that elevates the dish beyond the standard garlic bread, making it a bold and memorable addition to your culinary repertoire. This recipe is designed to serve 4-6 people, making it perfect for small gatherings or family meals.
Ingredients for French Garlic Bread with Herbs (Serves 4-6):
- 1 French baguette
- 1/2 cup unsalted butter, softened
- 4 cloves garlic, minced
- 1 tablespoon fresh parsley, chopped
- 1 tablespoon fresh thyme leaves
- 1 tablespoon fresh oregano, chopped
- 1/4 teaspoon salt
- 1/4 teaspoon black pepper
- 1/4 cup grated Parmesan cheese (optional)
Cooking Instructions:
- Preheat the Oven: Begin by preheating your oven to 375°F (190°C). This will guarantee that the bread bakes evenly and develops a nice crisp crust.
- Prepare the Garlic Herb Butter: In a medium bowl, combine the softened butter, minced garlic, chopped parsley, thyme leaves, oregano, salt, and pepper. Mix well until all the ingredients are fully incorporated, creating a smooth, fragrant butter.
- Slice the Baguette: Take your French baguette and slice it diagonally into 1-inch thick slices. Be sure not to cut all the way through; the slices should remain attached at the bottom, allowing the bread to hold together.
- Spread the Butter Mixture: Using a butter knife or small spatula, generously spread the garlic herb butter mixture between each slice of the baguette, making sure to cover both sides of each slice for maximum flavor.
- Wrap and Bake: Wrap the entire baguette in aluminum foil, which will help the butter melt into the bread and keep it moist. Place the wrapped baguette on a baking sheet and bake in the preheated oven for about 15 minutes.
- Crisp the Bread: After 15 minutes, carefully open up the foil to expose the top of the bread. If using, sprinkle the grated Parmesan cheese over the bread. Return it to the oven and bake for an additional 5-7 minutes, or until the top is golden brown and crispy.
- Serve: Remove the bread from the oven and let it cool for a minute before serving. The slices should easily pull apart, revealing the warm, buttery, and herb-infused interior.
Extra Tips:
For the best results, use fresh herbs as they provide a more vibrant flavor compared to dried herbs. If fresh herbs aren’t available, you can substitute dried herbs but use half the amount as dried herbs are more concentrated.
If you want a spicier kick, consider adding a pinch of red pepper flakes to the butter mixture. Additionally, this recipe can be easily doubled to accommodate larger crowds or more significant gatherings. Enjoy your French Garlic Bread with Herbs alongside your favorite soups, salads, or pasta dishes for a complete meal.
Garlic Butter Green Beans
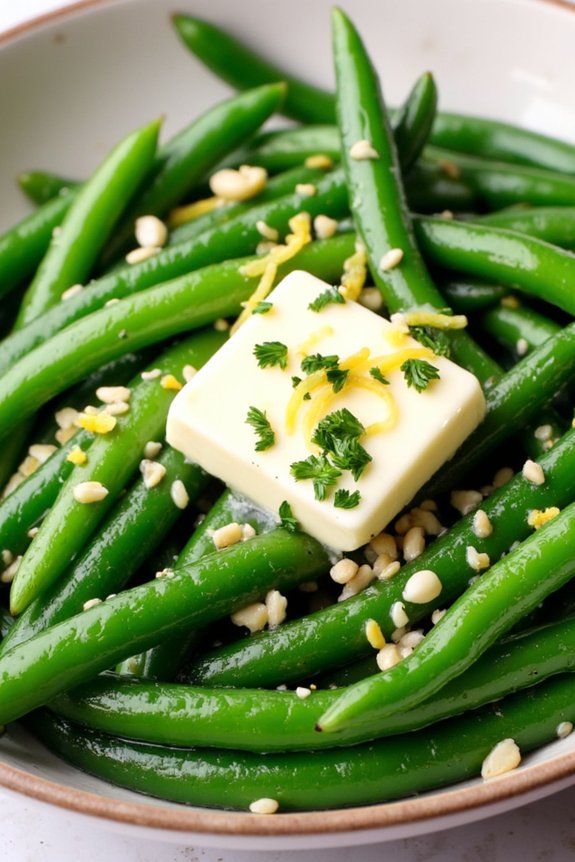
Garlic Butter Green Beans is a simple yet flavorful dish that’s perfect for any occasion, particularly when you want to add a touch of bold French flair to your meal. This recipe brings the aromatic essence of garlic together with the rich and creamy texture of butter, perfectly complementing the crispness of fresh green beans.
It’s a quick and easy side dish that pairs well with a variety of main courses, making it a versatile addition to your culinary repertoire. The dish isn’t only delicious but also nutritious, as green beans are a great source of vitamins and minerals.
The key to achieving the perfect Garlic Butter Green Beans is in the balance of flavors and the cooking technique that guarantees the beans remain crisp-tender. By following the steps below, you’ll be able to prepare this delightful dish for 4-6 people, making it an ideal choice for family gatherings or dinner parties.
Ingredients (serving size: 4-6 people):
- 1 ½ pounds fresh green beans, trimmed
- 4 tablespoons unsalted butter
- 5 garlic cloves, minced
- Salt to taste
- Freshly ground black pepper to taste
- 2 tablespoons fresh lemon juice
- Lemon zest (optional, for garnish)
- Fresh parsley, chopped (optional, for garnish)
Cooking Instructions:
- Prepare the Beans: Rinse the green beans under cold water and trim the ends. Pat them dry with a clean kitchen towel or paper towels.
- Blanch the Beans: Bring a large pot of salted water to a boil. Add the green beans and blanch them for 3-4 minutes until they’re bright green and tender-crisp. Immediately drain and transfer them to a bowl of ice water to stop the cooking process. Once cooled, drain the beans again and set aside.
- Prepare the Garlic Butter: In a large skillet, melt the butter over medium heat. Once melted, add the minced garlic and sauté for about 1-2 minutes until the garlic is fragrant and lightly golden, but not browned.
- Toss the Beans: Add the blanched green beans to the skillet with the garlic butter. Season with salt and freshly ground black pepper. Toss the beans in the butter mixture, ensuring they’re evenly coated.
- Finish with Lemon: Drizzle the fresh lemon juice over the green beans and give them a final toss. Cook for an additional 1-2 minutes until the beans are heated through.
- Serve: Transfer the Garlic Butter Green Beans to a serving dish. Garnish with lemon zest and chopped fresh parsley if desired. Serve immediately while warm.
Extra Tips: To achieve the best texture, make sure not to overcook the green beans during the blanching process; they should remain crisp-tender. If you prefer a stronger garlic flavor, feel free to add an extra clove or two of garlic.
Additionally, using high-quality butter will enhance the overall flavor of the dish. Finally, consider experimenting with other herbs such as thyme or dill for a different flavor profile.
Garlic and Cheese Stuffed Mushrooms
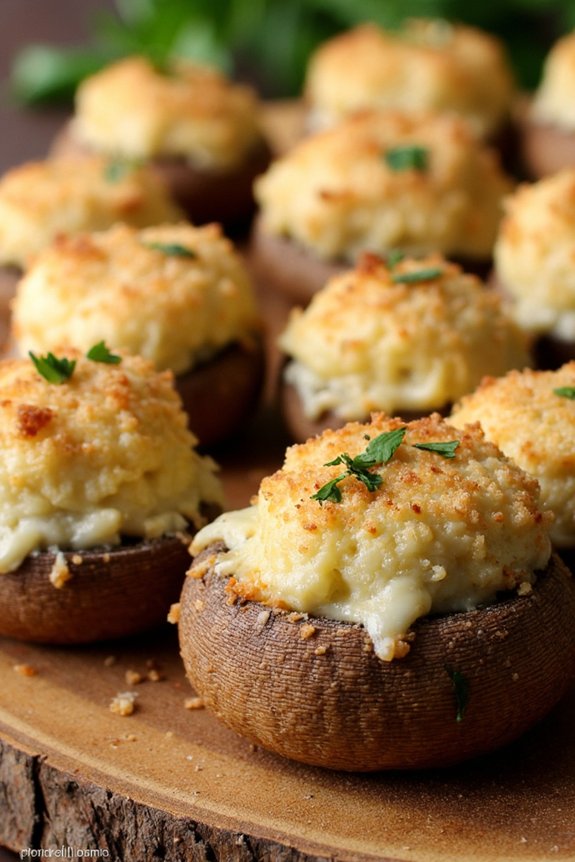
Garlic and Cheese Stuffed Mushrooms are a delicious appetizer or side dish that combines the bold flavors of garlic with creamy, melted cheese. This dish is perfect for those who love the rich taste of garlic, as it complements the earthy flavor of the mushrooms beautifully. The stuffing is made with a mixture of garlic, cream cheese, parsley, and Parmesan, creating a delightful filling that will leave your taste buds wanting more.
Whether you’re hosting a dinner party or looking for a savory snack, these stuffed mushrooms are guaranteed to impress.
The preparation of Garlic and Cheese Stuffed Mushrooms is quite simple, making it an ideal choice for both novice and experienced cooks. The mushrooms are first cleaned and de-stemmed, then filled with a flavorful cheese mixture before being baked to perfection. The result is a dish that isn’t only visually appealing but also bursting with flavor.
Serve these delicious bites as a starter or alongside your favorite main course for a truly memorable meal.
Ingredients (Serves 4-6 people):
- 18-24 large white or cremini mushrooms
- 3 cloves garlic, minced
- 8 oz cream cheese, softened
- 1/2 cup grated Parmesan cheese
- 2 tablespoons fresh parsley, chopped
- 1/4 teaspoon salt
- 1/4 teaspoon black pepper
- 2 tablespoons olive oil
- 1/4 cup breadcrumbs
Cooking Instructions:
- Preheat the Oven: Start by preheating your oven to 375°F (190°C). This will make certain that it’s ready to bake the mushrooms to a golden perfection.
- Prepare the Mushrooms: Clean the mushrooms gently with a damp cloth or paper towel to remove any dirt. Carefully remove the stems and set them aside. You can discard the stems or chop a few of them finely to include in the stuffing if desired.
- Make the Filling: In a mixing bowl, combine the softened cream cheese, minced garlic, grated Parmesan cheese, chopped parsley, salt, and black pepper. Mix well until all ingredients are fully incorporated to create a smooth filling.
- Stuff the Mushrooms: Using a small spoon, fill each mushroom cap generously with the cheese mixture. Press the filling down slightly to make sure it’s packed inside the mushroom.
- Prepare for Baking: Place the stuffed mushrooms on a baking sheet lined with parchment paper or lightly greased with olive oil. Drizzle a little olive oil over the top of the mushrooms to help them cook evenly and add extra flavor.
- Add Topping: Sprinkle breadcrumbs over the top of each stuffed mushroom. This will add a delightful crispy texture to the finished dish.
- Bake the Mushrooms: Pop the baking sheet into the preheated oven and bake for 20-25 minutes, or until the mushrooms are tender and the tops are golden brown.
- Serve: Once baked, remove the mushrooms from the oven and allow them to cool for a few minutes before serving. Enjoy them warm as a delightful appetizer or side dish.
Extra Tips:
When preparing Garlic and Cheese Stuffed Mushrooms, choose mushrooms that are firm and free from blemishes for the best results. If your mixture seems too thick, a splash of milk can help achieve a creamier consistency.
For added flavor, try incorporating finely chopped mushroom stems or a dash of white wine into the filling. These mushrooms are best enjoyed fresh out of the oven, but they can also be prepared in advance and baked just before serving.
French Onion and Garlic Tart
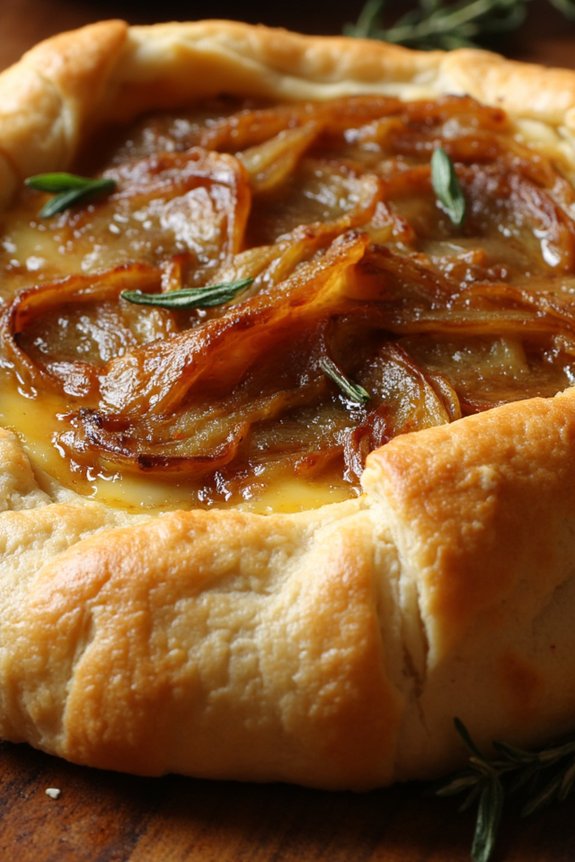
Indulge in the rich and savory flavors of the French Onion and Garlic Tart, a classic dish that beautifully showcases the boldness of garlic combined with the sweetness of caramelized onions. This tart is perfect for any occasion, whether it’s a family gathering or an intimate dinner party.
With its flaky pastry crust and velvety filling, it promises to be a crowd-pleaser, appealing to both garlic aficionados and those new to this aromatic ingredient. The harmony of flavors in this dish is reminiscent of a traditional French bistro, bringing a touch of elegance to your dining experience.
The preparation of the French Onion and Garlic Tart is a rewarding process that captures the essence of French culinary techniques. Caramelizing the onions to a golden perfection and roasting the garlic until it becomes buttery and sweet are key steps in building the tart’s depth of flavor.
The combination of these ingredients with creamy cheese and fresh herbs creates a dish that’s as delightful to the taste buds as it’s to the eyes. This recipe serves 4-6 people and can be enjoyed as a main course or a hearty appetizer.
Ingredients:
- 1 sheet of puff pastry (thawed)
- 4 large onions, thinly sliced
- 6 cloves of garlic, minced
- 2 tablespoons of olive oil
- 1 tablespoon of butter
- 1 teaspoon of sugar
- 1 teaspoon of balsamic vinegar
- 1 cup of Gruyère cheese, grated
- 1/2 cup of heavy cream
- 3 large eggs
- 1 teaspoon of fresh thyme leaves
- Salt and pepper to taste
Cooking Instructions:
1. Prepare the Pastry: Preheat your oven to 400°F (200°C). Roll out the puff pastry on a lightly floured surface to fit a 9-inch tart pan. Gently press the pastry into the pan and trim any excess. Prick the base with a fork to prevent it from rising. Chill in the refrigerator while preparing the filling.
2. Caramelize the Onions: In a large skillet, heat olive oil and butter over medium heat. Add the sliced onions and a pinch of salt. Cook, stirring occasionally, until they start to soften, about 10 minutes.
Add the sugar and balsamic vinegar, then continue to cook until the onions are deeply caramelized, about 15-20 minutes. Stir in the minced garlic for the last 2 minutes of cooking. Remove from heat and let cool slightly.
3. Mix the Filling: In a large bowl, whisk together the eggs, heavy cream, and thyme leaves. Season with salt and pepper. Stir in the grated Gruyère cheese and the cooled onion and garlic mixture until well combined.
4. Assemble the Tart: Pour the filling into the prepared pastry shell, spreading it evenly. Place the tart on a baking sheet to catch any drips and bake in the preheated oven for 25-30 minutes, or until the filling is set and the top is golden brown.
5. Cool and Serve: Allow the tart to cool for at least 10 minutes before slicing. This will help the filling set further and make it easier to serve.
Extra Tips:
For a more intense garlic flavor, consider roasting the garlic cloves beforehand. Simply wrap them in foil with a bit of olive oil and roast in the oven for about 20 minutes until soft. This will add a sweet and mellow garlic taste to the tart.
Additionally, you can customize the tart with other herbs like rosemary or sage for a different flavor profile. Serve the tart with a simple green salad or a glass of Chardonnay for a complete meal reminiscent of a French countryside lunch.